Project: Configuration: Stages
Purpose
The purpose of this document is to show you how to create and use stages in Odoo's project application. Stages are milestones of a project and are used to monitor progress, identify bottlenecks, and trigger customer check-in emails to get valuable customer feedback.
Important!
You must be in Debug mode to access the sections covered in this tutorial. To do so, simply add ?debug=1 to your page's address (URL) just before the # symbol, then hit Enter.

Once enabled, you'll see the icon on the top of your screen.

Process
To get started, navigate to the Project app.
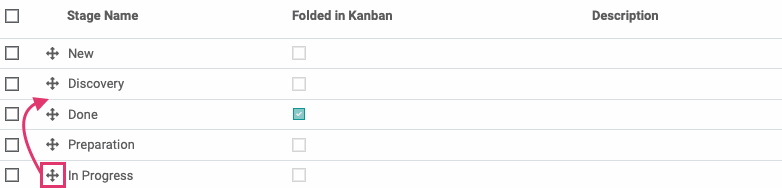
Click Configuration > Stages. On this page, you'll see all of the configured project stages organized into columns.

To open a stage record for modification, simply click the record name from the list.

To manually organize the sequence of the stages, click and drag the icon next to the record you wish to move.
Good to Know!
If your columns have been sorted, indicated by icons to the right of the column name, you'll need to reload the page first. Once reloaded, the records will become draggable.
Create a Stage
Good to Know!
Most projects within the same company will utilize the same stages, and it's It's good practice to create only one instance of each stage. Having more than one stage with the same name will result in inaccurate reporting, and can cause issues when you have the Ratings feature enabled.
To create a new stage, click Create and complete the form.
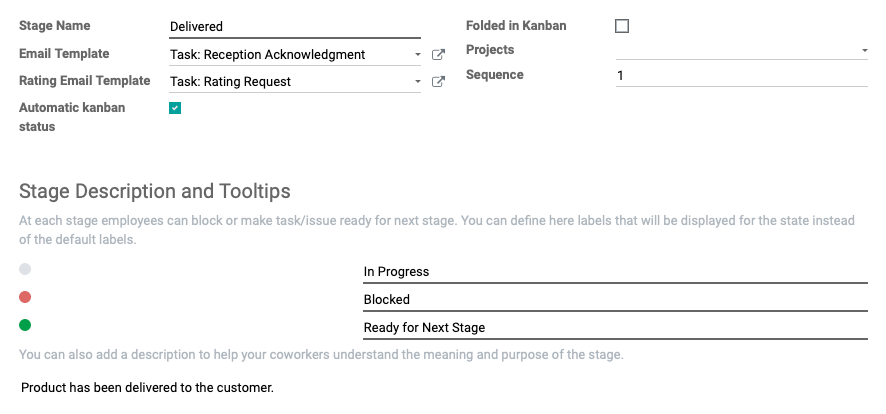
Stage Name: Enter the name of the stage you're creating.
Email Template: If you'd like an email to be delivered when the task moves to this stage, select that email template here.
Rating Email Template: If you'd like to request ratings-based feedback from the customer when the task moves to this stage, select that email template here. This option only displays when the Use Rating on Project option is enabled.
Folded in Kanban: Indicate if this stage should always be folded in kanban view, by default.
Projects: This field shows existing projects that use this stage. It will be empty in this form, but you can assign existing projects here if you need to.
Sequence: This is the order in which the stages are displayed in the list view.
Automatic kanban status: Enabling this feature will automatically set the kanban state when the customer replies to the feedback for this stage. If the customer replies with good feedback, the stage will be set to Ready for Next Stage with a green marker. Bad feedback will set the project as Blocked with a red marker. Neutral/medium feedback will set the project stage to In Progress with a gray marker. This option only displays when the Use Rating on Project option is enabled.
Stage Description and Tooltips:
Tooltips (In Progress, Blocked, Ready for Next Stage): When Automatic kanban status is enabled, the stages will be set to the following default stage names. You can customize those names here, but doing so will not change the action that occurs when feedback triggers a status change. This option only displays when the Use Rating on Project option is enabled.
Description: Enter a short description to help your coworkers understand what the stage means.