Project: Configuration: Projects
Purpose
The purpose of this document is to give an overview of the information and features under the Projects menu of the Odoo 14 Project application.
Process
To get started, navigate to the Project app.
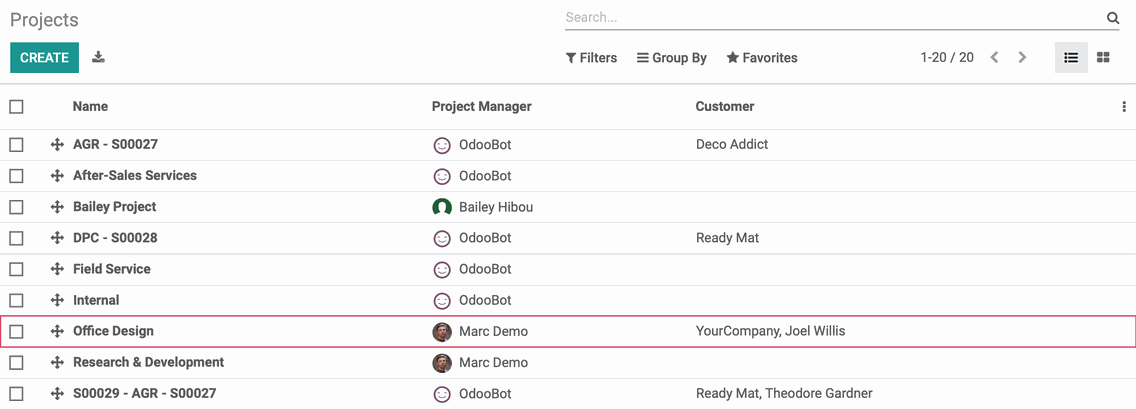
Click Configuration > Projects.
The data on this page is similar to the Projects overview page at a glance; however, its purpose is more focused on the project data and less on workflow.
Click on any record to bring up the details for a project.
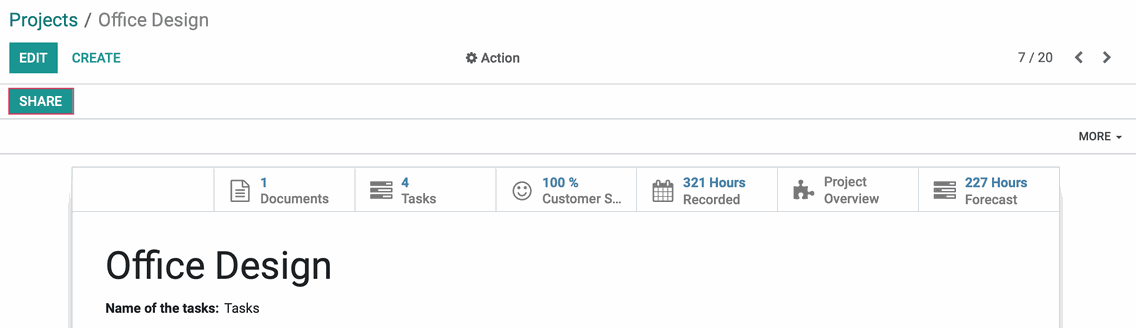
Smart Buttons
On the top of this page, you'll see smart buttons to relevant data in Odoo associated with this project. Depending on your database and Project app configuration, these buttons may vary.

Documents: View all documents attached to this project.

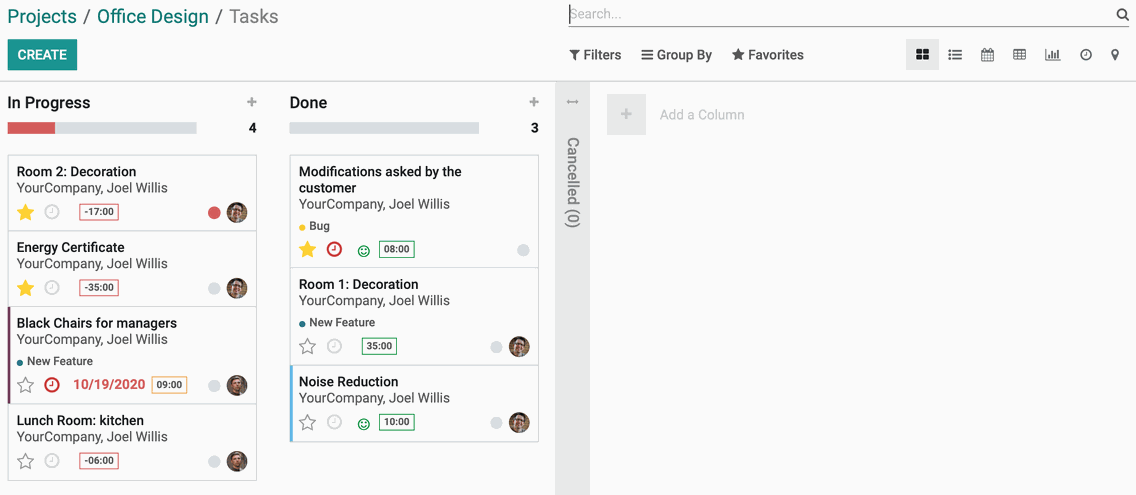
Tasks: View all Tasks & Sub-Tasks for this project. Note: This Smart Button can be configured to use language other than "Tasks". See the next section for more information.
Ratings: View all client feedback submitted for this project.

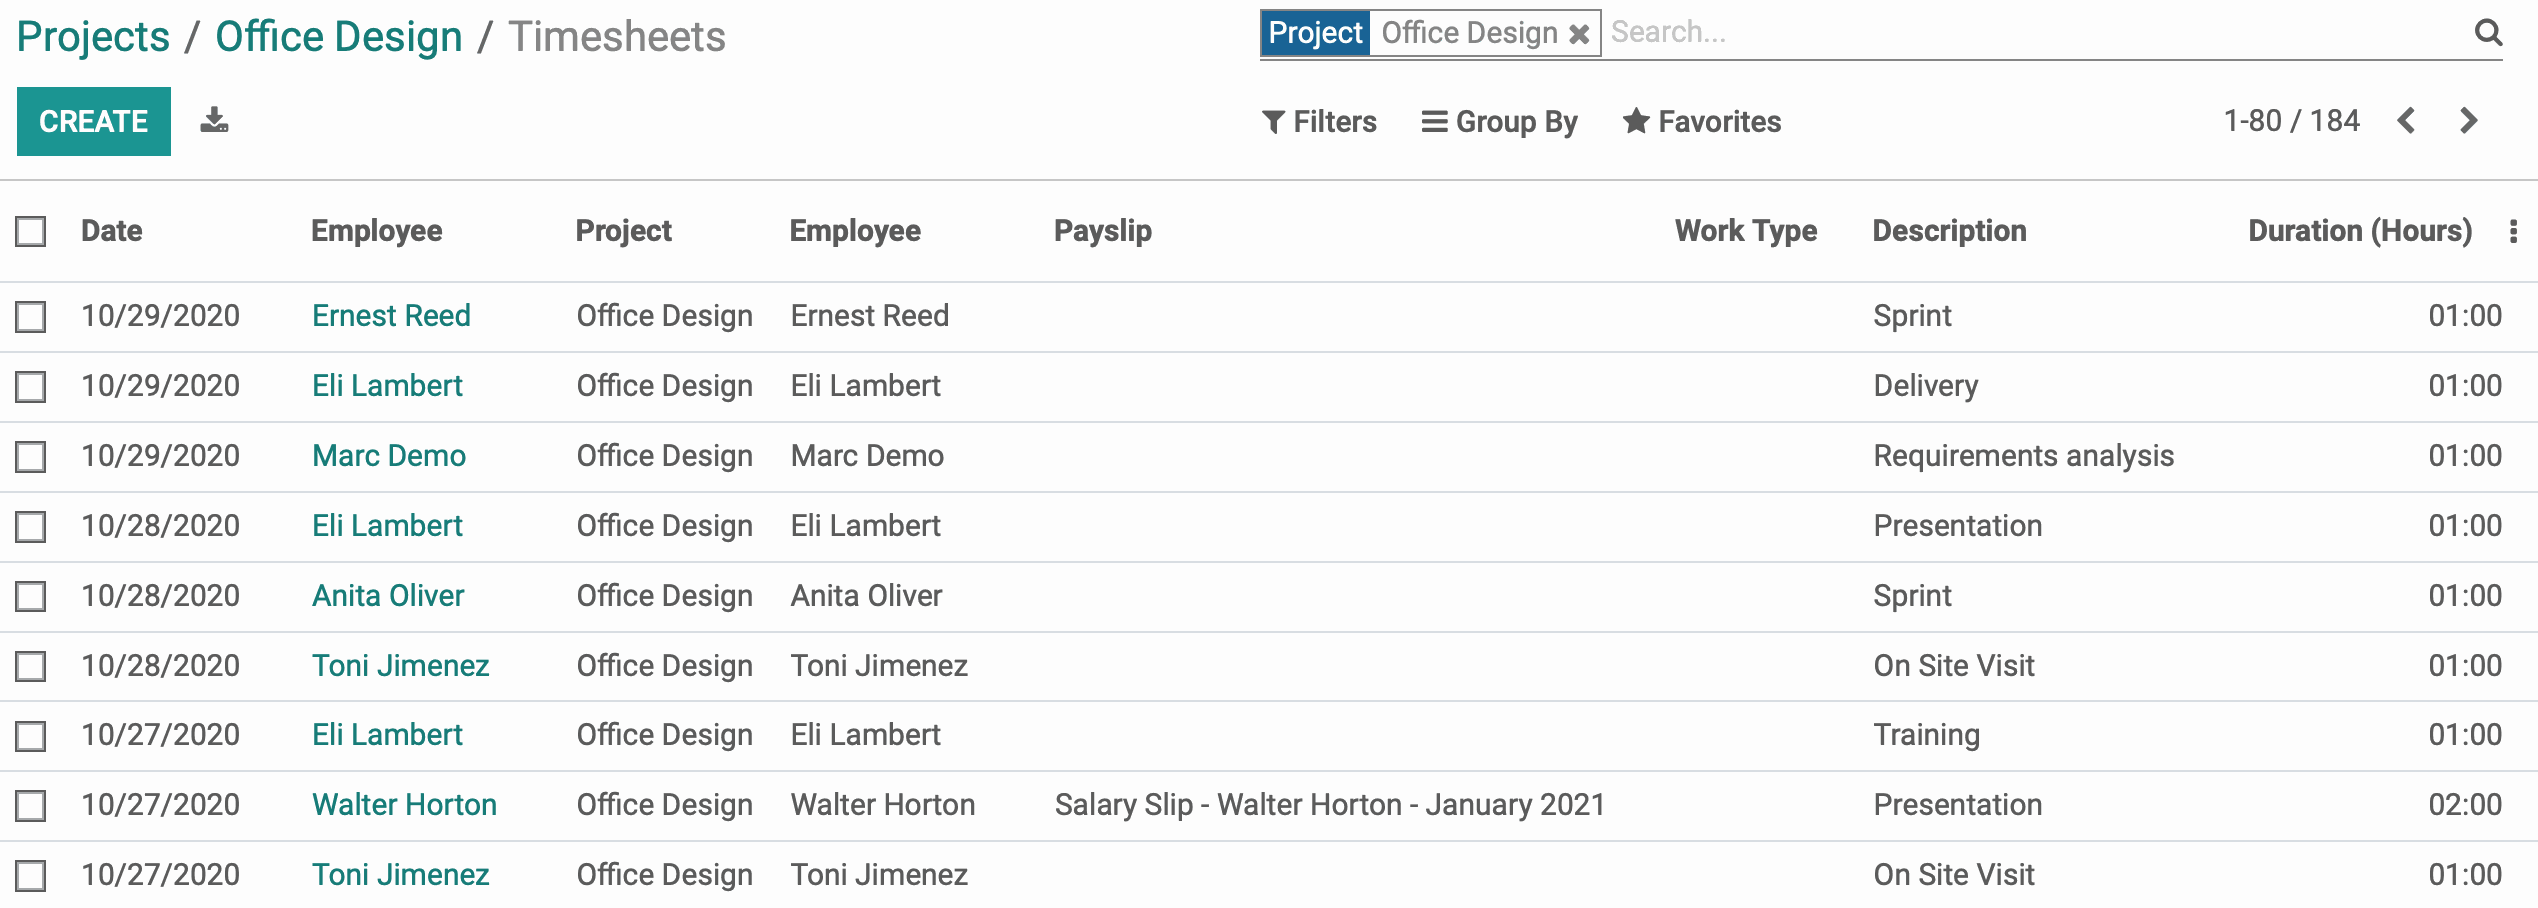
Timesheets: View all logged timesheets for this project.
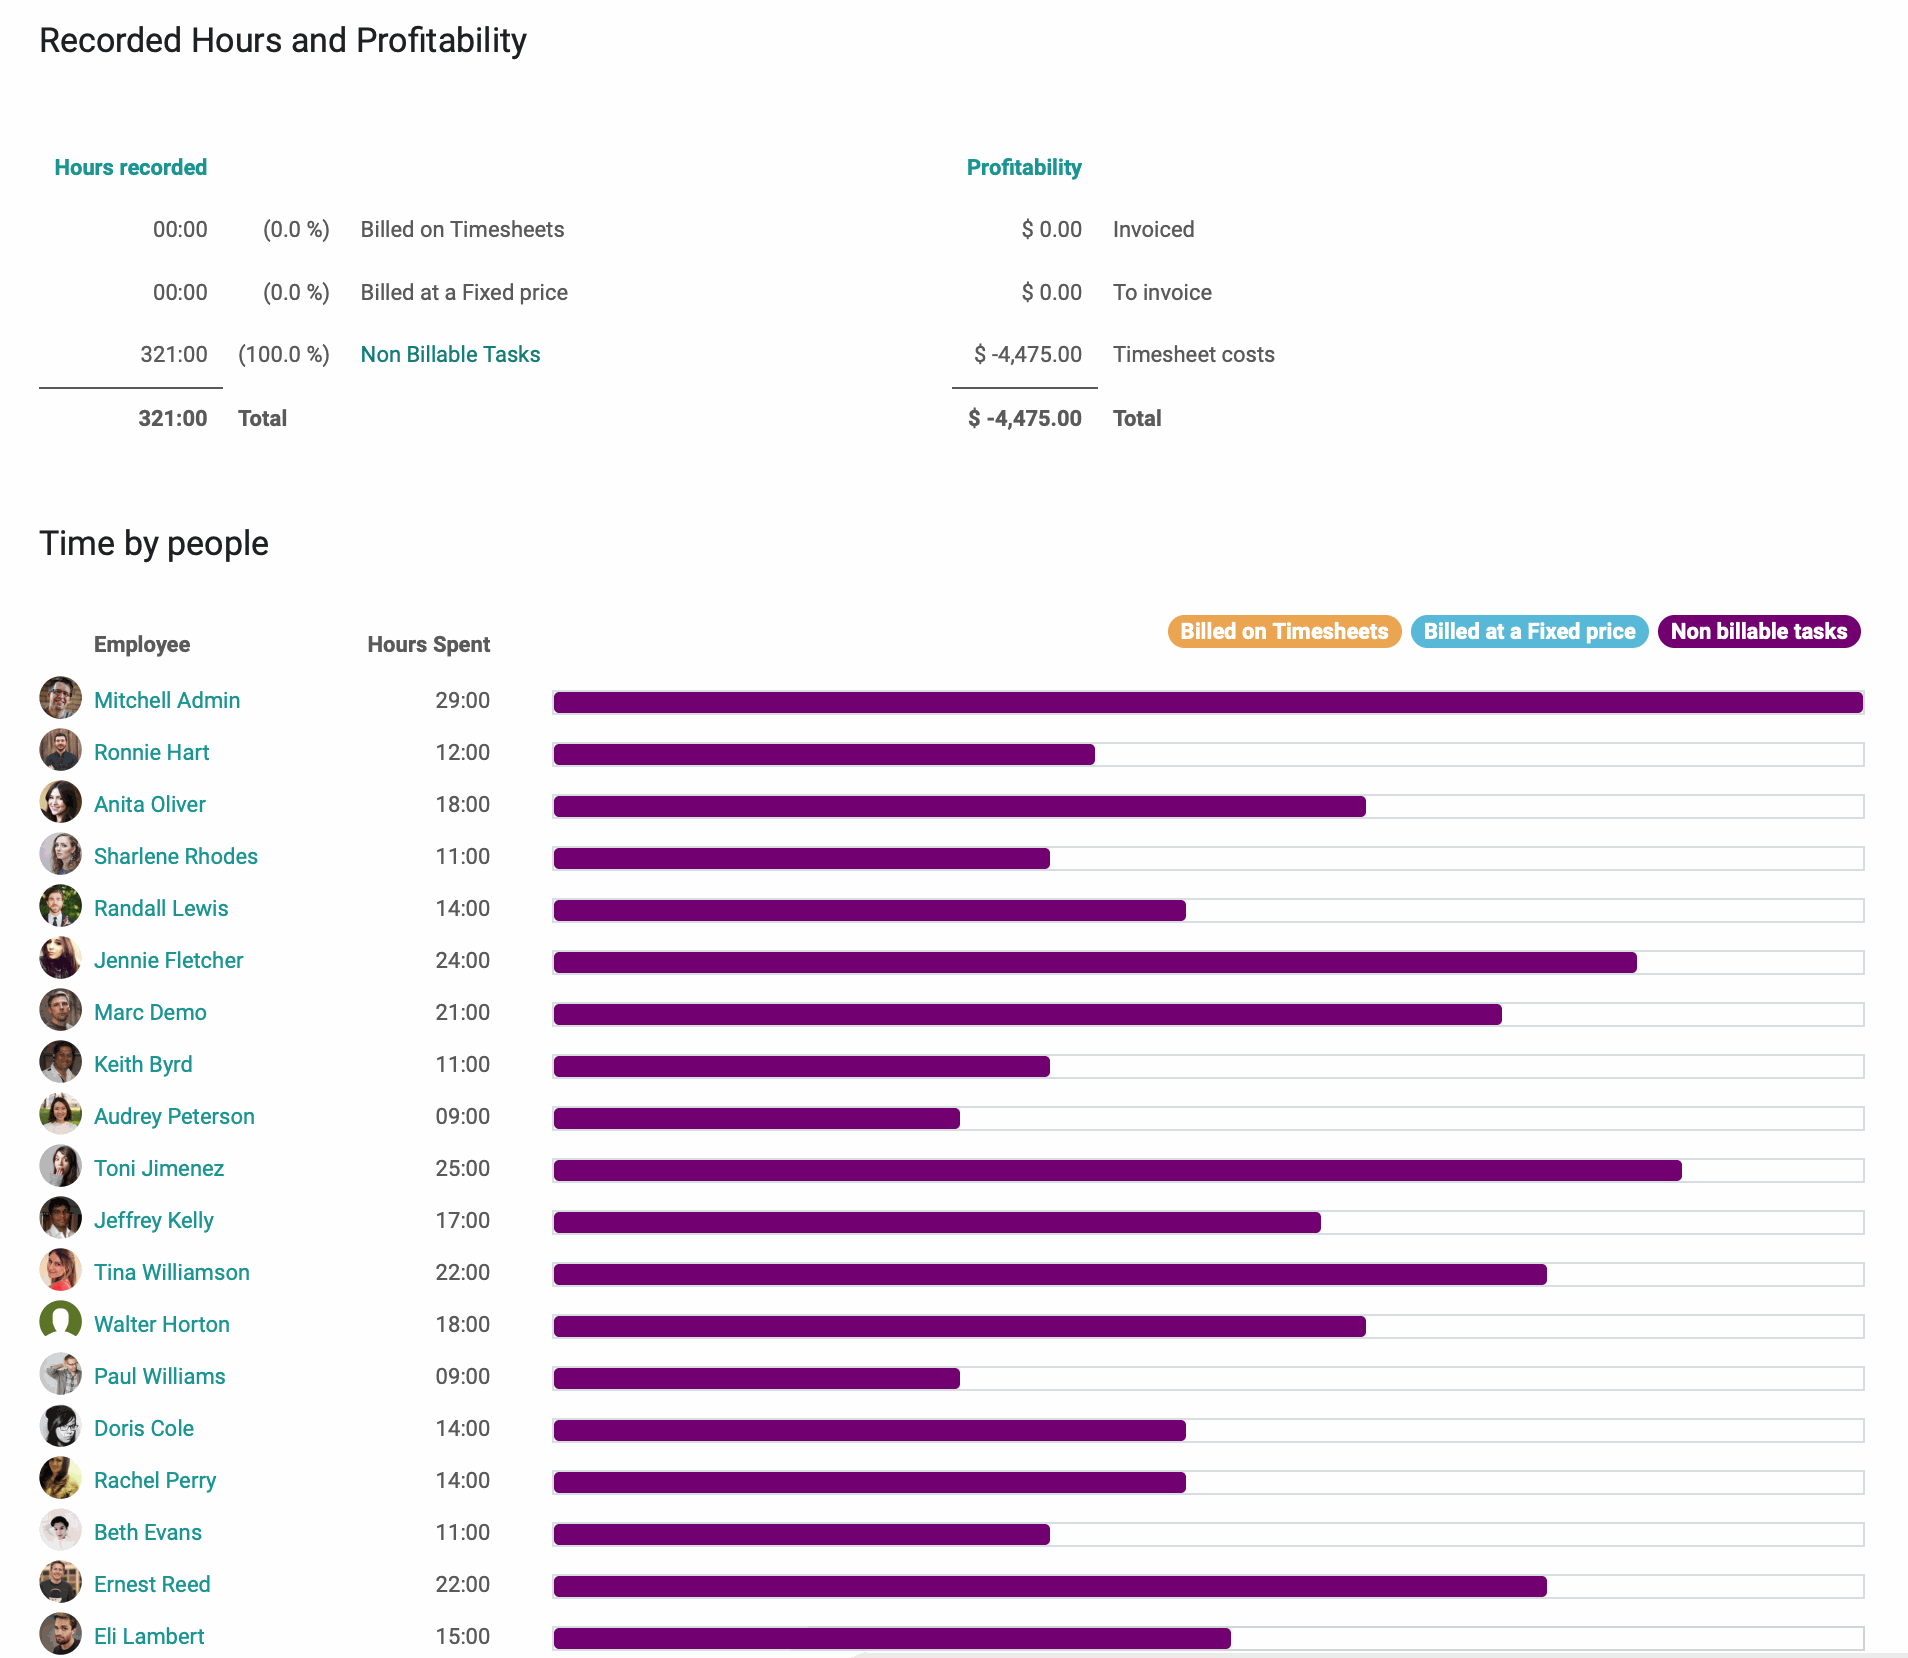
Project Overview: View the overview of the project including billed tasks, profitability, and reports on timesheets and planning related to this project.
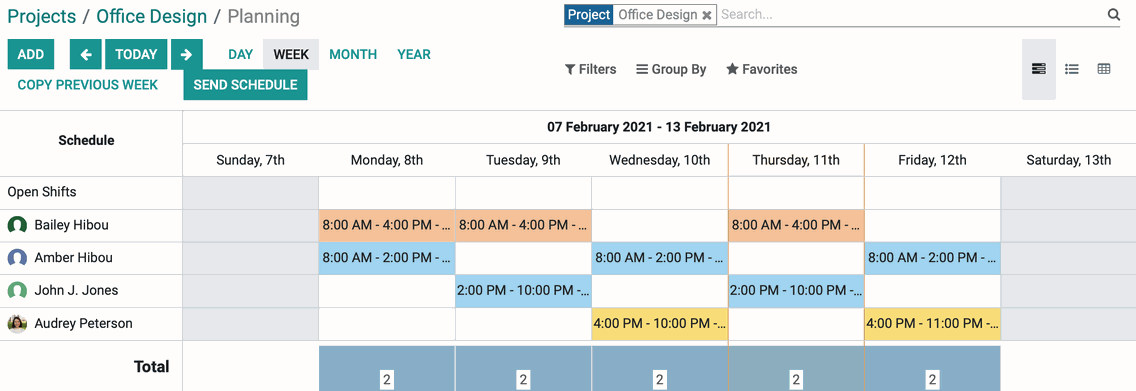
Planning: View and manage all tasks planned for this project.
Project Data
The majority of the setting and details on this page were configured when the project was created. Click edit on this page.
General Settings
Name: The name of the project.
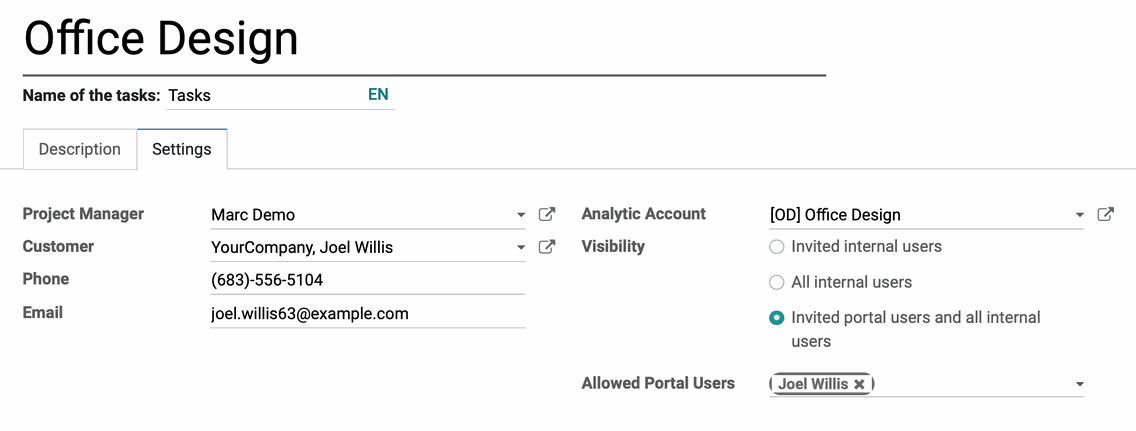
Name of the tasks: This defaults to "Tasks" but you can change it to reflect the type of project it is, such as "Steps".
Under the Description tab, enter a description for this project.
Under the Settings tab:
Project Manager: The employee in charge of this project.
Customer: The customer this project is for.
Phone: The phone number associated to the customer contact.
Email: The email associated to the customer contact.
Analytic Account: For accounting purposes, the designated Analytic Account.
Visibility: Indicate who can see this project.
Invited Internal Users: Only internal users who have this project Shared with them have access, covered below. A field titled Allowed Internal Users will appear if this visibility level is selected. In that field you will be able to select which Internal Users have access.
All Internal Users: If selected, any internal user will have access.
Invited Portal Users and All Internal Users: If selected, all internal users and those contacts with Portal Access will have access.
Allowed Portal Users: This field appears if Visibility is set to 'Invited portal users and all internal users'. Here you can select which Portal Users are allowed visibility of this project.
Planning, Timesheets & Ratings
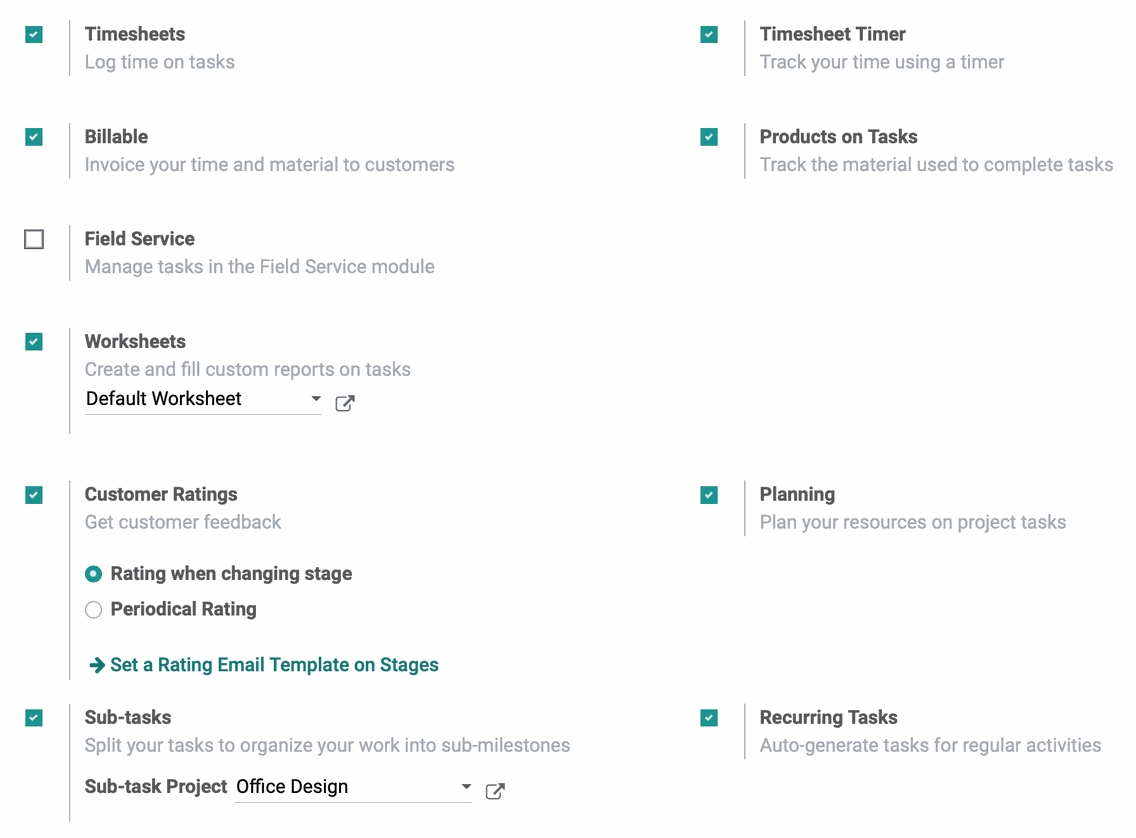
Timesheets: Enables the use of timesheets to log actual hours worked on tasks and projects. See Using Timesheets with Projects.
Timesheet Timer: Displays a timer on tasks that employees can toggle on and off to record hours worked.
Billable: Enables the ability to charge customers for actual time worked.
Products on Tasks: Allows you to track the material used to complete tasks and include material prices in the invoice.
Field Service: Enables the ability to manage tasks in the Field Service module.
Worksheets: Allows you to create and fill custom reports on tasks. When enabled, a field will appear for you to select the default worksheet template.
Customer(s) Ratings: Enables the option of customer ratings on project stages. See Project Ratings.
Rating when changing stage: A customer rating email will be sent when a task moves to a different stage.
Periodical Rating: A customer rating email will be sent periodically at a frequency of your choosing.
Planning: Enabled the ability to schedule work shifts to employees, projects and tasks. See Using Forecasts with Projects for more.
Sub-tasks: Allows you to add sub-tasks to your tasks, splitting them to organize your work into sub-milestones. When selected, the Sub-task Project field will appear asking you to select which project your sub-tasks will belong to.
Recurring Tasks: Allows you to configure tasks to auto-generate if they are regular, recurring activities.
Invoicing
Under the Invoicing tab:
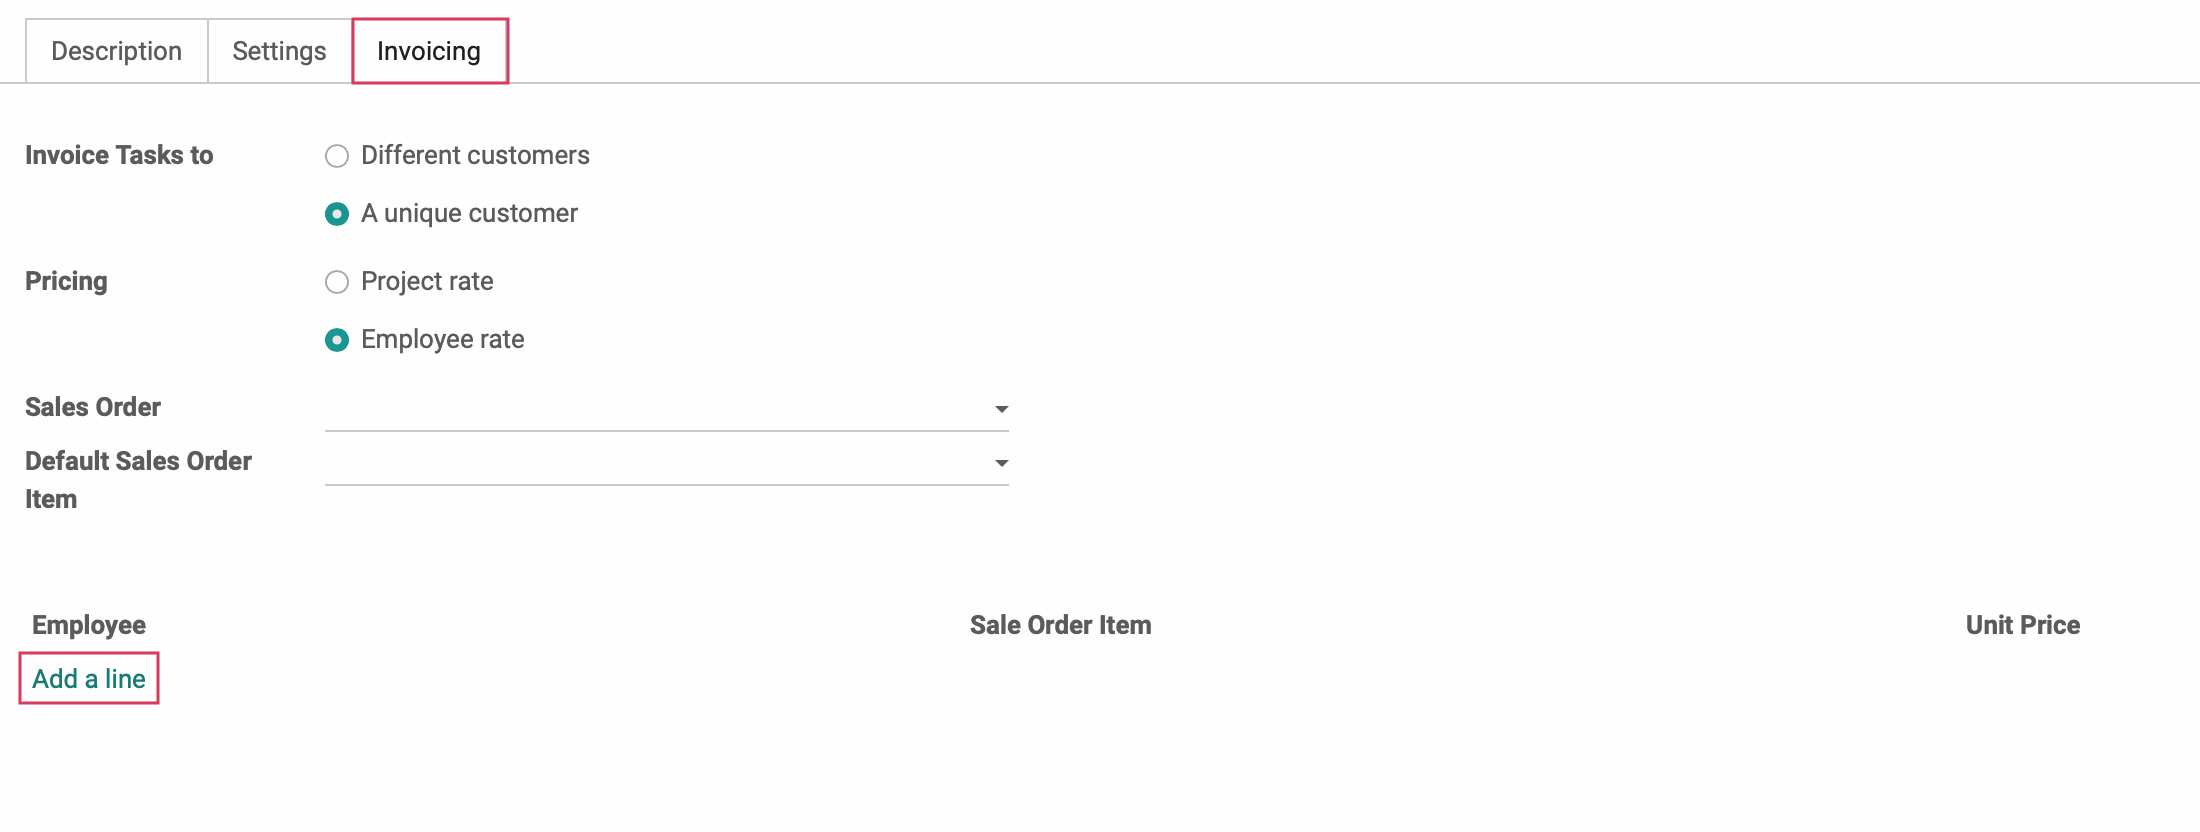
Invoice Tasks to: Depending on how you are billing for the time spent on tasks for this project, you can select either of the following options:
Different Customers: A Sales Order will be created from each task. Select this option if you would like to bill different services to different customers at different rates.
A Unique Customer: A Sales Order will be created from the Project. Select this option if you would like to bill all the tasks of a given project to a specific customer either at a fixed rate, or at an employee rate.
Service: This field only appears if the Different Customers option is selected. In this field, select a service project with which you would like to bill your time spent on tasks.
Pricing: This field only appears if the A Unique Customer option is selected. In this field you have two pricing options:
Project Rate: This is a fixed rate that is helpful if you bill a service at a fixed rate per hour or day worked regardless of the employee who performed it.
Employee Rate: This option is helpful if your employees deliver the same service at different rates.
Sales Order: This field only appears if the A Unique Customer option is selected. In this field, if applicable, select an existing Sales Order that this project is linked to.
Default Sales Order Item: This field only appears if the A Unique Customer option is selected. In this field, if applicable, select the Sales Order item for which the project is linked. This allows you to link the timesheet entry to the sales order item defined on the project. This only applies on tasks without a sale order item defined, and if the employee is not included in the Employee Lines below.
Employee Lines: This field only appears if both the A Unique Customer and Employee Rate options are selected. In this field, each line defines to which sales order item an employee's timesheet will be linked. Click add a line.
If you've made any changes to the project details, be sure to click Save.
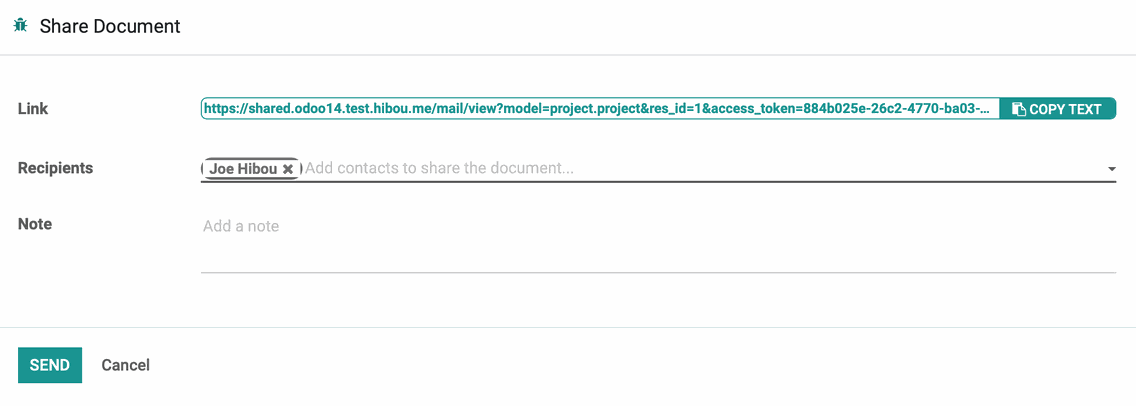
Share
The SHARE button allows you to invite others to view the project without administrative permissions by either copying the link and sharing with them manually, or adding them as a recipient to the Share Document form.