Project: Project Workflows: Planning (Project Forecasting)
Purpose
In previous versions of Odoo, you had the option to use the Forecast menu in Timesheets and Project. In Odoo 14, there's a new application called Planning that we'll be using. This app offers the same features with more flexibility.
Process
Enable Planning in Projects
If you don't have Planning installed, you can easily enable (and install) it from within Projects. To do so, navigate to the Project application.
Once there, navigate to configuration > Settings. Under the Time Management section, check Planning, Timesheets, and Allocated Time Percentage, then click Save.

Now, navigate to the Planning app.
Scheduling Options
The Planning application allows you to schedule by Employee, by Role, or by Project. The view you select is based on your preference. You'll find each of these options under Schedule.
By Employee
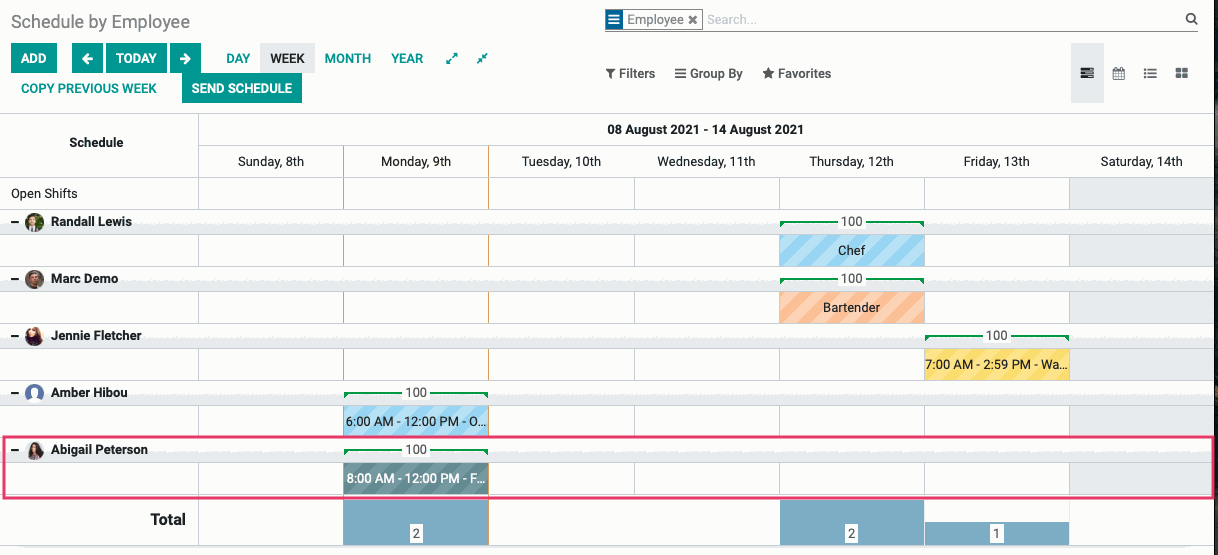
Let's start with Schedule > By Employee. This view shows employees organized down the y-axis and dates across the x-axis. The shift is show in the center and, if a role is assigned, that will display in lieu of the shift times.
By Role
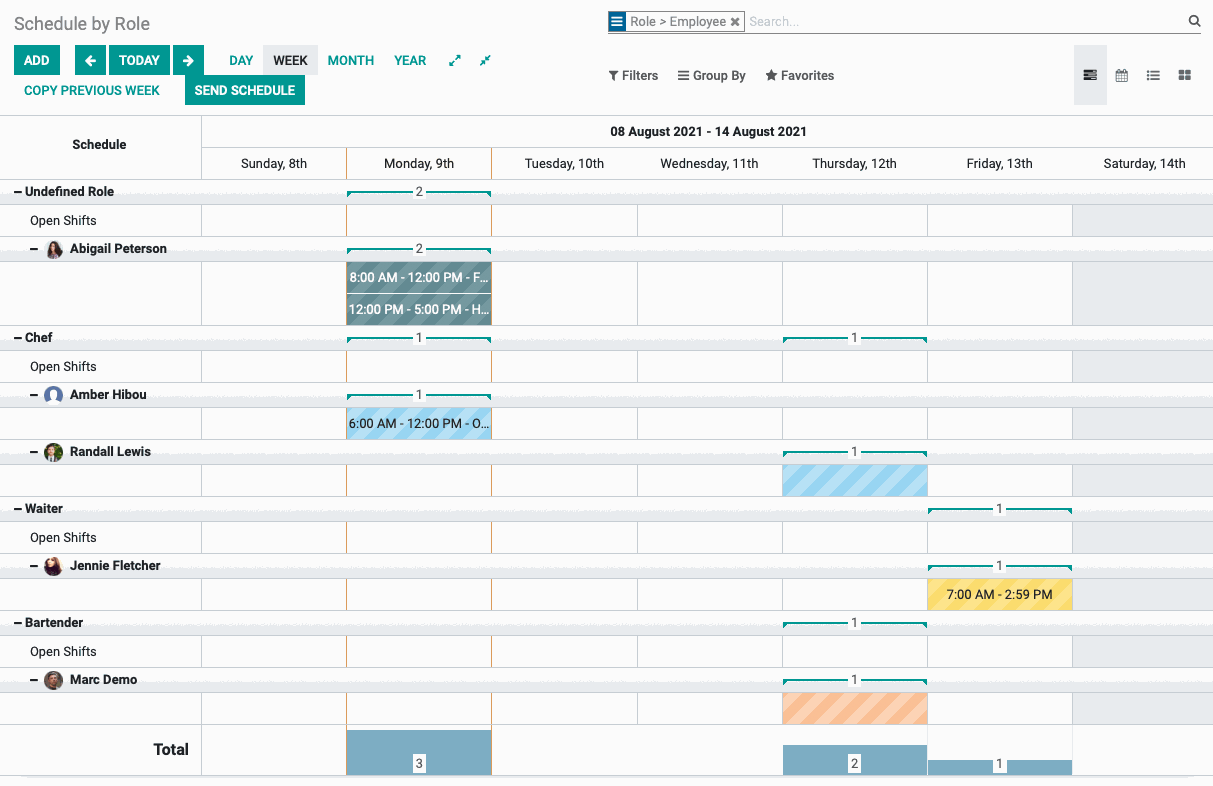
Click SCHEDULE > BY role. This view shows roles down the y-axis, further broken out by employee. Then, it shows dates across the x-axis. The shift is show in the center and, if a project or task is assigned, that will display within these shift slots.
By Project
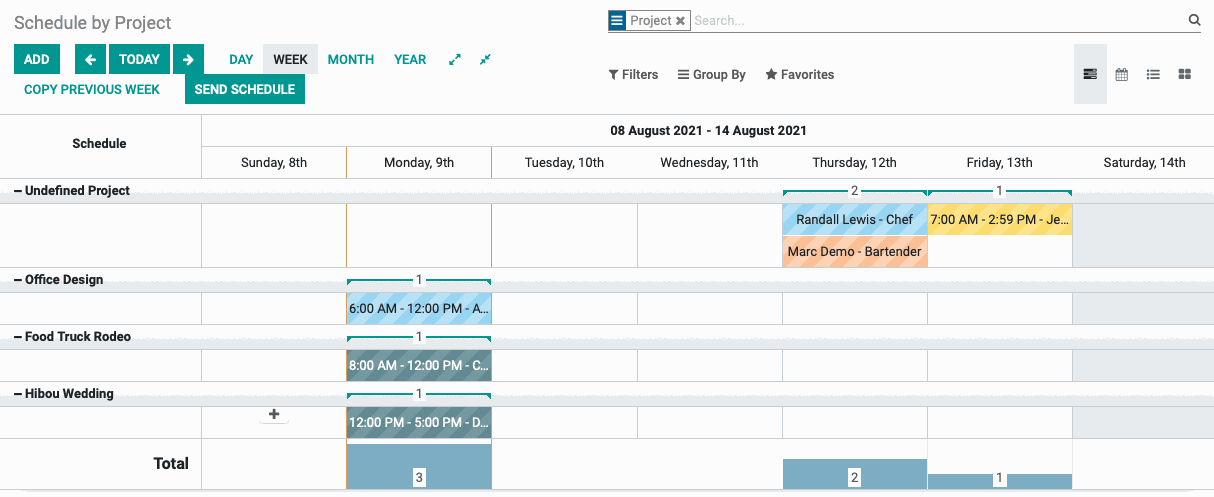
Click SCHEDULE > BY project. This view shows projects down the y-axisand dates across the x-axis. The shift is shown in the center and, if a role is assigned, that will display within these shift slots.
Schedule a Shift
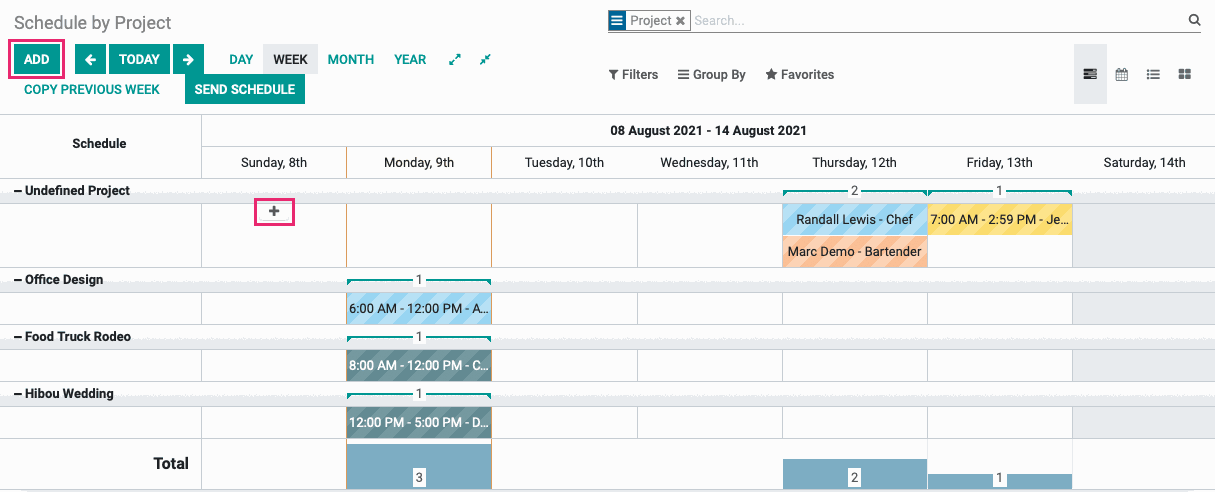
From any view, you can click add to schedule a new shift. You may also hover over any shift slot and click the icon. Doing it using the latter method will also fill in additional context and save some time.
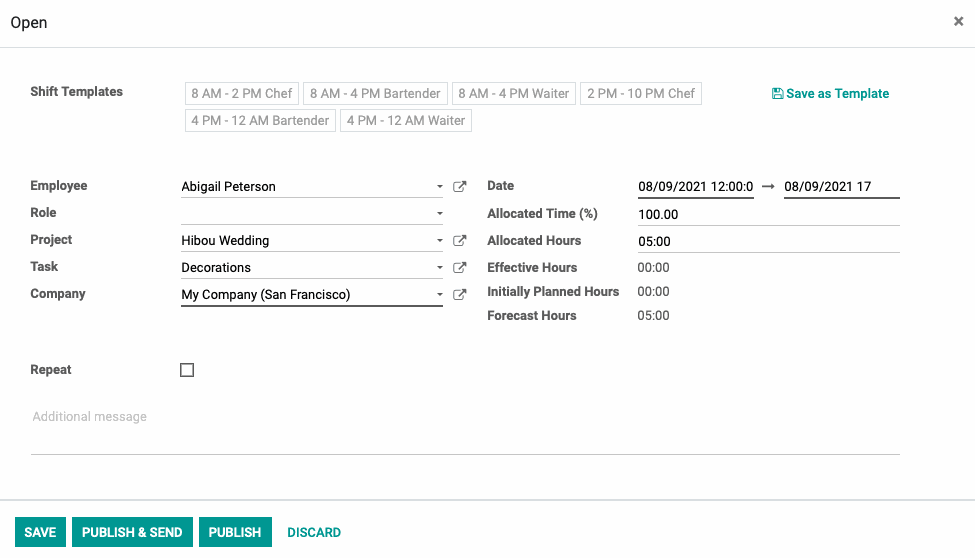
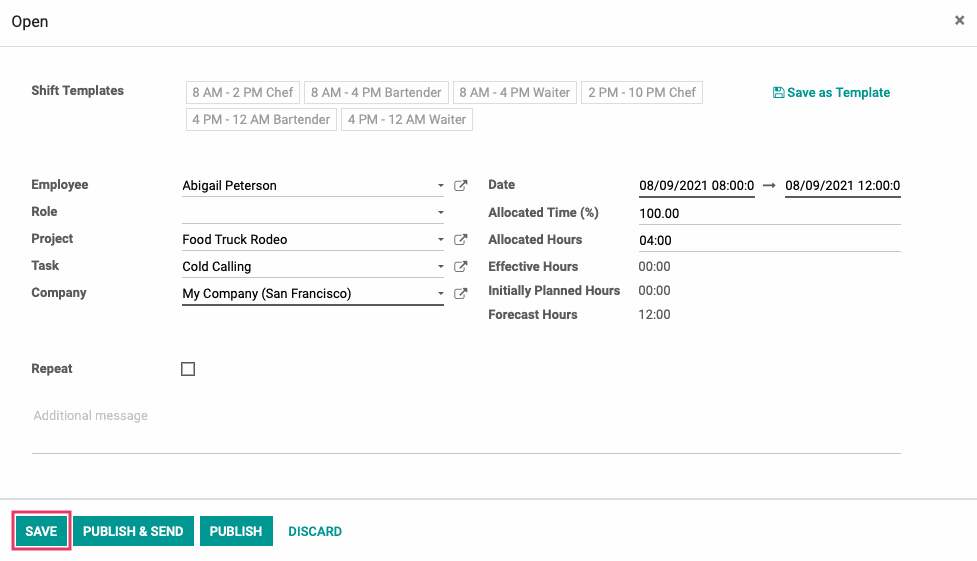
This brings up a new modal window. Here you'll want to complete the following form fields:
Employee: Select the employee who you're scheduling a shift for.
Role: This is optional, but if the role plays an important part in this work, you can select that here.
Project: Select the project to be worked on for this shift.
Task: If this is task specific, select the task for the project here.
Company: This will auto-populate with the company you're working in.
Date: Select the date and time for the start and end of this shift.
Allocated Time: Enter the allocated time (percentage of all scheduled working time) here.
Allocated Hours: This field will adjusted, based on the allocated time entered above. You may also override it.
Effective Hours: This field is hard coded and will reflect the time already spent on this task by this employee but only when a project and task are selected.
Initially Planned Hours: This field is hard coded and will reflect the time planned for task but only when a project and task are selected.
Forecasted Hours: This field is hard coded and will reflect the time currently forecasted for this task.
Repeat: If this is a repeating shift, you can check this box and select the frequency.
You have three options at the bottom of this modal:
save will save this shift as a draft.
Publish & Send will commit this shift to the schedule and send it to the employee.
Publish will commit this shift to the schedule.
Make your selection to continue.
Once save, we can see the shift added to the schedule for this employee.