Website + eCommerce: Configuration: Settings
Purpose
This document covers the Odoo 14 Website application configuration. We'll go over each sub-menu item and the items within. It also covers the installation and configuration of the eCommerce app.
Process
To get started, navigate to the Website app.

Once there, go to Configuration > Settings. Here we'll cover each section of this page.
Select the Website to Configure
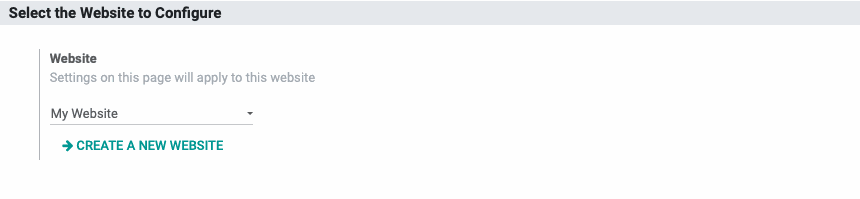
Website: Select the website you'll be configuring in the proceeding sections. You can also add another website instance by clicking Create a New Website.
Website
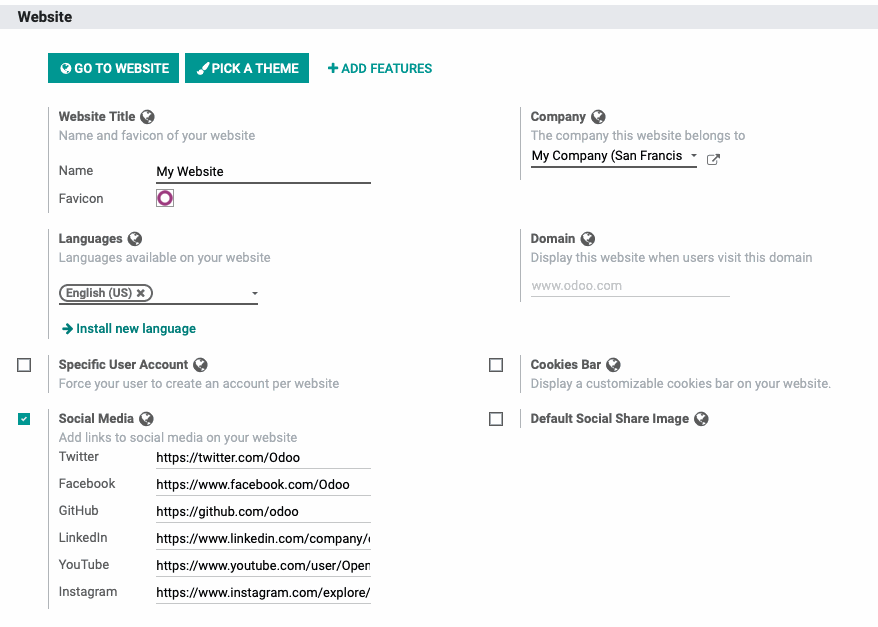
The first items in this section are action buttons.
Go to Website: This takes you to the front-facing website and is where you'll preview your site before publishing.
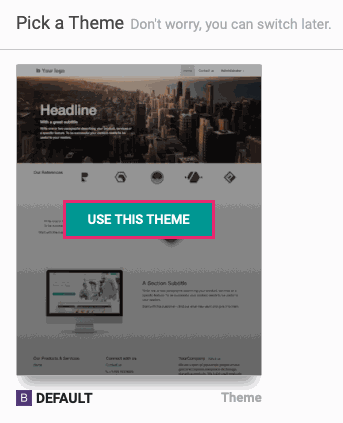
Pick a Theme: This takes you to a page of themes installed to your database.
To install a theme, hover over it and click Use this theme.
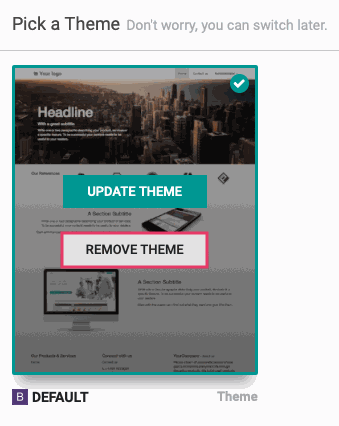
To update a theme, click Update Theme.
To remove the theme, click Remove Theme.

Website Title: Enter the title of your website. This is used throughout the Odoo website, so it should reflect your business name.
Favicon: This is the small graphic that will display on browser tabs.
Languages: Select the languages to make available on your Odoo database.To add a new language, click Install new language.
Specific User Account: Enable this to make newly create accounts website-specific.
Content Delivery Network (CDN): If you use a CDN, enable this and enter values for the CDN Base URL and CDN Filters fields that will display.
Default Social Share Image: Enable this to specify an image that will be used for social media when your website is shared. When this image is not set, your website logo will be used.
Company: In a multi-company database, use this field to associate a website with its appropriate company.
Domain: Enter the domain name to use with your Odoo database. In the next field, you can filter by country group once the selection of available websites by domain is done.
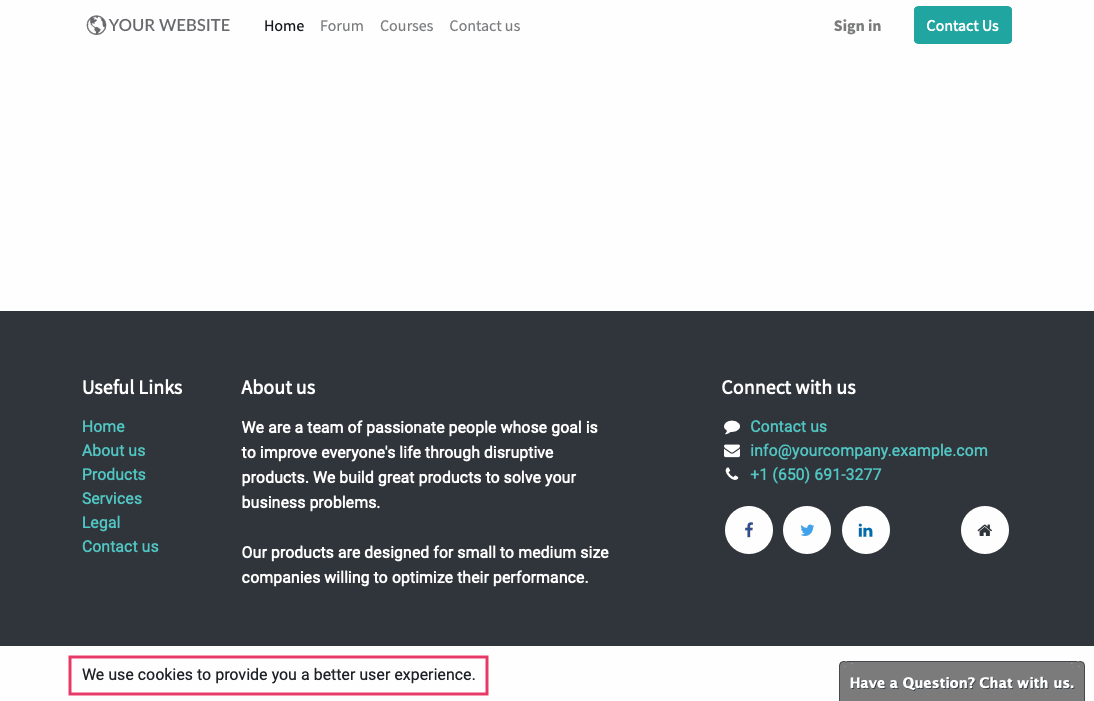
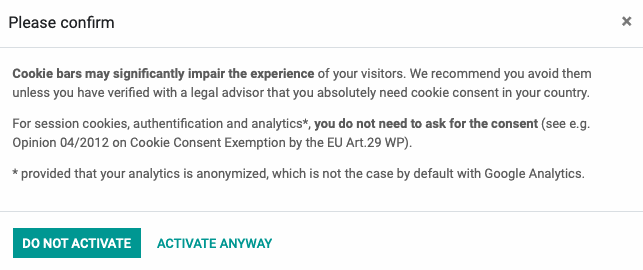
Cookies Bar: Enable this to display a cookies bar on your website.
When you toggle this setting on, you'll see a warning message. From here you can select Do Not Activate or Activate Anyway.
Social Media: Activate this to display socila media icons on your site. For each applicable platform, enter the absolute URL for your respective account (e.g. https://twitter.com/mybiz). Leave those that don't apply empty.
Features

Google Maps: This setting allows you to integrate Google Maps with your Odoo database. When enabled, you'll need to provide your API key from Google. If you don't have an API key, click Create a Google Project and get a key and Enable billing on your Google Project.
Slides: To integrate Google Slides into your Odoo database, enter the your API key. If you don't have an API key, click CREATE A GOOGLE PROJECT AND GET A KEY.
Live Chat: If you have Live Chat installed, select the Live Chat channel it should use for this website.
Customer Account: Select the method you'd like new customers to create an account.
On Invitation: When selected, only those who are invited can create an account.
Free Sign up: When selected, any website visitor can create an account.
Default Access Rights: Follow this link to set the default access rights for new customers.
Web Push Notifications
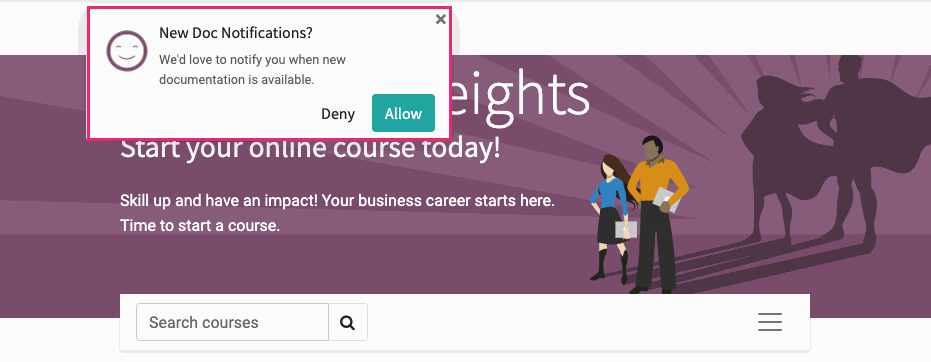
Enable Web Push Notifications: Push notifications are browser-based pop-ups that must be allowed by your visitors. They are managed in the Social Marketing application, but must be enabled here. When enabled, the fields to configure the intial request for permission will display.
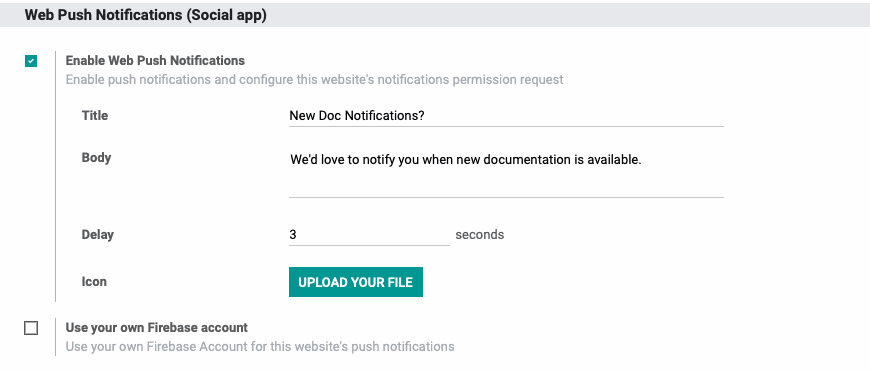
Title: The title of the push notification permission request.
Body: The content of the push notification permission request.
Delay: The number of seconds that will pass before your visitor sees the push notification.
Icon: The small graphic that will display on the push notification permission request.
Sample Push Notification Permission Request:
Use your own Firebase account: If you'd like Firebase to manage your Odoo push notifications, enable this box and enter your Firebase API credentials.
Communication
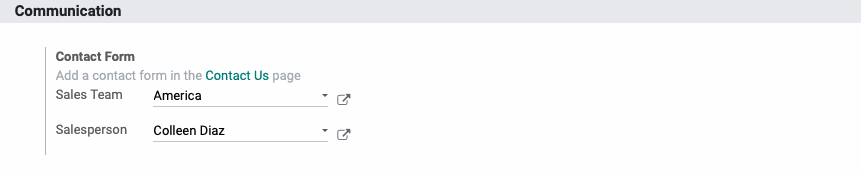
Contact Form
Sales Team: Select the Sales Team that forms submitted via the Contact Us page will be assigned to.
Salesperson: Select the Salesperson that forms submitted via the Contact Us page will be assigned to.
SEO
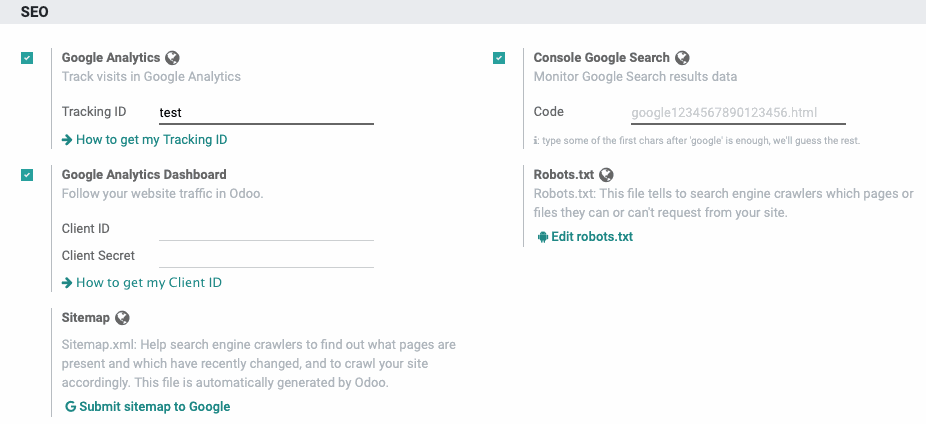
Google Analytics: Enable to use Google Analytics to track your website performance. When enabled, you can then enter your Tracking ID. To obtain a tracking ID, follow the instructions on the How to get my Tracking ID button.
Google Analytics Dashboard: When enabled, you can track your traffic directly in Odoo on the Website dashboard. To use this feature, you'll need to enter yoru Client ID and Client Secret from Google. Use the How to get my client ID button for further assistance.
Once enabled and configured, you can see your Analytic Data from Dashboard > Analytics.
Sitemap: Click Submit sitemap to Google to submit your sitemap.xml to Google. You must have a domain configured to do this.
Console Google Search: Enable this to display Google search metrics within your Odoo database.
Robots.txt: This file tells to search engine crawlers which pages or files they can or can't request from your site. Click Edit Robots.txt to modify this file.
eCommerce Options
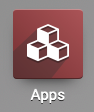
To install eCommerce, navigate to the Apps application.
Once there, search for 'eCommerce' and click Install.

Once there, go to CONFIGURATION > SETTINGS. Here we'll cover the configuration settings added when installing eCommerce.
Select the Website to Configure
Website: Select the website you'll be configuring in the proceeding sections. You can also add another website instance by clicking CREATE A NEW WEBSITE.
Products
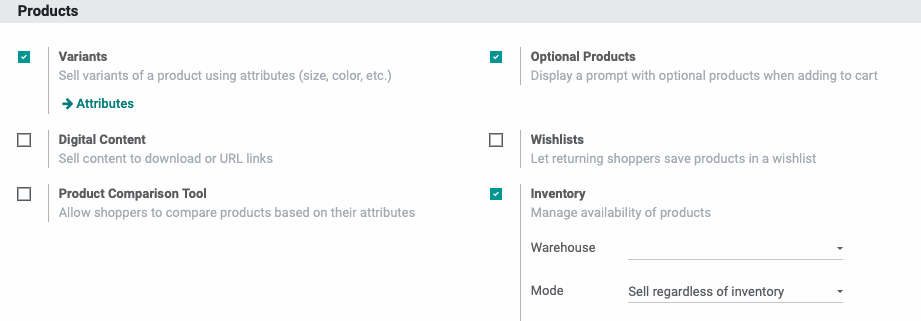
Variants: When enabled, you'll be able to sell variants of a product using attributes (size, color, etc.). You'll also be able to manage them by using the Attributes sub-menu.
Digital Content: When enabled, you'll have the ability to sell digital products that will be available to your customers after purchase via a download link.
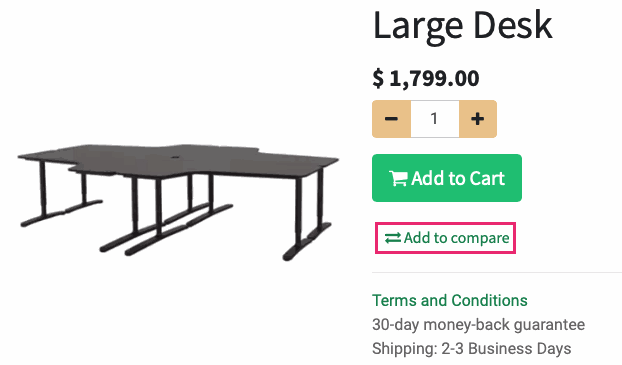
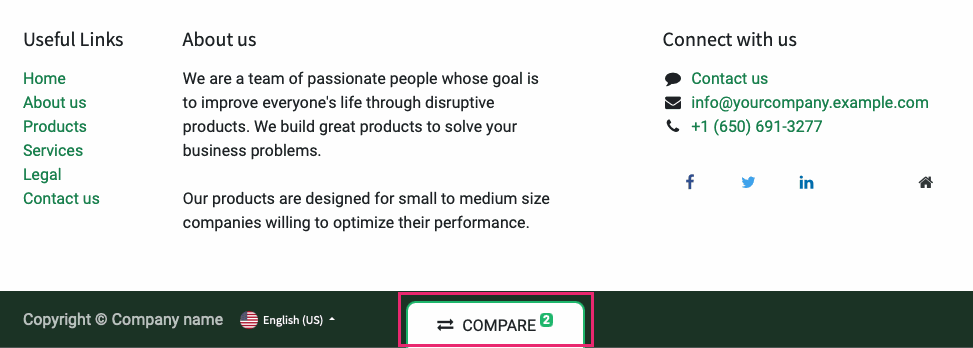
Product Comparison Tool: When enabled, products will have the Add to Compare option on them. The comparison list appears as a panel at the bottom of the shopper's screen. By clicking this, they can then access all products that have been added for comparison.
Optional Products: When enabled, a modal window will display to the customer upon adding a specific product to the cart and ask if they'd also wish to add the configured optional products. This is a popular way to add things like extended warranties or product assembly. Optional products are configured on the Sales tab.
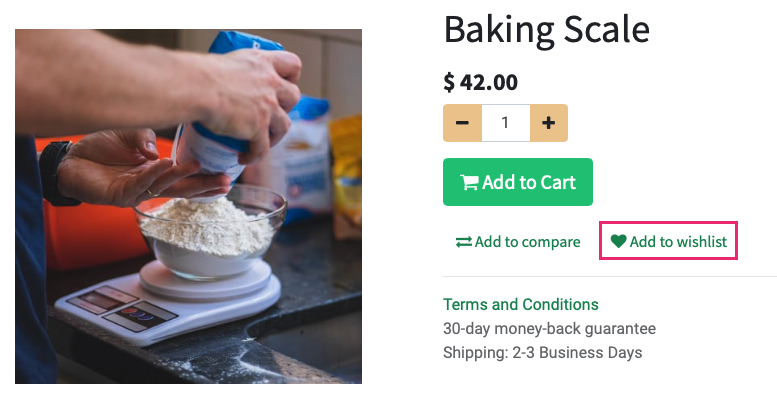
Wishlists: When enabled, products will have the Add to Wishlist option on them. Items added to the wishlist can be accessed on the top menu.

Inventory: Enable this to manage stock levels of products you offer in eCommerce. Once enabled, you'll have two additional options:
Warehouse: Select the warehouse that manages your eCommerce inventory. If left empty, all warehouses will be considered.
Mode: Select the mode in which inventory is managed:
Sell regardless of inventory: Customers may purchase this item whether or not there is stock.
Show inventory on website and prevent sales if not enough stock: Customers may purchase only the available stock.
Show inventory when below the threshold and prevent sales if not enough stock: Customers may purchase only the available stock above the set threshold. When enabled, you must enter a Threshold amount.
Show product-specific notifications: When enabled, you'll be able to set a Custom Message on the eCommerce tab of the product itself. This can be accessed by setting the availability to this option, as well.

Pricing
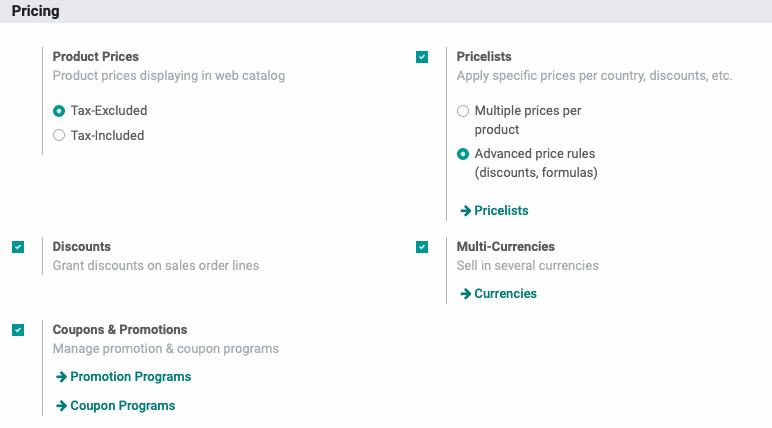
Product Prices: Select whether you'd like eCommerce to display prices with tax included or tax excluded.
Discounts: To allow ecommerce discounts, enable this options. Note that we recommend managing discounts with Coupons and Promotions for better traceability. This is a global setting; disabling it here will disable it system-wide.
Coupons & Promotions: Coupons and Promotion Programs can apply to ecommerce sales when enabled. This is a global setting; disabling it here will disable it system-wide.
Pricelists: When enabled, Pricelists can be applied to website sales and, depending on the pricelist's individual settings, may be selectable by customers. This is a global setting; disabling it here will disable it system-wide.
Multi-Currencies: Enable to sell products in several currencies.This is a global setting; disabling it here will disable it system-wide.
Shipping

Shipping Address: When enabled, customers can enter a shipping address that differs from their billing address.
Shipping Costs: When enabled, customers can get shipping quotes from different Shipping Methods.
Invoicing

Invoicing Policy: Decide whether invoices are created from the ordered or delivered quantity of goods. If set to ordered quantities, the option to invoice will be available immediately after the order is confirmed. On Delivered, it will not be available until at least one item on the order has been delivered through a validated transfer.This is a global setting; disabling it here will disable it system-wide.
Automatic Invoice: Enabling this will generate invoices automatically when the online payment is confirmed. This is a global setting; disabling it here will disable it system-wide.
Orders Followup
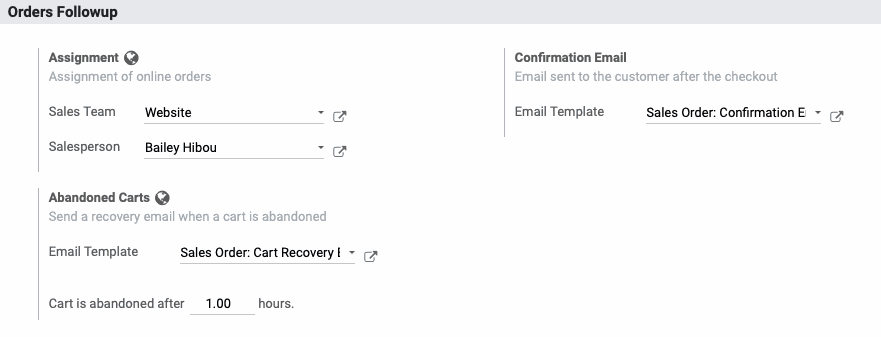
Assignment: Select the Sales Team and/or Sales Person that online sales should be assigned to as the responsible user.
Abandoned Carts: Select the email template to be used when sending reminders to shoppers with abandoned carts. You can then indicate how many hours after the abandonment to wait to send this email. Use the icon to edit this email template.
Confirmation Email: Select the email template to be used when confirming an order. Use the icon to edit this email template.