Sales: Products: Invoicing Policy
Purpose
A product's invoicing policy is what tells Odoo when an order is ready to be invoiced - either when products are ordered, or when they're delivered. We cover enabling this setting briefly in our Products documentation; however, this document will go one step further and outline how this setting affects workflow in the Sales application of Odoo 14.
This is not to be confused with the Ordered Quantities Service Invoicing Policy.
Process
To set the Invoicing Policy on a product, first navigate to the Sales app.
Once there, go to Products > Products and select any storable product. From within the product, click Edit and move to the sales tab. Here you'll see the Invoicing section.
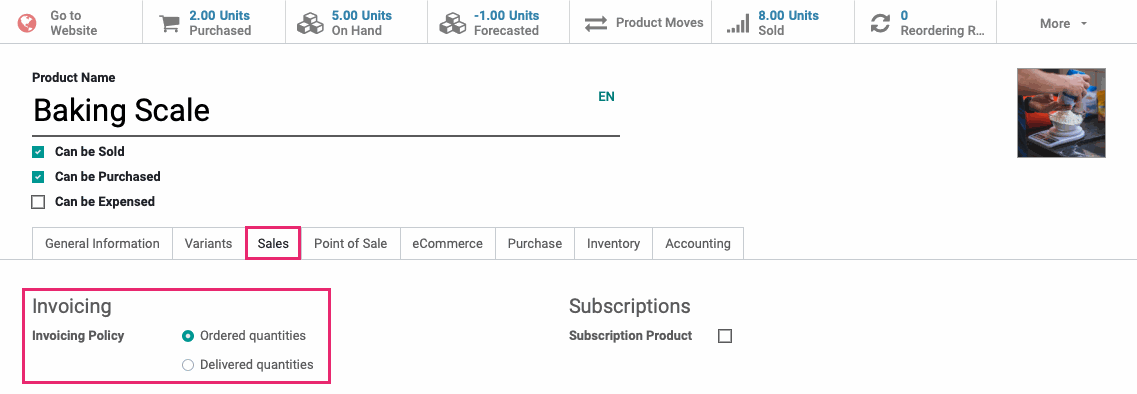
Select the policy you wish to use, then click Save.
Workflow: Ordered Quantities
Let's see what happens when we order a product with 'Ordered quantities' as the Invoicing Policy. Click Orders > Quotations, then click create to make a new quotation.
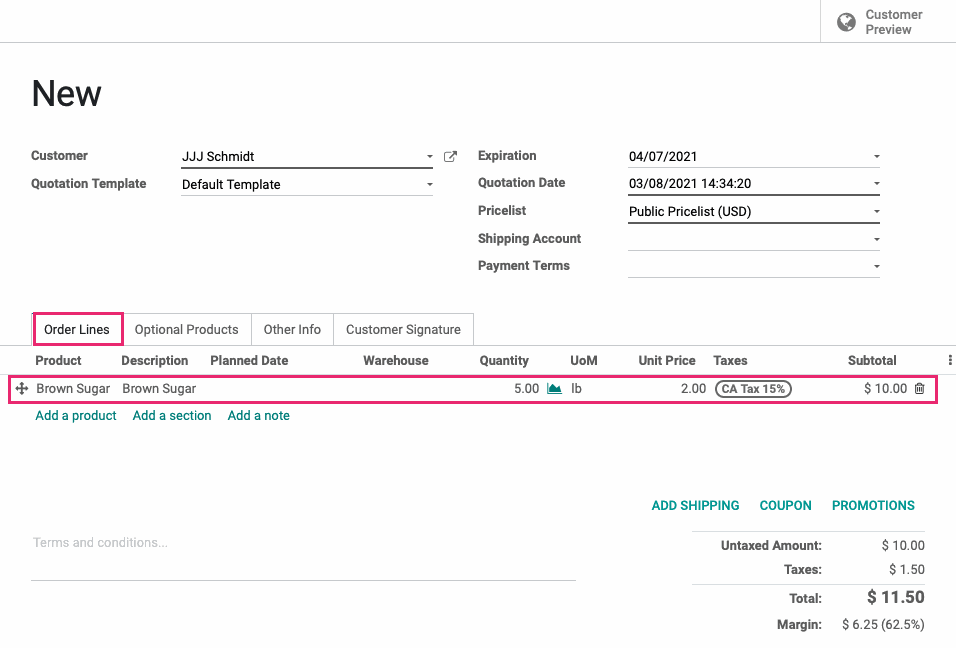
Select a customer, then add your product (set to invoice 'Invoiced quantities') to the Order Lines tab by clicking Add a product.
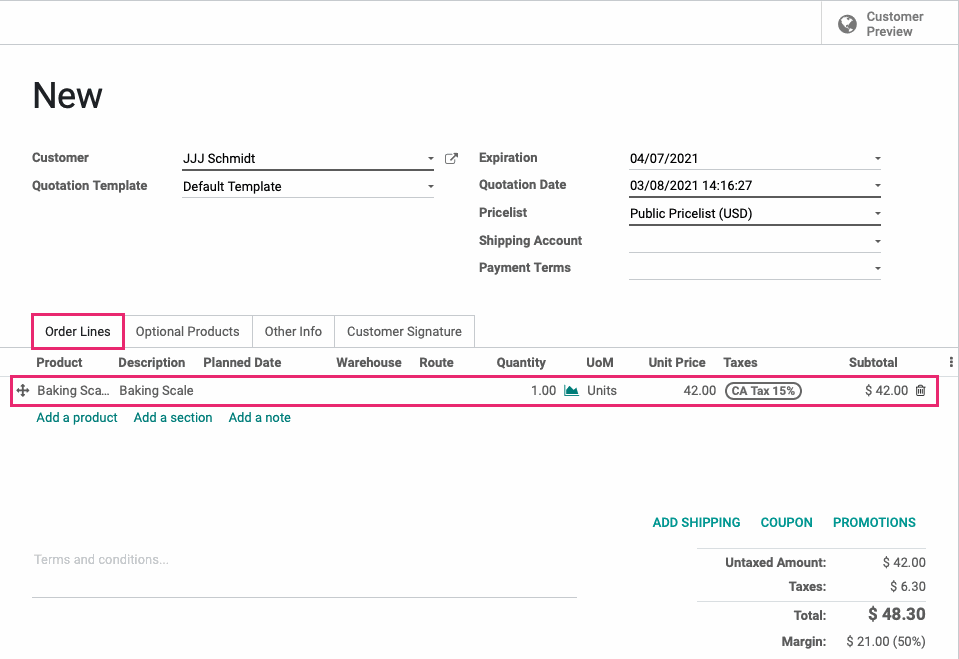
When you're done, click Save, then click Confirm.
What you'll notice now is the Quantity field for the product line. The product is ready to be invoiced so the quantity is shown in bold blue.

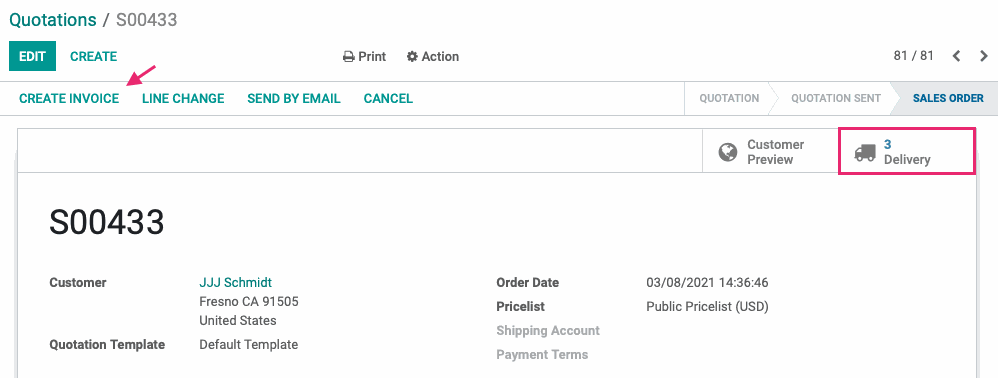
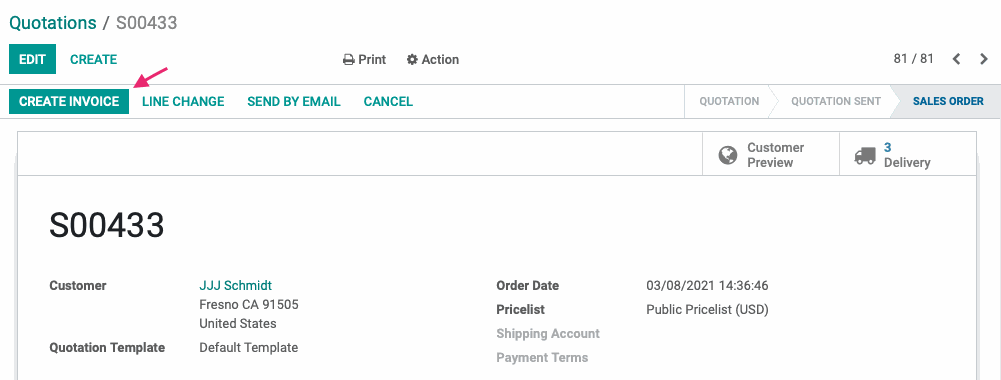
You'll also notice the Create Invoice button is solid. This indicates the entire order is set to 'Quantity ordered' for the Invoicing Policy. Otherwise, this button would have a white background.
Good to Know!
You CAN Deliver First
Odoo won't stop you from delivering the product before invoicing; however, by understanding what the colors and styles mean, you'll immediately know what the next expected steps are.
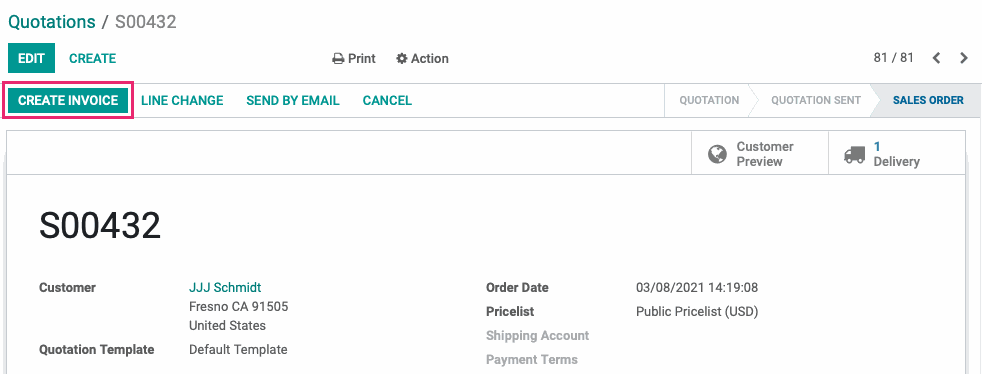
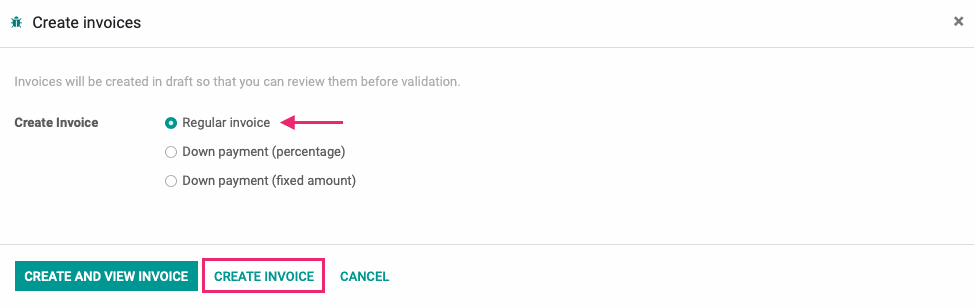
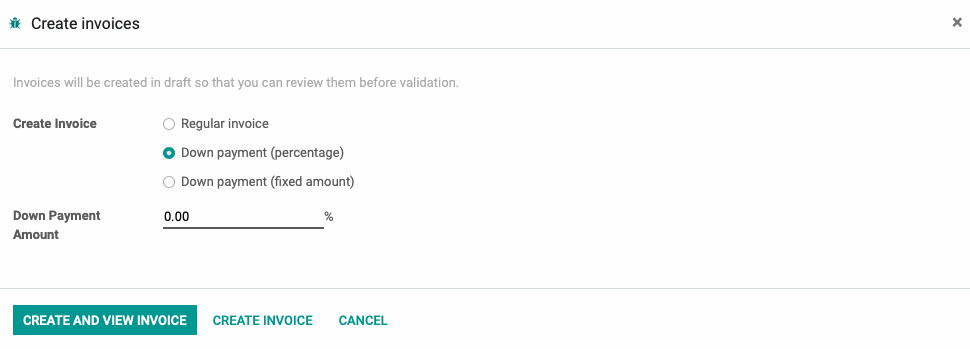
Let's continue this workflow by clicking CREATE INVOICE. This brings up a modal window where you'll select what you're invoicing for. By default, 'Regular invoice' is selected based on the Invoicing Policy. Leave this option selected and click CREATE INVOICE.
It's important to call out here that the invoice does not need to be paid for the next steps to happen. If this is part of your company's workflow, be sure to collect payment before delivery.
You can now deliver the product.
Workflow: Delivered Quantities
Now, let's see what happens when we order a product with "Delivered quantities" as the Invoicing Policy. Click Orders > Quotations, then click create to make a new quotation.
Select a customer, then add your product (set to invoice 'Delivered quantities') to the Order Lines tab by clicking Add a product.
When you're done, click Save, then click Confirm.
What you'll notice now is the Quantity field for the product line. The product is not yet ready to be invoiced so the quantity is shown in black.

You'll also notice the Create Invoice button is has a white background. This indicates that there are no invoicable lines, and is a rsult of the only product being set to 'Deliver ordered' for the Invoicing Policy. Otherwise, this button would be a solid color.
The next step would be to deliver the product. Click the Delivery smart button and process the delivery.
Once the product has been delivered, you'll then have the option to CREATE INVOICE.
Good to Know!
You CAN Invoice First
Odoo won't stop you from invoicing the order before delivering the product. If you were to click Create Invoice, you'd see a modal window where you'd select what is to be invoiced. By default, a 'Down payment' option will be selected.
Delivered + Ordered Quantities
What happens if an order contains products with a mix of Invoicing Policies? Let's find out! Click ORDERS > QUOTATIONS, then click CREATE to make a new quotation.
Select a customer, then add two products to the ORDER LINES tab by clicking ADD A PRODUCT. Make sure one product has the Invoicing Policy set to 'Ordered quantities' and the other is set to 'Delivered quantities'.
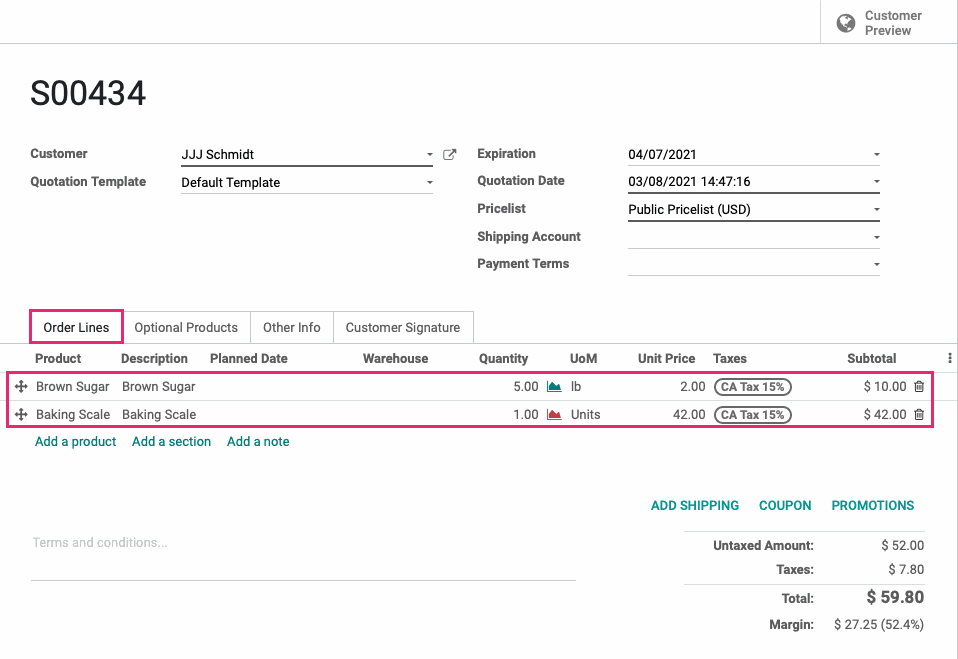
When you're done, click SAVE, then click CONFIRM.
What you'll notice now is the Quantity field for each product line. The product that's ready to be invoiced is blue, the other is black. Because there's an invoicable line, you can click the solid Create Invoice button.
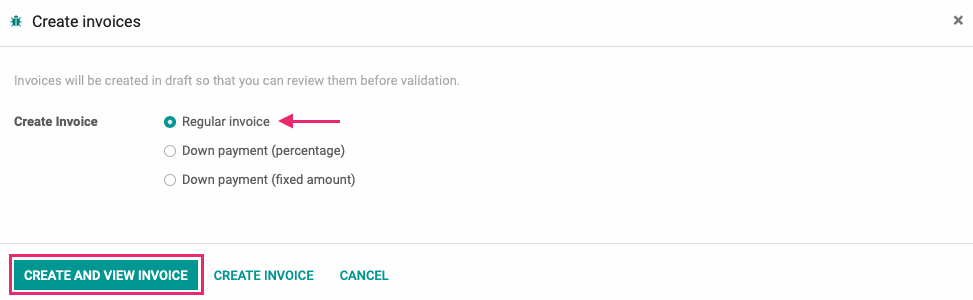
Let's continue this workflow by clicking CREATE INVOICE. This brings up a modal window where you'll select what you're invoicing for. By default, 'Regular invoice' is selected based on the Invoicing Policy. In this scenario, Leave this option selected and click CREATE and view INVOICE.
The newly created invoice is only for the 'Ordered quantities' product because it was the only invoicable line. Click Confirm.
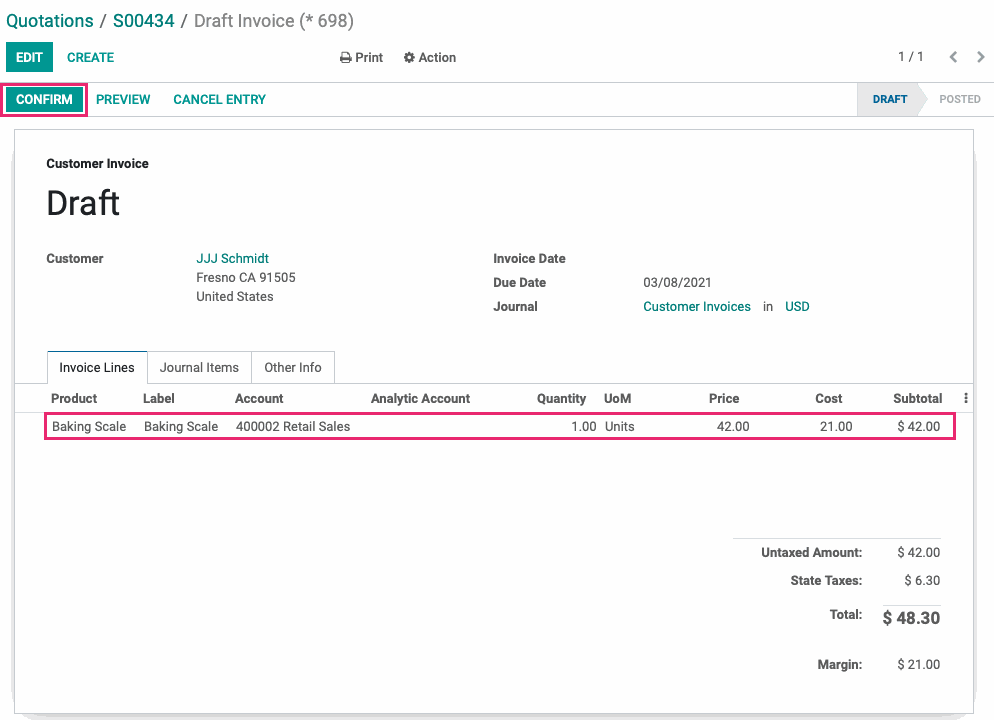
Again, it's not necessary for this invoice to be paid to continue. Use the breadcrumbs to navigate back to the sale order.

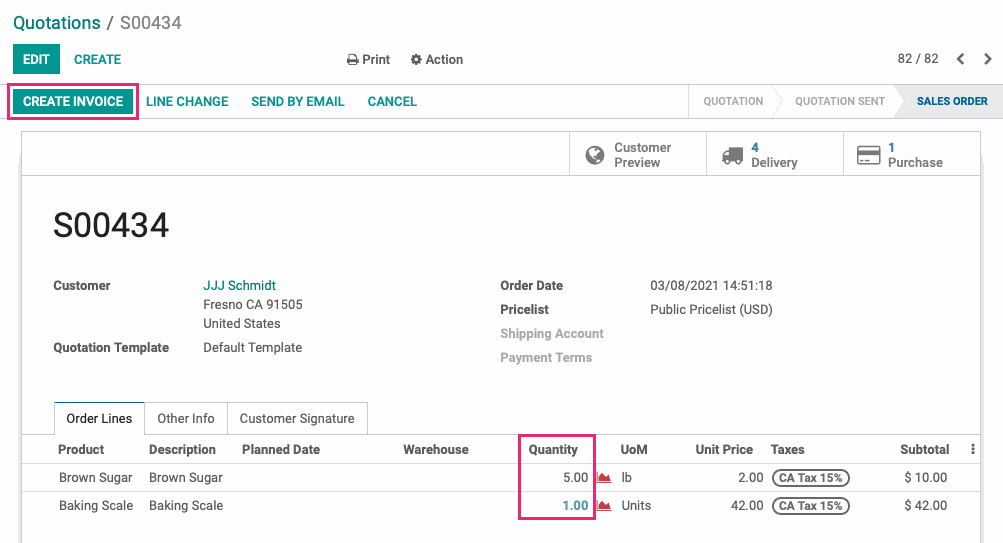
You'll now notice the quantity fields are both shown in black. This means there are no invoicable lines, so the next step is delivery. Click the Delivery smart button and process all deliveries.
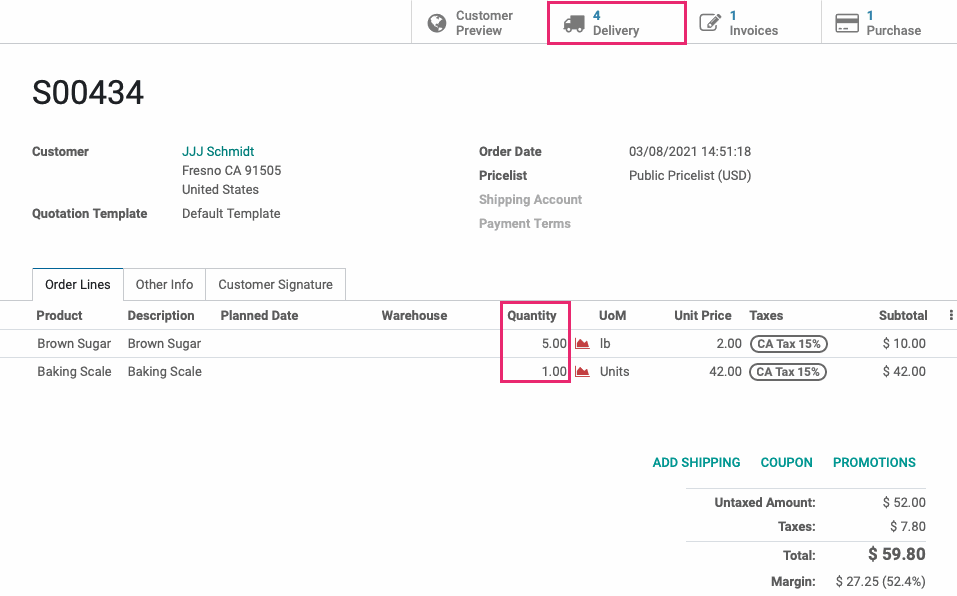
Once all deliveries are processed, you'll notice the Quantity field on the "Delivered Quantities" product is now shown in bold blue for the invoicable line. Click the solid CREATE INVOICE button.
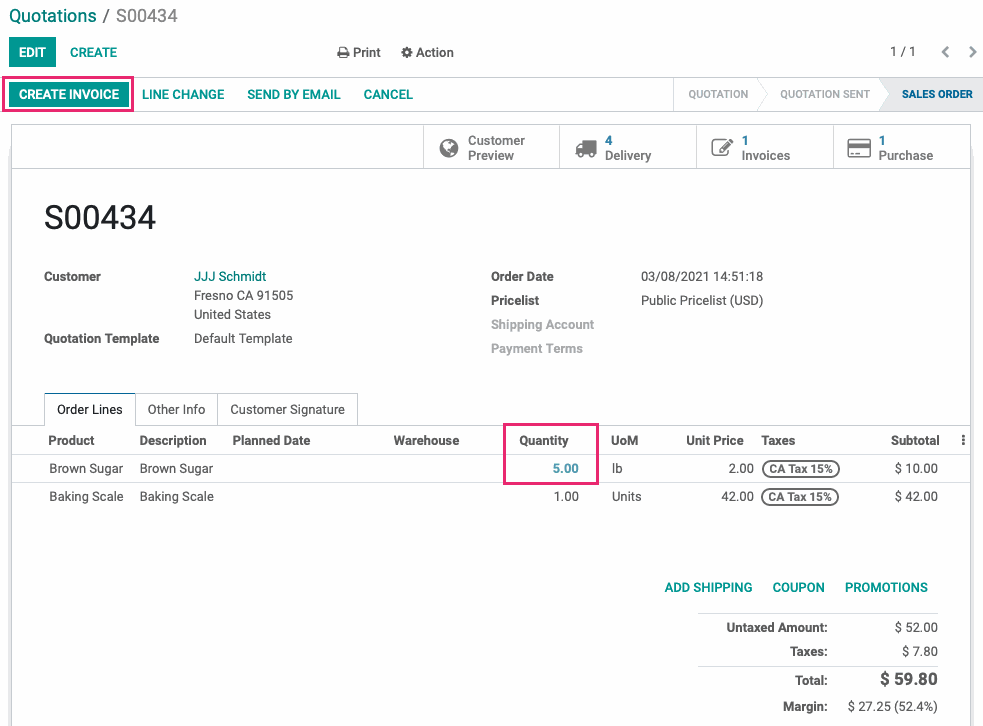
This brings up a modal window where you'll select what you're invoicing for. By default, 'Regular invoice' is selected based on the Invoicing Policy. In this scenario, Leave this option selected and click CREATE AND VIEW INVOICE.

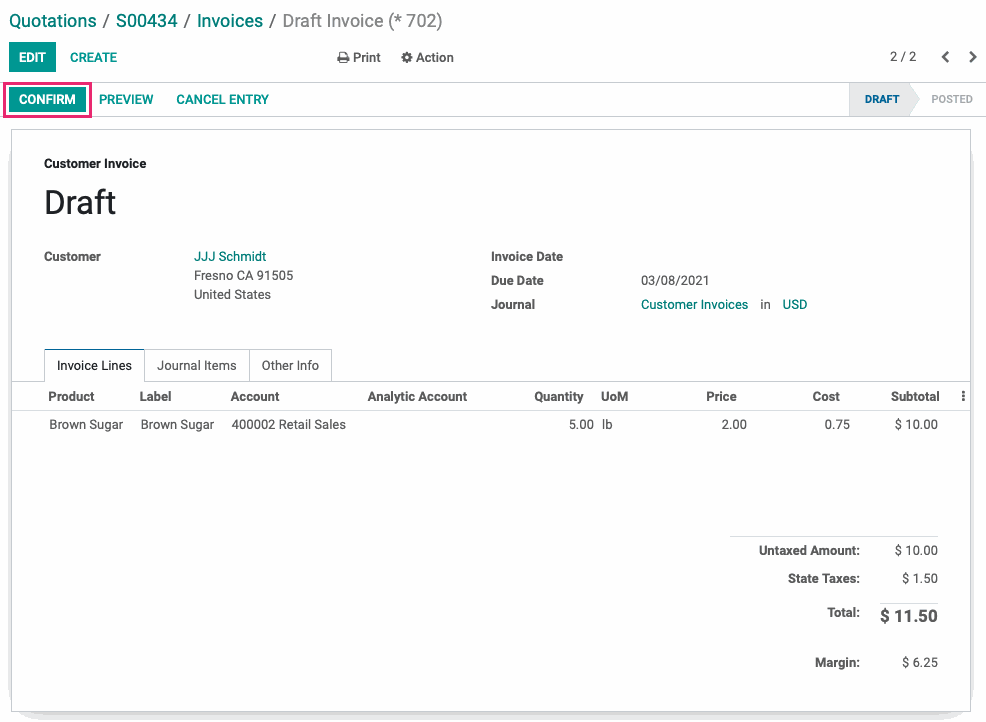
This brings you to a list of invoices based on this Sale Order. You'll see the first invoice you created in Posted status. The invoice we just created will be showin in Draft. Click the draft invoice.
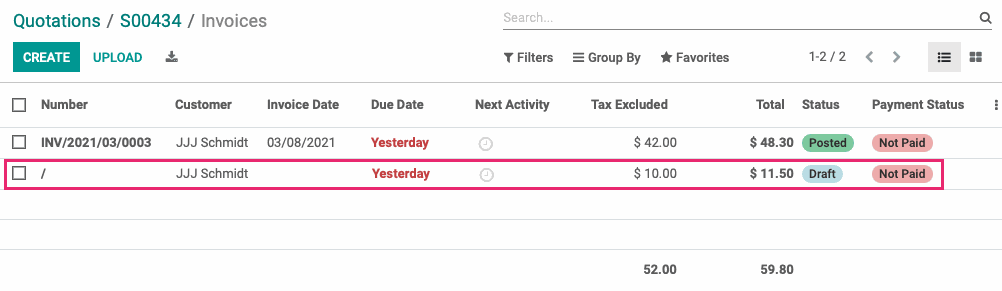
The newly created invoice is only for the 'Ordered quantities' product as it was the only invoicable line. Click CONFIRM.
Your entire order has been invoiced.