Sales: Sales Workflows: Service Invoicing Policies: Ordered Quantities
Purpose
Service Invoicing Policies determine how and when a service-type product is invoiced. This document serves as a walkthrough for the Ordered Quantity policy. This policy is intended to be used when you're being paid a flat-rate fee on a service, such as a Notary Public.
Process
Product Configuration
Navigate to the Inventory app.
Once there, either select an existing product to modify or create a new product using the Product Creation Workflow document as a guideline, and be sure to configure your product with the following settings:
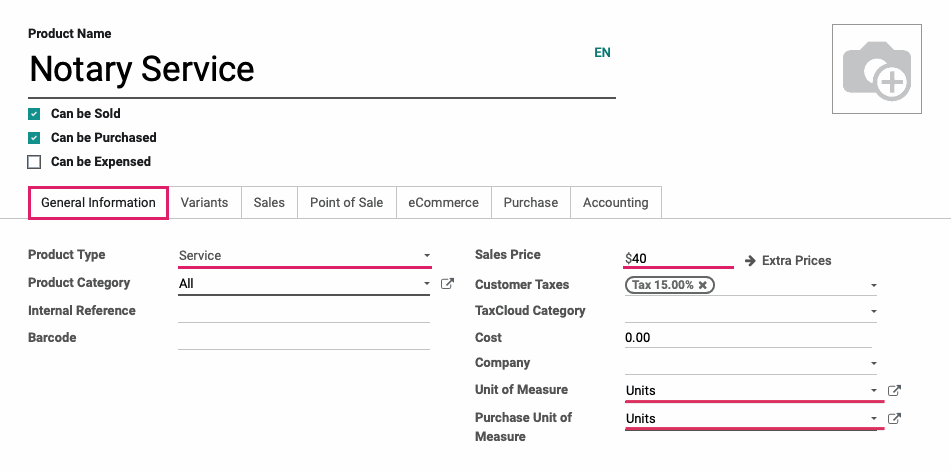
Under the General Information tab:
Product Type: Set to Service.
Sales Price: This is the cost-per-unit of the service.
Unit of Measure: This is the default Unit of Measure used for all stock operations. You can leave this as a general “unit” measure or use “hours,” “days,” or another time-based measure. As we are offering Notary Service, which is a flat-rate fee, we will select the "Units" unit.
Purchase Unit of Measure: This field represents the Unit of Measure used for Purchase Orders. The unit here will automatically default to the unit selected in the Unit of Measure field. However, you can manually change this.
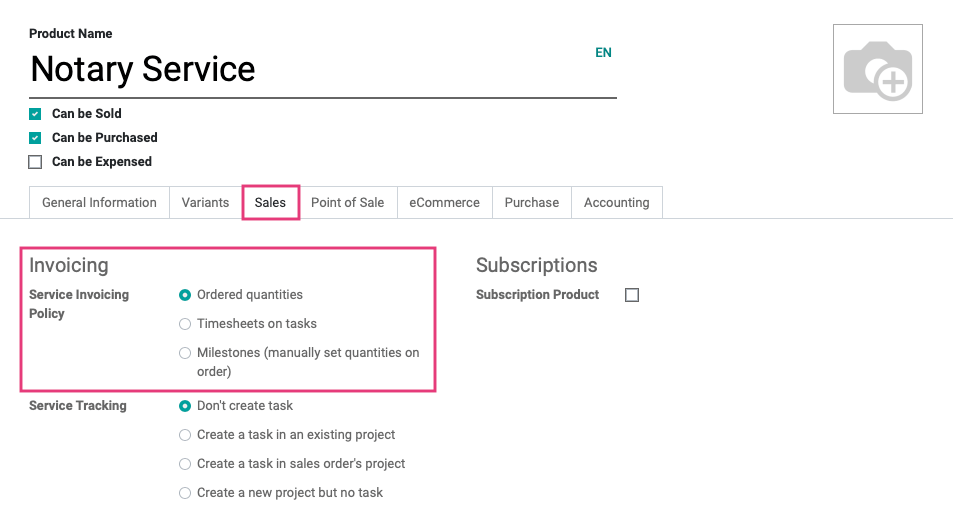
Under the Sales tab:
Service Invoicing Policy: Set this to Ordered quantities.
If you've made changes, click Save.
Good to Know!
Service Tracking
To track work on a service product, you can set up Service Tracking. See our Service Tracking for a Product document for workflow examples.
Quotation / Sale Order
To see how this works in a Sale Order, navigate to the Sales app.
Once there, click Orders > Orders, then click create.
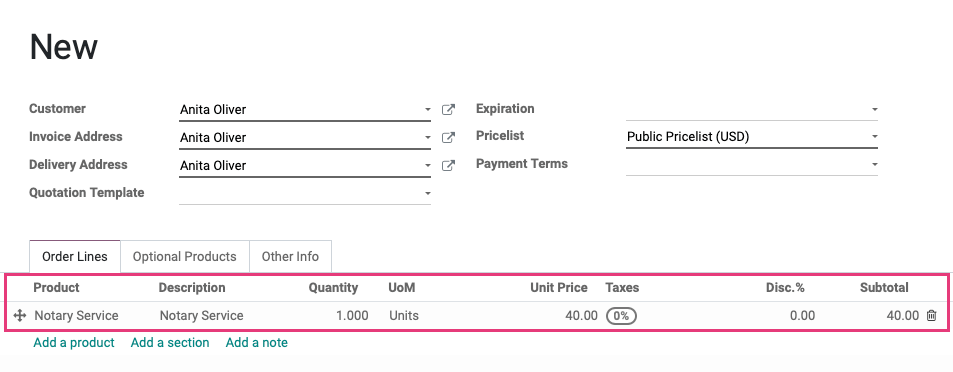
In the Sales Order form, select a Customer from the drop-down.
Under the Order Lines tab, click Add a Product and add the service product configured with this Service Invoicing Policy. Our example shows the Notary Service product charged at $40.00 per unit (i.e. instance).
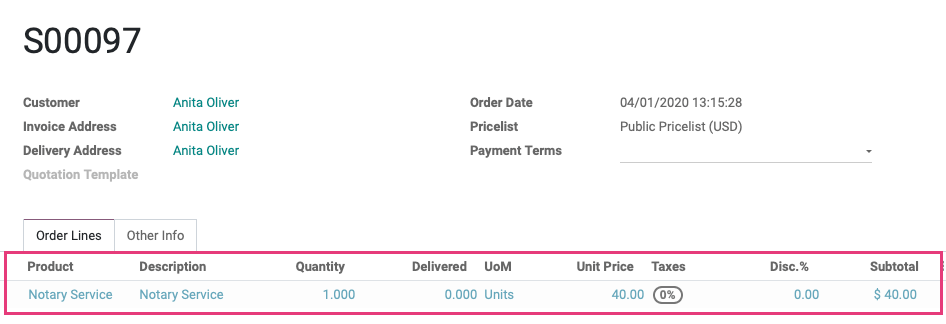
When you're ready, click confirm. You'll now see the order line is blue, indicating it can now be invoiced. This is because we're invoicing on Ordered Quantities, per the Service Invoicing Policy.
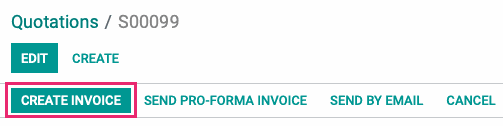
When ready, click CREATE INVOICE.
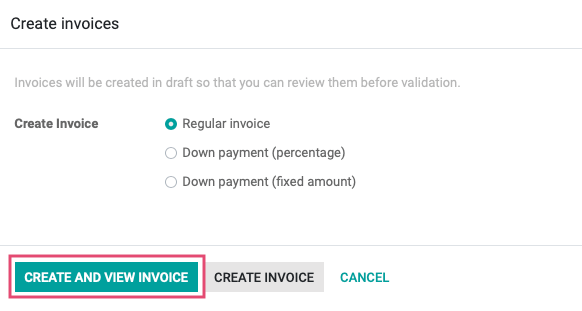
On the next modal window you shoudl see Regular Invoice pre-selected. Click CREATE AND VIEW INVOICE on the modal window that displays.
You're now ready to Post the invoice, accept payment, and deliver the service.