Sales: Sales Workflows: Service Invoicing Policies: Milestones
Purpose
The purpose of this document is to inform you of how Service Invoicing Policies determine how and when a service-type product is invoiced in Odoo 16. This document serves as a walkthrough for the Manual, or sometimes known as Milestones policy. This policy is intended to be used when you have a project that will be completed and invoiced in phases, such as website development.
Process
Timesheet Configuration
First, navigate to the Timesheets app.
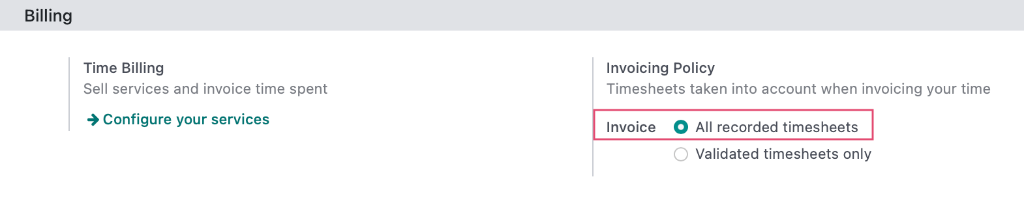
Under the Billing section, configure Timesheets to not require approval in order to bill clients by setting the Invoicing Policy to All Recorded Timesheets.
When you're done, click SAVE.
Product Configuration
Navigate to the Inventory app.
Once there, go to Products > Products to select an existing product to modify or click NEW to make a new product using the Product Creation Workflow document as a guideline, and be sure to configure your product with the following settings:
For this workflow, you'll create a service product for every milestone and configure each of those services (e.g. Dev, Design, Content) with the following settings:
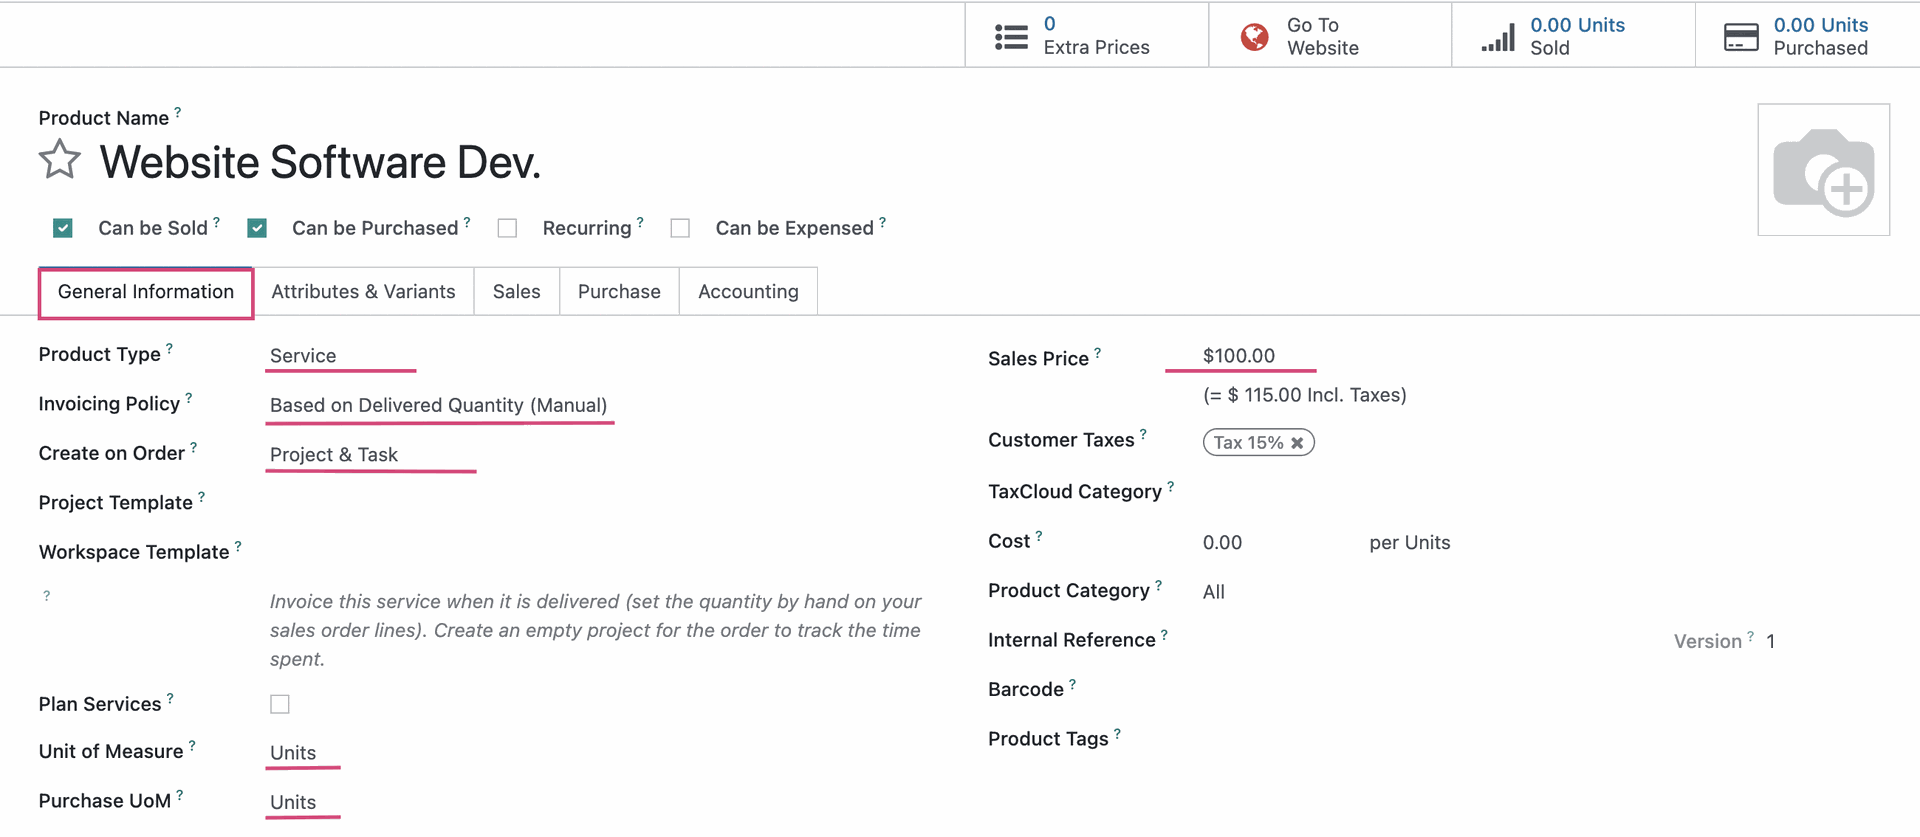
Under the General Information tab:
Product Type: Set to Service
Invoicing Policy: Based on Delivered Quantity (Manual).
Create on Order: When using manual, or Milestones as it is sometimes called, you may also want to set up Service Tracking. See our Service Tracking for a Product document for workflow examples.
Our example indicates that when this service is ordered, a task will be created in a project based on the Sale Order. This will allow us to enter time spent on the timesheets. These timesheets will give us an accurate figure to invoice.
Sales Price: This is the cost-per-unit of the service.
Unit of Measure: This is the default Unit of Measure used for all stock operations. You can leave this as a general “unit” measure, or use “hours,” “days,” or another time-based measure.
Purchase Unit of Measure: This field represents the Unit of Measure used for Purchase Orders. The unit here will automatically default to the unit selected in the Unit of Measure field. However, you can manually change this.
Quotation / Sale Order
To see how this works in a Sale Order, navigate to the Sales app.

Once there, click NEW.
On the Sales Order form, select a Customer from the drop-down.
Under the Order Lines tab, click Add a Product and select the manual/milestone service product you just created.
At this point, you can modify any of the fields in each product line. In our below example, we have modified the Quantity field, which shows the hours of planned work on the milestone, and the Description field, to indicate which milestone the line represents.
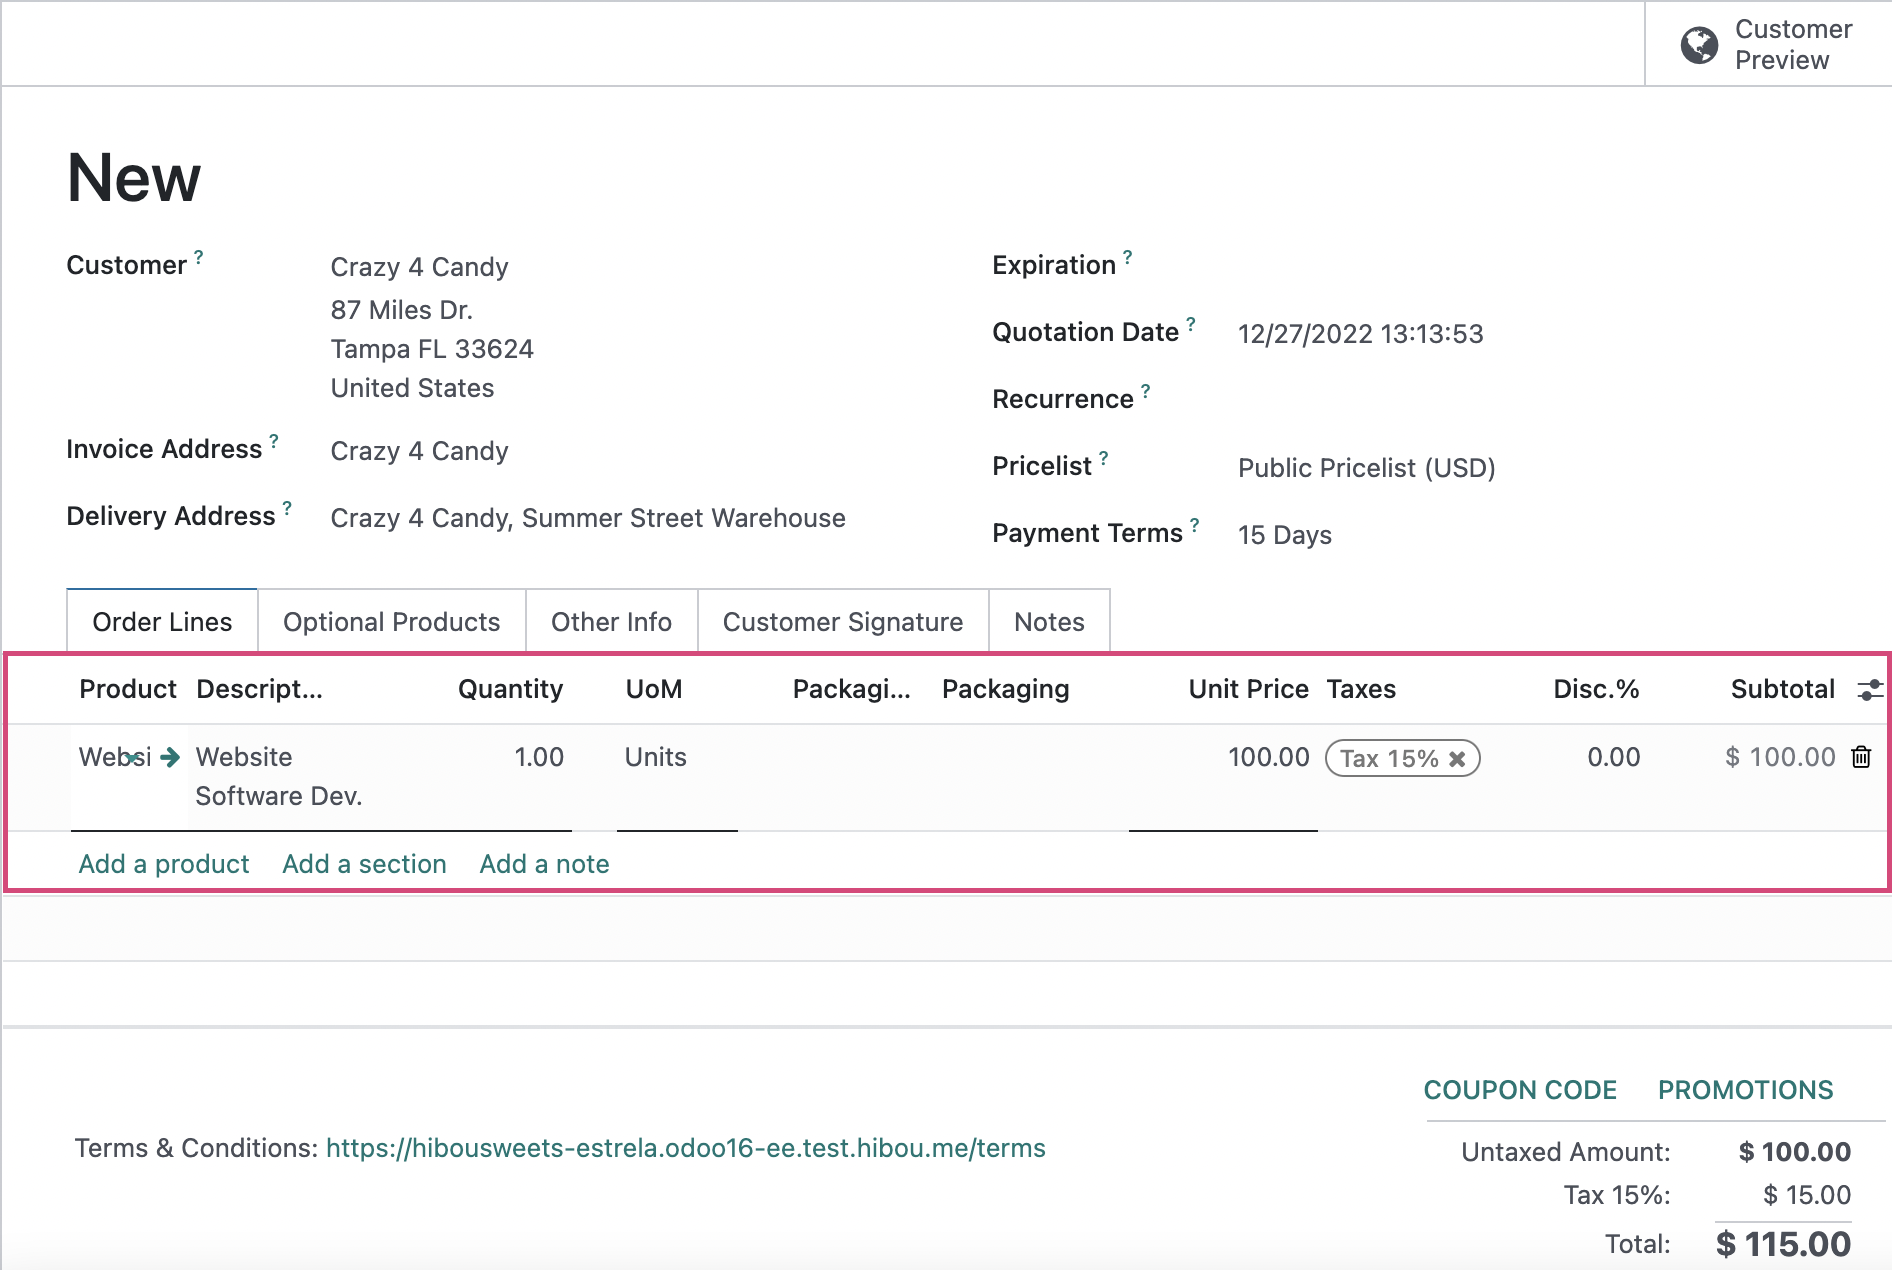
When you're ready, click confirm. You'll see the order lines remain black, indicating this order is not ready to be invoiced. This is because we're invoicing when a milestone is completed, per the Service Invoicing Policy.
Because of our Create on Order selection, we now see a Projects and a Tasks smart button.
Click the Tasks smart button.
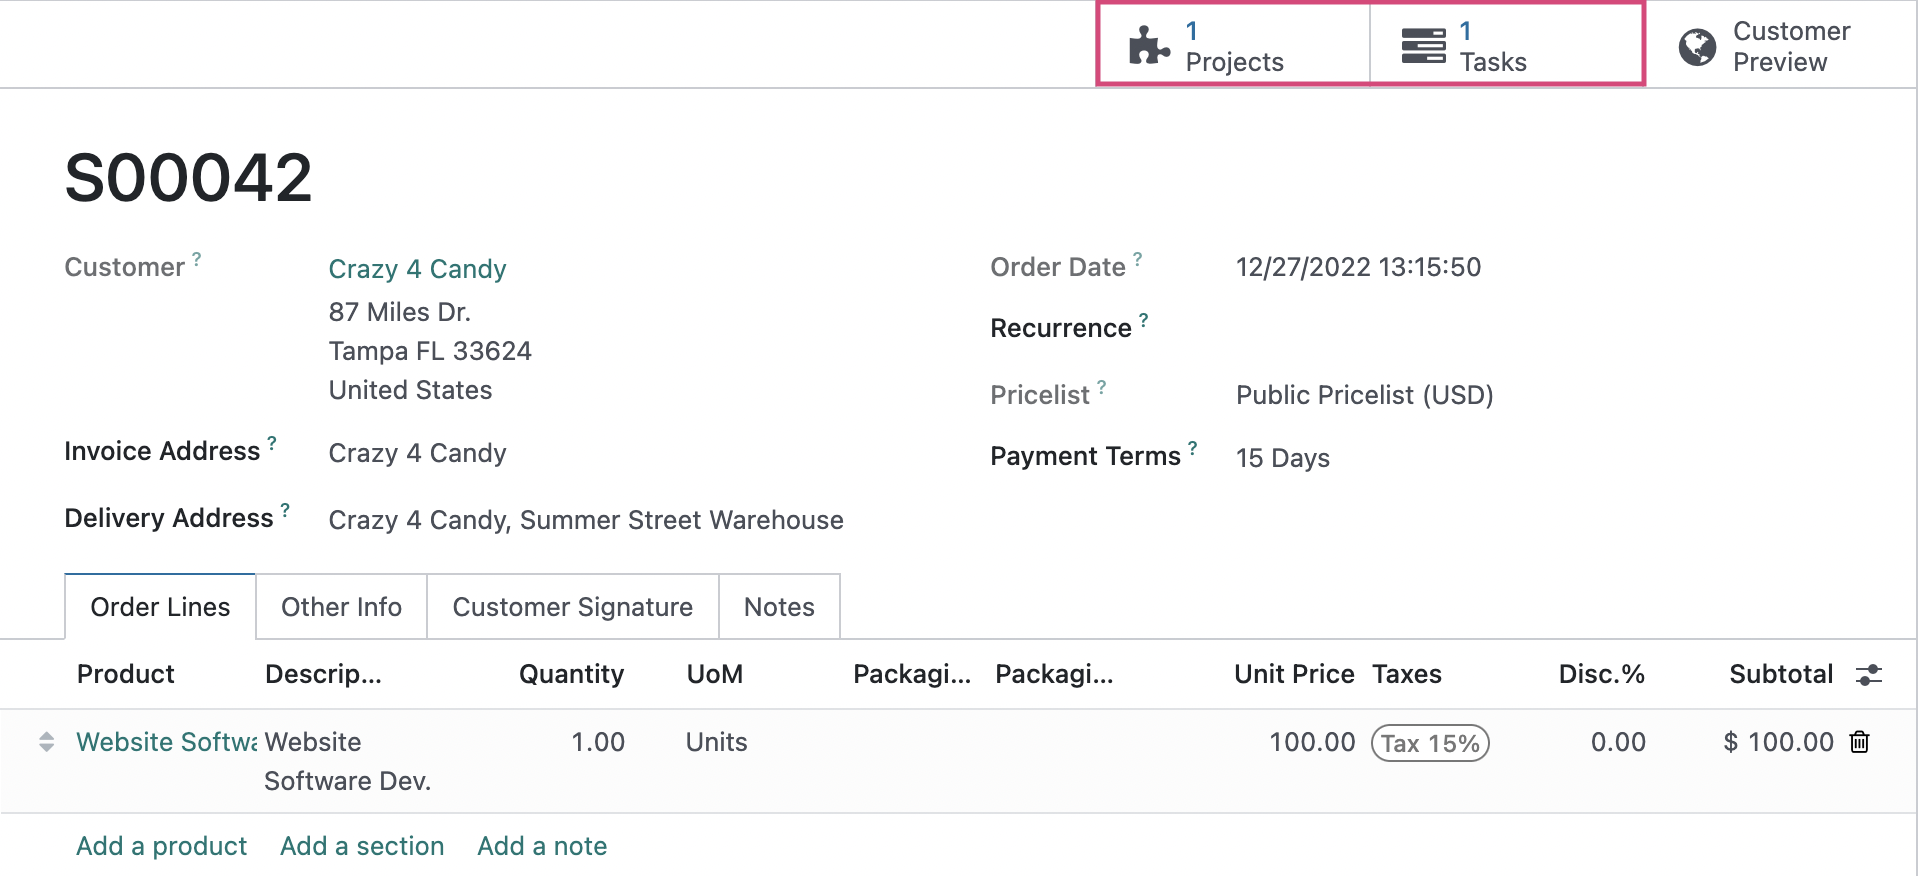
You will be taken to a page showing the task created on the project.
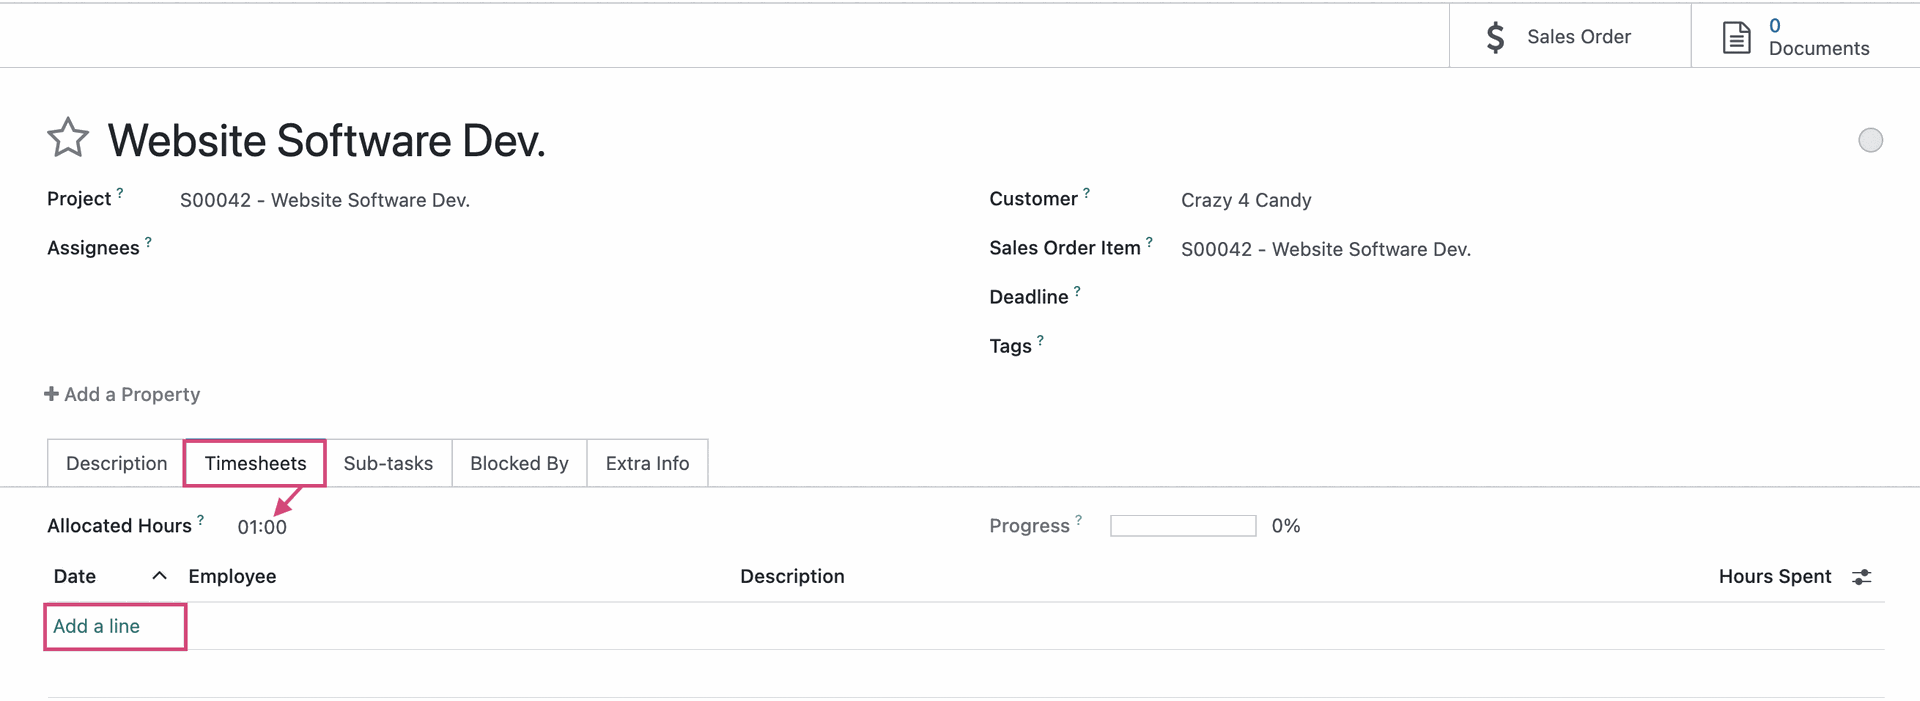
From the task view, under the Timesheets tab, you'll see the number of hours ordered on the Sale Order are now the Planned Hours for this task.
Click Add a Line.
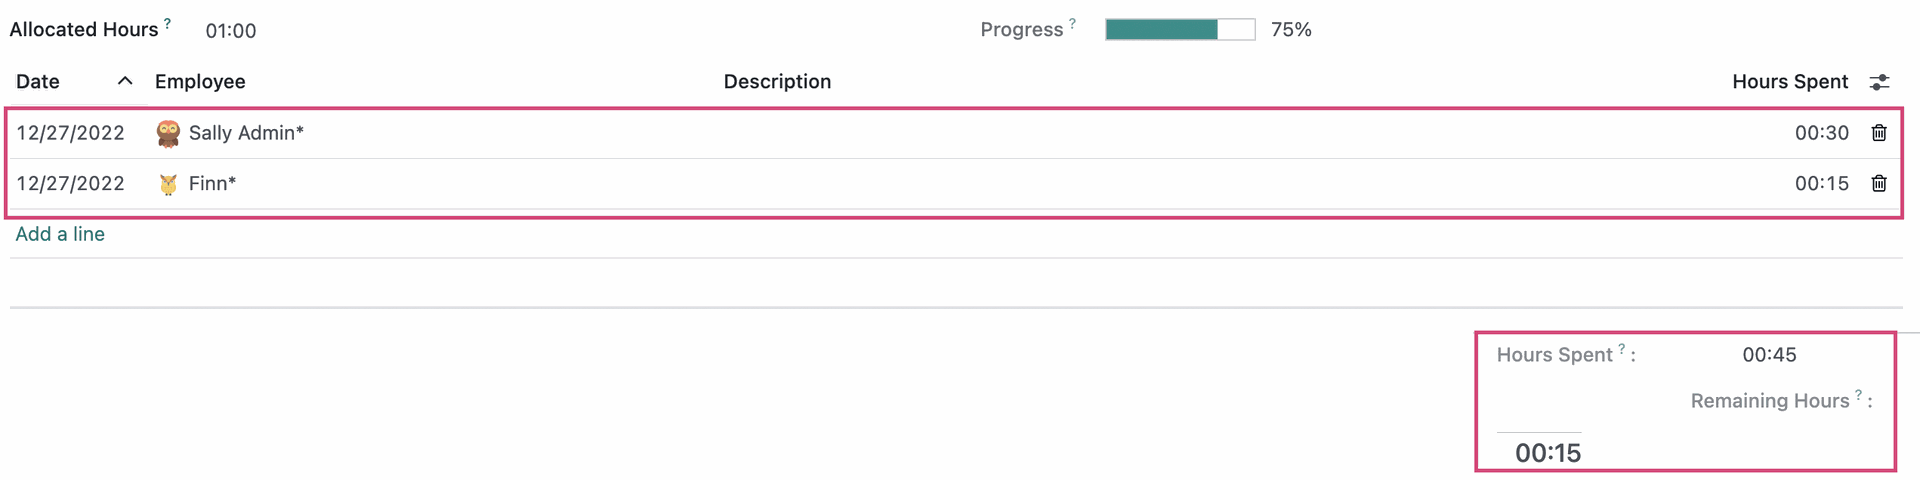
Enter timesheet entries totaling the planned hours. You'll see the totals reflected at the bottom, including Remaining Hours not utilized in the timesheets.
Click the Sales Order smart button when you're done.

On this Sales Order, you'll see that the Delivered column doesn't reflect the timesheets. This is because with the Manual/Milestones policy, we need to enter these numbers manually. To do so, click on it and begin to edit.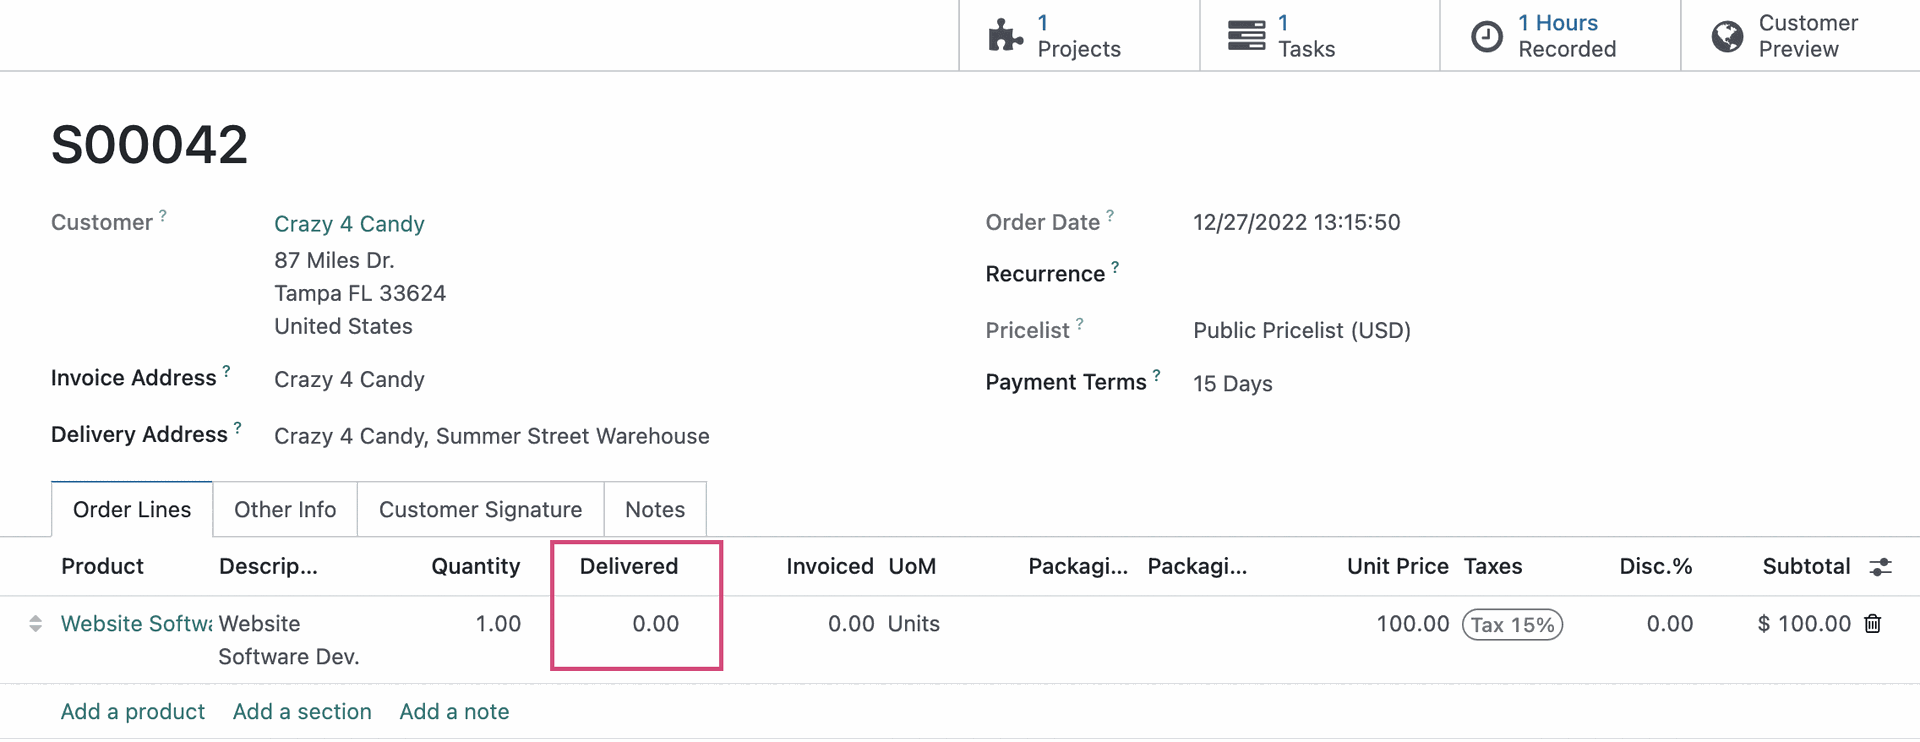
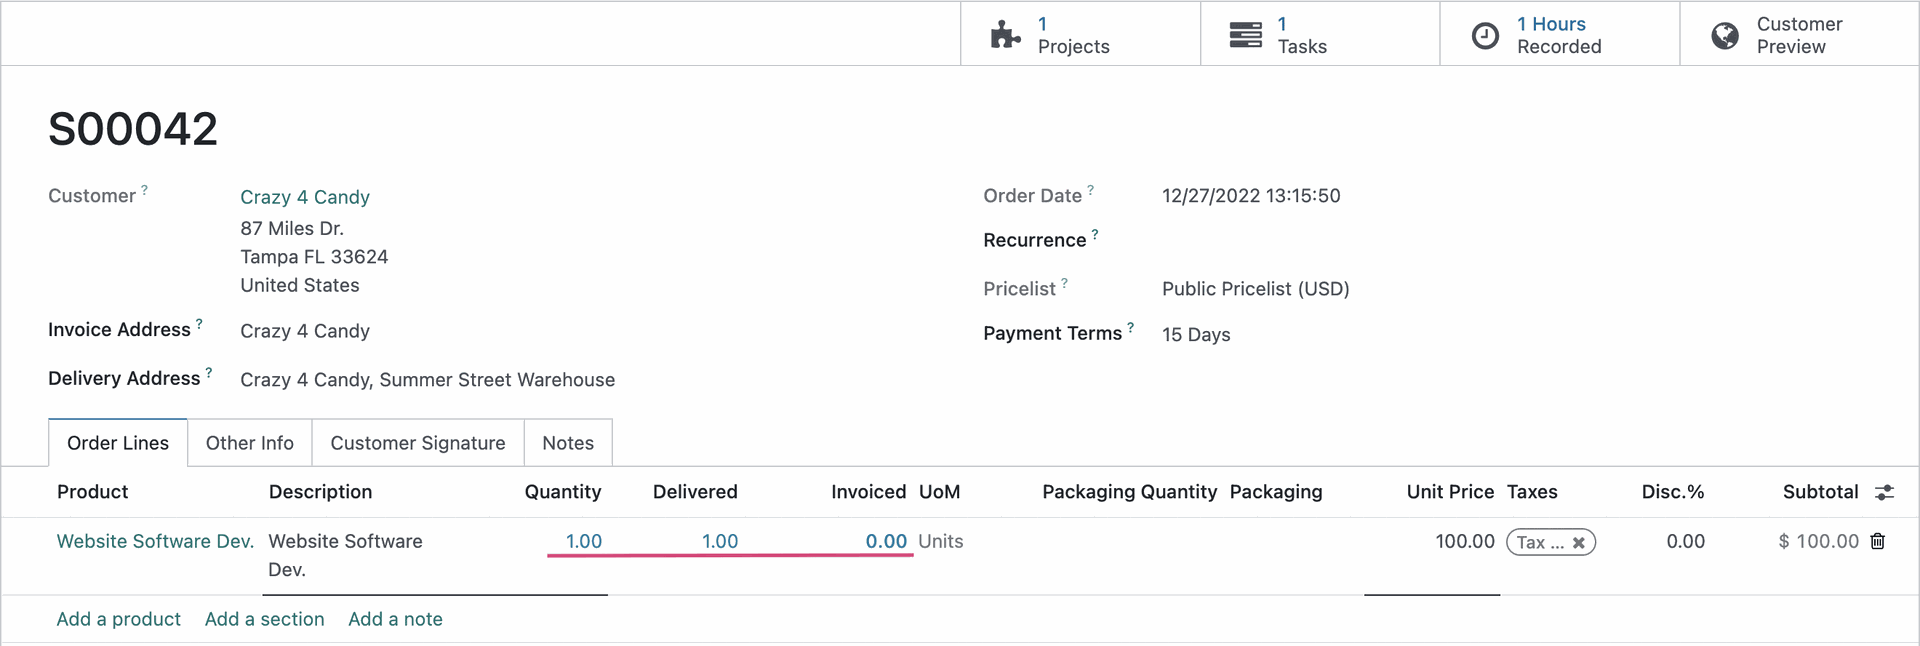
On the order line, set the Delivered column to the actual time you'll be charging the client for by simply clicking into the field and entering the number.

Now you'll see this order line has turned blue, indicating it can now be invoiced.
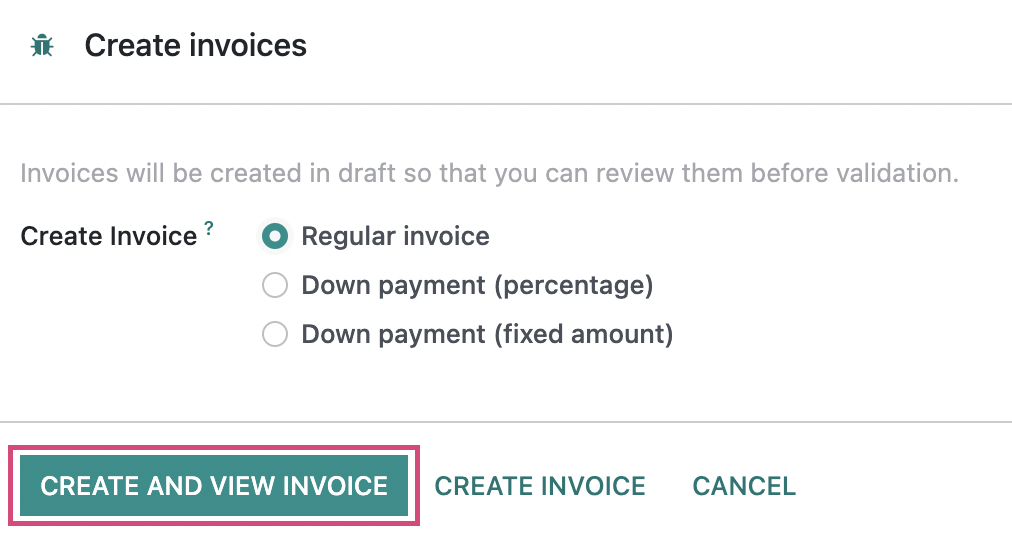
Within the Sale Order, click CREATE INVOICE.
This brings up the Create invoices modal window where Regular Invoice should be pre-selected. Click Create and View Invoice.
The invoice that was created reflects work done on the manual/milestone service product.
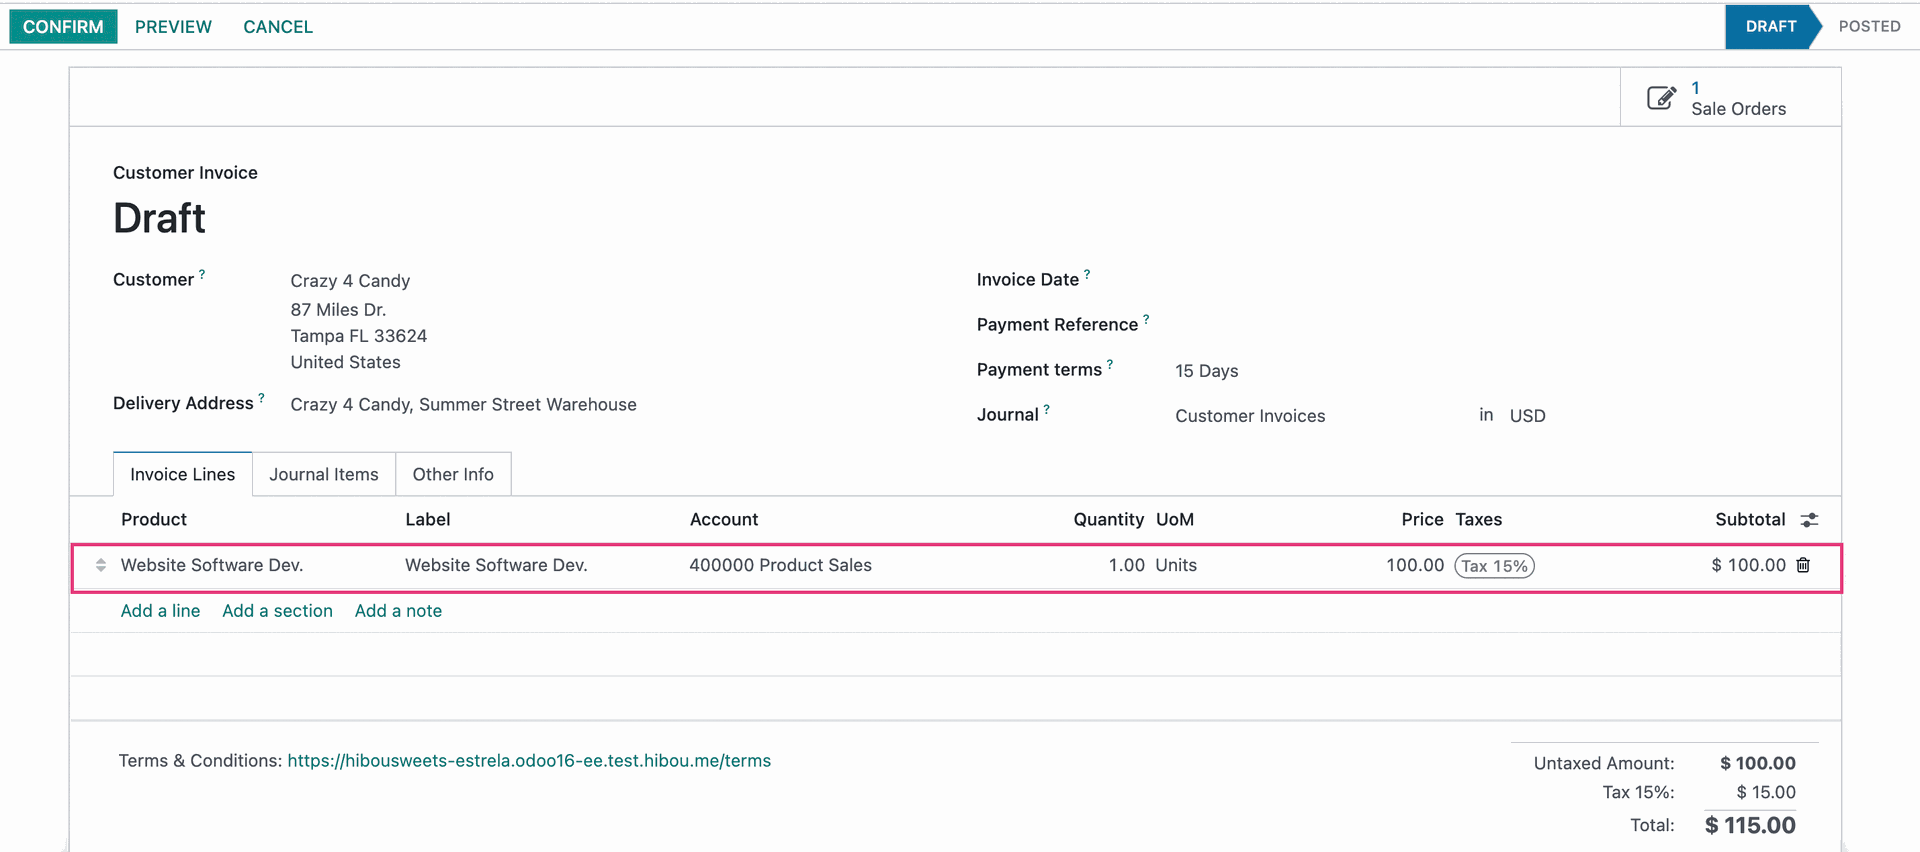
You can now confirm and you'll be ready to collect payment from the customer for this milestone. Repeat this process for work on each milestone until the project is complete.