Odoo Essentials: Managing Users
Purpose
The purpose of this documentation is to teach you to create and define new users within your Odoo 14 database. These users can be designated as internal users and given permissions that allow them to interact with or manage the configuration of Odoo.
Important
User vs. Contact
You'll notice these terms used in reference to Odoo. It's very important to know the difference.
A User (or Database User) has been granted permission to access one or more backend applications of Odoo, such as an administrator or employee. Odoo charges per-seat for every added user.
A Contact (or Partner) is an entry in the Contacts application who does not have access to the backend applications, such as a customer or job applicant. There is no limit to the number of contacts that can be added to the database.
Process
To get started, navigate to the Odoo Settings App.
This will bring you to the Odoo database dashboard. Make sure you are on the General Settings page, and scroll down to the Permissions section.
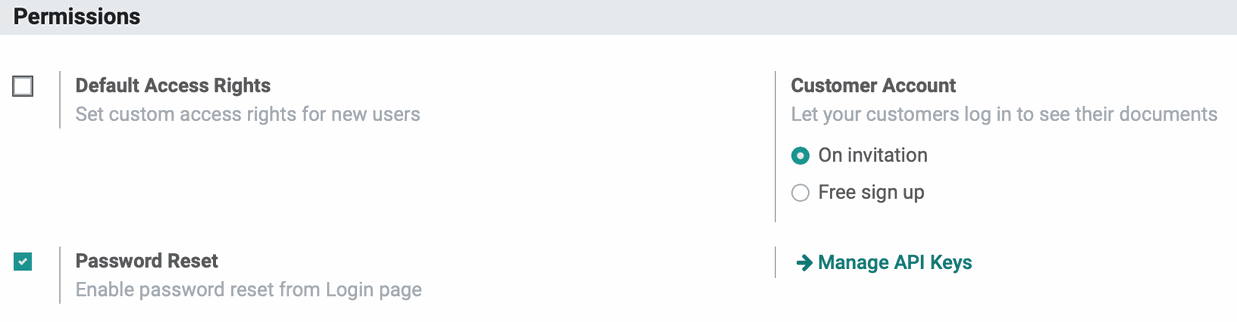
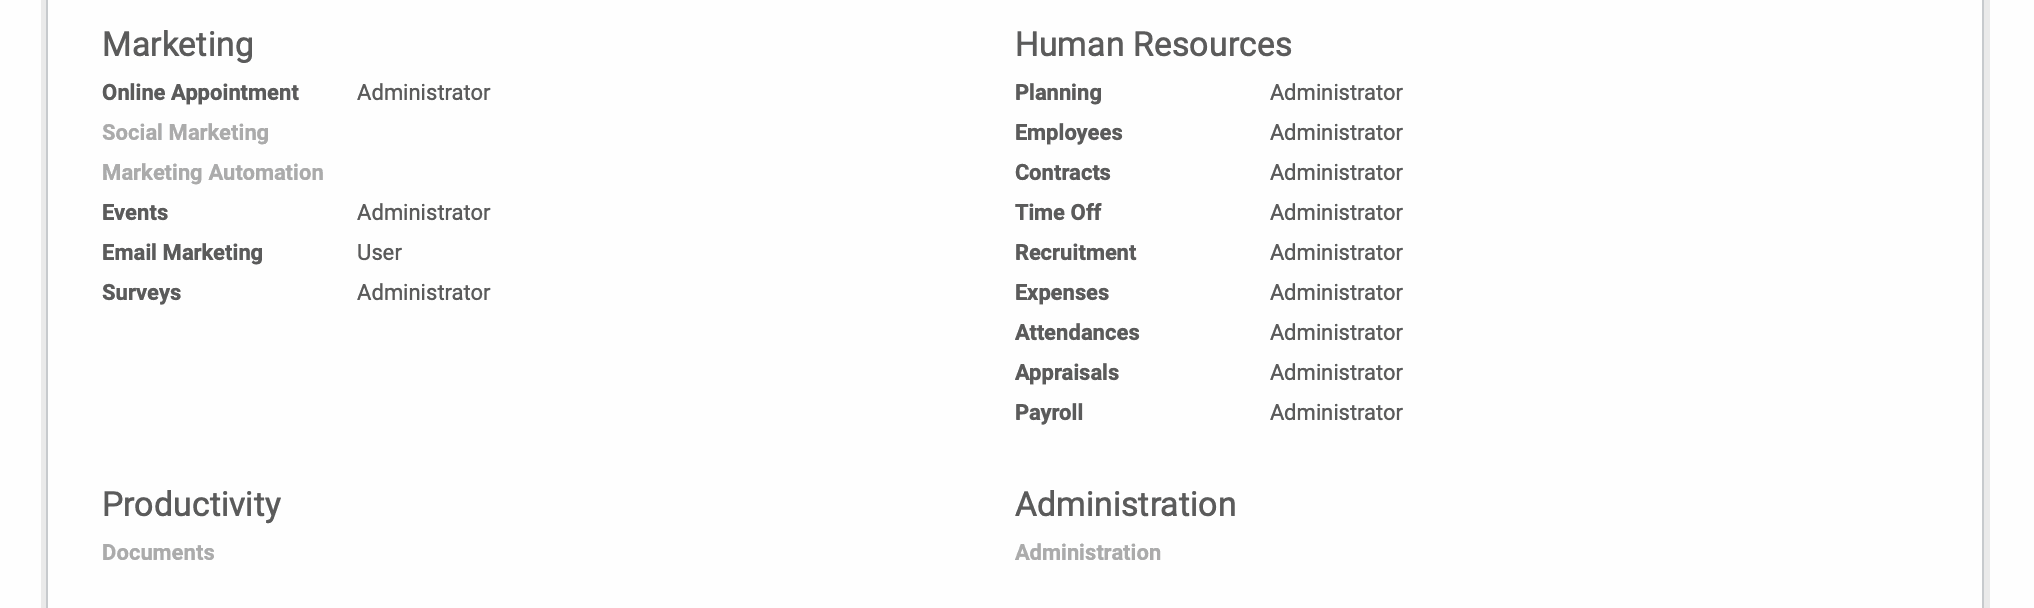
This section determines the default permissions granted upon new user creation. The settings are as follows:
Default Access Rights: Allows you to set custom access rights for new users.
Customer Account: Indicates if website users can create a customer account (portal access) from the front-end of the site or if an internal user must invite/create the account
Password Reset: Allows users to reset their own passwords from the Odoo Login screen.
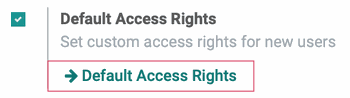
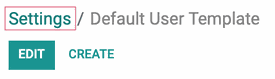
For this walkthrough, be sure to enable Default Access Rights and any other options you would like, then click Save. Next, click Default Access Rights.
This brings up the Default User Template where you can select the default settings. Note that this template is shown as ARCHIVED; it can, and is, still applied to new users, it's just not listed as an active Contact. This prevents it from being accidentally modified or removed.
To modify this template, click Edit. There will be options for each app you have installed to the database which require permissions. Permission options are listed in the drop-down in lowest to highest permissions.
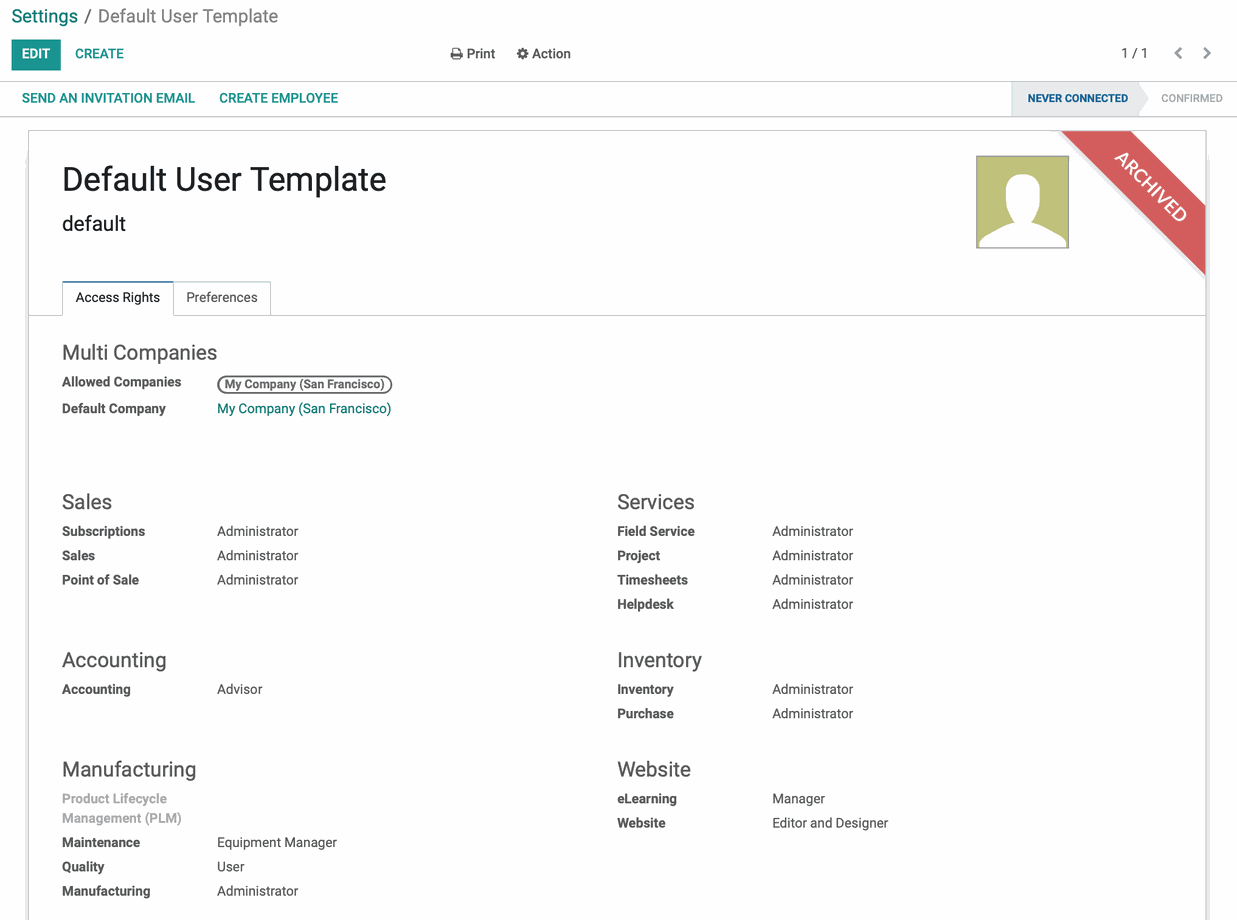
Once you've made your changes, click Save. Click Settings in the breadcrumbs to navigate to the previous page.
Good to Know!
Apps will come preloaded with certain access rights enabled. Whether your user is designated a User or Manager for that app will determine the amount of editing power available to them. Therefore, when adding an app, you may have to alter a user's permissions to grant them management of database items. To fine-tune a user's access, see their user configuration.
Adding a User
There are two methods in which to add a Database User. To get started, navigate to the Settings app.
![]()
Manually Add a User
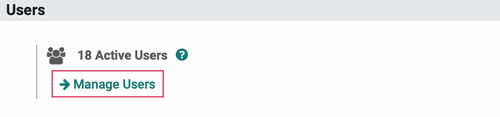
From General Settings, under Users, click Manage Users.
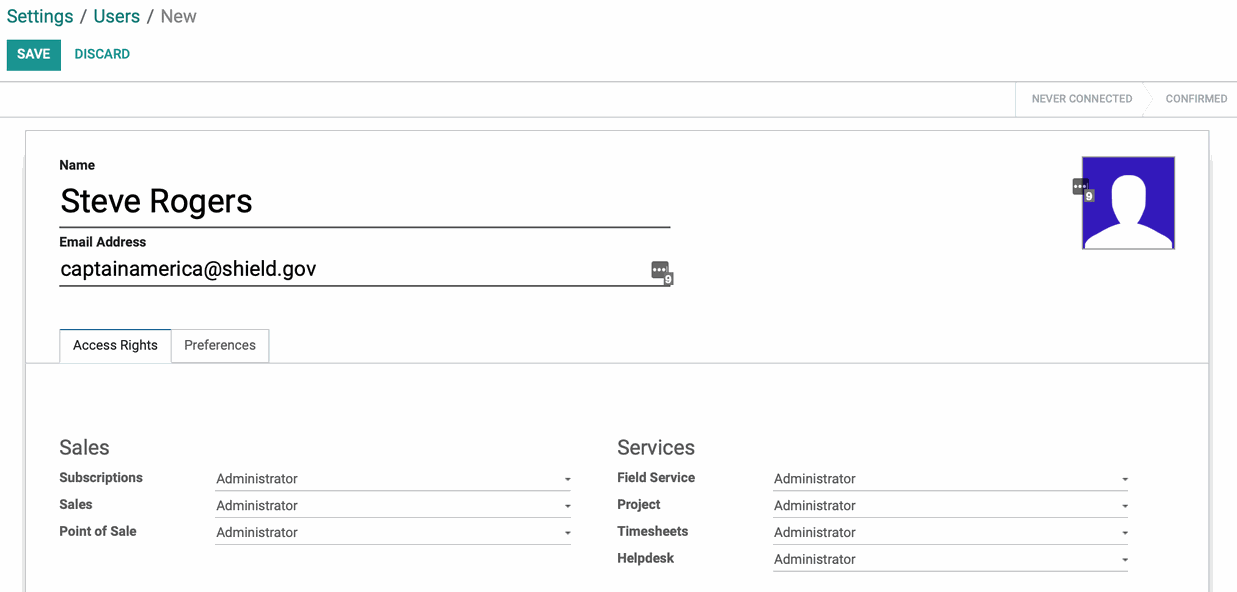
Once there, click Create to open the New User form. Enter the Name and Email Address for the new user.
The Access Rights and Preferences tabs will be prefilled from the Default User Template and can be modified as needed.
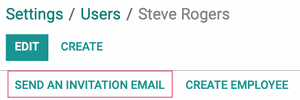
When you're done, click Save. A banner will appear notifying you that an invitation email with a subscription link has been sent to notify the new user of their new account, inviting them to connect. They'll need to accept the invitation from this email. Doing so will take them to the Odoo database where they'll create their own password.

At any point, however, you may click send an invitation email to resend the invitation email.
Invite a User
From General Settings, under Users, you'll see the Invite New Users section to the right. Enter the email address for the new user, then click Invite.

The user will get an email inviting them to connect; they'll need to accept the invitation from this email. Doing so will take them to the Odoo database where they'll create their own password.
Managing Access Rights + Preferences
The Default User Template will be referenced when creating new internal users in order to provide a basic set of permissions, but you can modify those settings at any time. From general settings, under the Users section, click Manage Users.

From the list of users, select a user to modify. You can use the search field to filter down to a specific user. If the user record line has blue text, that means the new user has yet to connect via the invitation email.

From the open user record, click Edit to see your available options.
Under the Access Rights tab you will be able to choose the level of access to each of the applications in your database.
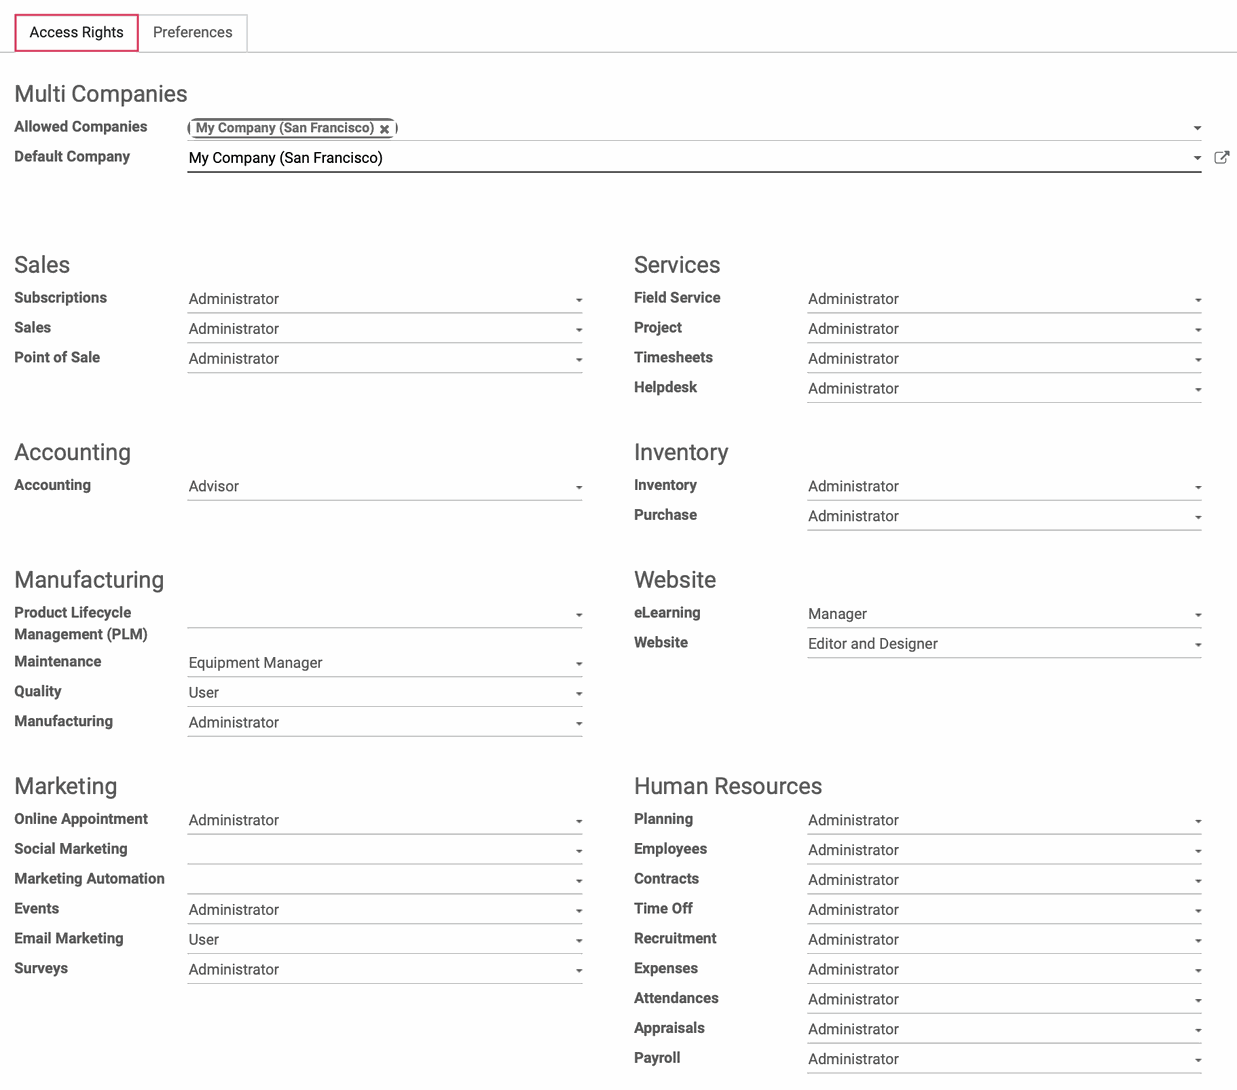
Lower access rights will have access and creation rights for records within an application, while higher level rights (Manager, Administrator) will have reporting and configuration tools.
Good to Know!
No Access?
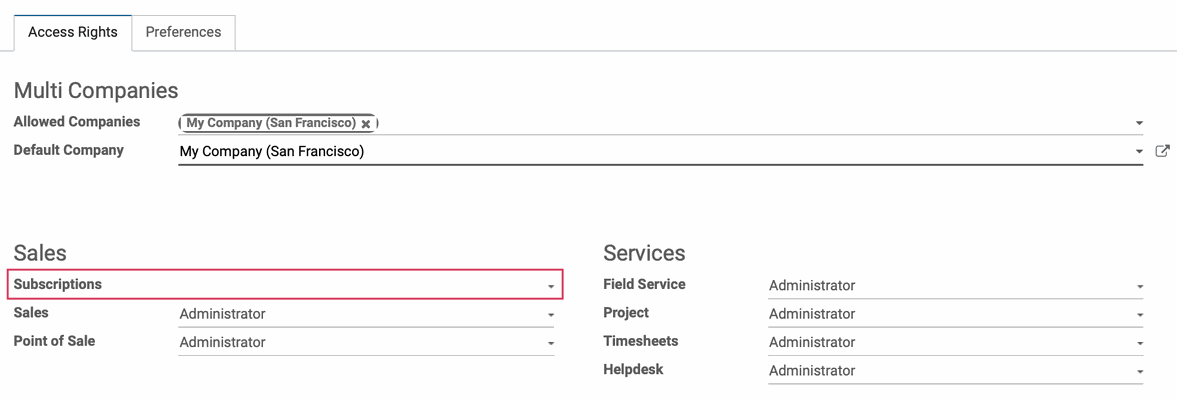
Leaving the access level for an application blank will give the user no access. Upon logging in, the user will not see the application icon or be able to access any of its settings or pages.
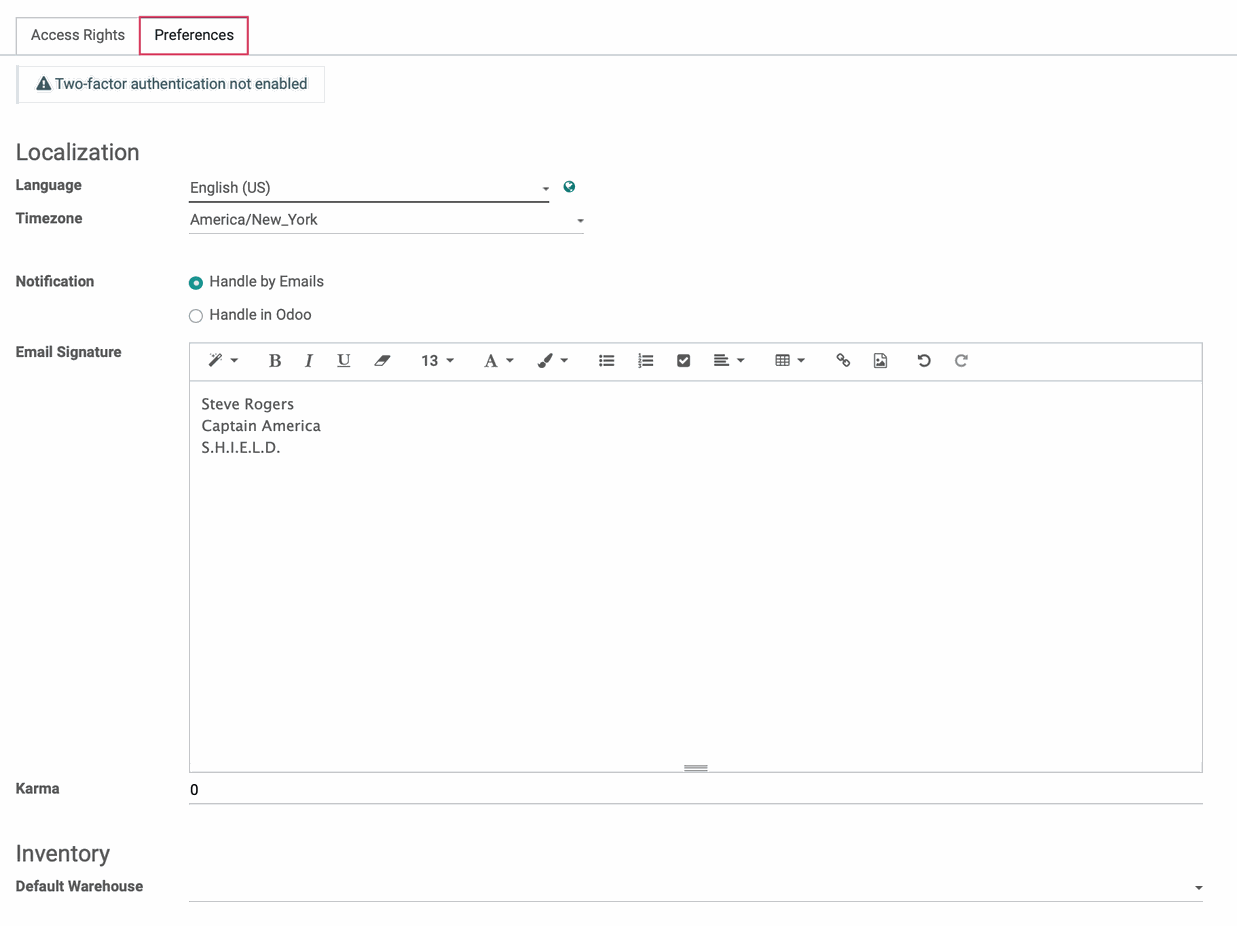
In the Preferences tab, these settings are also pulled from the Default User Template and you can change them here. The user will have access to this tab to configure them, as well.
Language: Select the user's preferred language. These are preconfigured in Odoo and may only have one option.
TImezone: It's important that the timezone is set appropriately for the user or their calendar will not sync correctly with other users' and apps.
Notification
Handle by Emails: This setting will send all Odoo communication via email to the user's email address.
Handle in Odoo: This setting will send all Odoo communication to the Odoo inbox.
Email Signature: This is the default signature that will be used when sending email correspondence through Odoo.
Karma: Users can earn Karma from eLearning courses, their Karma will display here.
Default Warehouse: If the User configuring this new User manages multiple warehouses, they can select a default warehouse applicable to this new user.