Odoo Essentials: Export Wizard: Importing Records from Outside of Odoo
Purpose
The purpose of this document is to outline the process of importing data into Odoo that originated elsewhere. Building data in Odoo can be overwhelming, following the best practices outlined in this document will make the process as easy as possible.
Process
To get started, you want to make sure the data you will be importing is as clean as possible. If there are any missing records, reorganization, or general maintenance that has been ignored, now is the time before importing into Odoo.
For more advice on how to best prepare for your data import, please take a minute to read this post from our Blog: Importing: Best Practices: A Helpful Guide to Data Building and Management: Part Two
Creating an Import Template
Once the data in your current system has been cleaned up, it is ready to be imported into Odoo via an Import Template. This is a respective data file in either .csv or .xlsx format.
Important!
Before creating your template, you should know which fields are required for the related records in Odoo.
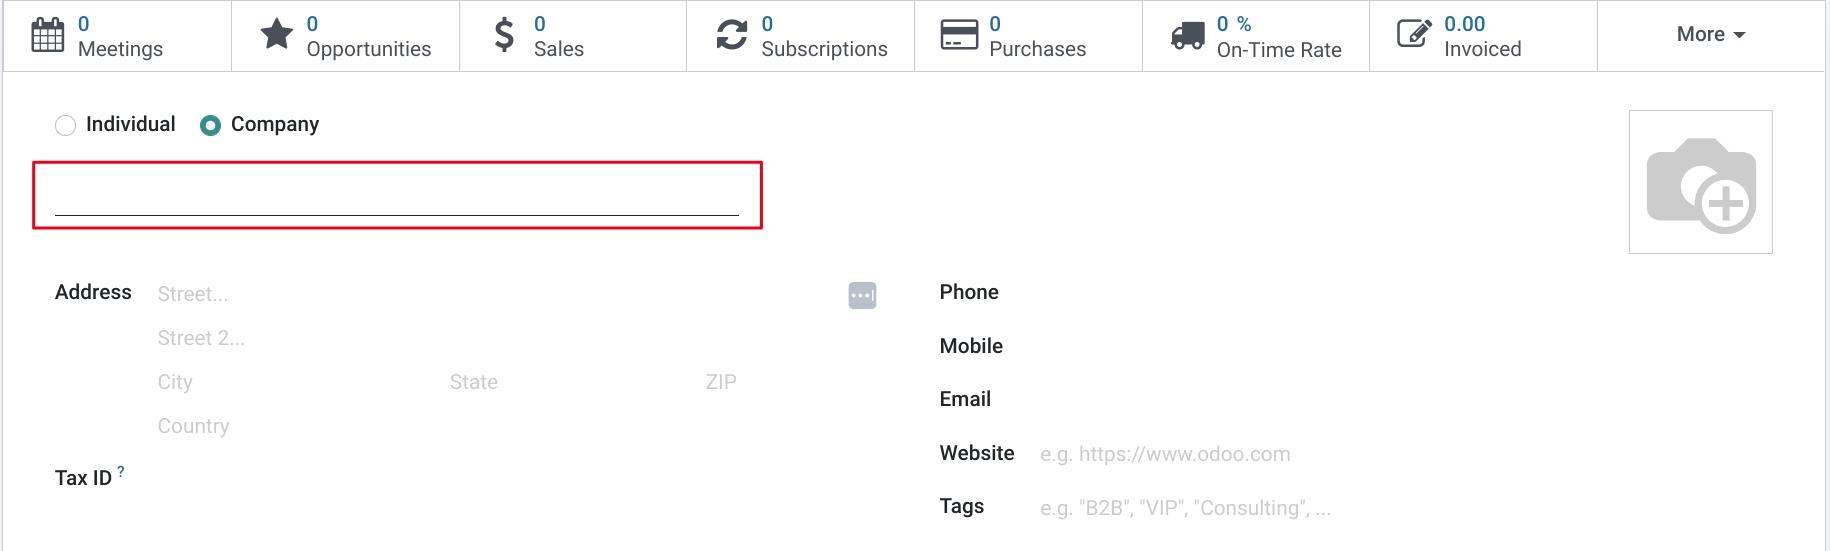
For example, to import a list of vendors into Odoo, start with the New Vendor form. All required fields will have a bold underline. Here I can see that the name is required, and this is indicated by the bold underline of the field.
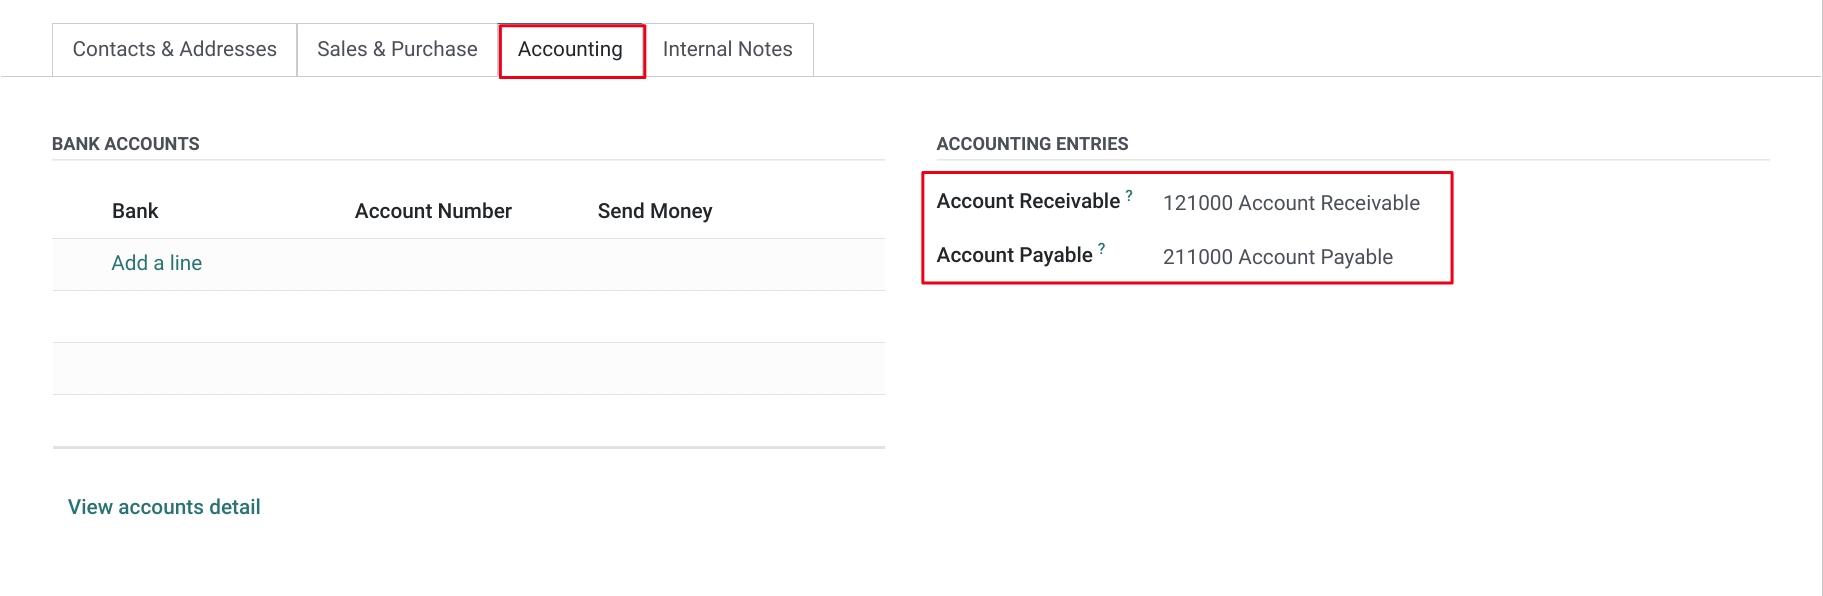
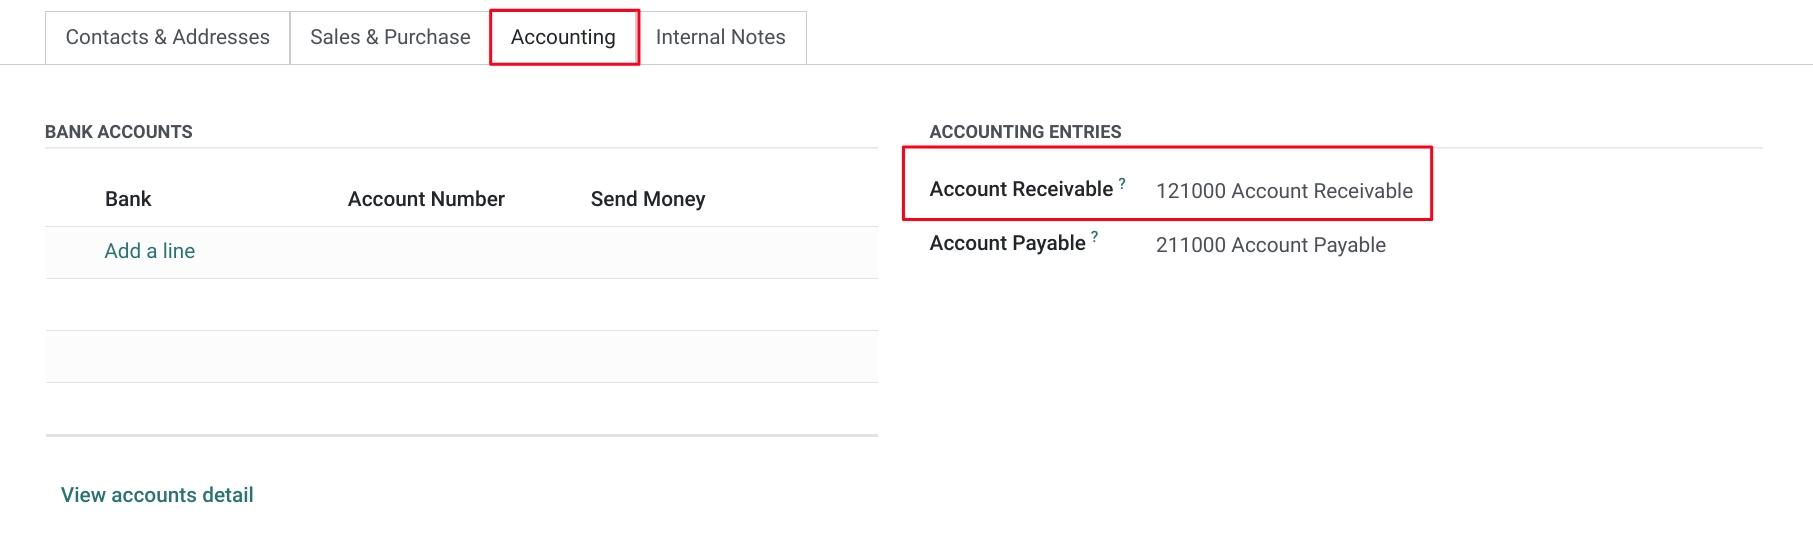
Be sure to navigate through the different tabs as well when you look for required fields. Since Accounting is already activated and configured, the Accounts Receivable and Accounts Payable are also required.
Formatting
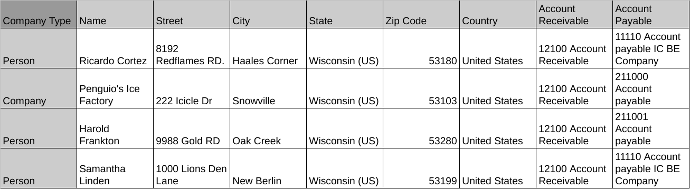
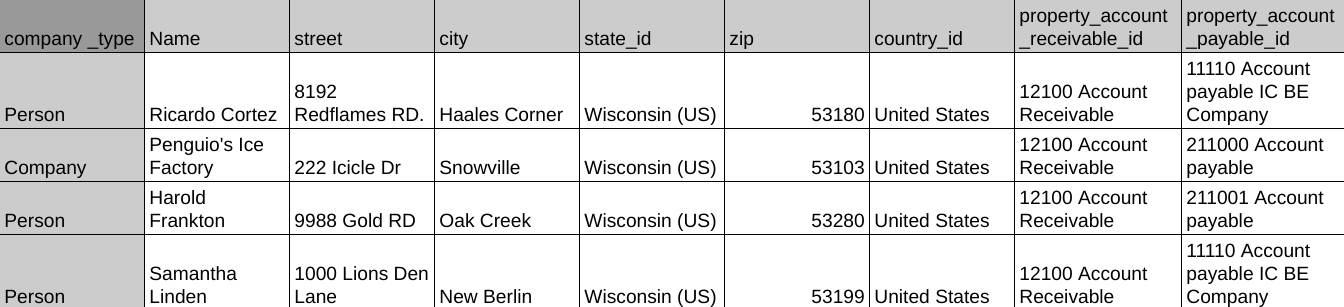
Your import template needs to have each row associated with a new record you wish to create in Odoo with the import. Each column will contain the data for every field you wish to enter data for on those new records. In the example below, you will see a row for each new vendor with columns for each field of data to fill.
Good to know!
For Odoo to best recognize which fields your columns correspond to, they should be formatted with the fields' technical names.
With the import template's column names formatted the way they are, Odoo may not recognize the fields to populate. While you can map those fields at the time of import, it's much easier to handle this before getting to that point. To do so, name each column as the corresponding technical name from Odoo.
To find the technical name for a field, you must be in Debug Mode. At that point, you can hover over the fields on a template for the record you wish to import.
In this image, we want to see the technical name for the fields on our import template. For example, if I want to know the technical name for the Phone field, I can hover over it and a window appears showing me that the technical name is "phone".

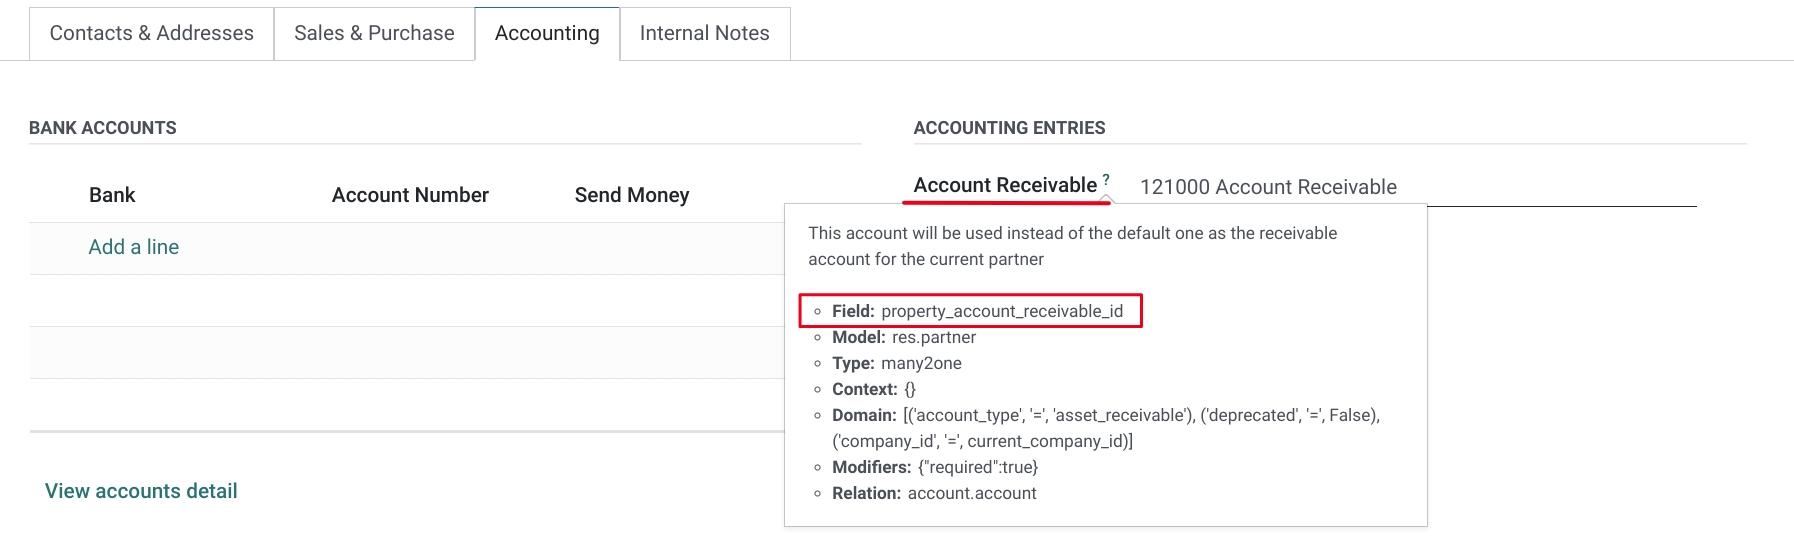
This can be especially handy when you're dealing with more complicated fields like Account Receivable: "property_account_receivable_id".
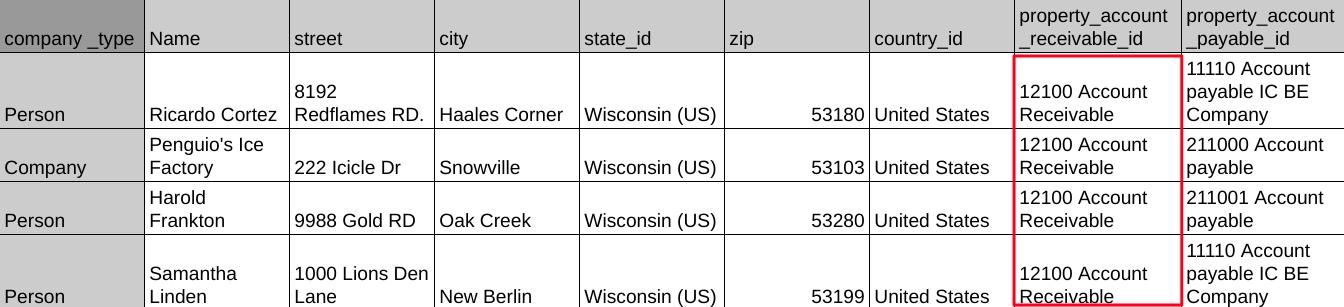
Here is what our import template looks like with the technical names as column headers.
Important!
Avoiding duplicate records with your import.
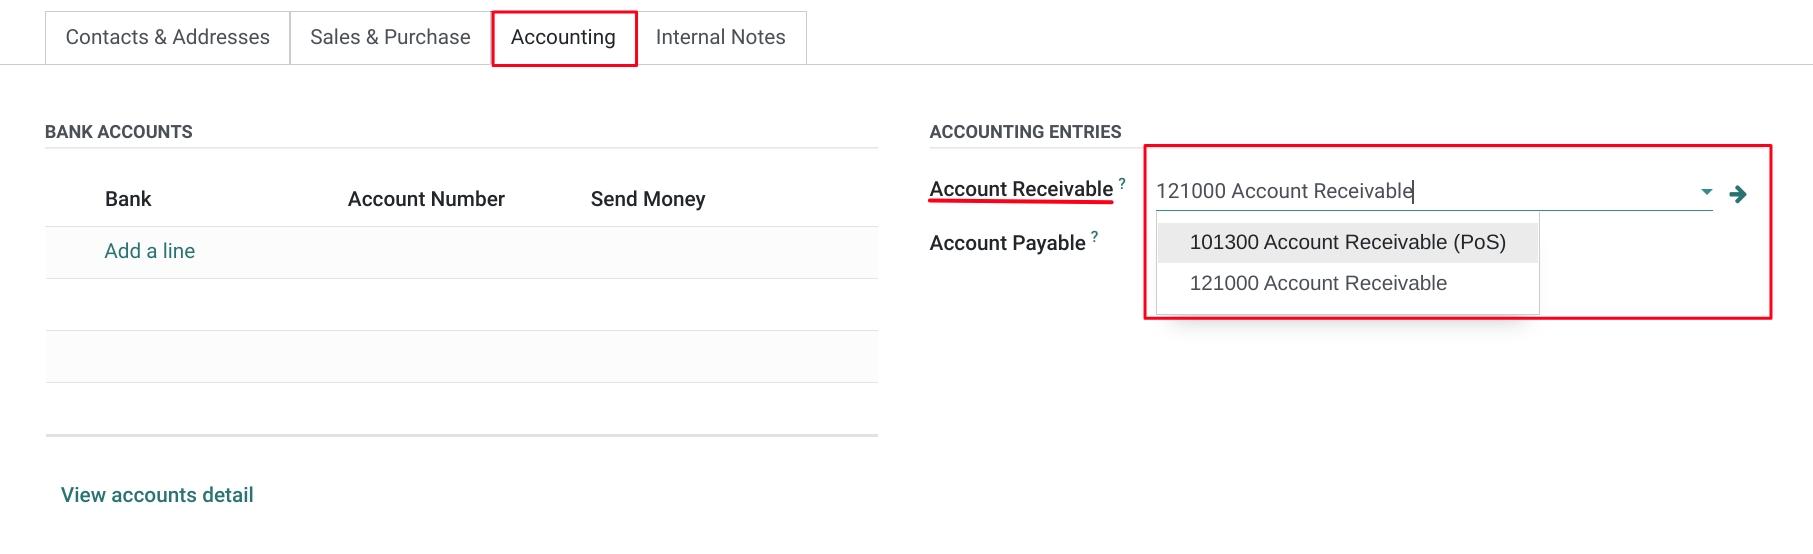
When creating a new record, there are, more often than not, fields that have a dropdown for you to decide between pre-configured options within the database. These are called "many2one" fields. For example, when creating a new contact, we must select a value for the Account Receivable field by selecting one of the options from the dropdown.
When importing data that includes selections on many2one fields, it is important that we make sure the data we enter on the import template is formatted exactly how the selection is in Odoo.
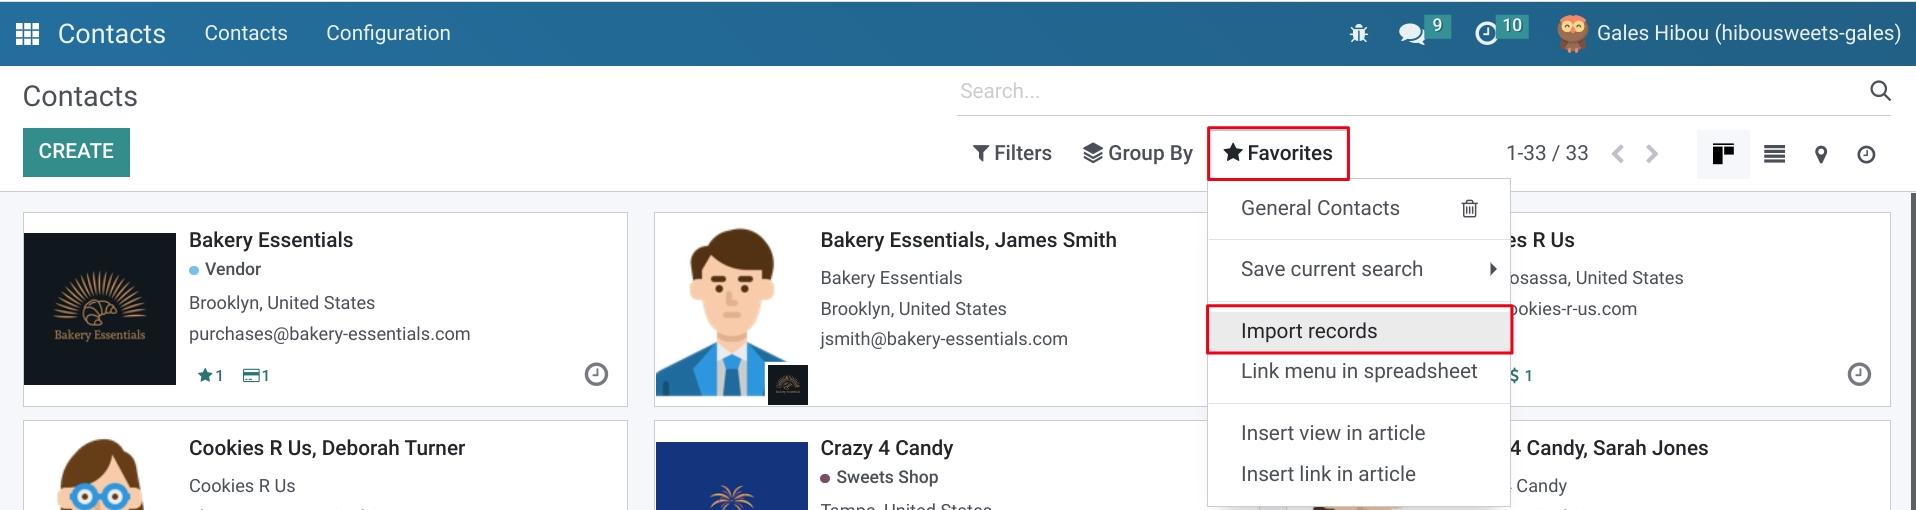
To import data, from the main view click on Favorites > Import Records.
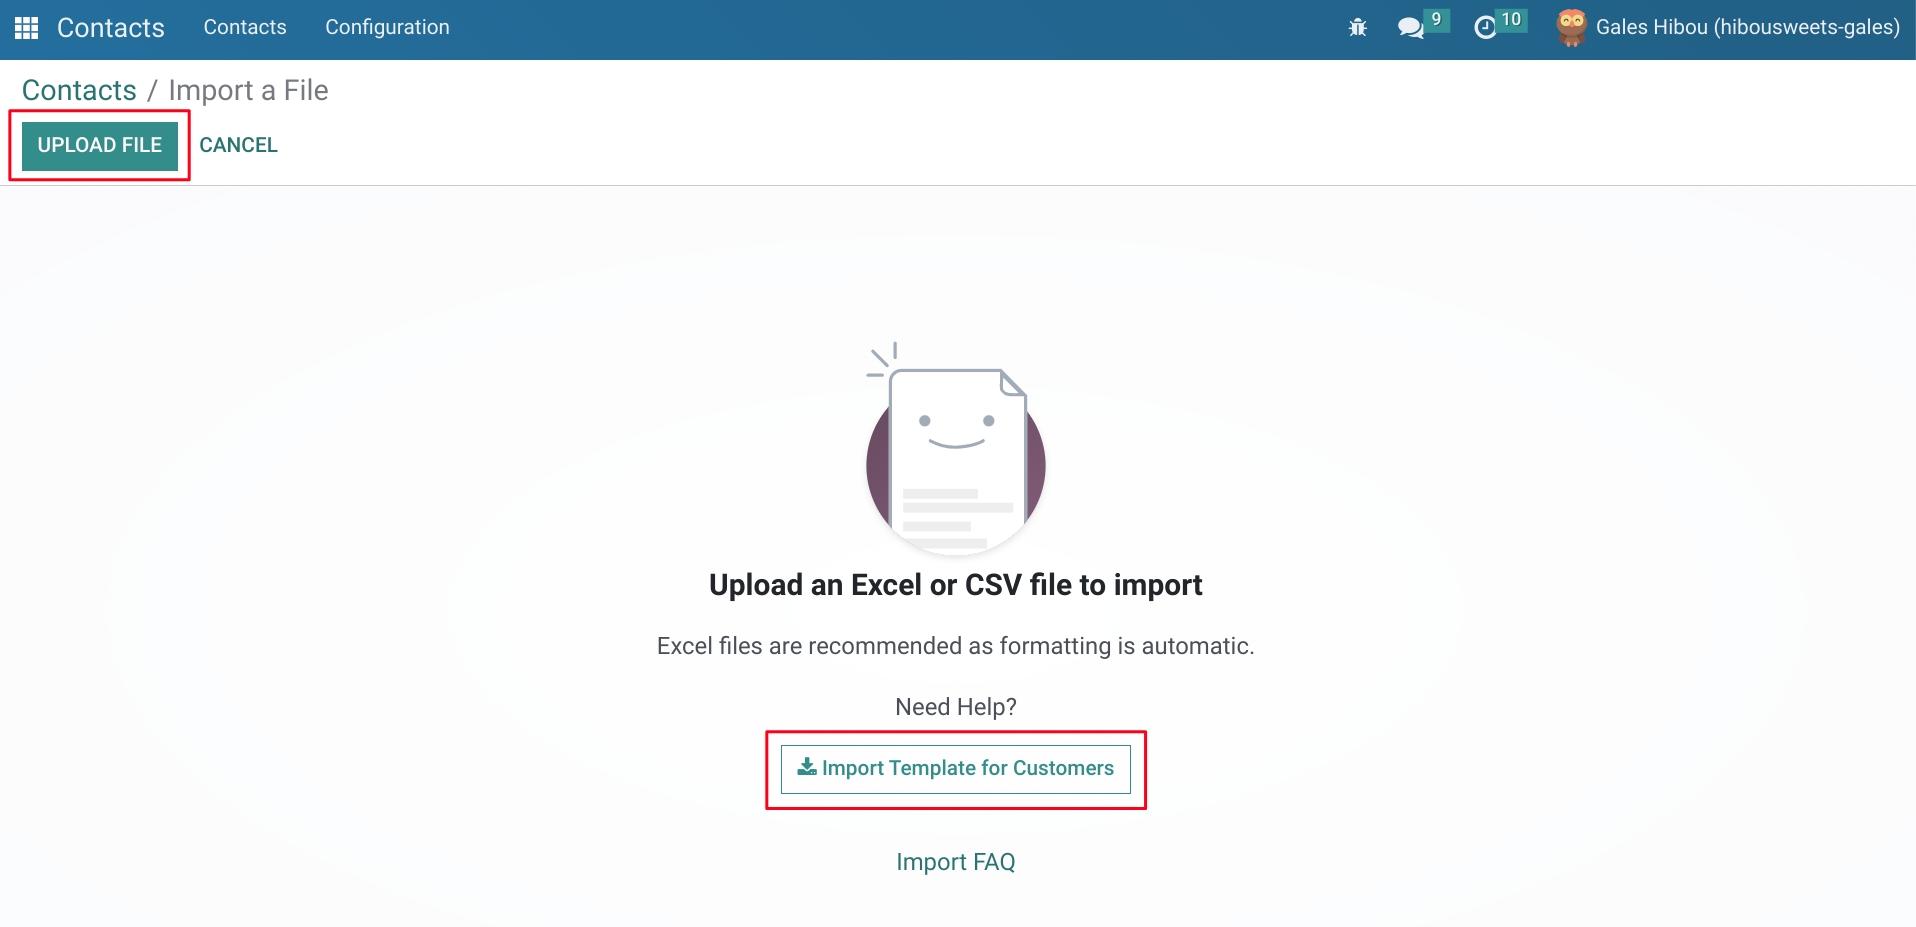
This will open up the Import template view where you will need to click Upload File to load in your excel file. This same screen towards the bottom, will give you the ability to download Odoo's default Import Template for Customers, if you would prefer not to customize your own import template.
After making sure all many2one field data matches the options in Odoo, our import template is formatted completely and ready for import!
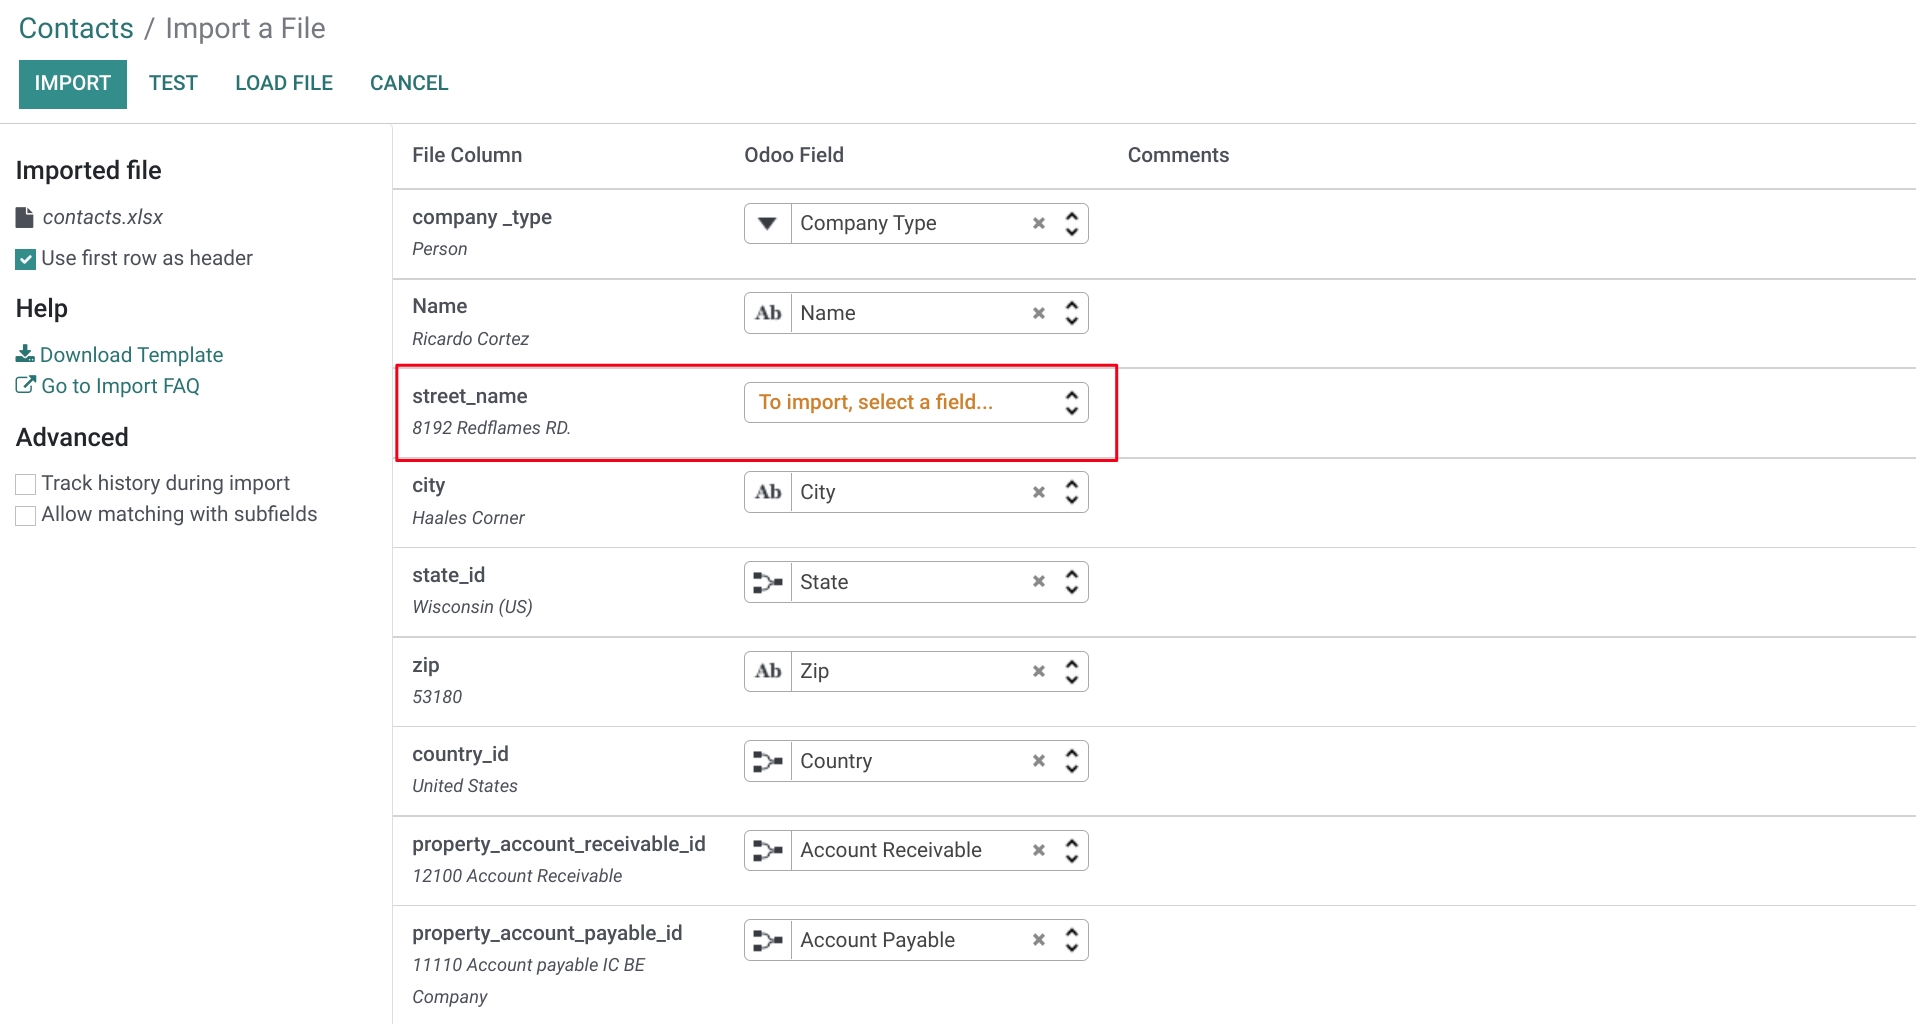
Before jumping right to IMPORT though, it is very important to TEST your import to make sure all of your fields are correctly named, then you are good to go!
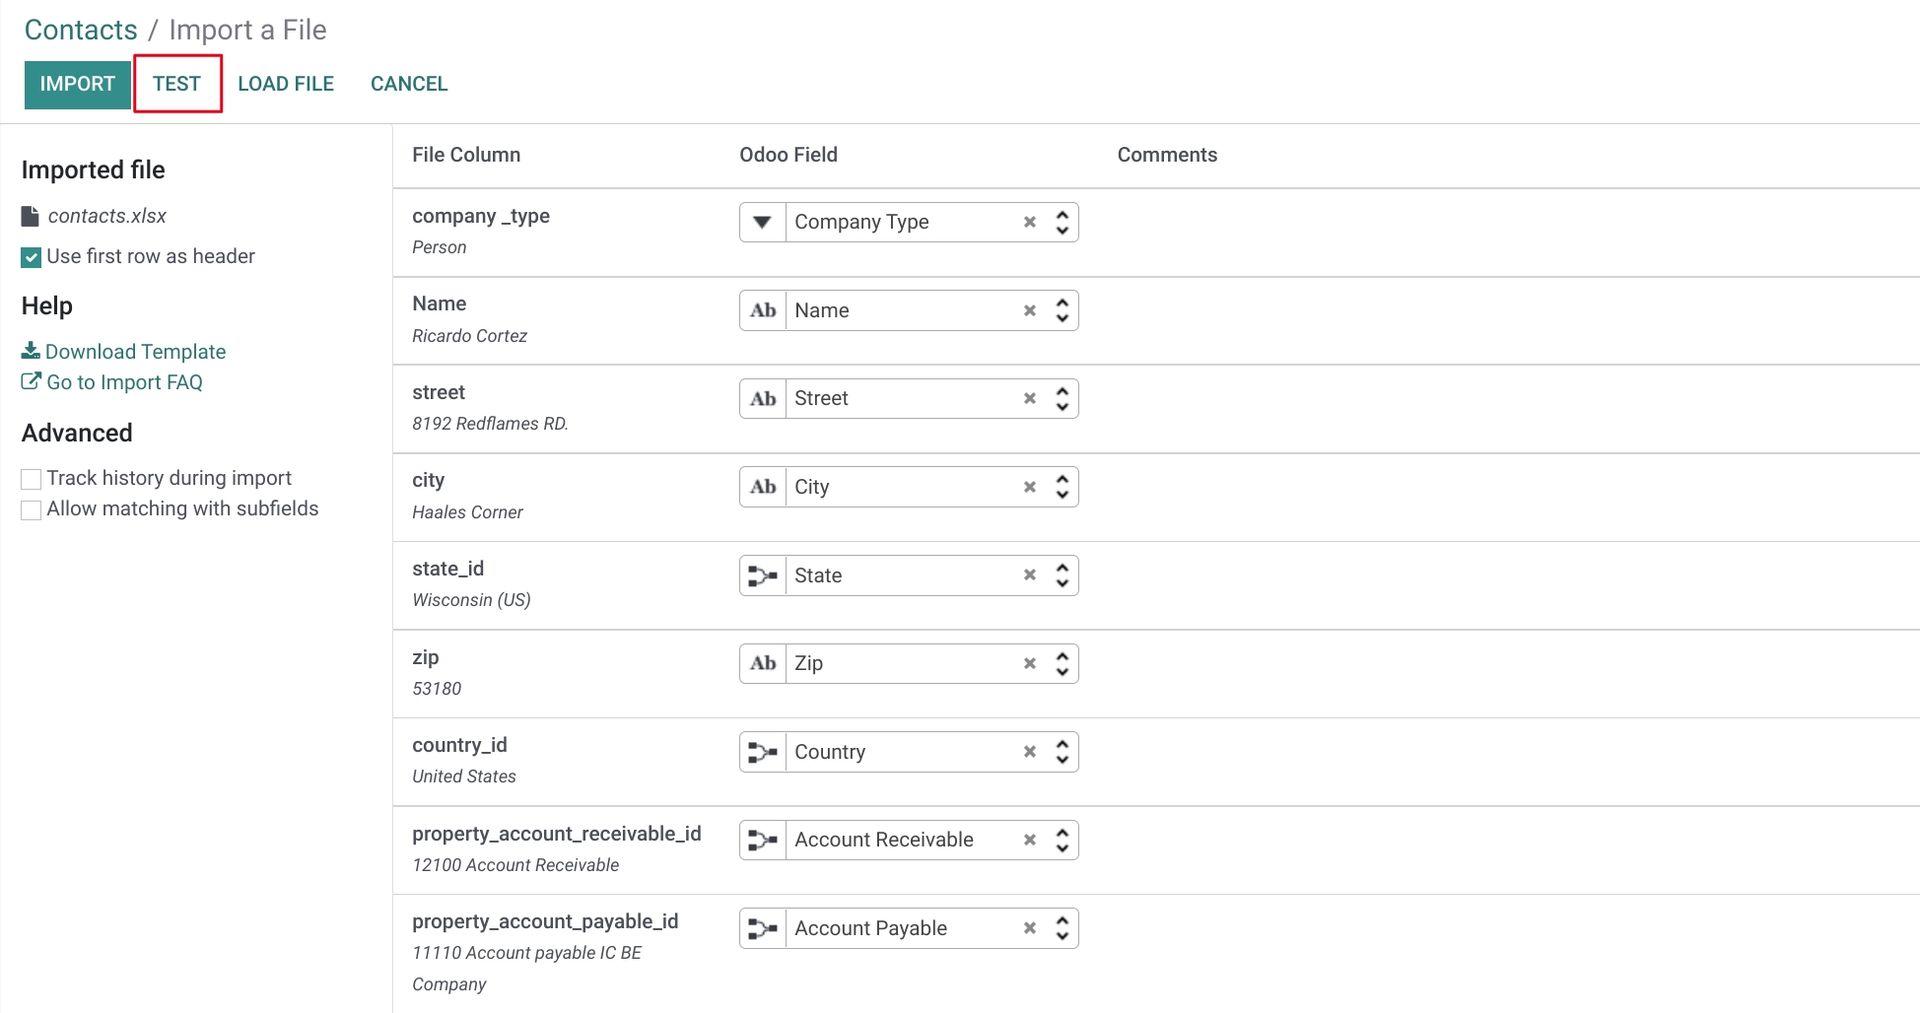
If the field has an incorrect name, the following message will appear "to import, select a field...".