Odoo Essentials: Export Wizard
Purpose
This document introduces Odoo's v16 Export Wizard. This tool allows the user to easily create customized reports from most types of records in Odoo that can be exported to an Excel or CSV file.
Process
Good to know!
Export Wizard is Only in 'List View'
The majority of record types in Odoo have the List View option. For the example outlined in this document, we will be looking at contacts.
Getting to the Export Wizard
To get started, navigate to the Contacts app.
To view all contacts in list view, select the List View icon underneath the search bar.

Once in list view, the data will appear in an organized table; each row corresponds to a singular record. To narrow down the records you wish to choose from, you can use the Filters and Group By tools underneath the search bar. You can also increase the number of records you see on this page by clicking the field holding the number of records and editing as needed. For more information on how to navigate through Odoo records, please see our Odoo Navigation Overview page.
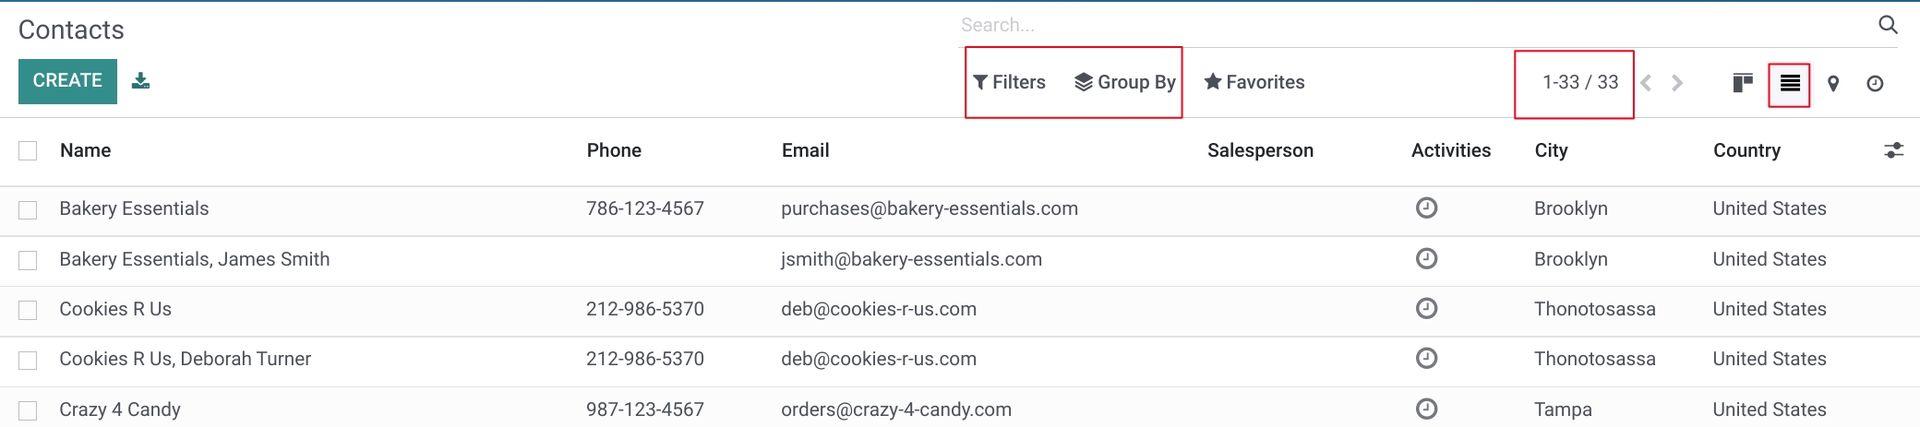
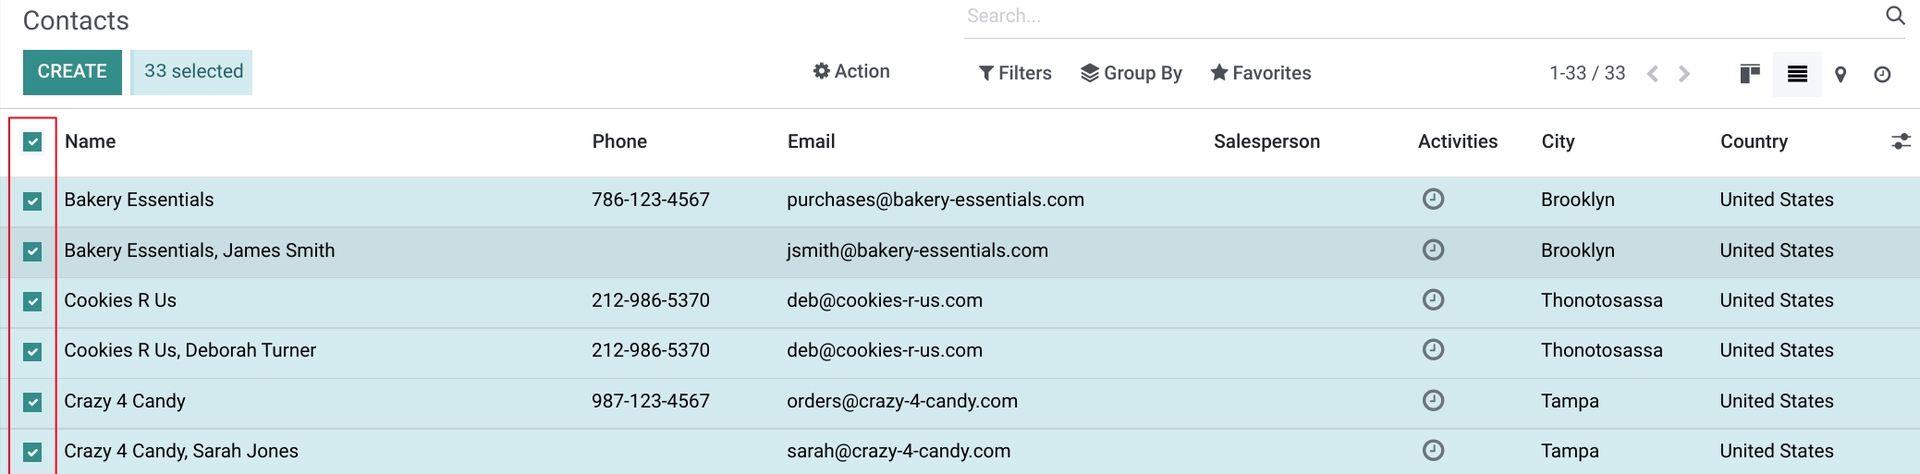
On the far left, you will notice a column of checkboxes. This is how you will select the specific items you wish to export.
Using the Export Wizard
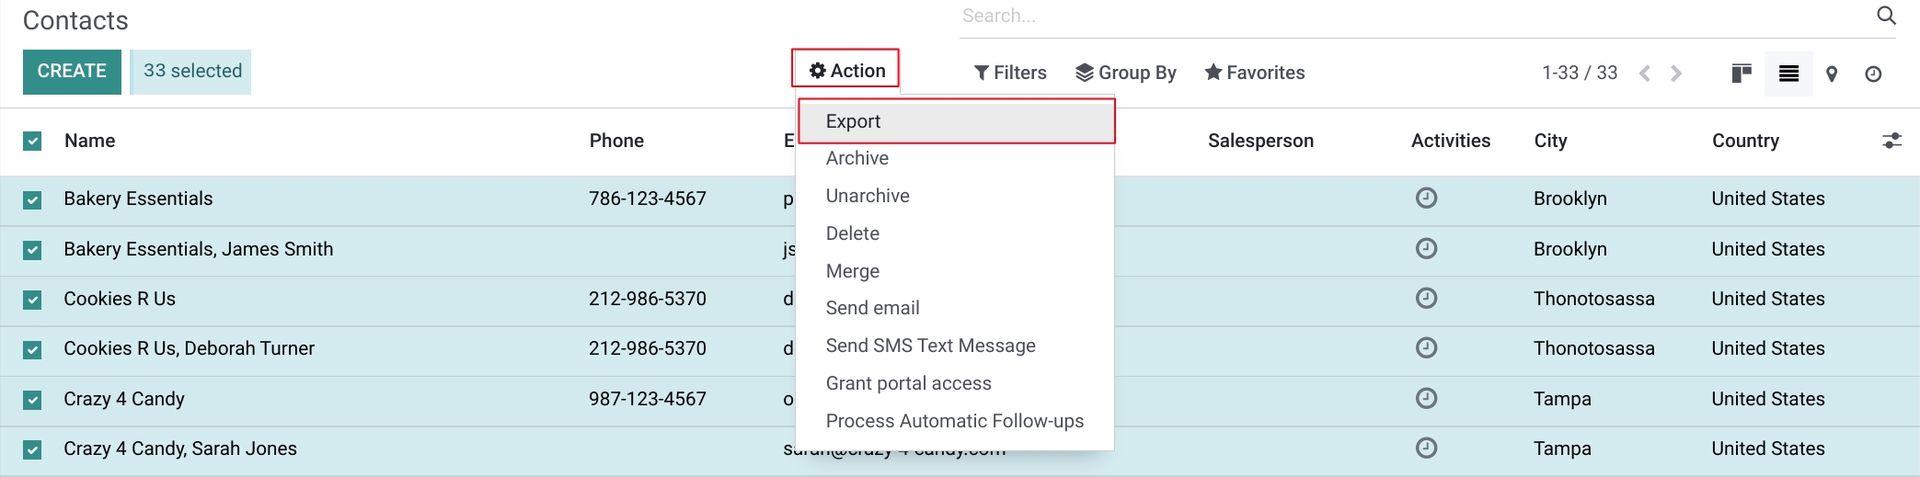
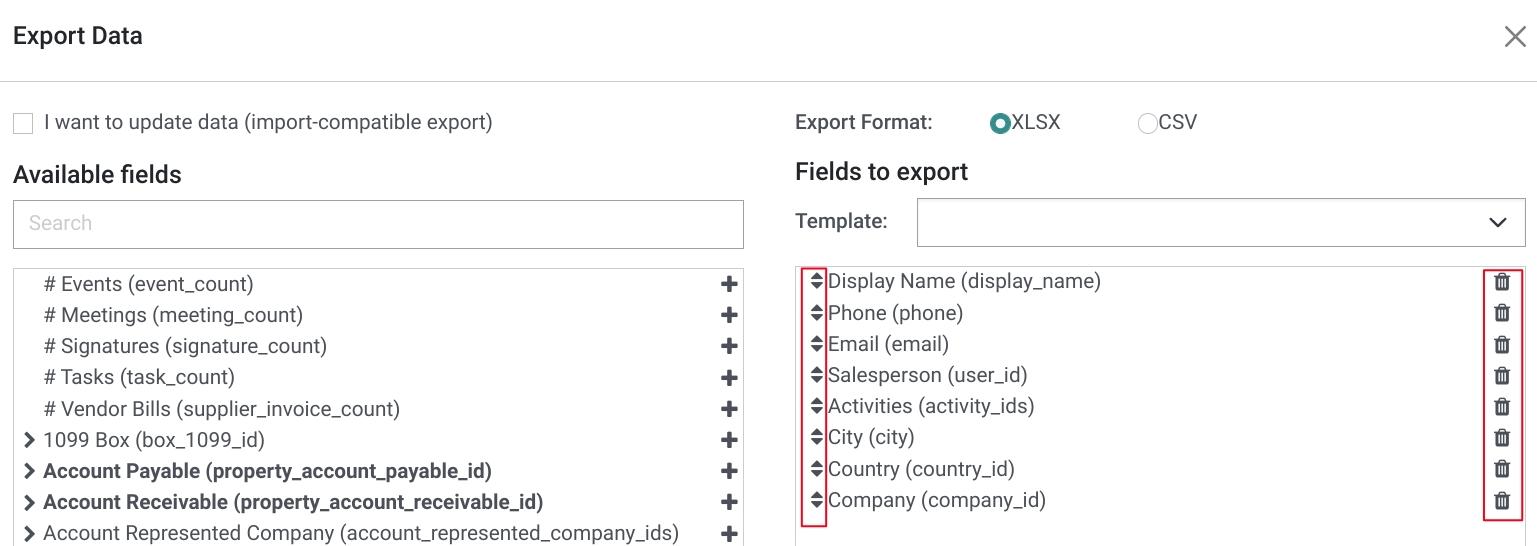
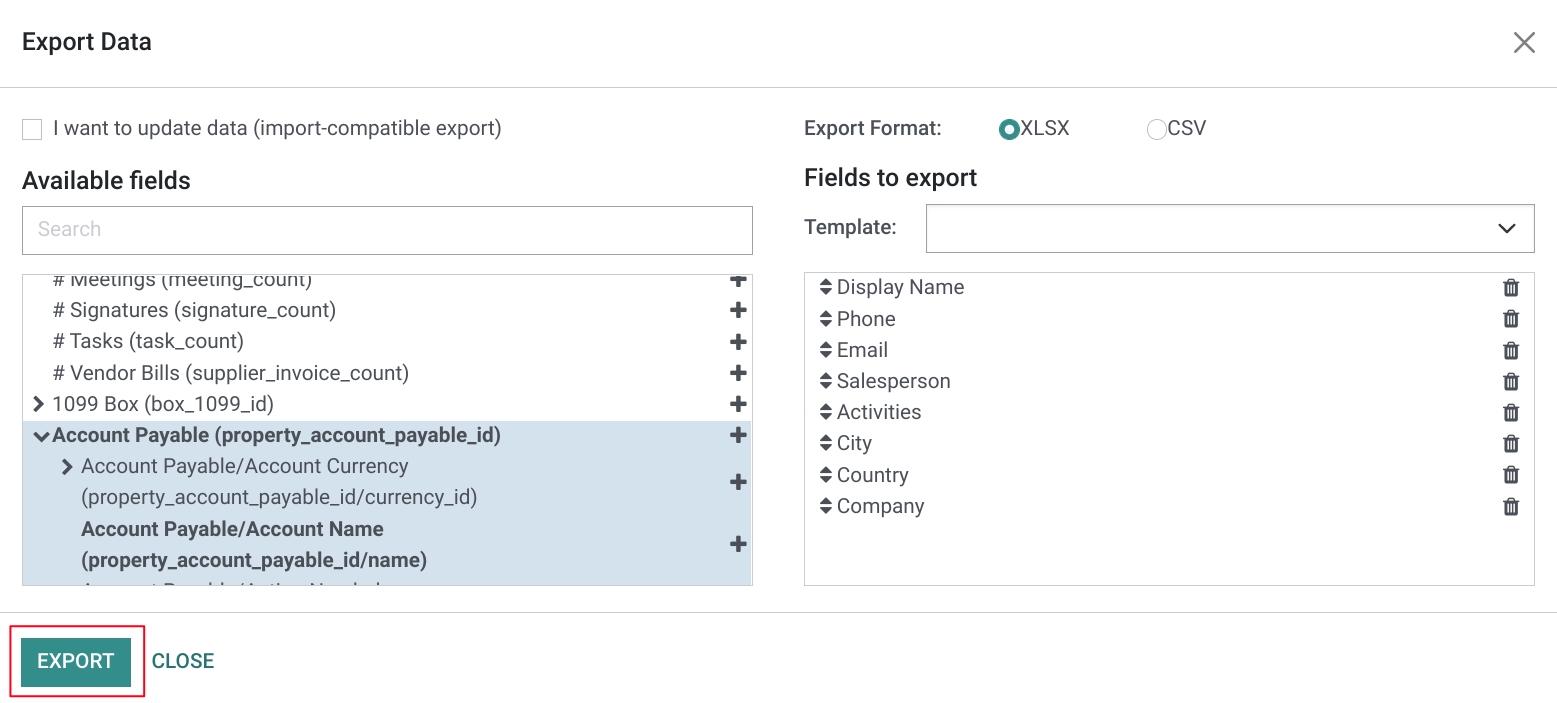
After selecting the Export option from the Action menu, the Export Data modal window will appear. This is the Export Wizard!
In this window, you will see the following fields:I want to update data (import-compatible export): Select this option if you are exporting these records to update them and import them back into Odoo or otherwise plan to import them back into your database. This inserts a Database ID unique to each record exported that Odoo uses to locate that record upon import. Selecting this option also shortens the list of fields in the Available fields for export.

Important!
Any item that is imported without an import-compatible Database ID will generate a new record.
If the import-compatible export step is missed, or the Database ID is altered in the exported file, it can duplicate or overwrite records. It is good practice to hide or otherwise protect this column in the resulting export to prevent accidental editing or record mismatch.

Export Format: Select the file format for the exported data. You can choose between XLSX and CSV.
Available fields: This is the list of available fields for export on this list of records. Note that this list will shorten significantly after selecting the I want to update data (import-compatible export) option. You can use the Search bar to search for specific fields. To add a field to your export file, click the icon or double-click the field. You will see the field appear in the Fields to export field on the right hand side.

Fields to export: This field will pre-fill with a default list of fields otherwise known as 'flat data', or, user-specified information that can be changed through the UI. These can be arranged in any order by clicking and dragging the icon on any one. You can also remove them from the export by selecting the corresponding trash icon. As mentioned above, when you select available fields to export they will appear in this field.
Good to know!
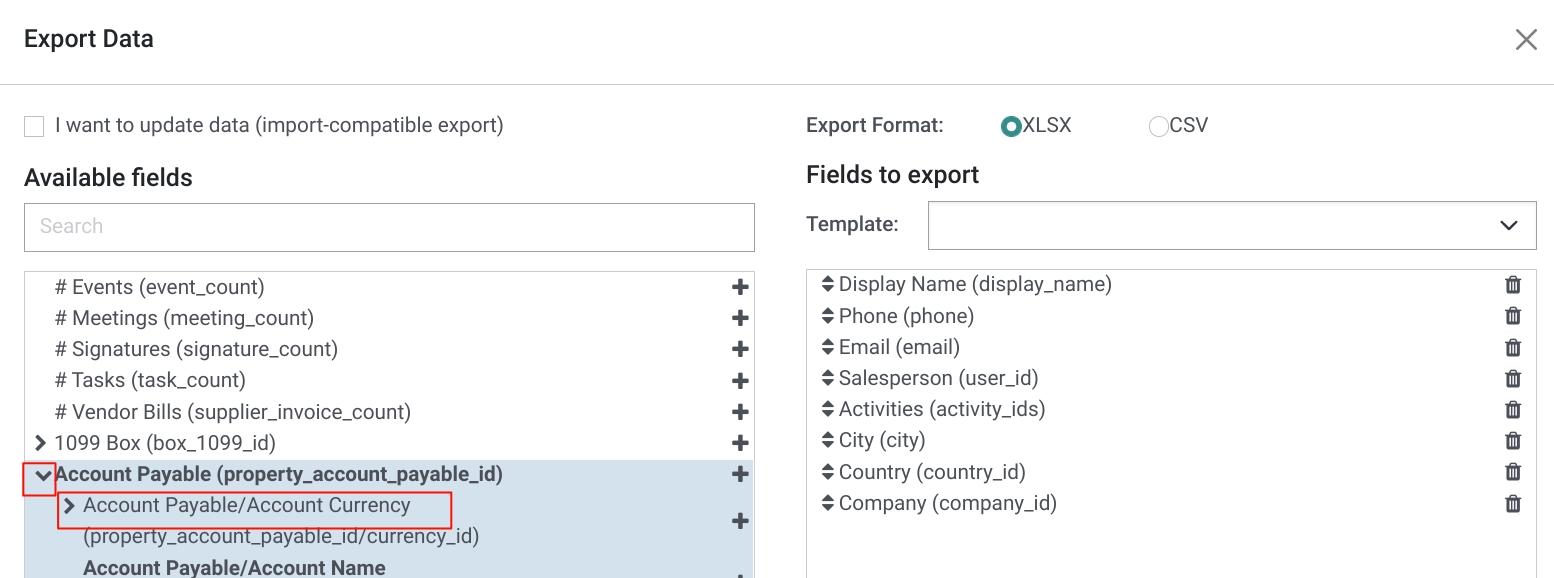
It is possible to go deeper and export relational data.
Many of the options in Available fields will have a drop down icon. This means that field also has options to export relational data associated with it. For example, if I'm exporting contacts and I would like to include the bank accounts associated with the contact, I could use the drop down to see the relational data fields and select what I need.
It can take some trial and error to build your list of fields to export. You are encouraged to experiment with the variations to make sure you are grabbing the right data. If you are ever in doubt, try exporting multiple fields you believe will yield similar results to see which field gives you exactly what you need.
Template: Utilize this field if you would like to save your list of Fields to Export for later as an export template. Click the Template field dropdown and select "New Template".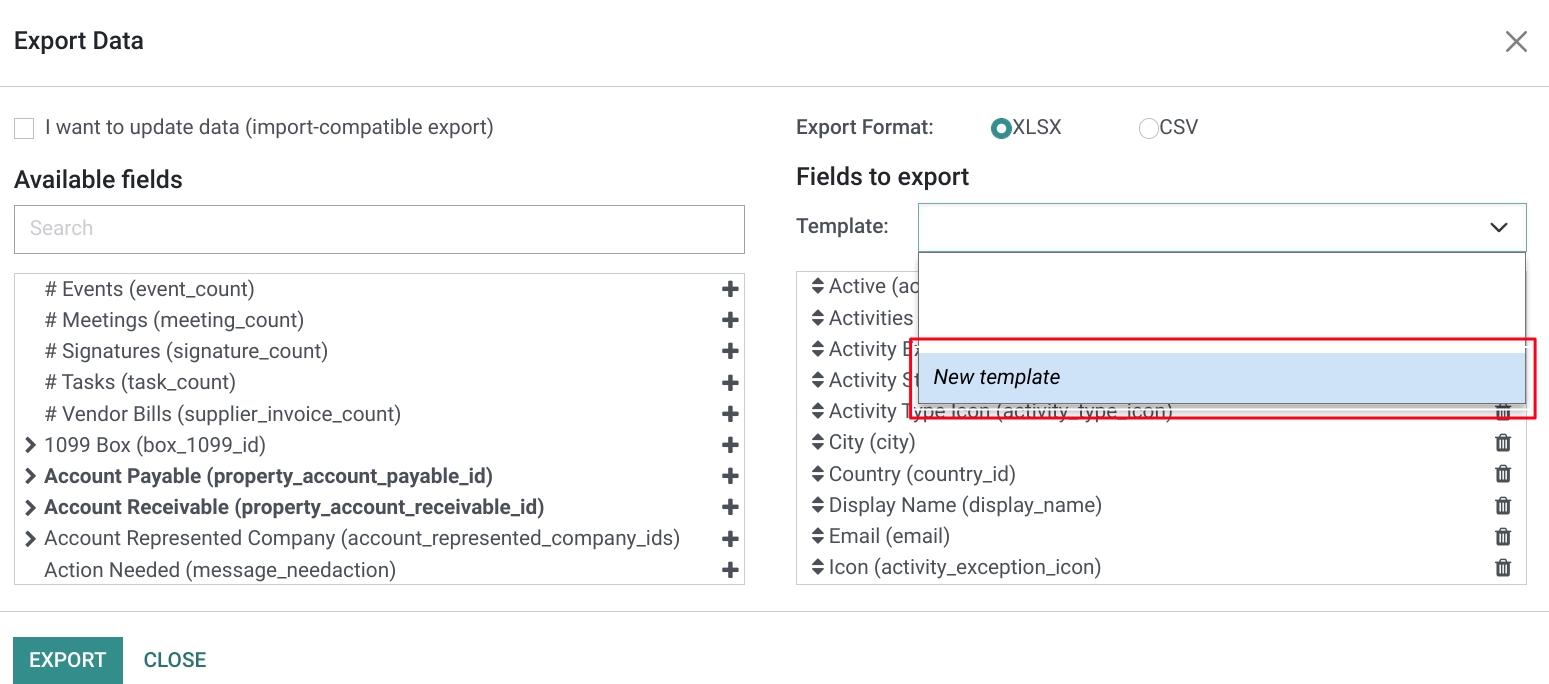
Then, input the name for your new template and select the save icon .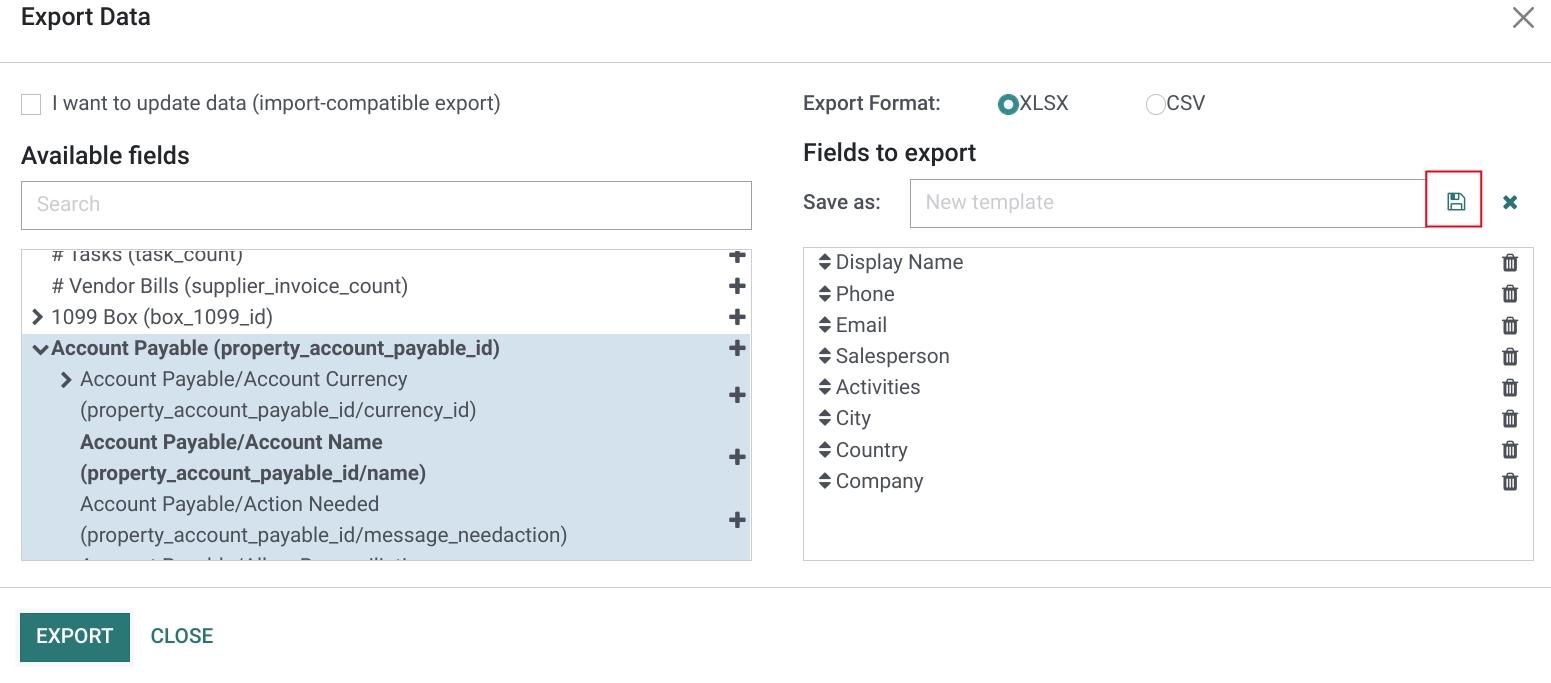
Now, whenever you use the Export Wizard, your new template will be available to you by clicking the Template field.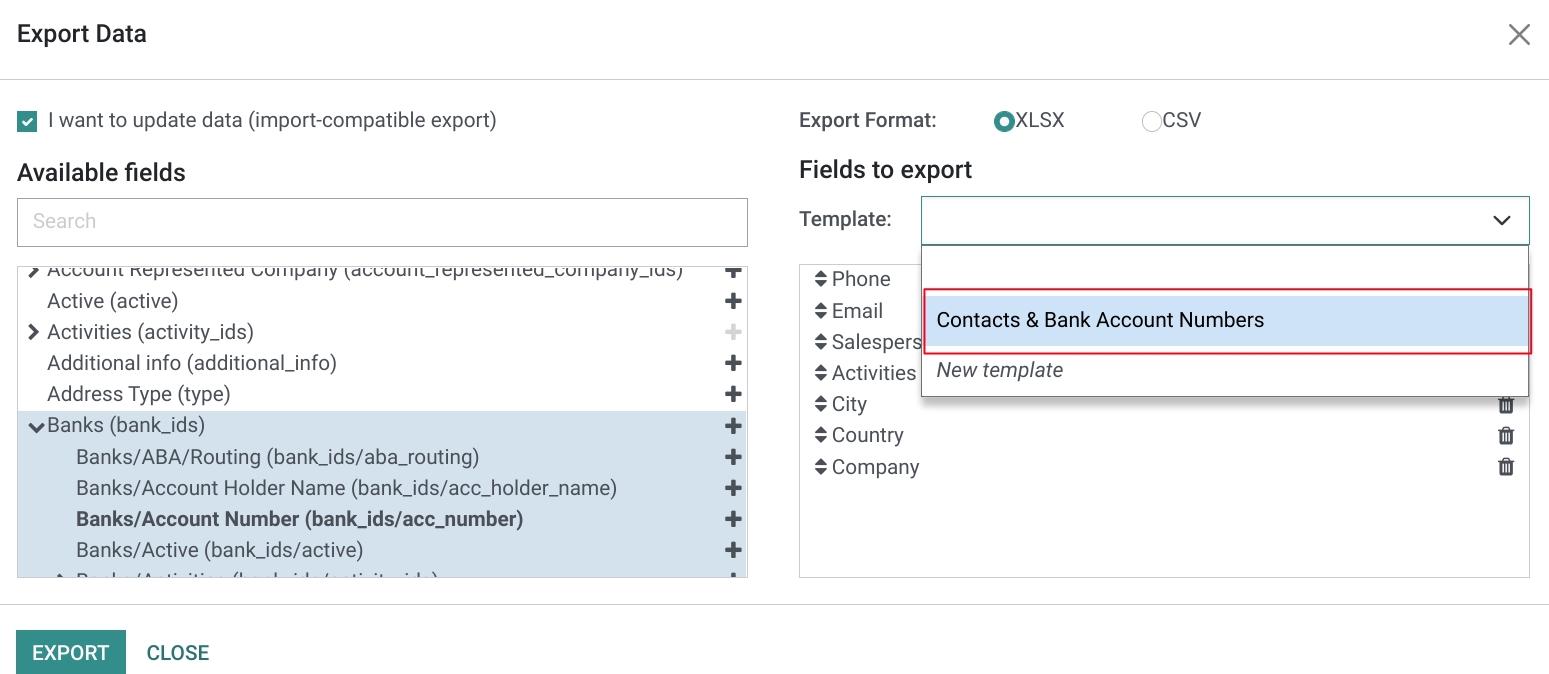
Once you have a final list of fields to export, click EXPORT, and a XLSX or CSV file will be downloaded to you computer in the selected format.
Since the import-compatible option was selected on this export, there will be a column for the Odoo ID, and the column headers will be specifically formatted to be recognized by Odoo upon import.
