Odoo Essentials: Configuring Digest Emails: Debug Configuration for Digest
Purpose
The digest outbound email is configurable with HTML, and the individual KPIs can be edited to include certain information if the client wishes it. There is a further option to include specific reports as attachments.
Debug Mode
You’ll need to enter Debug Mode for some steps in this document.
Process
To get started, navigate to the Settings app.
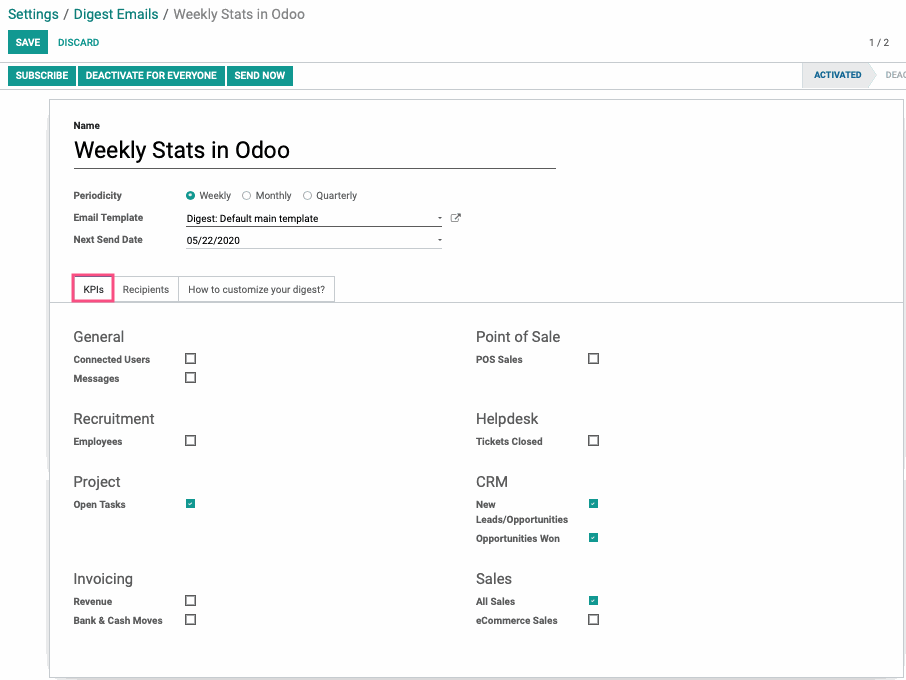
This will take you to the General Settings page. From here, you are going to scroll down to the Statistics section, click Configure Digest Emails, then click Create.
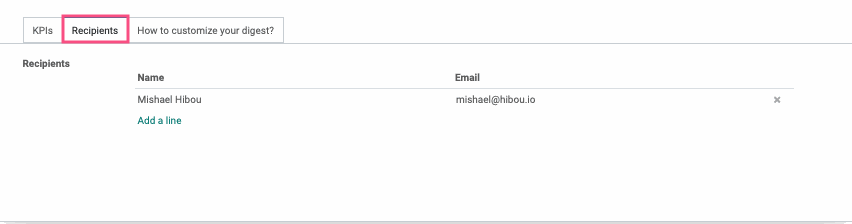
Under the RECIPIENTS tab:
This is where you can assign the recipients of this digest email to be sent out by using the ADD A LINE button. You can also discard any recipients on the list using the button.
Once you are done configuring the Digest Email, click SAVE.
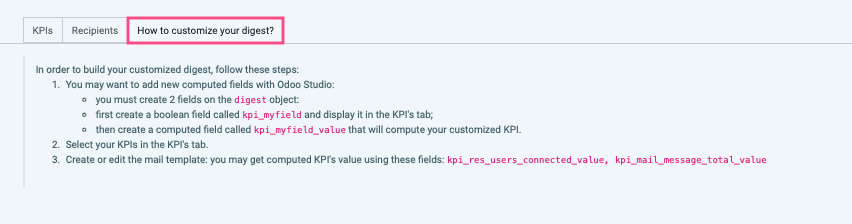
Under the How to Customize Your Digest tab:
This will give you a set of instructions on how to customize your digest
Editing the Template
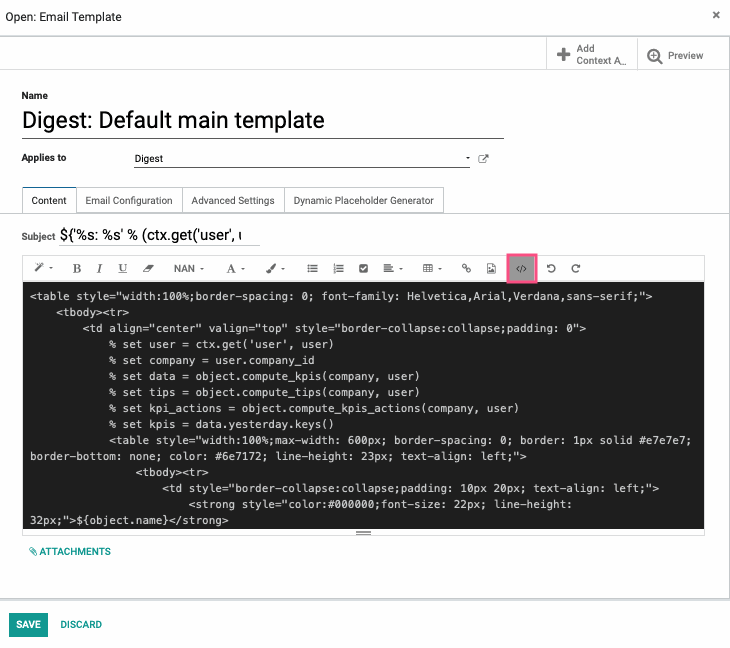
Click the External Link icon to open up the email template.

This will allow toy to access its raw HTML by selecting the </> option. This will allow you to edit as needed and the window will provide a Preview smart button in the top right corner to see the final email template from the customer's point of view.
Name: Name of your email template.
Applies To: This is the type of document this email template can be used with.
Under the Content tab:
Subject: This is the subject that will appear on email.
- Attachments: This will allow you to attach a file to your email template.
Here is a visual overview of the other tabs and their functions in the email template that can be customized.
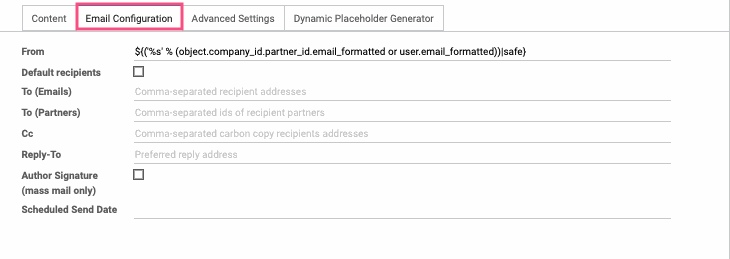
Under the Email Configuration tab:
From: This is the sender address (Placeholders may be used here). If this is not set, the default value will be the authors email alias or email address.
Default Recipients: These are the default recipients of this record, this can be the partner ids or recipient email address. By selecting this option, it is no longer necessary to set the To (Emails), To (Partners) and CC fields.
To (Emails): This is where you will list the comma-separated recipient addresses.
To (Partners): This is where you will list the comma-separated ids of recipient partners.
CC: This is where you will list the comma-separated carbon copy recipients addresses.
Reply-To: This is the preferred response address (Placeholders may be used here).
Author Signature (Mass Mail Only): If checked, the user's signature will be appended to the text version of the message.
Scheduled Send Date: If set, the queue manager will send the email after the date set, otherwise the email will send as soon as possible (Placeholders may be used).
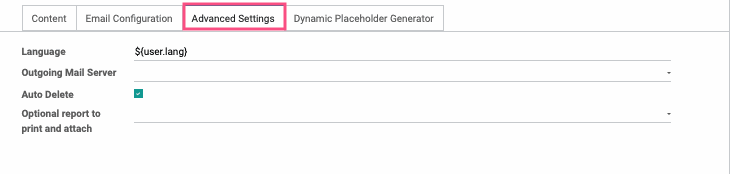
Under the Advanced Settings tab:
Language: This is an optional translation language (ISO Code) to select when sending out an email. If this is not set, the english version will be used. This should usually be a placeholder expression that provides the appropriate language.
Outgoing Mail Server: This is the optional preferred server for outgoing mails. If not set, the highest priority mail server will be used.
Auto Delete: This option will permanently delete the email after sending it in order to save space.
Optional Report to Print and Attach: This will allow you to attach an optional report to print. Here you can configure the format and template.
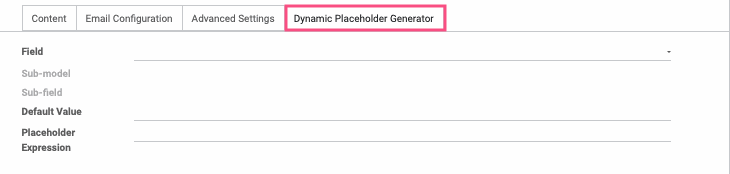
Under the Dynamic Placeholder Generator tab:
Field: Select a target field from the related document model. If it is a relationship field, you will be able to select a target field at the destination of the relationship.
Default Value: This is the optional value than can be used in case the target field is empty.
Placeholder Expression: This is the final placeholder expression, to be copy and pasted in the desired template field.
When you are done configuring, click SAVE.