Events: Events Workflows: Tracks: Event Gamification
Purpose
This document covers the configuration and usage of Event Gamification in the Odoo 14 Events application. This feature allows you to add a quiz to a track.
Process
To get started, navigate to the Events app.
Enable Event Gamification
Once there, you'll need to enable Event Gamification. To do so, go to configuration > Settings. Under the Events section, enable Schedule & Tracks. Once enabled, you'll see several other options beneath. From those options, enable Event Gamification.
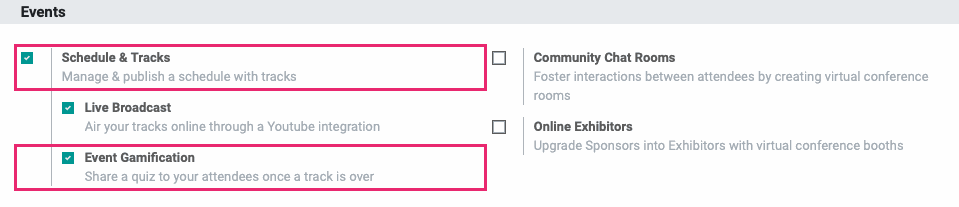
When you're done, click Save.
Create an Event
You can add Event Gamification to existing events with the use of tracks. To create a new event, follow the guidelines in our Basic Event Workflow documentation.
Add a Track
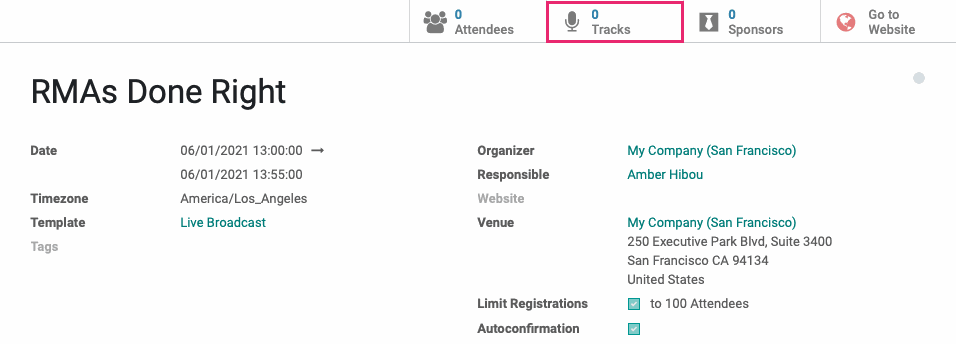
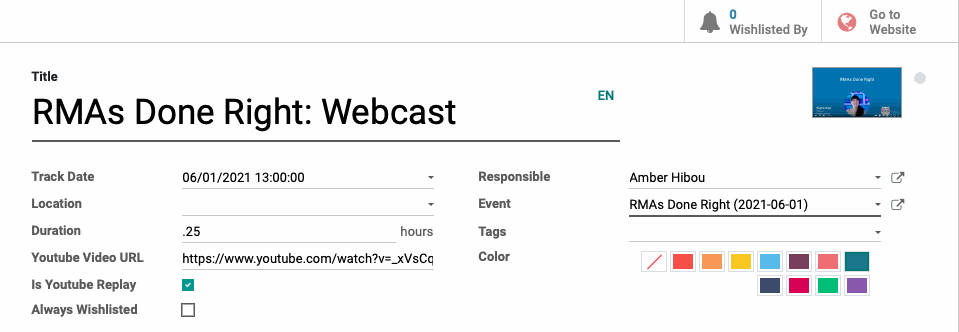
From within the saved event, click the Tracks smart button, then click Create. This opens the Event Tracks form.
Title: Enter the name of this track. You may also upload an image to represent this track.
Track Date: Select the date for this track. This will be auto-populated based on the event, but if you have multiple tracks in one event, you may wish to adjust the time per track.
Location: This field is optional. If there is a physical location for this track, you may select it here. If it's a virtual event, then you can leave it empty.
Duration: Enter the duration of this track.
Youtube Video URL: Enter the YouTube URL for this video. This option is available if Live Broadcasts are enabled.
Is Youtube Replay: If this video has already been uploaded to YouTube, select this option. If it's a live event, leave this unselected.
Always Wishlisted: If select, this track will be starred for all attendees. They will not be able to unstar it.
Responsible: This will prepolulate with your name, as the person creating the record. You can change it, as needed.
Event: This will preopulated with the Event that you accessed this page from. You can change it, as needed.
Tags: Add any applicable tags, if desired.
Color: To associate this track with a color, select that color here.
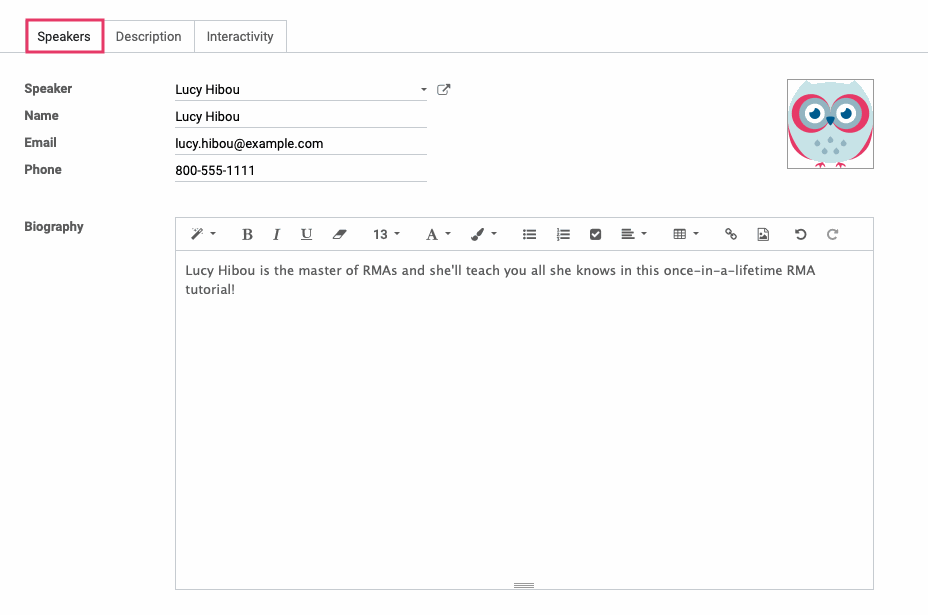
Details under the speaker tab are optional. If you'd like to add information about the speaker or presenter, you would do so here.
Speaker: Select or create a contact, if desired.
Name: This will auto-populate with the name from the contact record. If this speaker has no contact record, and you don't wish to add one, simply enter their name here.
Email: This will auto-populate with the email address from the contact record. You may also manually enter an email address here.
Phone: This will auto-populate with the phone number from the contact record. You may also manually enter a phone number here.
Biography: If desired, enter a short biography outlining the speaker's background and qualifications.
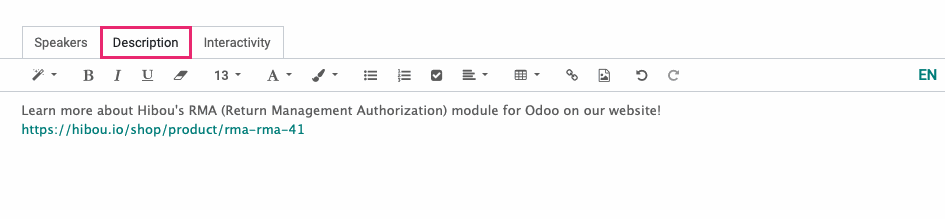
The Description tab where you'll describe the presentation itself.
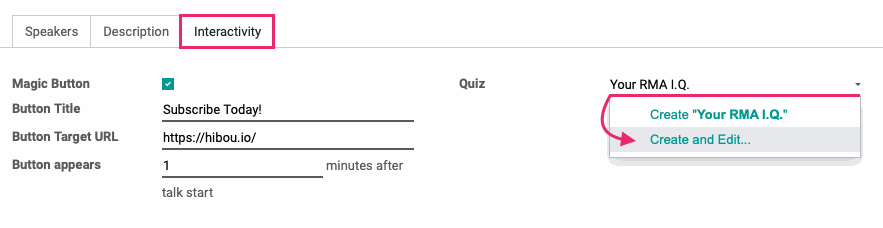
Next, move to the Interactivity tab.
Magic Button: If you'd like this track to display a button over the YouTube video at some point in the video, check this box. When you do so, more fields are exposed. This section displays if Live Broadcasts are enabled.
Button Title: Enter the text to display on the button.
Button Target URL: Enter the URL where the viewer will go if they click this button.
Button appears: Enter the number, in minutes, when yo'd like this button to display. After that point, it will display for the duration of the video.
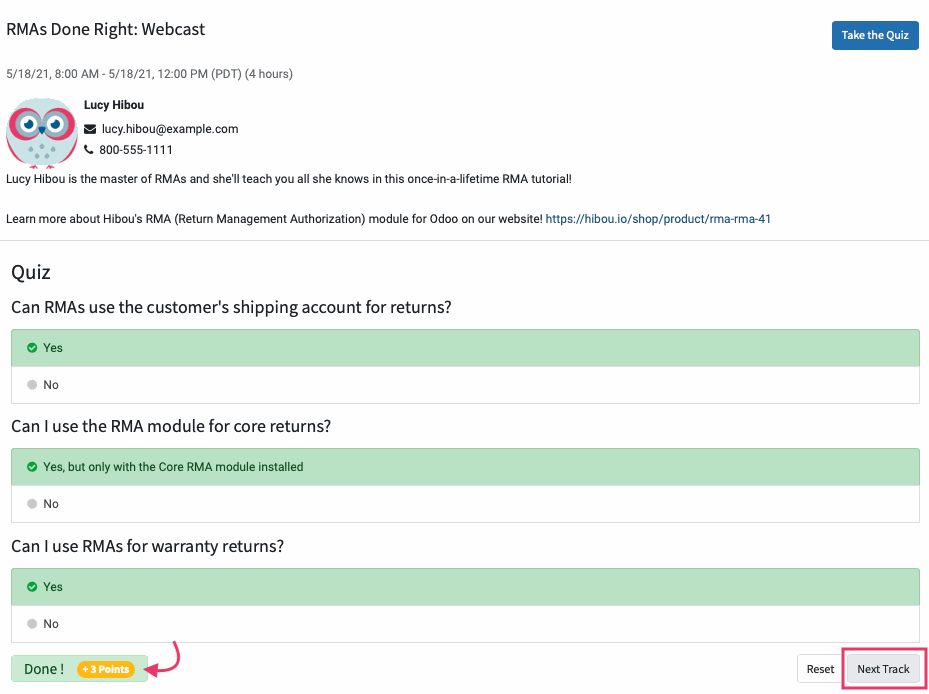
Quiz: If you've already configured a quiz (i.e. survey), you can select it from this list. To create a new quiz, enter the name and click Create and Edit.
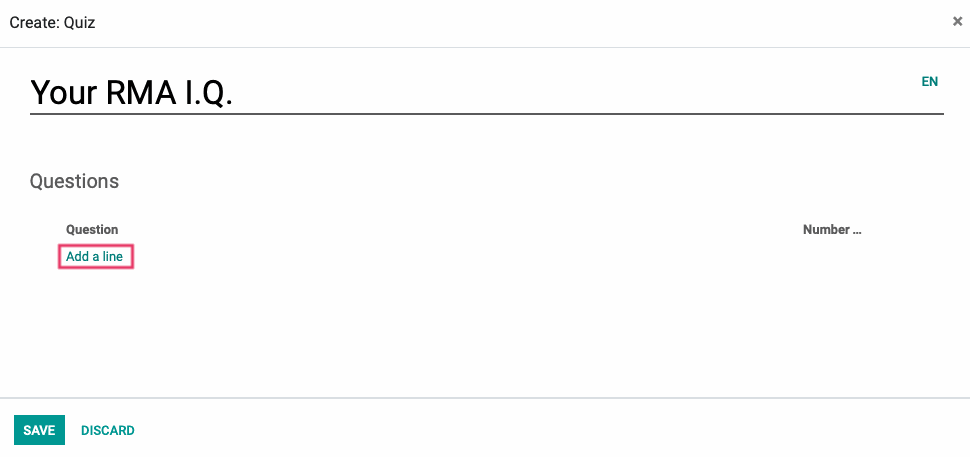
This brings up the Quiz modal window. To add a question, click Add a Line.
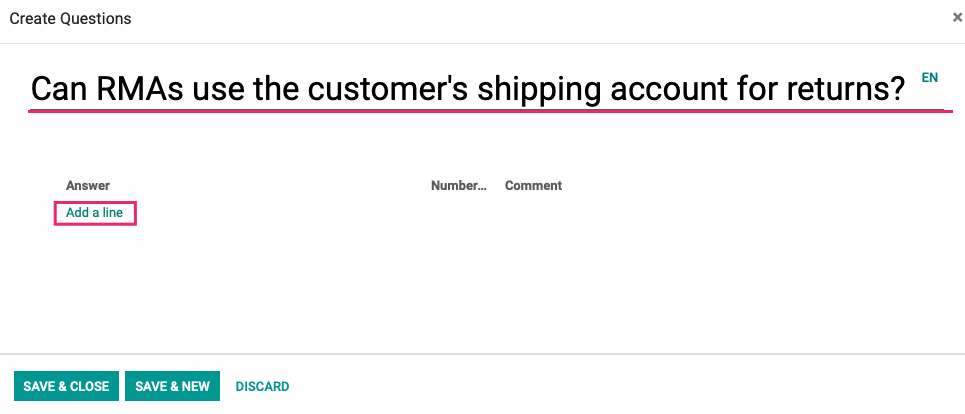
Doing so opens the Create Questions modal. Enter your question in the first open field. Under Answer, click Add a Line.
Add all answers to your quiz in this manner. Assign 1 or more points to the correct answer, and assign 0 or less points to incorrect answers. You can only have one correct answer, but may have multiple incorrect answers.
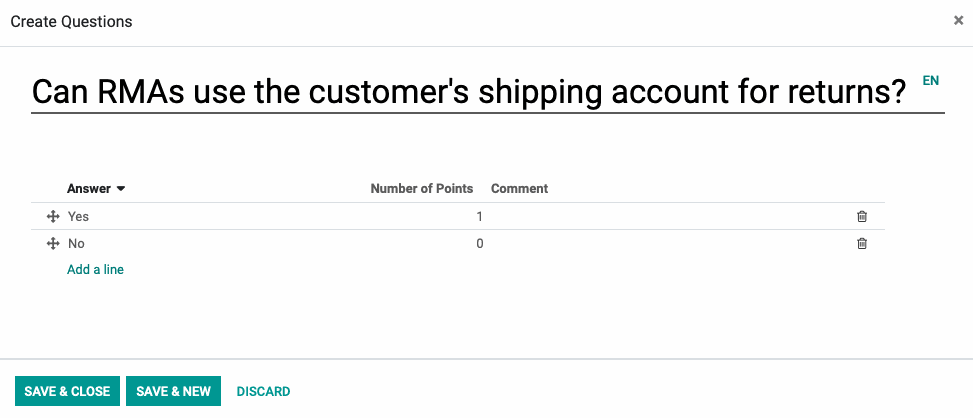
When you're done, click Save & Close if you're done adding questions, or click Save & New to add another question. When you're done adding questions, click Save on the Quiz modal.
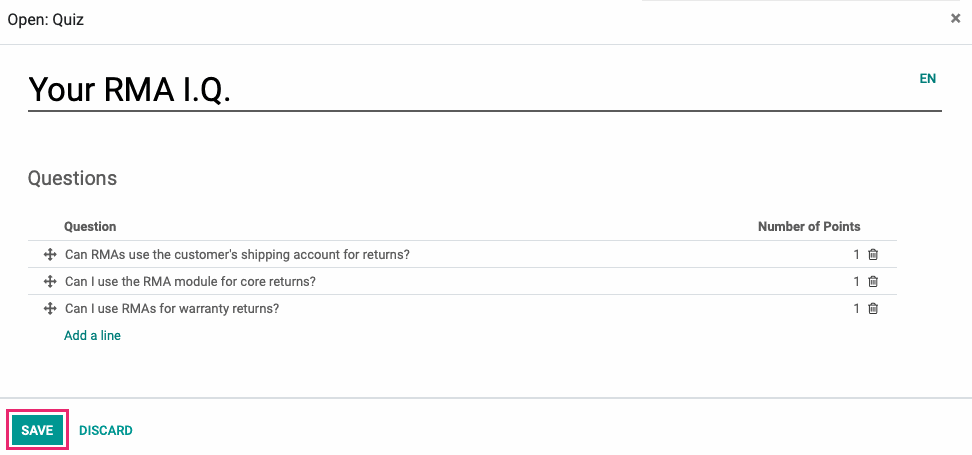
When you're ready, click Save on the track.
Accessing Quizzes
When the presentation is complete, users can then access the quiz from a button on the overlay.
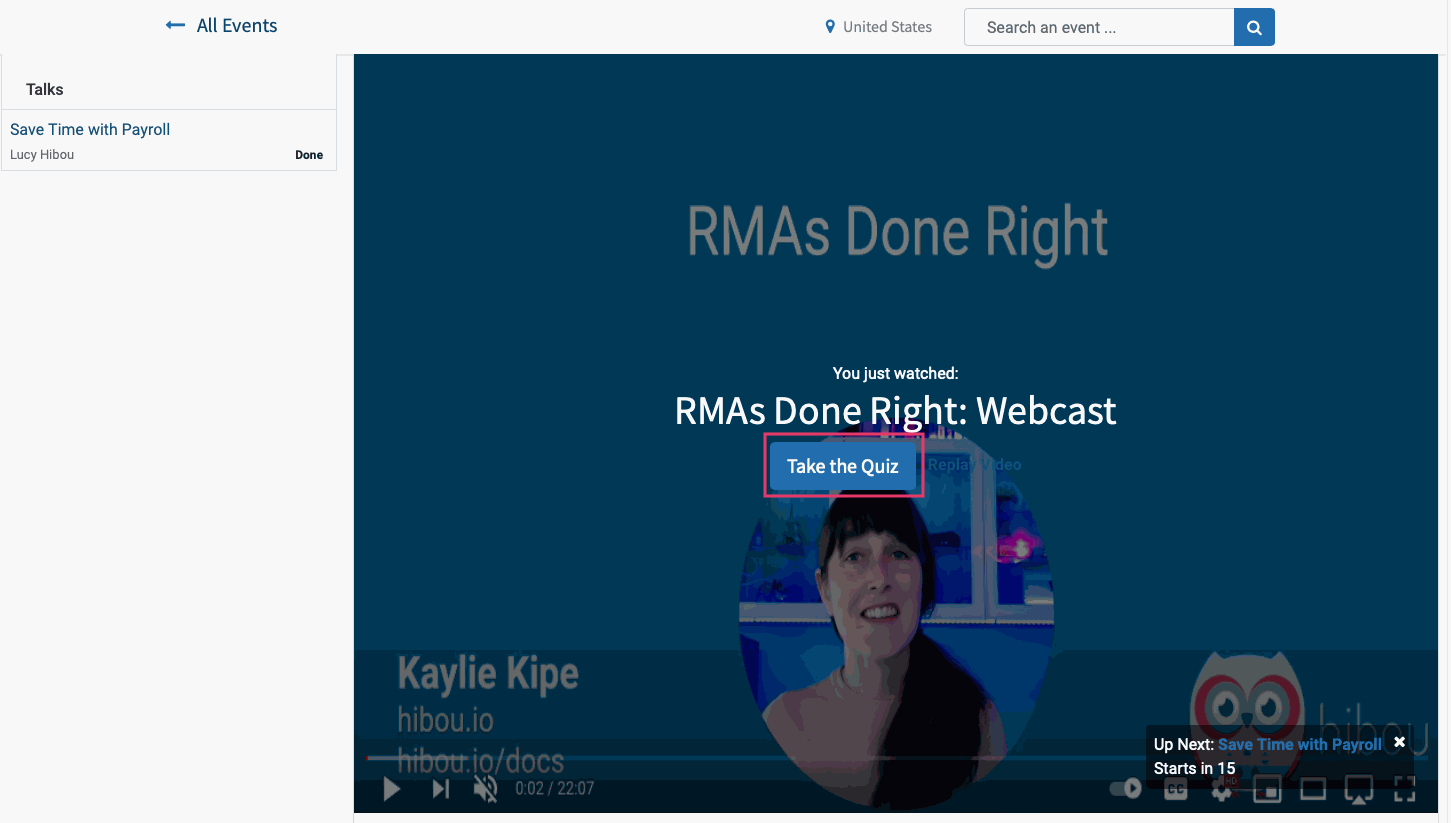
After the user completes the quiz, they can submit their answers and manually continue to the next track.
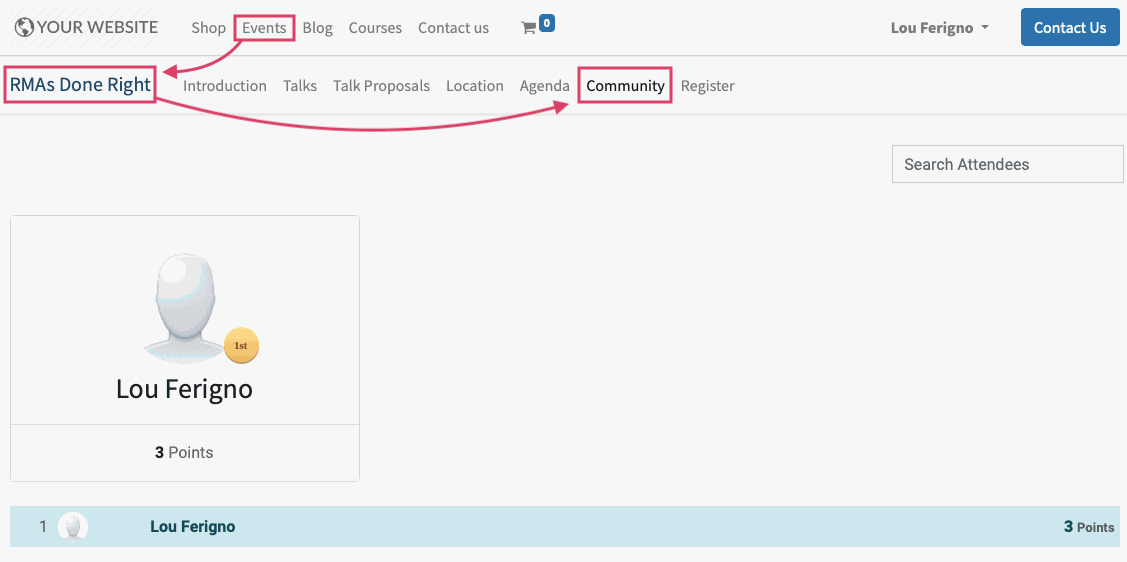
Points are displayed on the Community tab of the events page on the public-facing website.