Events: Events Configuration
Purpose
This document covers the Configuration menu of the Events application in Odoo 14.

Events
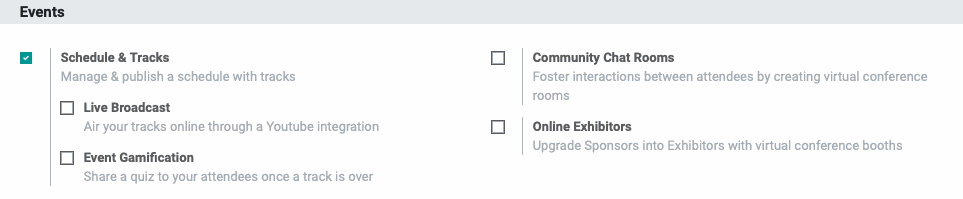
Schedule & Tracks: Use this to enable even tracks and scheduling. When enabled, you'll see two more options:
Live Broadcast: Allows you to air your tracks online through a YouTube integration.
Event Gamification: Allows you to share a quiz with your attendees when the track is over. It's a good way to test knowledge or gather feedback.
Community Chat Room: Allows you to create chat rooms for your event attendees to discuss with one another.
Online Exhibitors: Gives the ability to have Exhibitor Booths in virtual events.
Registration

Tickets: Allows you to sell tickets using Sale Orders in Odoo.
Questions: Allows you to add preset questions to the event registration form to gather information from/about attendees.
Online Ticketing: Allows you to sell tickets on the customer-facing portion of your website.
Attendance

Barcode: Allows you to scan ticket barcodes at the time of admission. Nametags with barcodes are issued via email upon registration.
If you've made any changes to these settings, be sure to click Save.
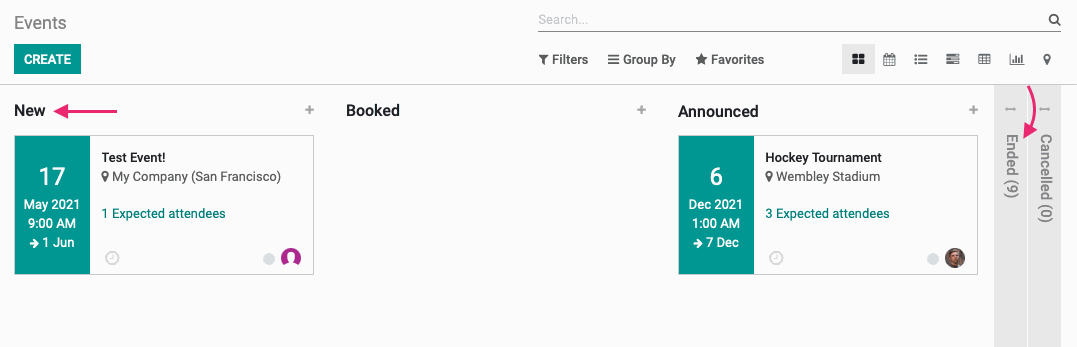
Event Stages
The event pipeline is organized in stages. Here we can see the New, Booked, and Announced stages, as well as the folded Ended and Cancelled stages.
To manage these stages, go to Configuration > Event Stages. Here you'll see a list of existing stages. To add a new one, click Create.
Stage Name: Enter a name for your stage.
End stage: Select if there will be no further activity after this stage (e.g. Ended and Cancelled)
Folded in Kanban: Select to hide in kanban view, like the 'Ended' and 'Cancelled' stages in the image above.
Sequence: To preset a sequence (column order), do so here. You can also move stages while in kanban view. Doing so will adjust this number accordingly.
Stage Description and Tooltips: You can define here labels that will be displayed for the state instead of the default labels in the kanban view.
Description: If desired, add a description to help your coworkers understand the meaning and purpose of the stage.
When you're ready, click Save. The new stage will now display in your Events pipeline.

Event Tags Categories
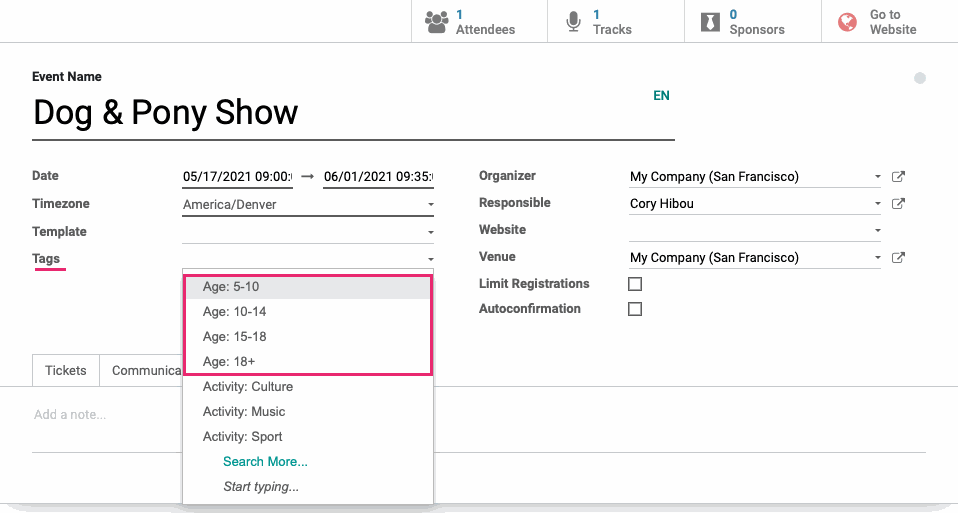
Events can be organized by tags, and these tags often fall into categories. For example, to indicate the age appropriateness for an event, you can add an Event Tag Category of "Age" and then tags within that category for each age range. This akes adding tags to an event faster because you have that uniform category name you can search by.
To add a new category, go to Configuration > Event Tags Categories and click Create.
Title: Enter a category title.
Tags: Click Add a Line under the Name column to add your first tag. This will open a field where you'll enter that name and also select a color to associate with it.
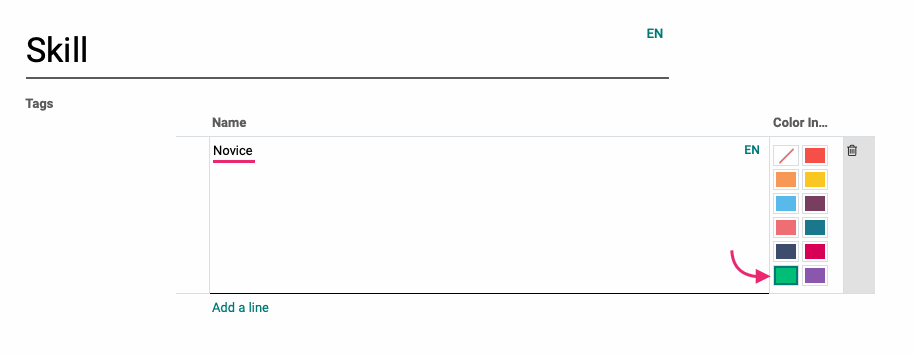
Continue adding additional tags, as needed. When you're ready, click Save.

You can now apply these tags to events.