Scheduling: Timesheets
Purpose
This document covers the Timesheets application for Odoo 13. Timesheets are relevant to both Payroll and Attendances,a nd this app allows you to track your employees' hours by project, task, billing rate, and employee.
Process
To get started, navigate to the Timesheets app.
Configuring Timesheets
Click Configuration > Settings to modify the settings of this application.
Time Encoding
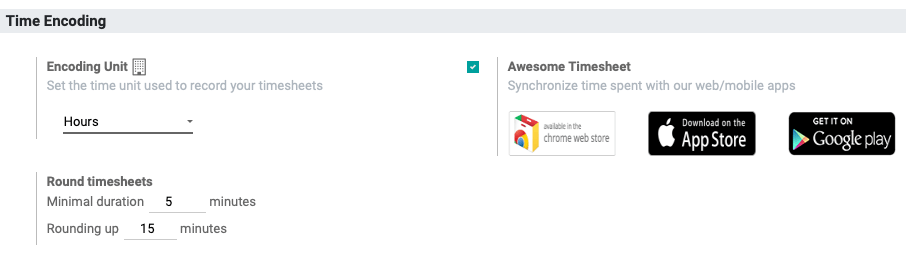
Encoding Unit: Select the time unit used to record your timesheets. You'll have the option of Hours or Days.
Minimal duration: Enter the number of minutes that must be worked to qualify as a shift.
Rounding up: Enter the increment of minutes to round to. This will simplify payroll and time billing by keeping entries uniform. (e.g. If you enter 15, this means a shift of 38 minutes will round up to 45.)
Awesome Timesheet: For employees who log their time remotely via mobile or web app, there are apps that will synchronize with your Odoo database.
Billing
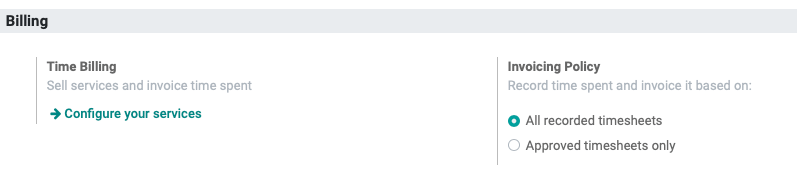
Time Billing: Setting up the time-billable services will allow you to bill time to customers using timesheets in projects, and invoice them appropriately. The Configure your services button acts as a shortcut to service-based products.
For more information on billing customers based on timesheets in projects, please see our Using Timesheets with Projects documentation.
Important!
Time-Billable Product Checklist
Follow the Product Creation Workflow documentation to create a product, but keep in mind that a time-billable product template should meet the following criteria:
Under the General Information tab:
Product Type: Select Service.
Sales Price: Set this to the hourly rate charged to the customer.

Under the Sales tab:
Service Invoicing Policy: Select Timesheets on tasks.
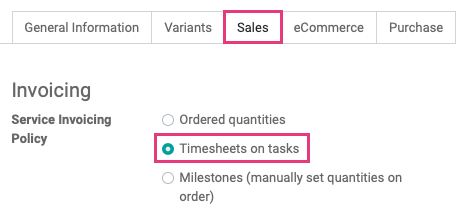
Invoicing Policy: Indicate here how you'd like to invoice the recorded time spent.
All recorded timesheets: Select this option to invoice the customer for all timesheet activity related to their service product.
Approved timesheets only: Select this option to invoice the customer for only those timesheets that have been approved by an officer or administrator.
Timesheet Control

Employee Reminder: Enable this option to activate a periodical email reminder for timesheet users. You can then select the frequency to send based on the last day of the week or month.
Manager Reminder: Enable this option to activate a periodical email reminder for timesheet managers. You can then select the frequency to send based on the last day of the week or month.
When you're finished configuring your Timesheets application, click Save.
Timesheets
Adding Hours Worked
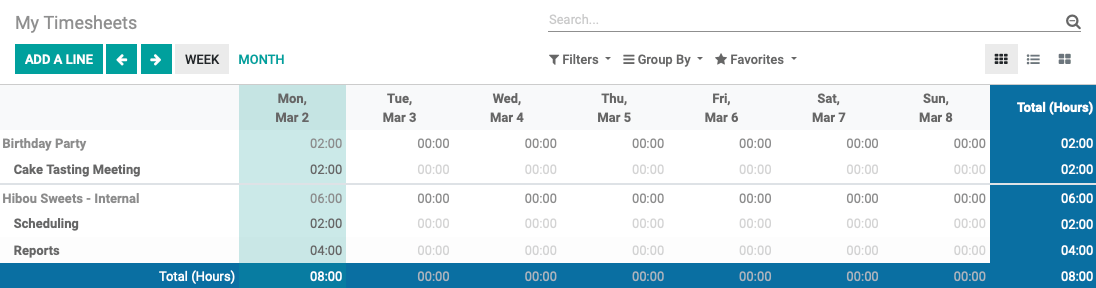
From Timesheet > My Timesheets you can add hours worked by clicking add a line. This will open a modal window with the following options:
Project: Select the project you're logging time to.
Task: If there is a specific task within this project you're working on, select that here.
Employee: This field will auto-populate with your name, but if you're adding hours for another employee, select their name here.
Date: This field will auto-populate with today's date. Change it if needed.
Time Spent: Enter the number of hours spent on his task or project.

When you're done, click Save. Add all time worked using this same method.
You'll then see your weekly schedule with projects and tasks on the y-axis and days of the week on the x-axis. Daily totals are listed underneath their corresponding weekday, and weekly totals are shown on the bottom right.
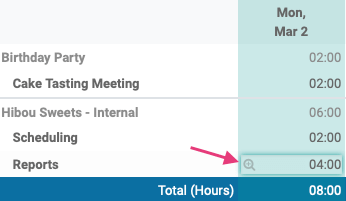
In general, you will want to add a description to the timesheet entry. Creating a timesheet from the ADD A LINE on the grid view does not allow you to enter a description, but will automatically add a description of “/“ because a Description is a required field on timesheet entries.
To add a description, hover over any entry and you'll see a small magnifying glass icon appear in grey. Click the magnifying glass to open a list view of your shifts. Alternately, you can click the list view and click directly into the row you'd like to edit.
Click into the description field for the appropriate entry and type in the description. Click SAVE when complete.

From this view, you can also add further entries by clicking the Create button. This opens a new line where you’ll type directly into the fields and SAVE when done or simply click away to save.

Validating
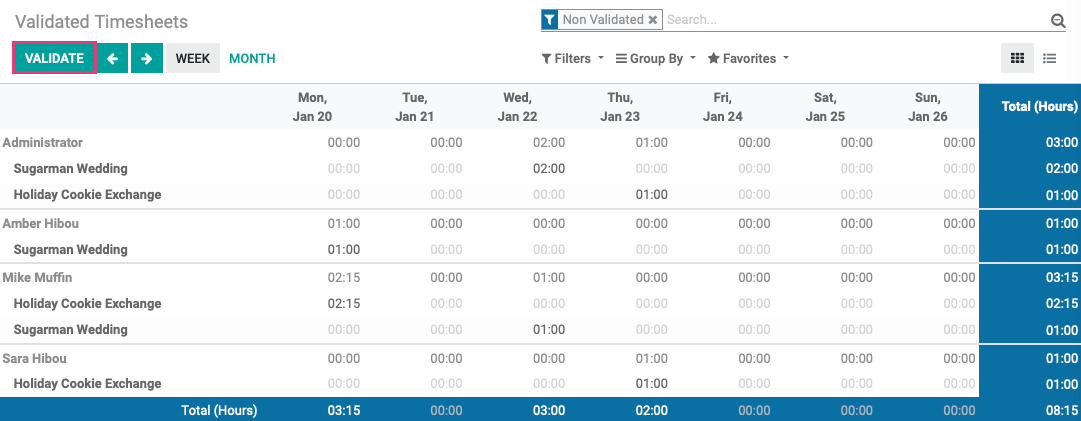
The To Validate menu is available to those with timesheet approval permissions. This menu gives the option to approve timesheets by week or by month via the To Validate > Last Week and To Validate > Last Month menu items.
Note: The default view on this page has a My Team filter. To view all non-validated timesheets, be sure to remove that filter.
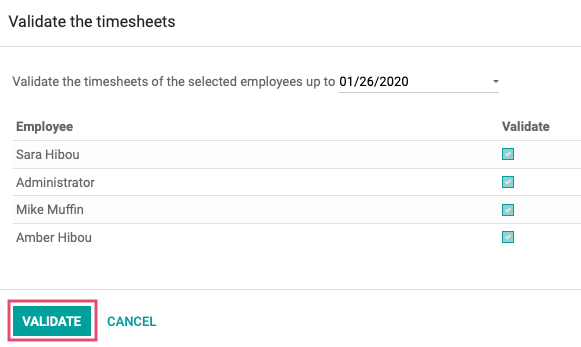
To begin the validation process, click Validate.
This brings up a modal window with the option to deselect timesheets that aren't ready for approval. When ready, click Validate.
 .
.
Reporting
Under Reporting there are several different views available to you.
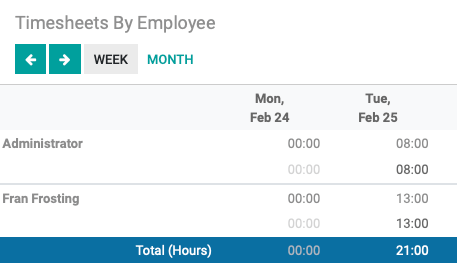
By Employee: Changes the timesheet grid to separate timesheets by employee on the y-axis.
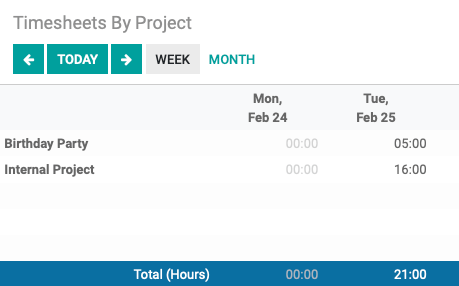
By Project: Changes the timesheet grid to separate timesheets by projects on the y-axis.
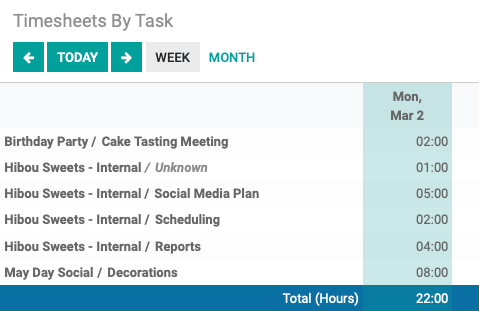
By Task: Changes the timesheet grid to separate timesheets by task on the y-axis.
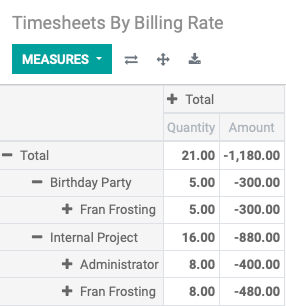
By Billing Rate: Changes the timesheet grid to a pivot table, as seen below.
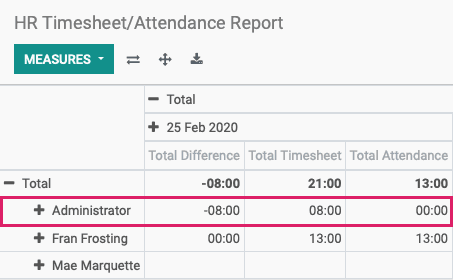
The final menu item is the Timesheet / Attendance report. This report will show discrepancies between the time the employee was clocked in versus timesheets they entered. In the following example, the administrator logged a timesheet for eight hours but was not clocked in for eight hours. As a result, the Total Difference shows -08:00.