Scheduling: Planning
Purpose
The purpose of this documentation is to go over the configuration and function of the Planning application in Odoo 14. This application is used to plan staffing coverage for necessary roles during your business hours.
Process
To get started, navigate to the Planning app.
App Settings
Once there, click Configuration > Settings.
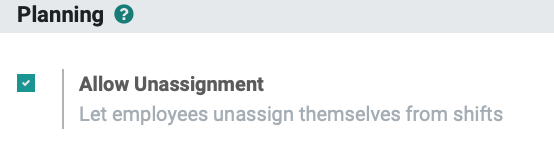
Allow Unassignment: When selected, employees will have the option to remove themselves from a scheduled shift in the case they are not available. You can enable this at your discretion.
If you've made changes, click Save.
Roles
Click Configuration > Roles to see all active roles within your company. These entries are useful when you need to have a specific number of each type of worker staffed at one time.
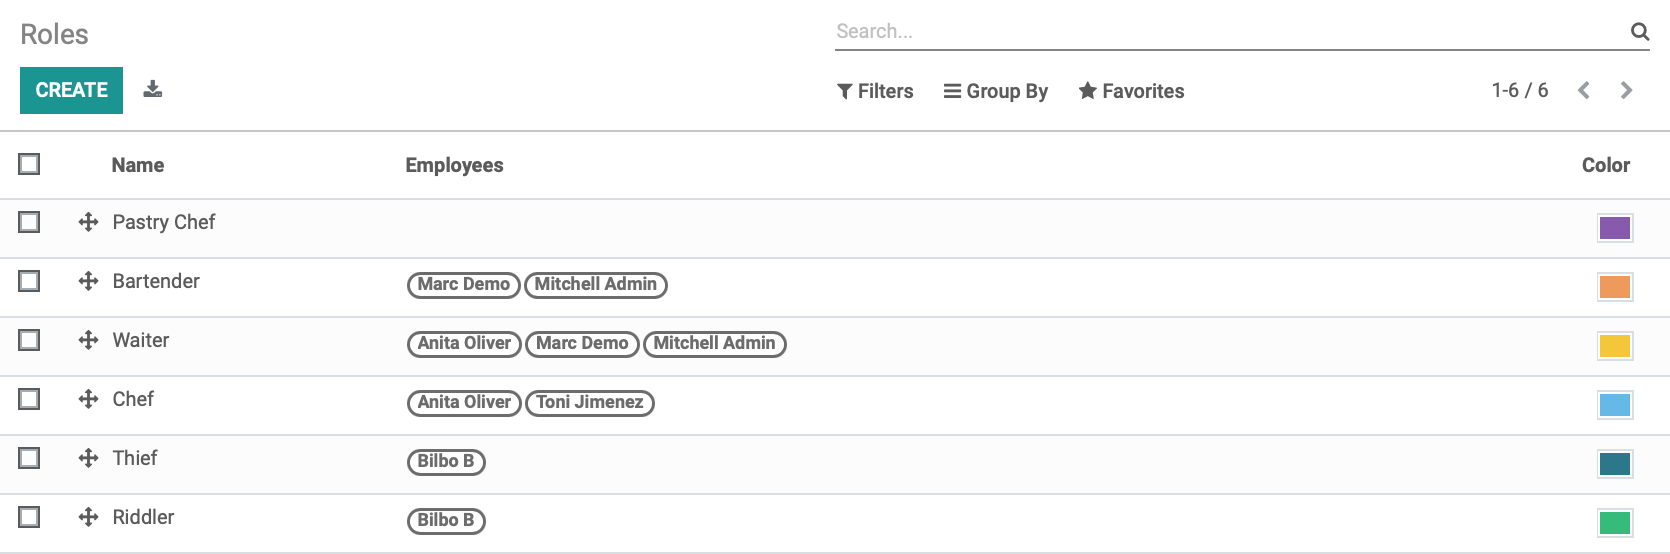
Click Create to add a new role. This opens a new line where you'll type in the name, and you have the option of selecting a color. These colors are useful when assessing your coverage at-a-glance.
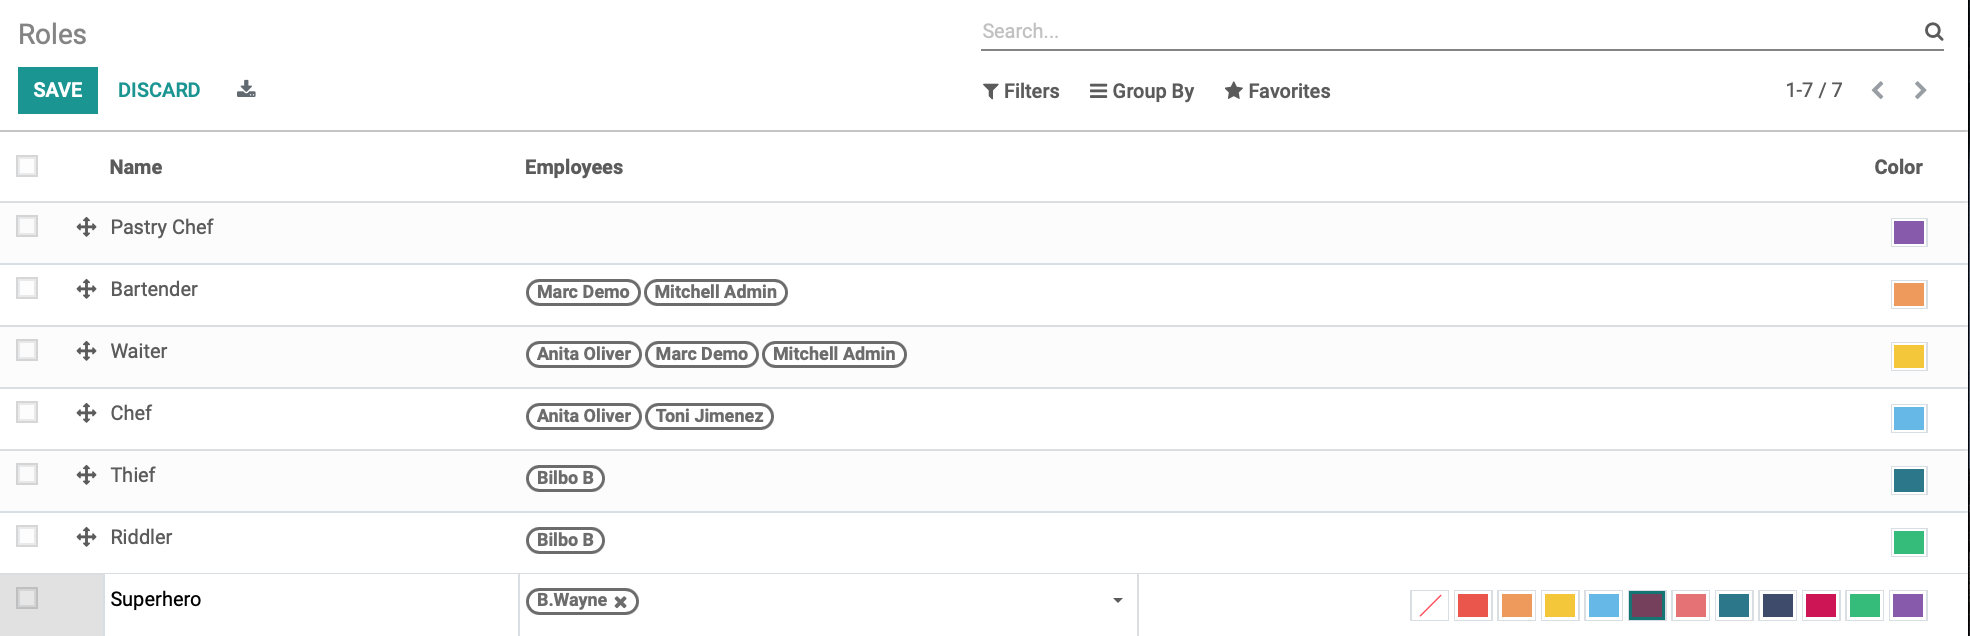
When you've added the roles you require, click Save.
Shift Templates
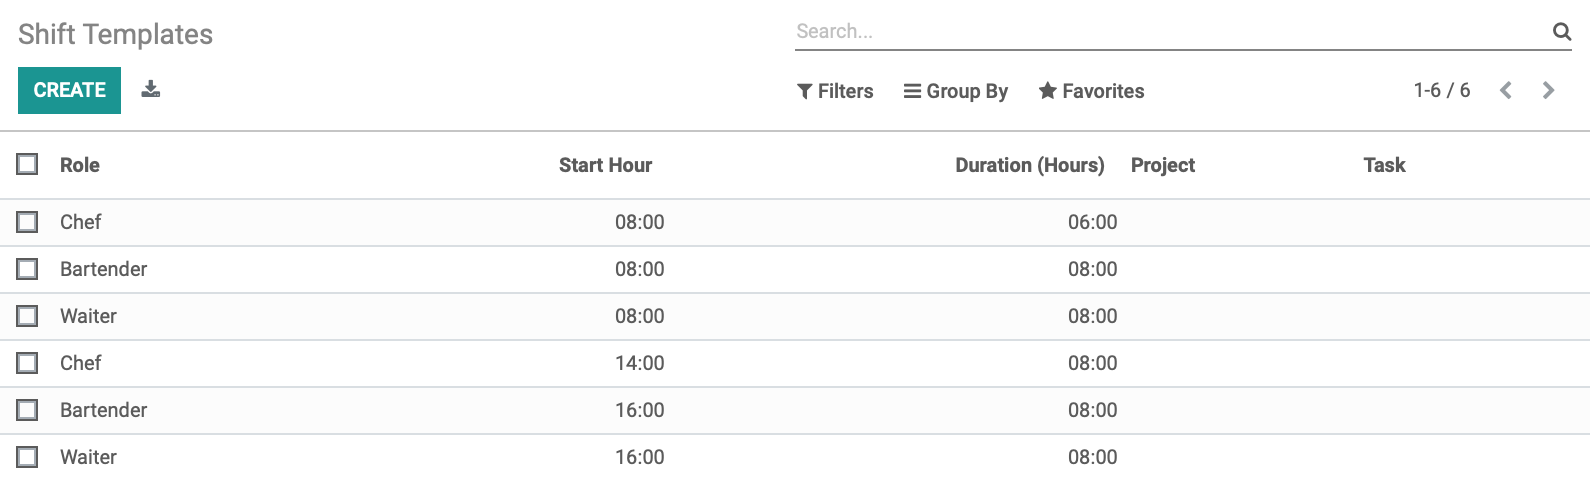
Click Configuration > Shift templates. This page displays available shift templates. These templates make it easy to schedule your employees with preconfigured starting hours and shift durations. These shift options will display when you create a shift on a schedule.
To add a shift template, click create. This opens a line where you'll enter the following details:
Role: Select the role this shift applies to from the drop-down menu.
Start Hour: Enter the time this shift begins using the 24-hour clock format (e.g. 6:00 PM = 18:00).
Duration (hours): Enter the duration of this shift, in hours.
Project: Set a project related to this shift if desired.
Task: Set a task related to this shift if desired.
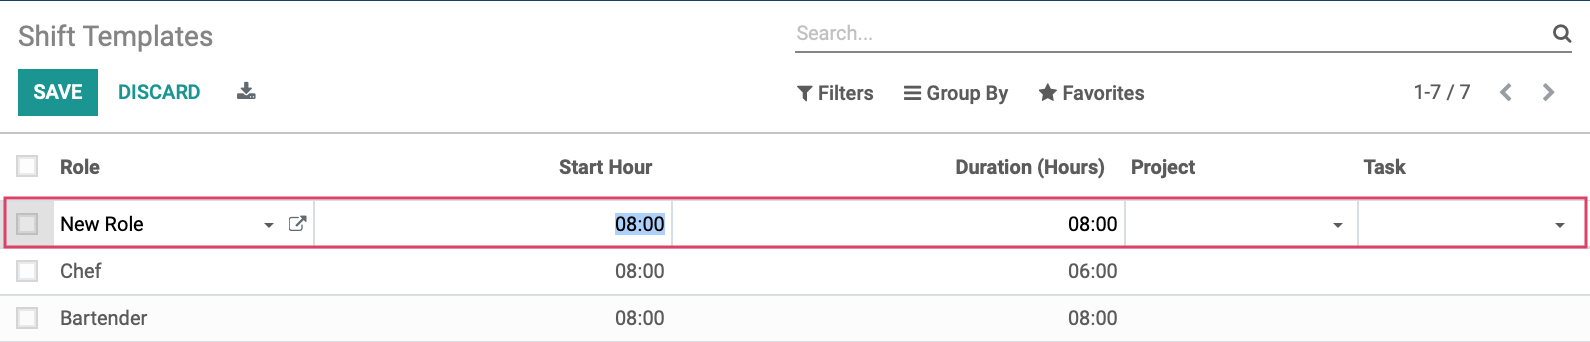
When you've added the necessary shift templates, click Save.
Schedule Formats
There are three formats to choose from when viewing and planning schedules. The one you choose depends on your personal preference and business configuration.
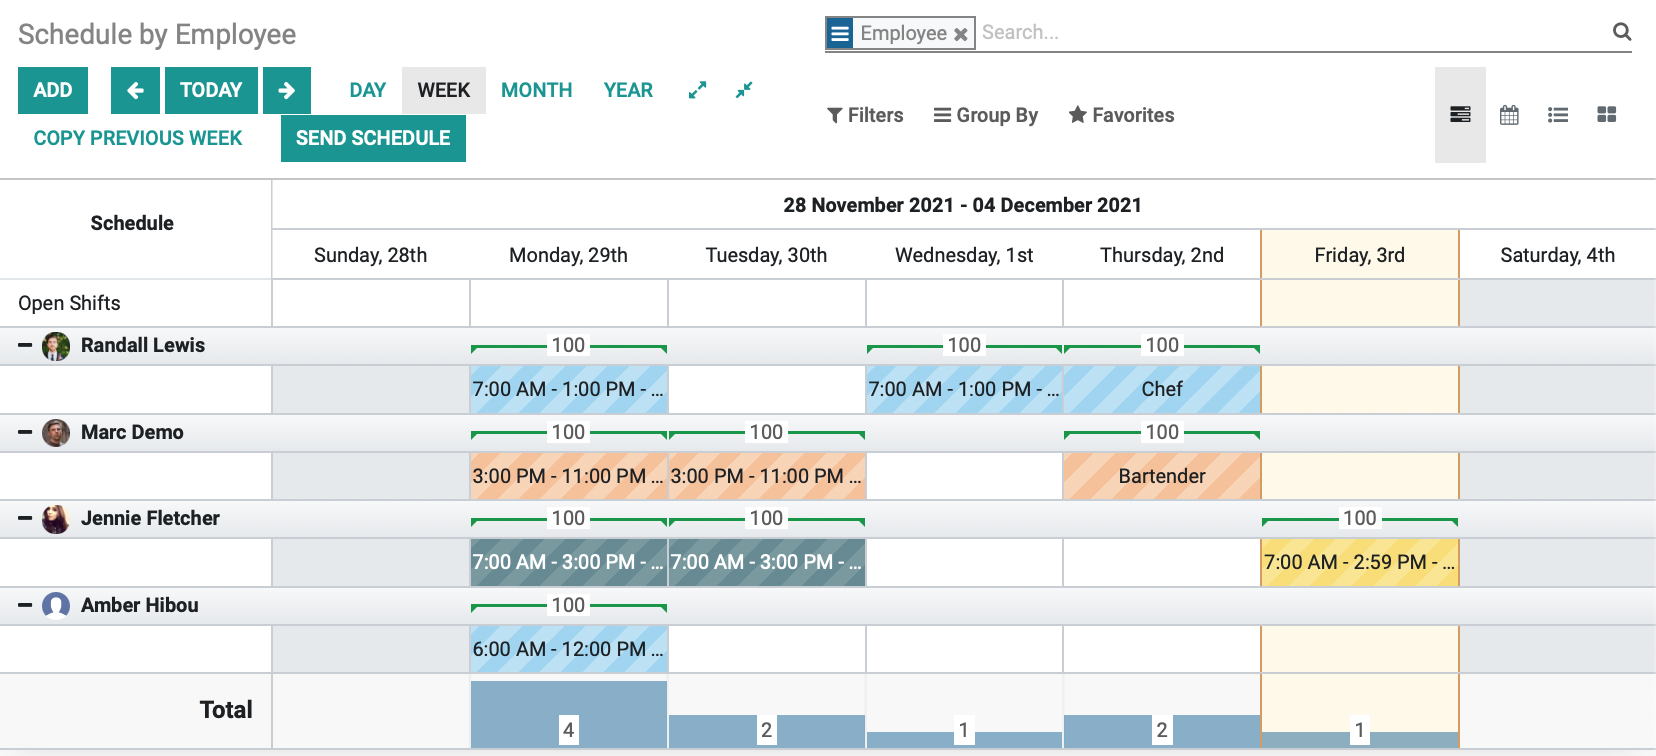
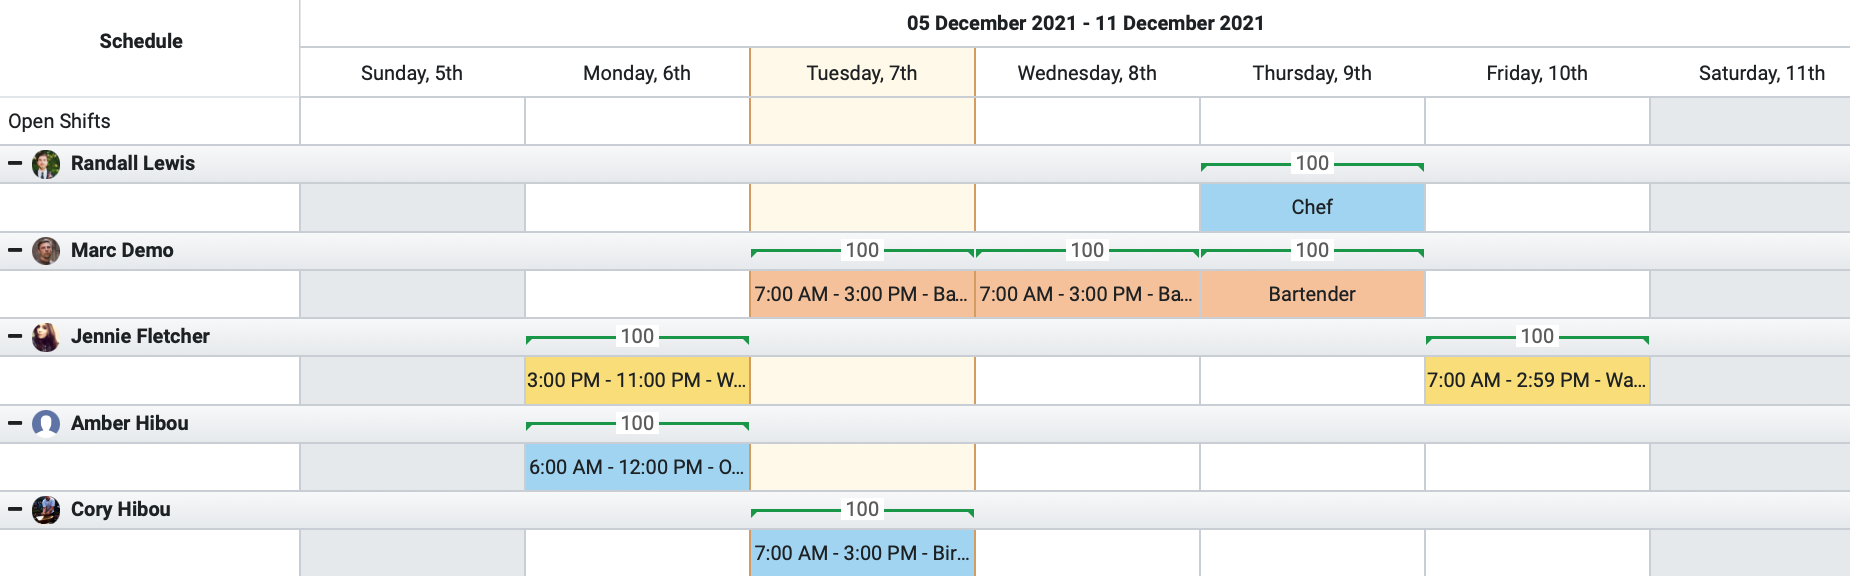
Schedule > By Employee: This view displays employees down the left and dates across the top. The hours are shown on the individual shifts, and roles are indicated by color.
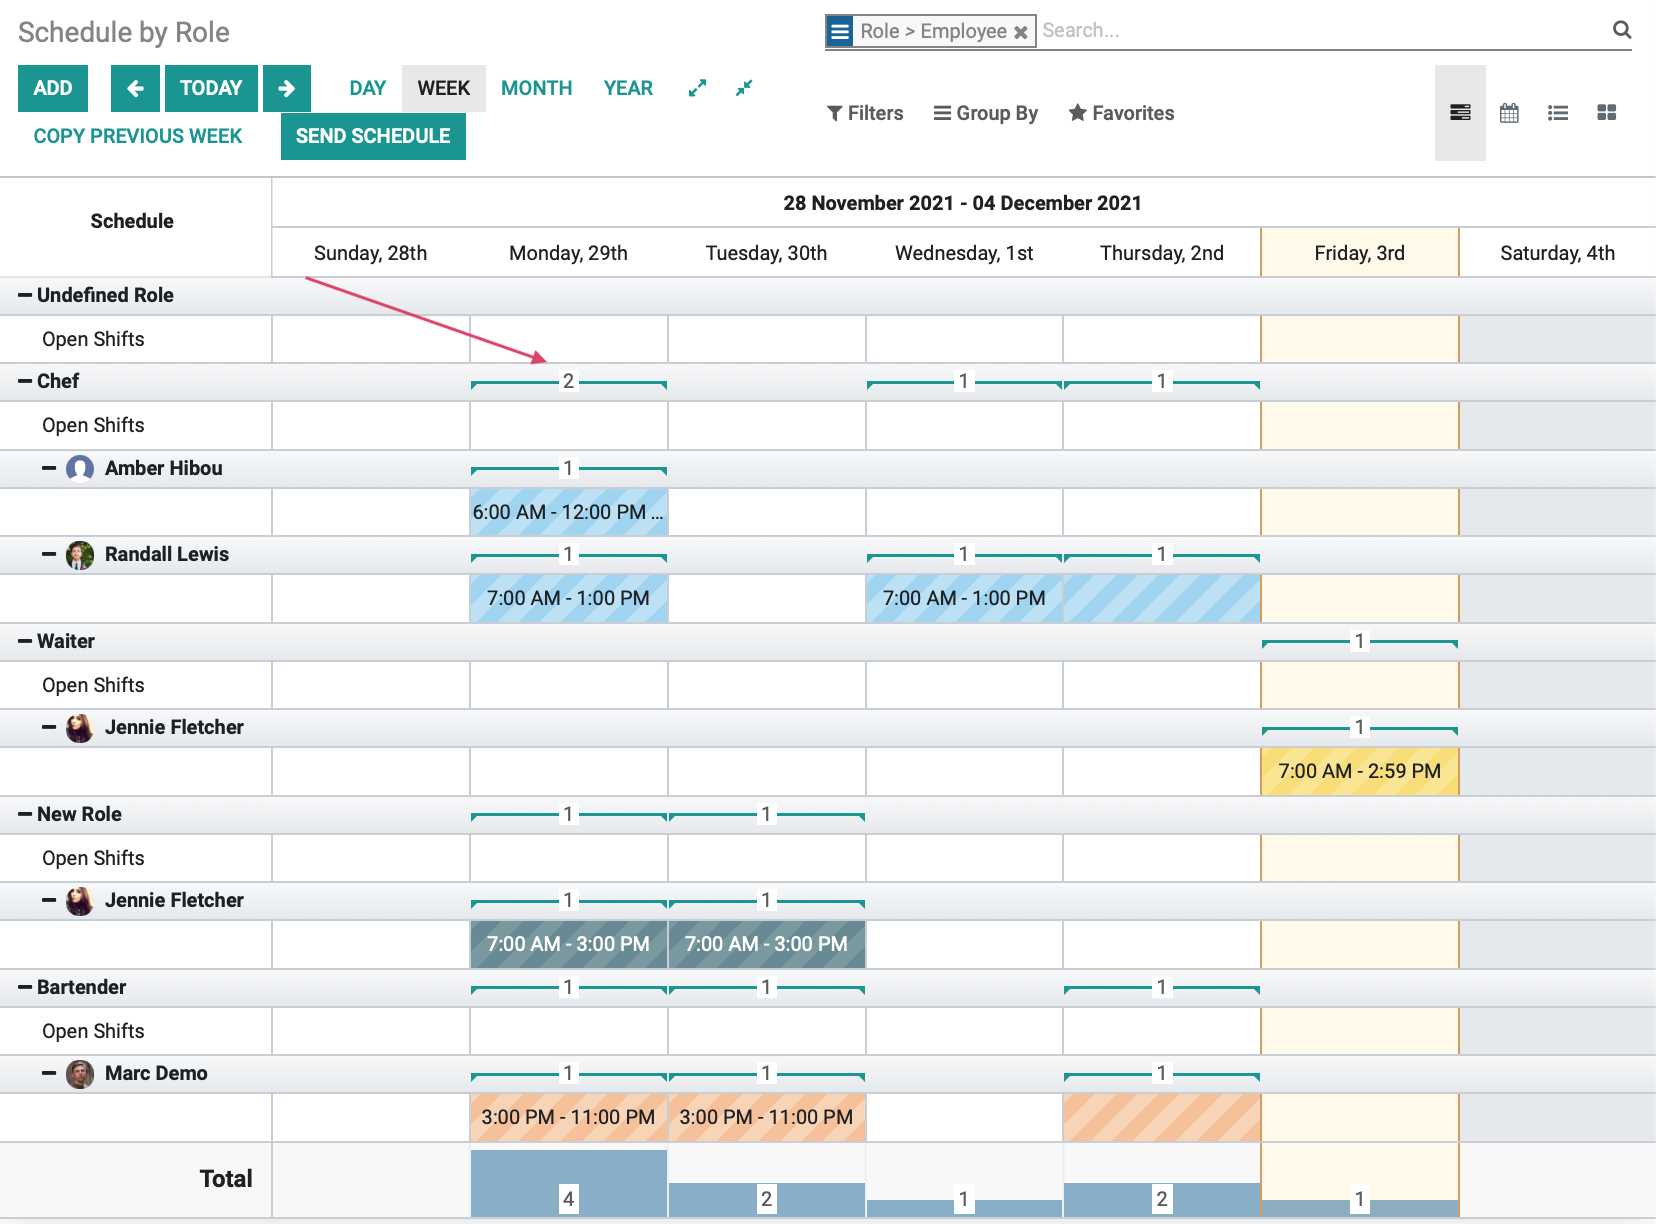
Schedule > By Role: This view displays employees by role and employee down the left, and dates across the top. You'll notice that each date entry shows the number of workers schedule at that timeslot for the same role.
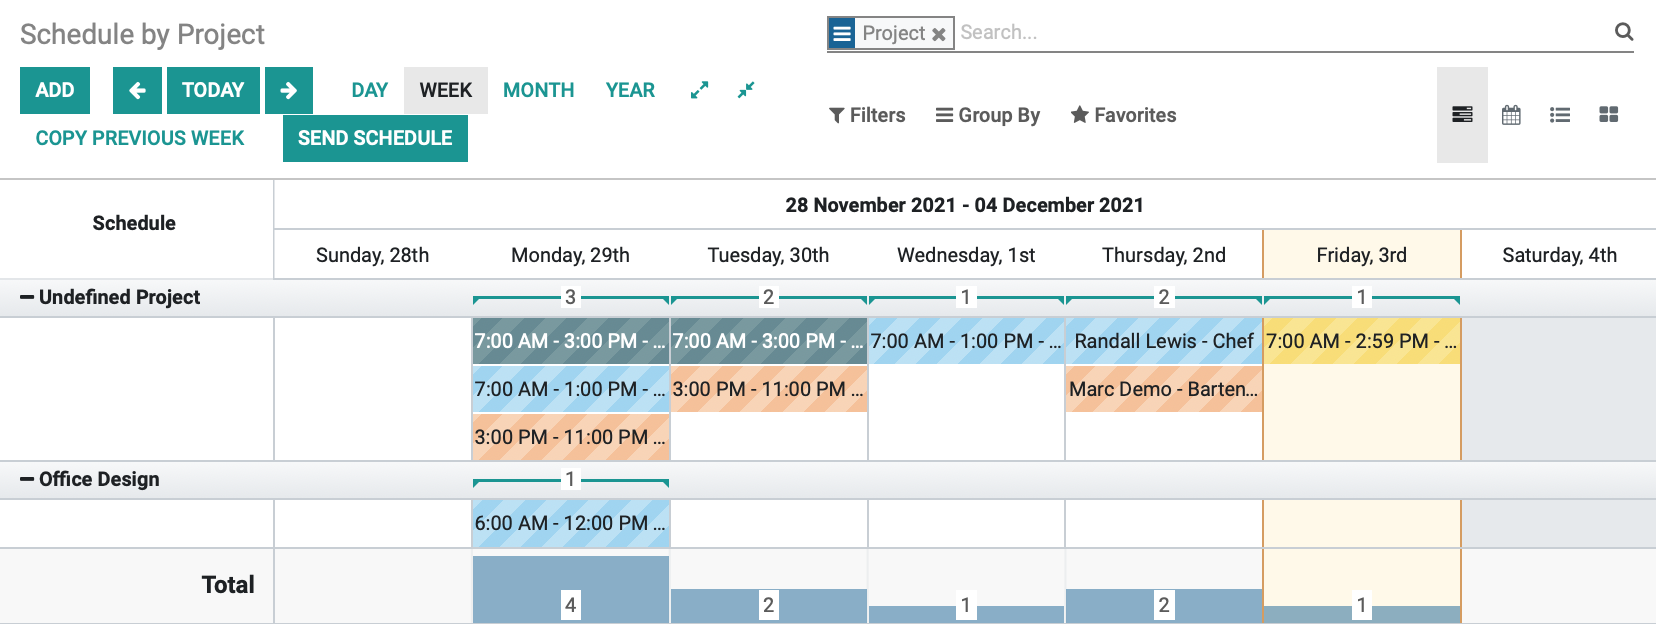
Schedule > By Project: This view displays projects down the left and dates across the top. This is useful to ensure, at a glance, that your coverage is sufficient for specific projects. Shifts that aren't related to a project will be labeled Undefined Project.
Good to Know!
Assign a Shift to a Project
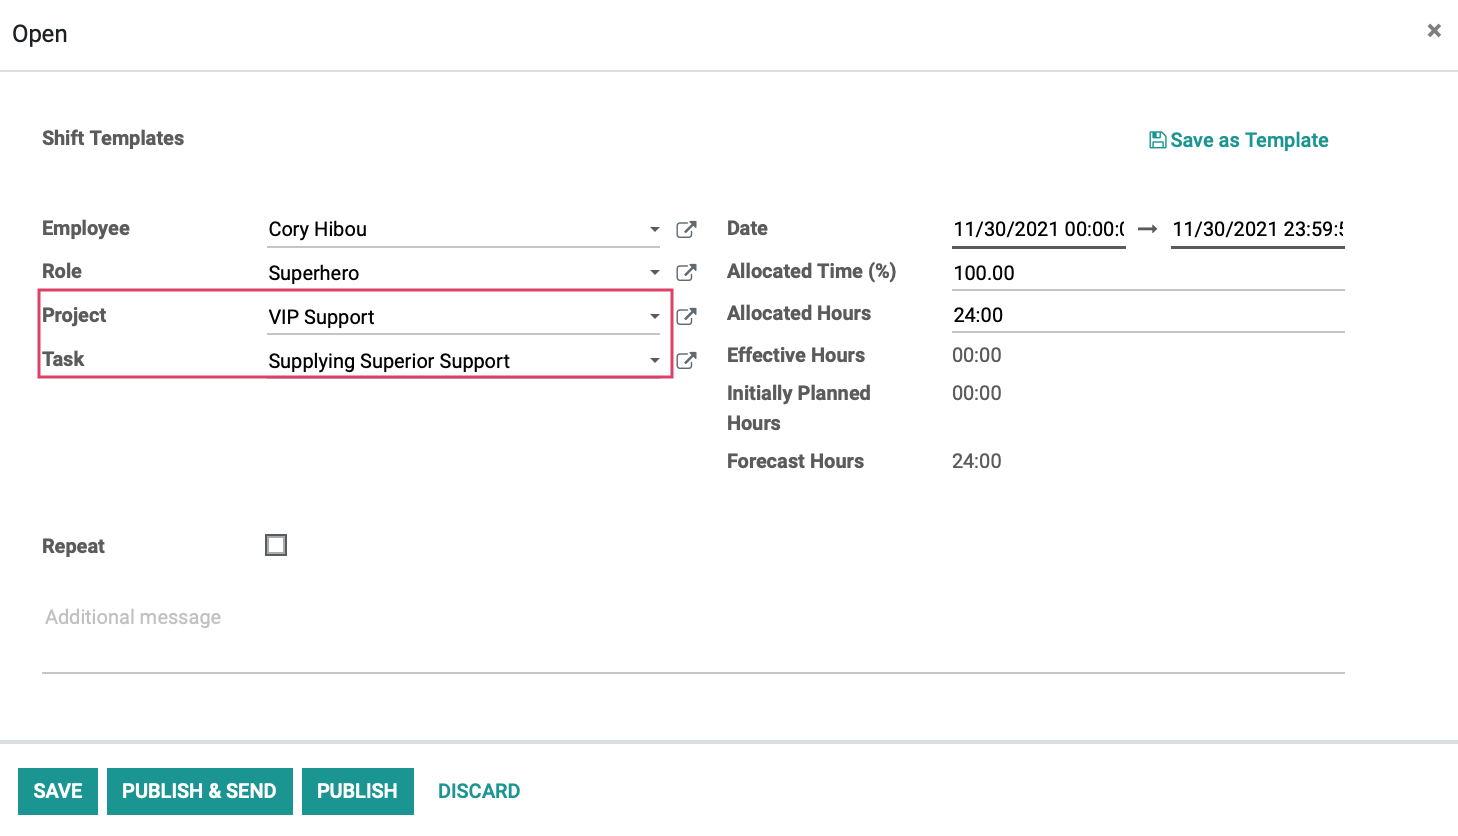
To assign a shift to a project, be sure you're in the Scheduling > By Project menu, then click the shift to assign from the list or calendar. This opens the details of that shift.
Project: In this field, select the project that houses the task you'll be assigning the shift to. This will open a Task field.
Task: In this field, select or create the task to assign this shift to.
When you're done, click Save.
Creating a Schedule
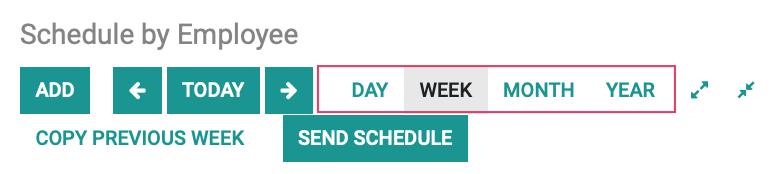
For this example, we'll select Schedule > By Employee as it's the most common view. You can adapt these instructions to either of the other two options, as needed.
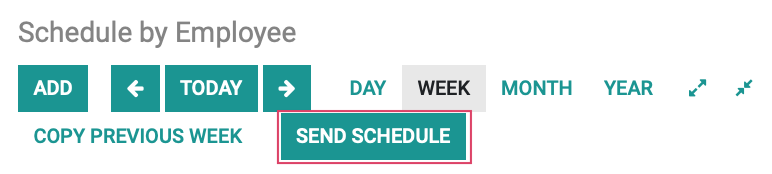
We'll be planning by Week, but you have the option to view by Day or Month using the buttons at the top.
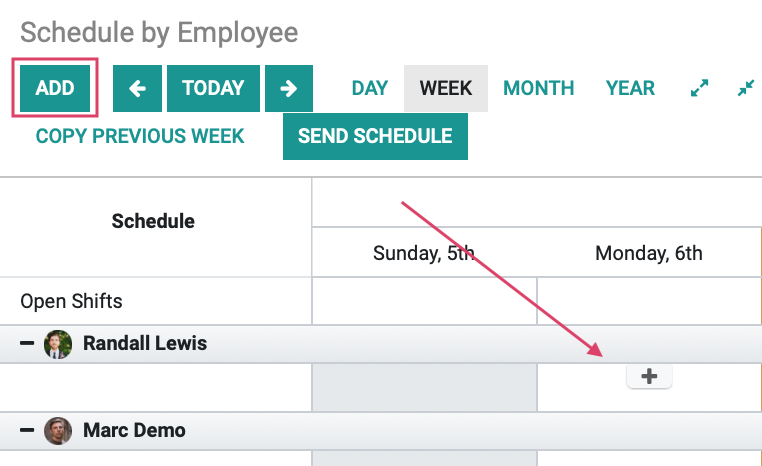
To add a new shift, click Add, or hover the timeslot to schedule to and click the icon. Using the icon will populate associated fields and save a little time.
You'll then complete the shift form according to the following guidelines.
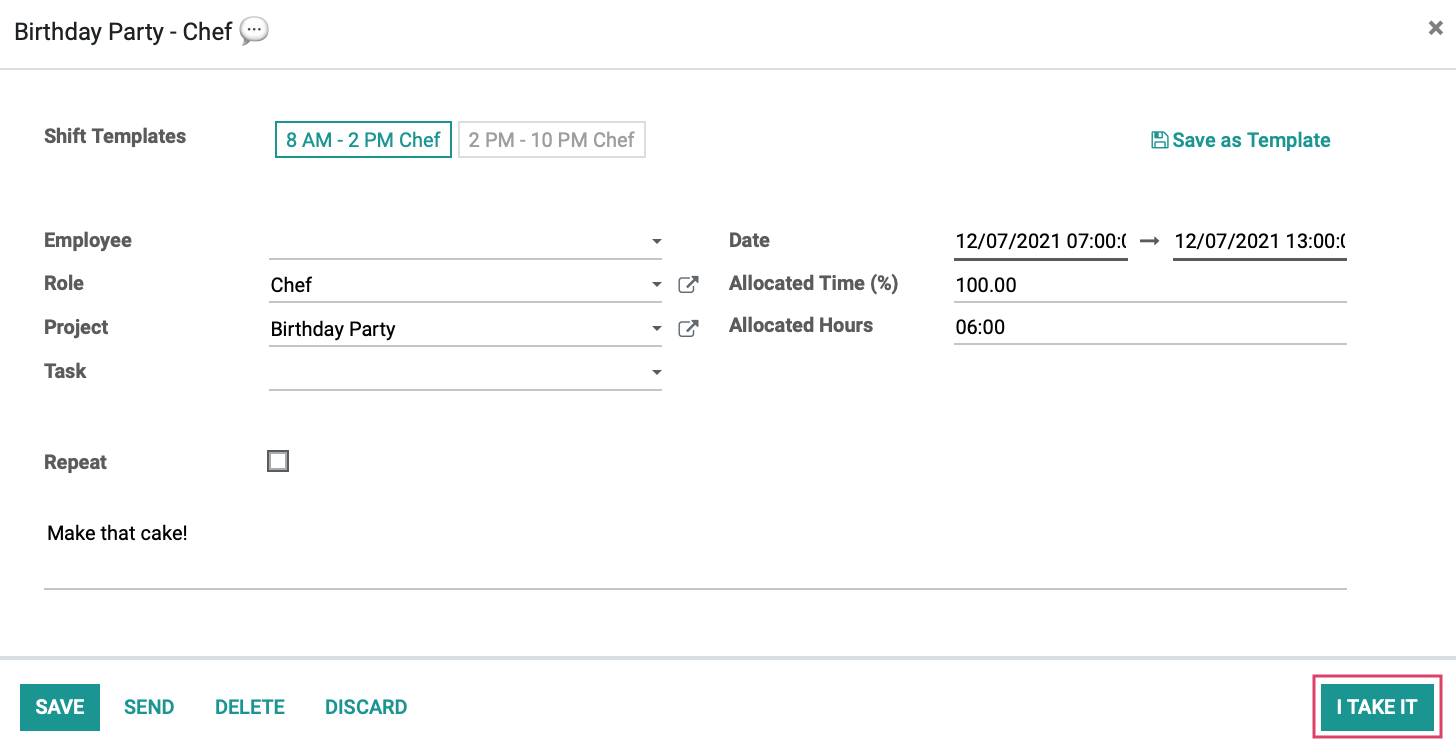
Shift Templates: Optionally, you may select a preconfigured template for this role. Doing so will populate other fields in the form: Role, Start Date, End Date, Allocated Hours.
Employee: Select the employee to assign this shift to. To schedule this as an Open Shift that employees can claim, leave this field empty.
Role: Select the role to be covered during this shift. Changing the role will also filter the Planning Templates above.
Project: If this shift should be attributed, or billed, to a specific project, select it here.
Task: Assign the shift to a task if necessary or desired.
Start Date: Enter the date and time this shift will begin.
End date: Enter the date and time this shift will end.
Allocated Time: Enter the percentage of time the employee should be working during this shift. Keep in mind that this number should not be 100% as that would not allow for breaks. For a 30 minute break on an 8-hour shift, this would be 93.75%. (actual hours x 100 / scheduled hours).
Allocated Hours: Enter the number of hours the employee should be working during this shift.
Repeat: Select this option to repeat this shift for this employee and role. When selected, you'll have additional options.
Repeat Every: Indicate the number of weeks to skip before repeating.
Duration
Forever: Select this to repeat this shift indefinitely.
Until: Select this to choose a date when the repetition will stop.
Note: Enter details regarding this shift. Shifts with shift notes will display the chat icon when hovered on the schedule.

Save as Template: If you've created a new configuration you'd like to use in the future, select this option.
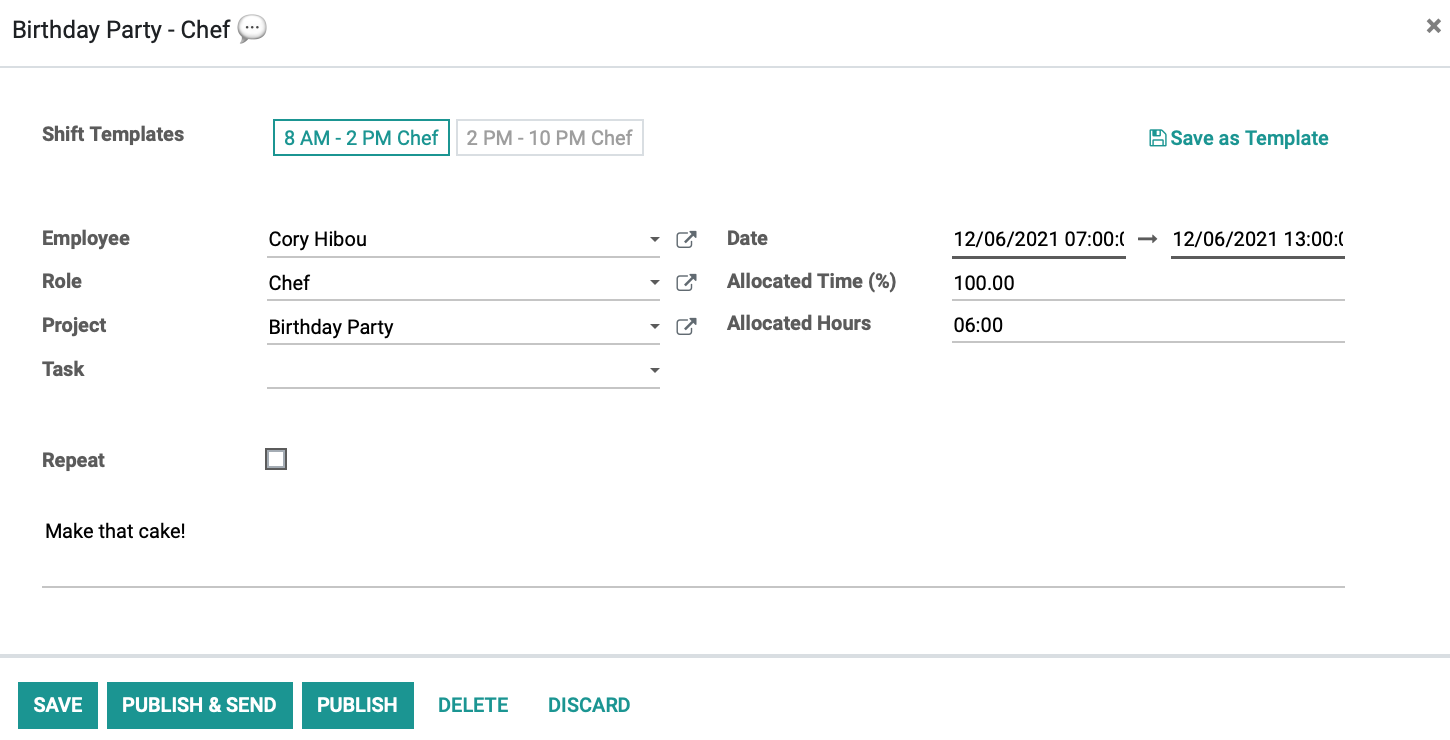
When you're done, click Save.
You also have the options to Publish, which means you're committing this to the schedule, or to Publish & Send, which means you're committing it to the schedule and notifying the affected Employee by email.
Good to Know!
You may notice an I am Unavailable option on the bottom-right of the form. This shouldn't be clicked when creating a shift. This is meant for the employee who the shift was scheduled to unassign themselves if they're not available.
Refer to the configuration section at the beginning of this document for instructions on enabling/disabling the Allow Unassignment feature.
You can now see this shift on the schedule.
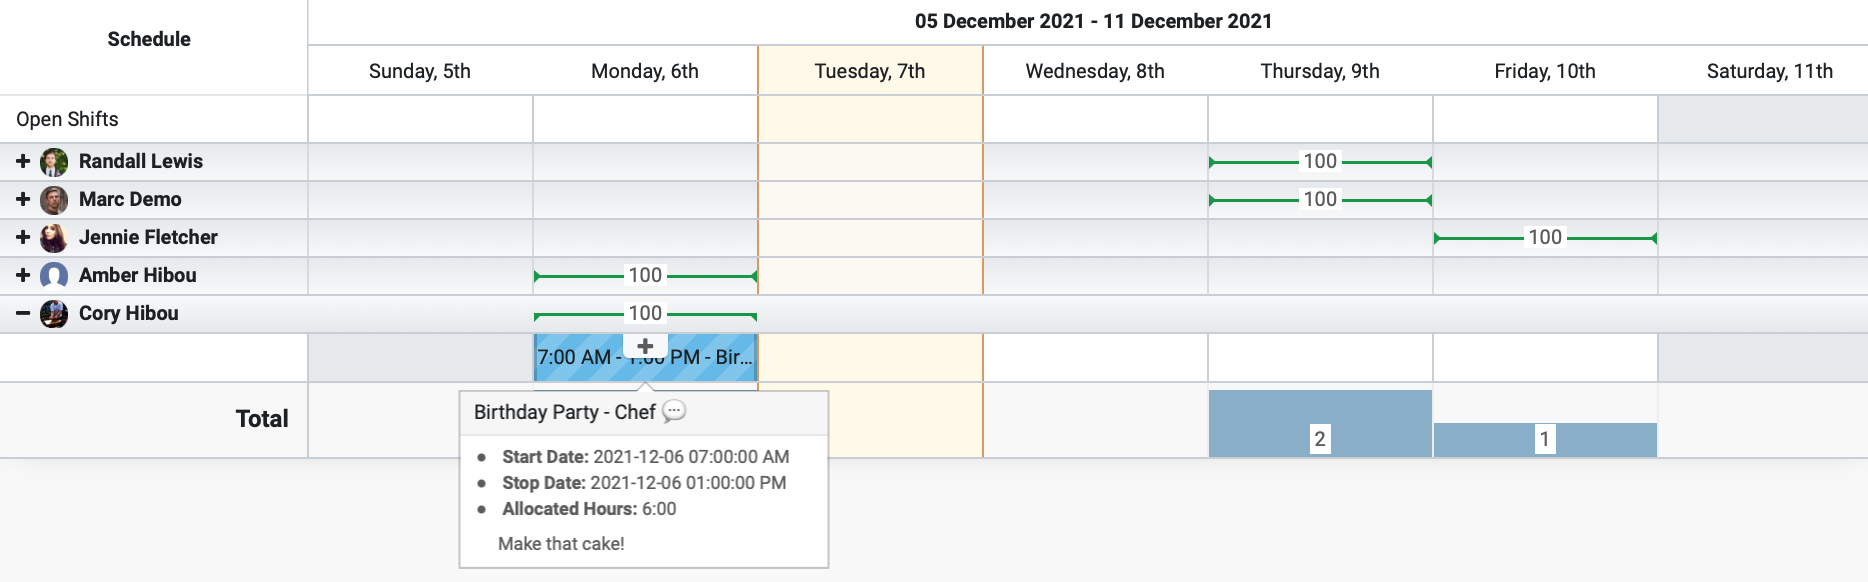
A few helpful things to note:
Color: The shift is shown in the color selected for the associated role (Chef). We configured this in the Configuration > Roles menu.
Unpublished: The shift displays with a striped pattern. This is because it's not yet published. As soon as we commit this schedule, it will turn solid.
Shift Details: When you hover the shift, you can see the details entered at-a-glance.
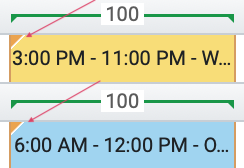
Editing: You can easily edit where this shift is, according to your x and y axes by clicking and dragging. If you reposition it a published shift, it will go back into the draft state (striped).
Changing Duration: You can easily change the duration of the shift by clicking and dragging it from either end. You'll see an arrow icon appear when you're positioned correctly. This is most commonly done in Day view.
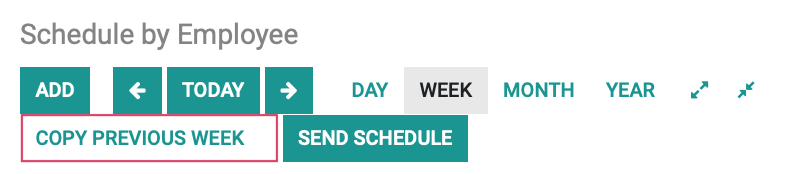
Copy Previous Week
If the scheduling from one week will simply repeat to the next week, you can click Copy Previous Week to quickly populate the current week, including open shifts. This is only available on the Week view.
Publish or Publish & Send Schedule
When the schedule has been prepared and you're ready to publish, click Send Schedule. This button will give you the option to publish without sending, as well.
You'll then see a modal window with the following details:
Start Date: This is the first day of the proposed schedule.
Stop Date: This is the last day of the proposed schedule.
Includes Open Shifts: If you'd like to omit the Open Shifts from displaying on the schedule you send to employees, disable this option.
Employees: List the Employees to send the Email to.
Notes: Enter any notes relating to this schedule for your employees to see.
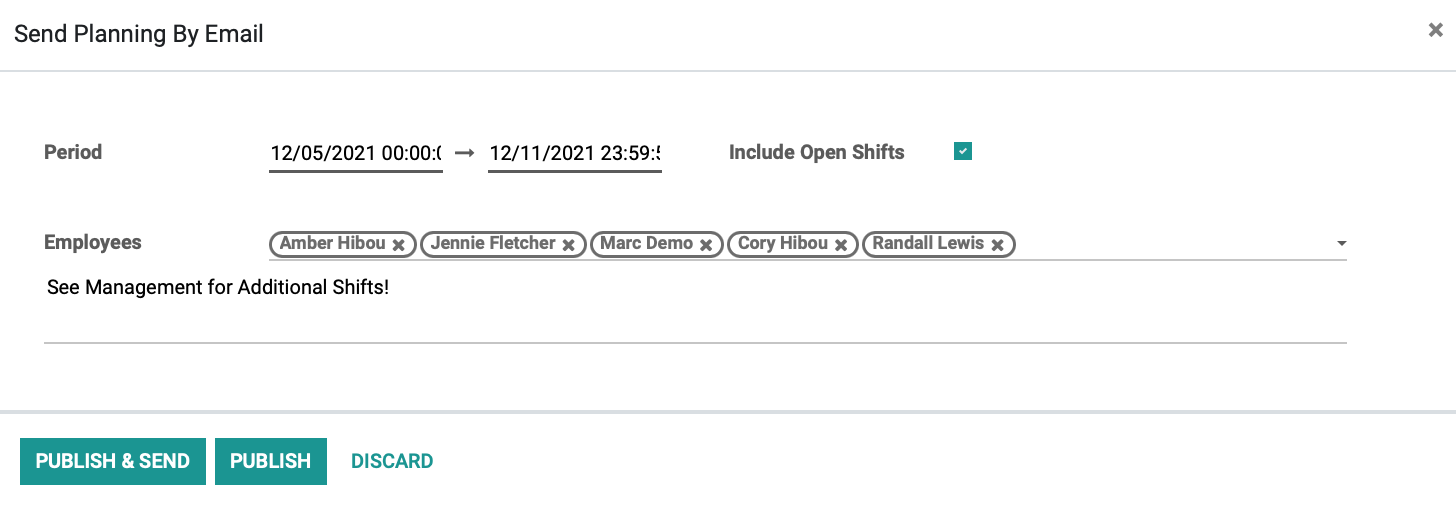
When you're ready, you can click Publish & Send to commit the schedule and notify employees. If you're not ready to notify employees just yet but would like to commit, click Publish.
Once published, all shifts are shown as a solid color.
Good to Know!
You can still move and adjust these shifts after you've published. Modified shifts are indicated with an orange label in the corner.
Once published, the label will disappear.
Employee View & Options
When you publish and send a schedule or individual shift, each affected employee will receive an email. The following is a sample email for a full scheduled shift.
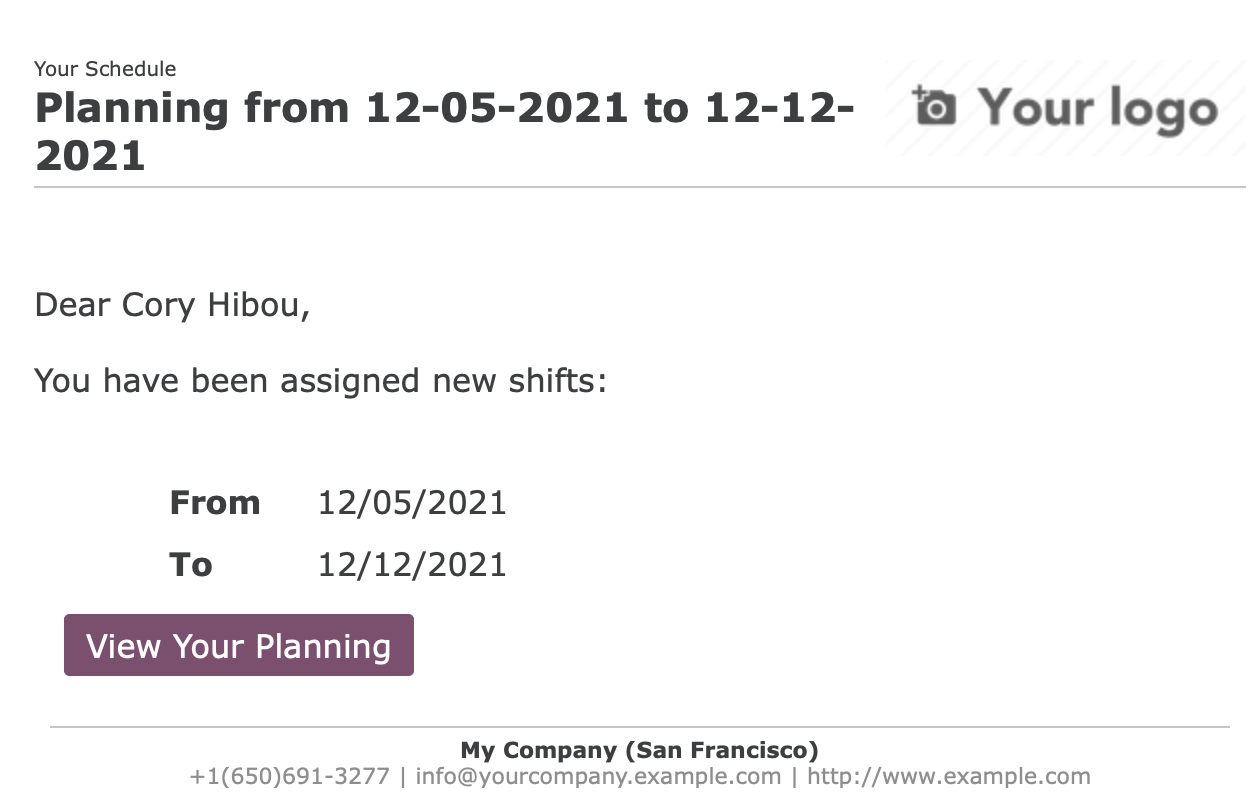
To see the schedule, the employee will click View Your Planning. This directs them to your Odoo website's Planning page. Here they can view the details of each shift by clicking the entry.
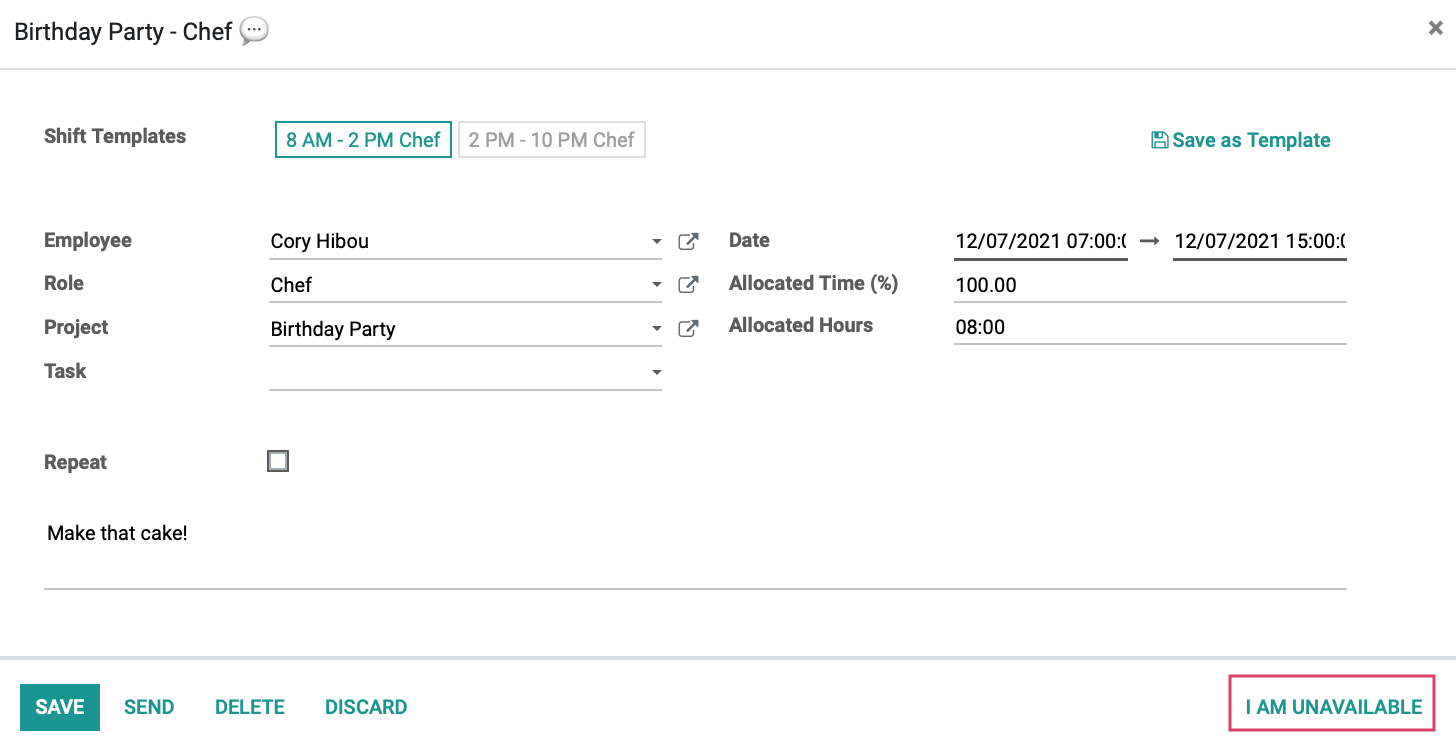
If Allow Unassignment is enabled in your configuration, they'll have the option to remove themselves from this shift with the I Am Unavailable button. Doing so will move this shift to Open where others may claim it.
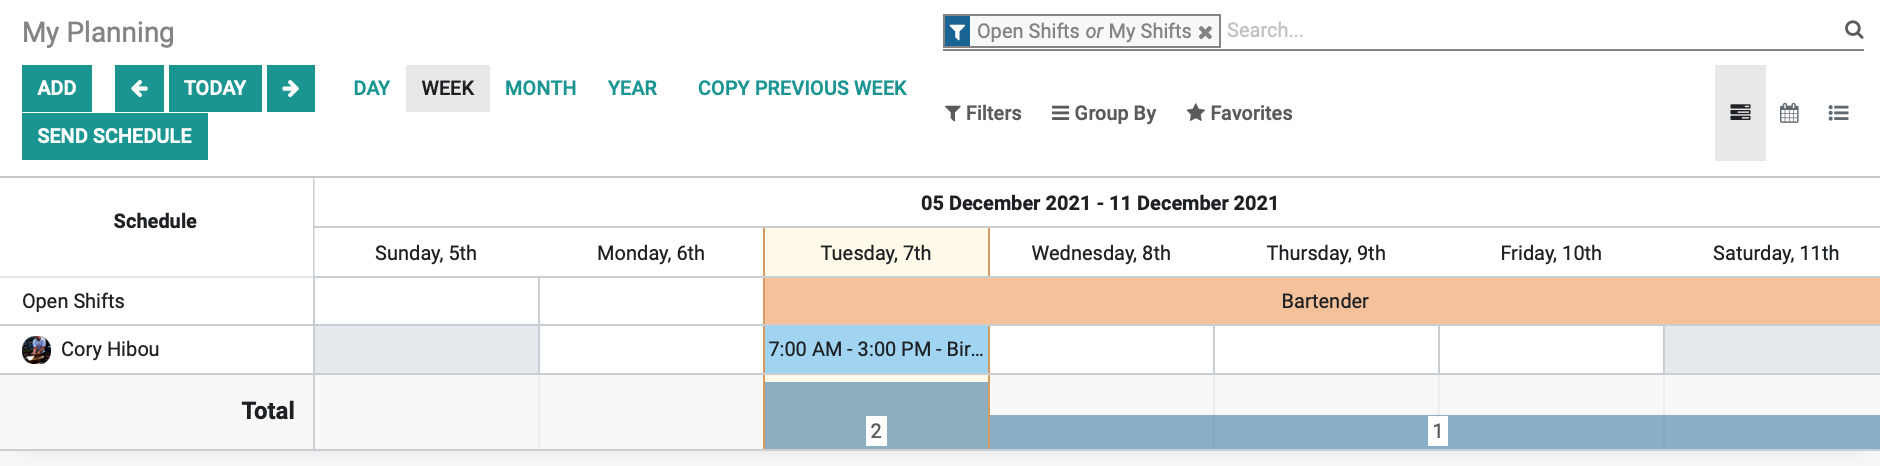
From the overview page, employees can view their shifts, and grab open shifts by clicking on the shift to open the shift's details, and then clicking i take it. Doing so will move that shift to the employee's calendar.