Scheduling: Timesheets
Purpose
Timesheets are relevant to both Payroll and Attendances. The Odoo Timesheets app allows you to track and compare the amount of time spent on a project versus its value and the efficiency of the employees.
Process
To get started, navigate to the Timesheets application.
Configuring Timesheets
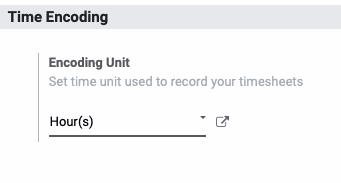
Under Configuration > Settings, determine the unit of time used to record timesheet entries, either days or hours.
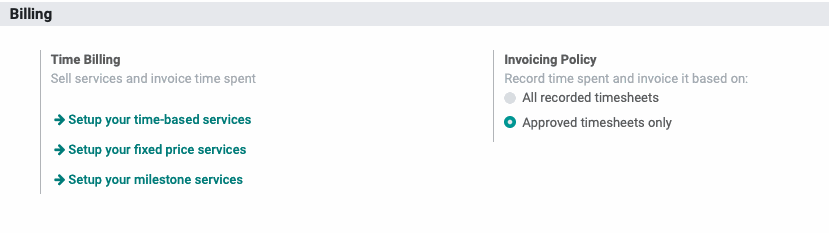
Time Billing
Setting up the following services will allow you to bill time to customers using timesheets in projects, and invoice them based on a fixed price (Ordered Quantity) or based on timesheets on tasks (Delivered Quantity).
- Setup your time-based services: Create a product whose price is your hourly billable rate, to invoice based on timesheets on tasks.
Setup Your Fixed Price Services: Create a product whose price is a fixed project rate to invoice based on ordered quantities.
Setup Your Milestone Services : Create a product that is used to invoice when a task or series of tasks are completed within a project by manually setting the delivered quantities on the order.
Under Invoicing Policy, decide whether all timesheets will be billed, or only approved timesheets.
For more information on billing customers based on timesheets in projects, please see our Projects documentation.
Timesheet Control
If desired, turning these features on will allow you to send reminder emails to Employees and Managers after a specified time to review their timesheets and take care of any necessary changes.

Leaves
The last configuration option will allow you to change the desired internal project and task used to track work leaves.
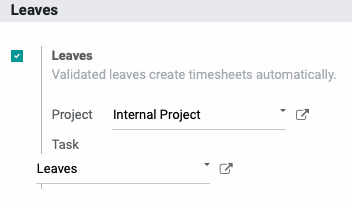
For more information on leaves, please see our Leaves documentation. Once your options are configured, click Save.
Timesheets
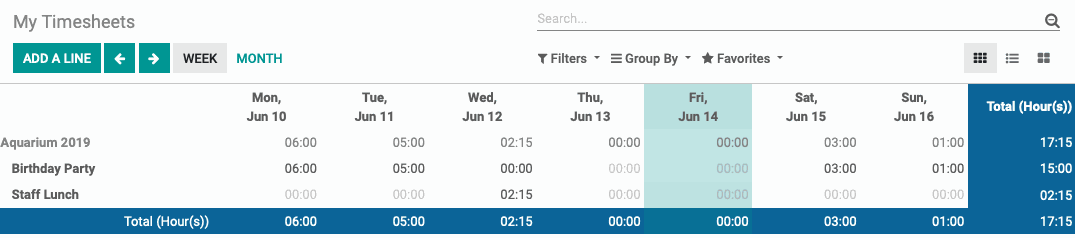
When you first open the Timesheets app, you will be presented with a grid view of your own timesheets for the week to date. The tasks the sheets are logged in will be broken down on the left, and in the far right, there will be a running total. Daily sums will be displayed below the day columns.
Using the Add a Line button at the top will allow you to quickly add a timesheet entry. A modal window will pop up asking you for the project and task for which you'd like to create a new line.

In general, you will want to add a description to the timesheet entry.
Creating a timesheet from the Add a Line on the grid view does not allow you to enter a description, but will automatically add a description of “/“ because a Description is a required field on timesheet entries. In order to write a more appropriate description for the timesheet, mouse over the empty block of time for each line item, and you will see a small magnifying glass icon appear in grey.
Click on the magnifying glass, and you will be redirected to the list of timesheet records for that task. You can click on any timesheet line to edit the line’s description.
Click Create to add a new one, and the record can be added directly in the list view. Click Save when Complete.


Reporting
In the navigation menu under Reporting, there are several different views available to you.
By Employee: Changes the timesheet grid to separate timesheets by employee on the y axis.
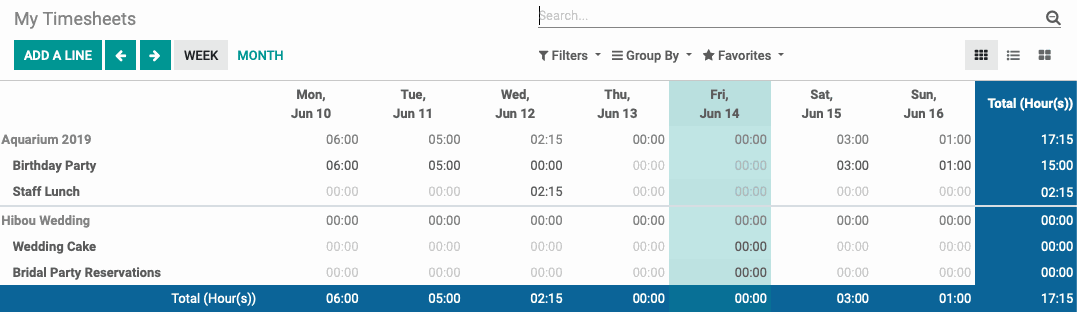
By Project: Changes the timesheet grid to separate timesheets by projects on the y axis.
By Task: Changes the timesheet grid to separate timesheets by task on the y axis.
By Billing Rate: Changes the timesheet grid to a pivot table, as seen below.
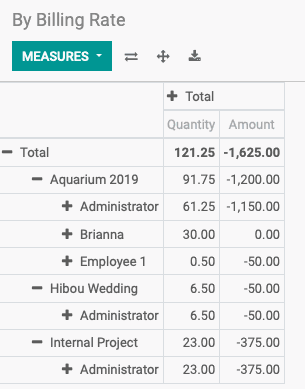
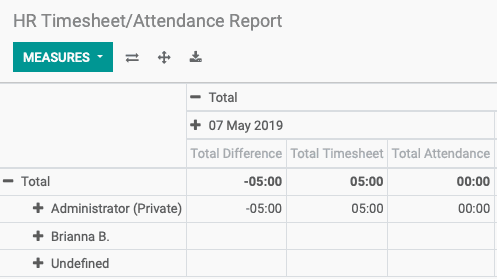
Also available is the Timesheet / Attendance report, which allows you to see discrepancies between the time the employee was clocked in and timesheets they entered. In the below example, the administrator logged a timesheet for five hours but was not clocked in at the time, leading to an equivalent difference.