Marketing: Email Marketing: Configuration
Purpose
The purpose of this document is to walk you through the processes of configuring the Email Marketing application in Odoo 13.
Process
To get started, navigate to the Email Marketing app.

Configuration
Once there, go to CONFIGURATION > SETTINGS.
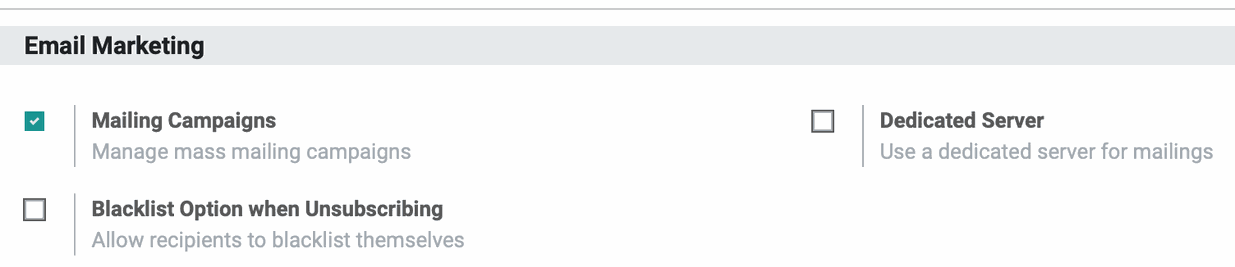
Under the settings screen you’ll see the available options:
Mailing Campaigns: This feature is geared toward campaigns that are composed of several different emails. With this feature enabled, you're able to manage your email campaigns using a kanban view to move each campaign through to the next stage at a certain point in its lifecycle. This also gives you additional options for your email campaigns like A/B split testing.
Blacklist Option when Unsubscribing: This allows recipients of your emails to not only unsubscribe their email from your list, but to also add their email to the blacklist which will block all mass email campaigns from being sent to them. They will still receive all emails sent out by Odoo in regards to orders or other inquiries that they initiate with your company.
Emails on the blacklist that are also your customers will receive a visual indicator that they are on the blacklist.
Dedicated Server: If you have a designated mail server that you would like to send mailings from, you can specify that here. Once you select this option, you can choose from the list of configured email servers on your database.
We will not be covering setting up a mail server in this article, if you need help configuring a mail server for your mailings, contact Hibou Support for assistance.
Once you have your options selected, click the Save button.