Field Service: Configuration: Projects
Purpose
This document covers the creation and management of Projects in the Field Service application of Odoo 15.
Debug Mode
One or more fields outlined in this document will not display unless you’re in Developer (Debug) Mode.
Process
To get started, navigate to the Field Service app.

Once there, go to Configuration > Projects. Here you'll see a list of existing Field Service projects. To add a new project, click Create.
This opens the Projects form where you'll enter the following information:
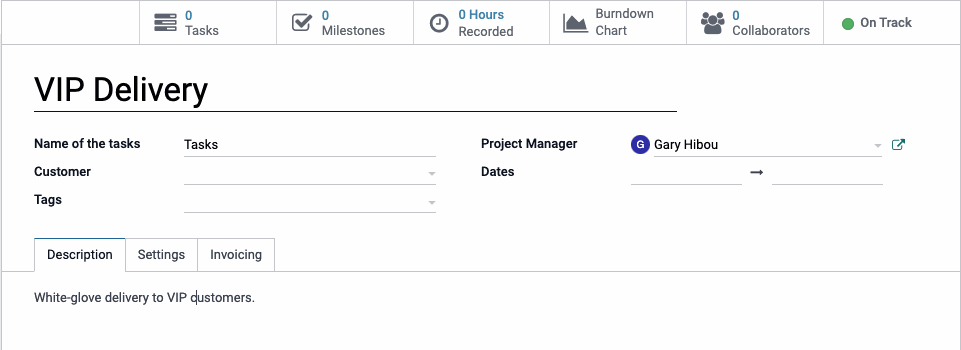
Project Name: Enter a project name.
Name of the tasks: The defaults to "Tasks" But you can customize the name, as needed.
Project Manager: Select the employee who will be managing this project.
Customer: If this project is for a specific customer, select them here.
Dates: Type or use the calendar to select the planned start and end dates for the project.
Tags: Add tags if needed as a helpful tool in organizing your projects.
In the Description tab, enter a brief description to describe the tasks in this project.
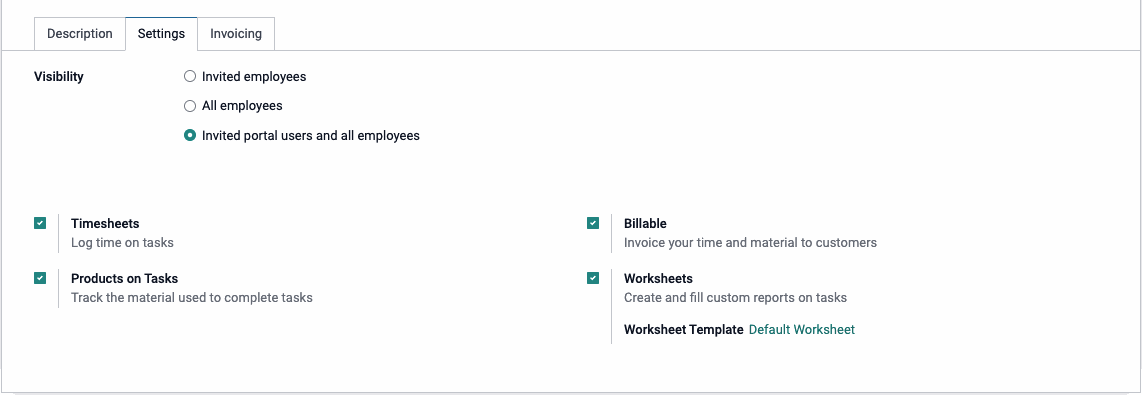
Under the SETTINGS tab:
Note: Options that appear on this tab will vary based on the apps installed on your database and configurations within those apps.
Visibility: Select who should be allowed to see this project and its tasks.
Invited employees: When selected, you'll be able to select individual employees that can access this project.
All employees: Any employee in Odoo can view this project.
Invited portal users and all employees: When selected, the project is visible to all employees and specific portal users.
Create tasks by sending an email to: Enter a prefix for an email alias. All emails sent to this address will be added to the chatter of this project.
Analytic Account: If analytic accounting is enabled, select the analytic account for the task.
Timesheets: Enable to log time spent on tasks.
Billable: Enable this to invoice your time and material for this task to customers.
Products on Tasks: When enabled, you're able to track products used to complete tasks.
Worksheets: When enabled in settings, you can enable the use of worksheets on tasks in this project. Select or create a Worksheet Template to apply, by default.
Under the Invoicing tab, set a product against which you wish to bill for services.

If you have Project Description module installed, you'll see a notes tab. Here, you can enter any applicable notes for this project.

When you're ready, click Save.
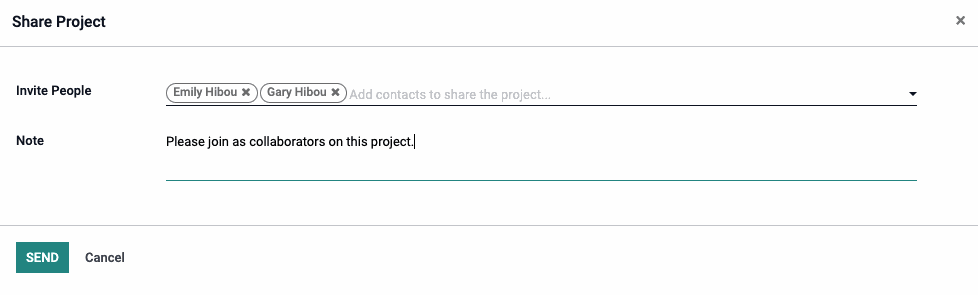
Once you have it saved, if you have chosen the "Visibility" option of "Invited portal users and all employees", you will see options to invite them at the top of the window called SHARE READONLY and SHARE EDITABLE . Clicking either one will bring up a modal window where you can add individual portal users. Odoo will attempt to send an invitation via e-mail. Click SEND when ready.
If the contact does not have an e-mail, you will be brought to their contact record to complete that detail.
Good to Know!
Field Service Project Smart Buttons
Depending on your configuration, there are smart buttons you can use to quickly access different aspects of the Field Service project.
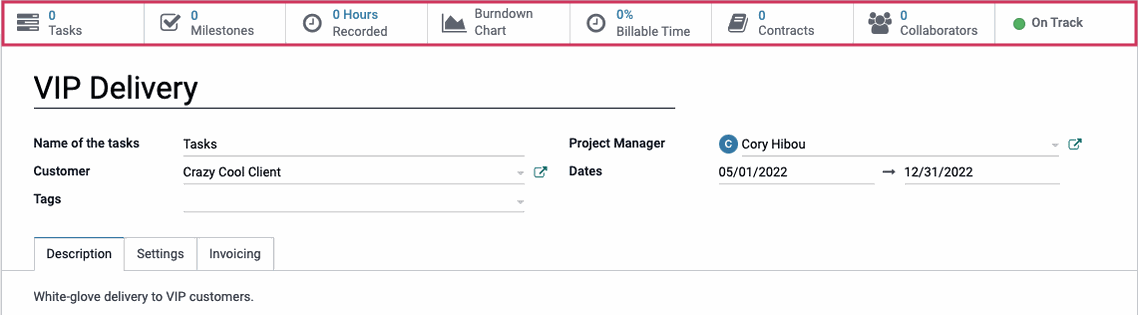
Some common examples are:
Tasks: All tasks created for this project.
MILESTONES: The list of targets to hit with deadlines that can be used to track progress.
HOURS RECORDED: Hours logged for tasks in this project.