Field Service: Field Service Tasks: Field Service Map
Purpose
This document covers how to use the Map in the Field Service application of Odoo 16.
Process
Open the Settings app.
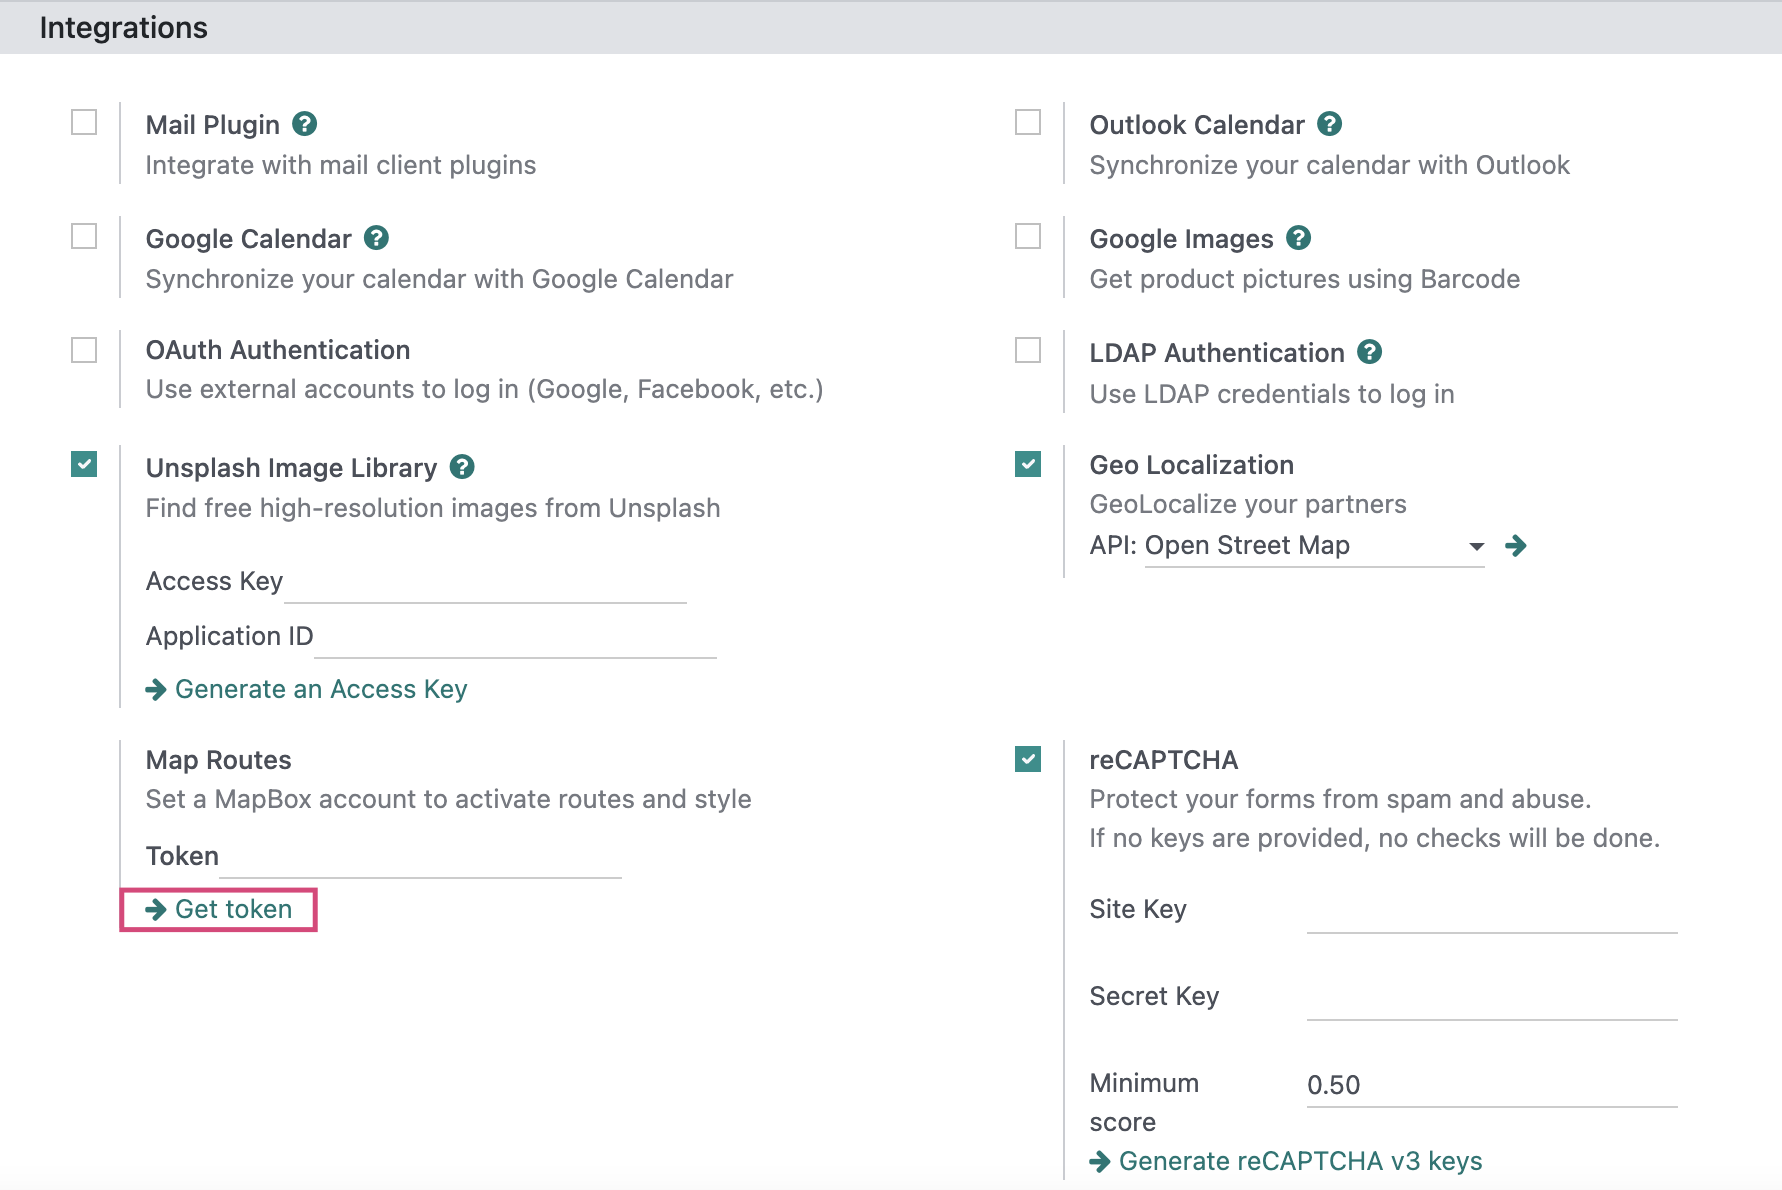
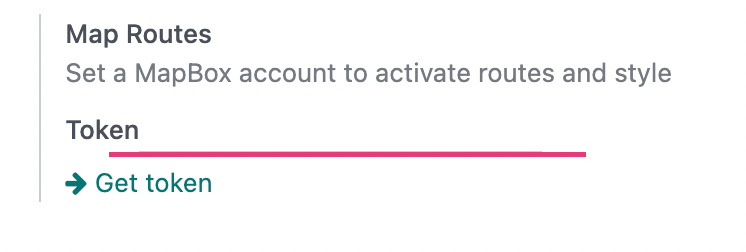
In the Integrations section, click Get Token under the Map Routes field.
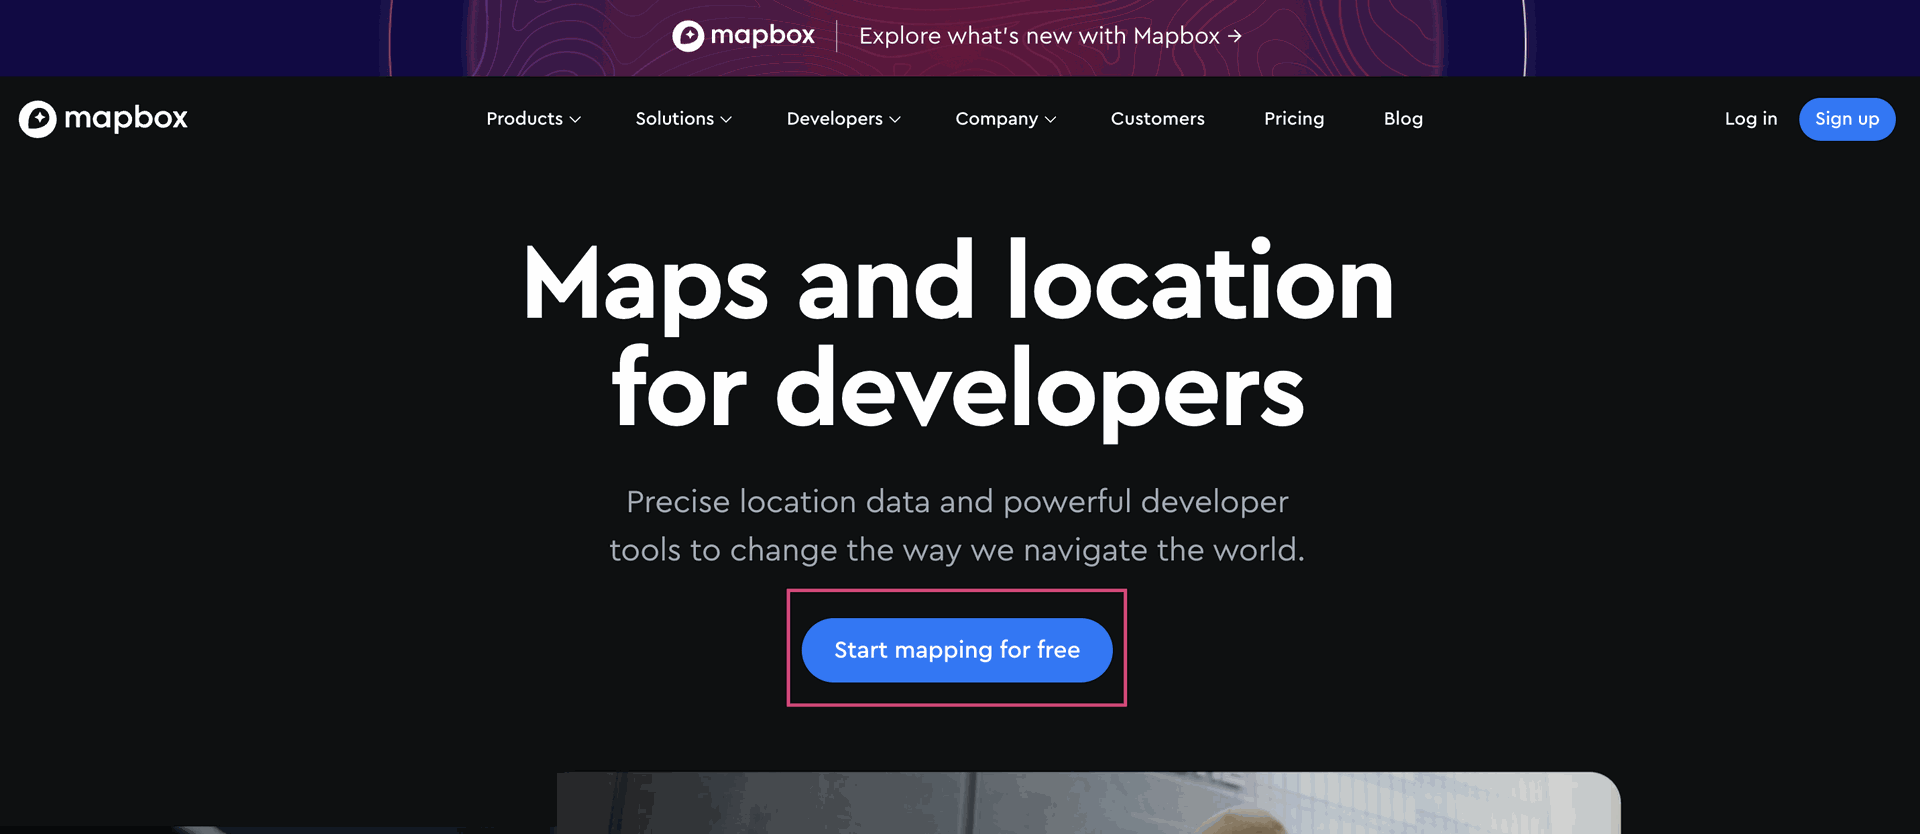
This takes you to the MapBox home page in a new window. Once there, click Start Mapping for Free.
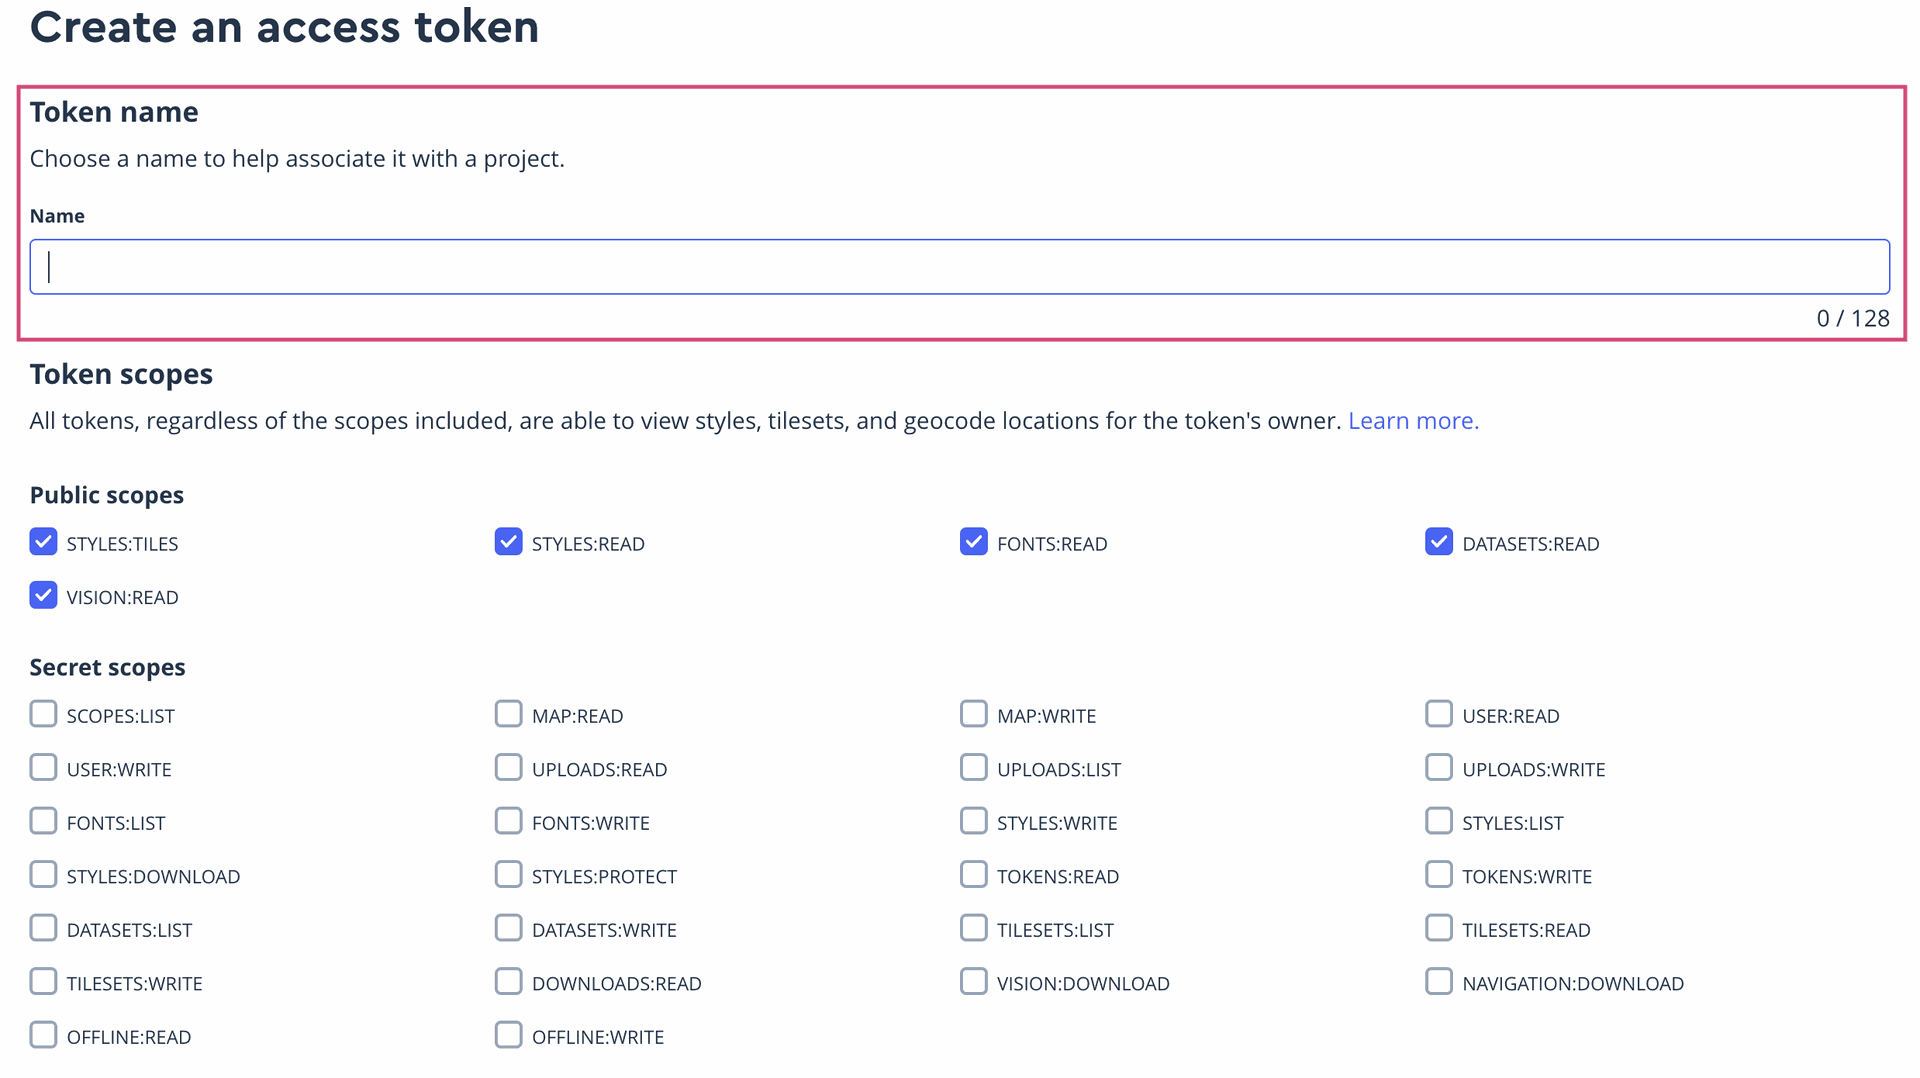
Complete the form on the next page to create an account, and follow instructions to verify your registration. Once you're logged in to MapBox, click + Create a Token.
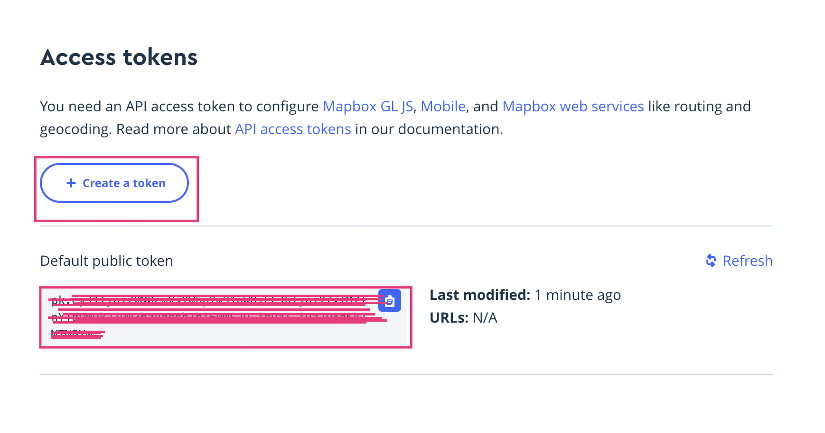
Give your token a name (e.g., "Odoo"), leave the default settings and enter the URL for your Odoo database. You can add an additional URL for other URLs that may use this token. When done, click Create Token. You'll be asked to confirm your password.
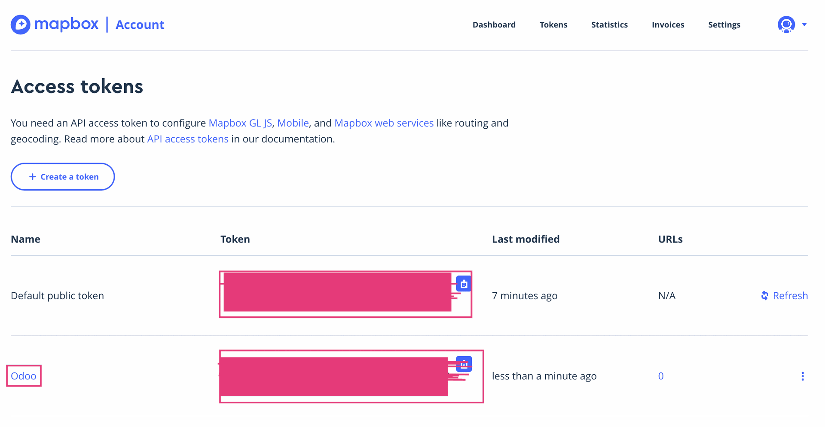
This takes you to your Access Tokens page. Click the clipboard icon next to the token you just created and head back to Odoo settings.
Under the Integrations settings in Odoo, paste the token you copied into the Token field under Map Routes, then click Save.
Process
Navigate to the Field Service app.
Once there, go to My Tasks > Map. By default, the filter is set to My Tasks and Today.
On the right side of the page you'll see a numbered list of field service tasks. Items that are grayed out indicate there is no address associated with this contact; they will not be shown on the map.
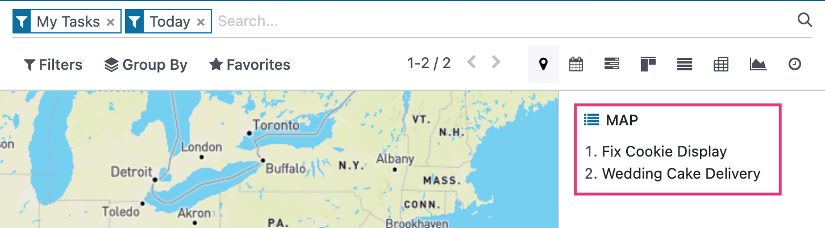
The task's list number corresponds with the plotted point on the map, as well as the order they're scheduled. Click a task from the list to see further details.
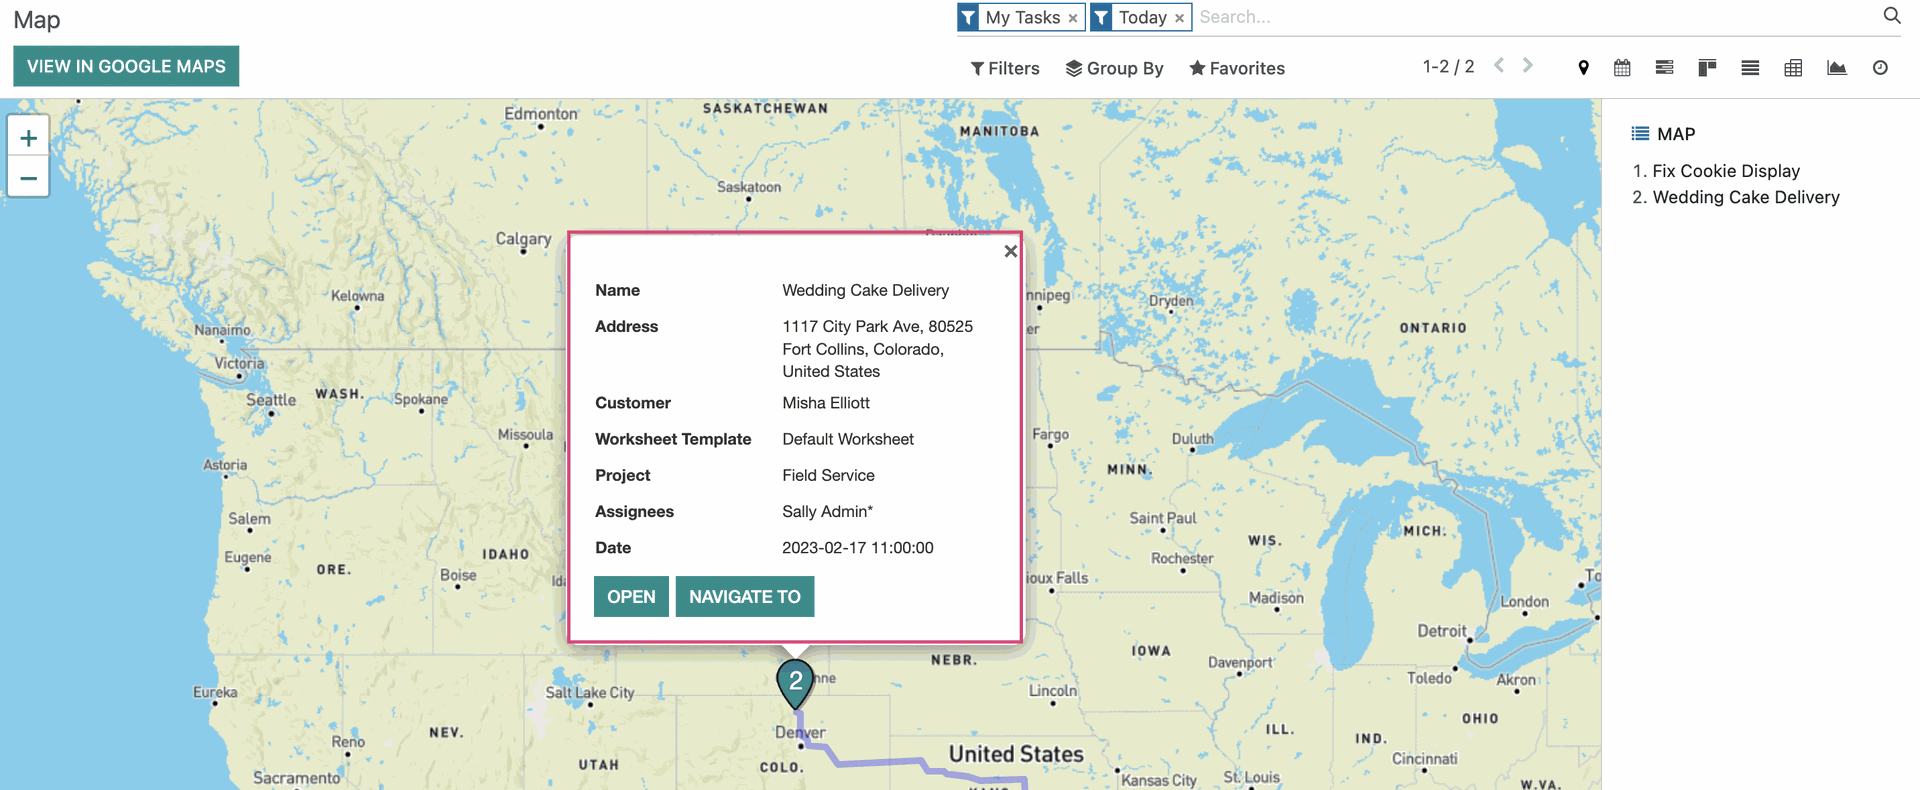
Click Open to see the task details; this will take you out of the map view.

Click Navigate To to open this task's location on Google Maps in a new window.

To create a navigation plan for all destination points, use the View in Google Maps button on the top-left of the page.

Good to Know!
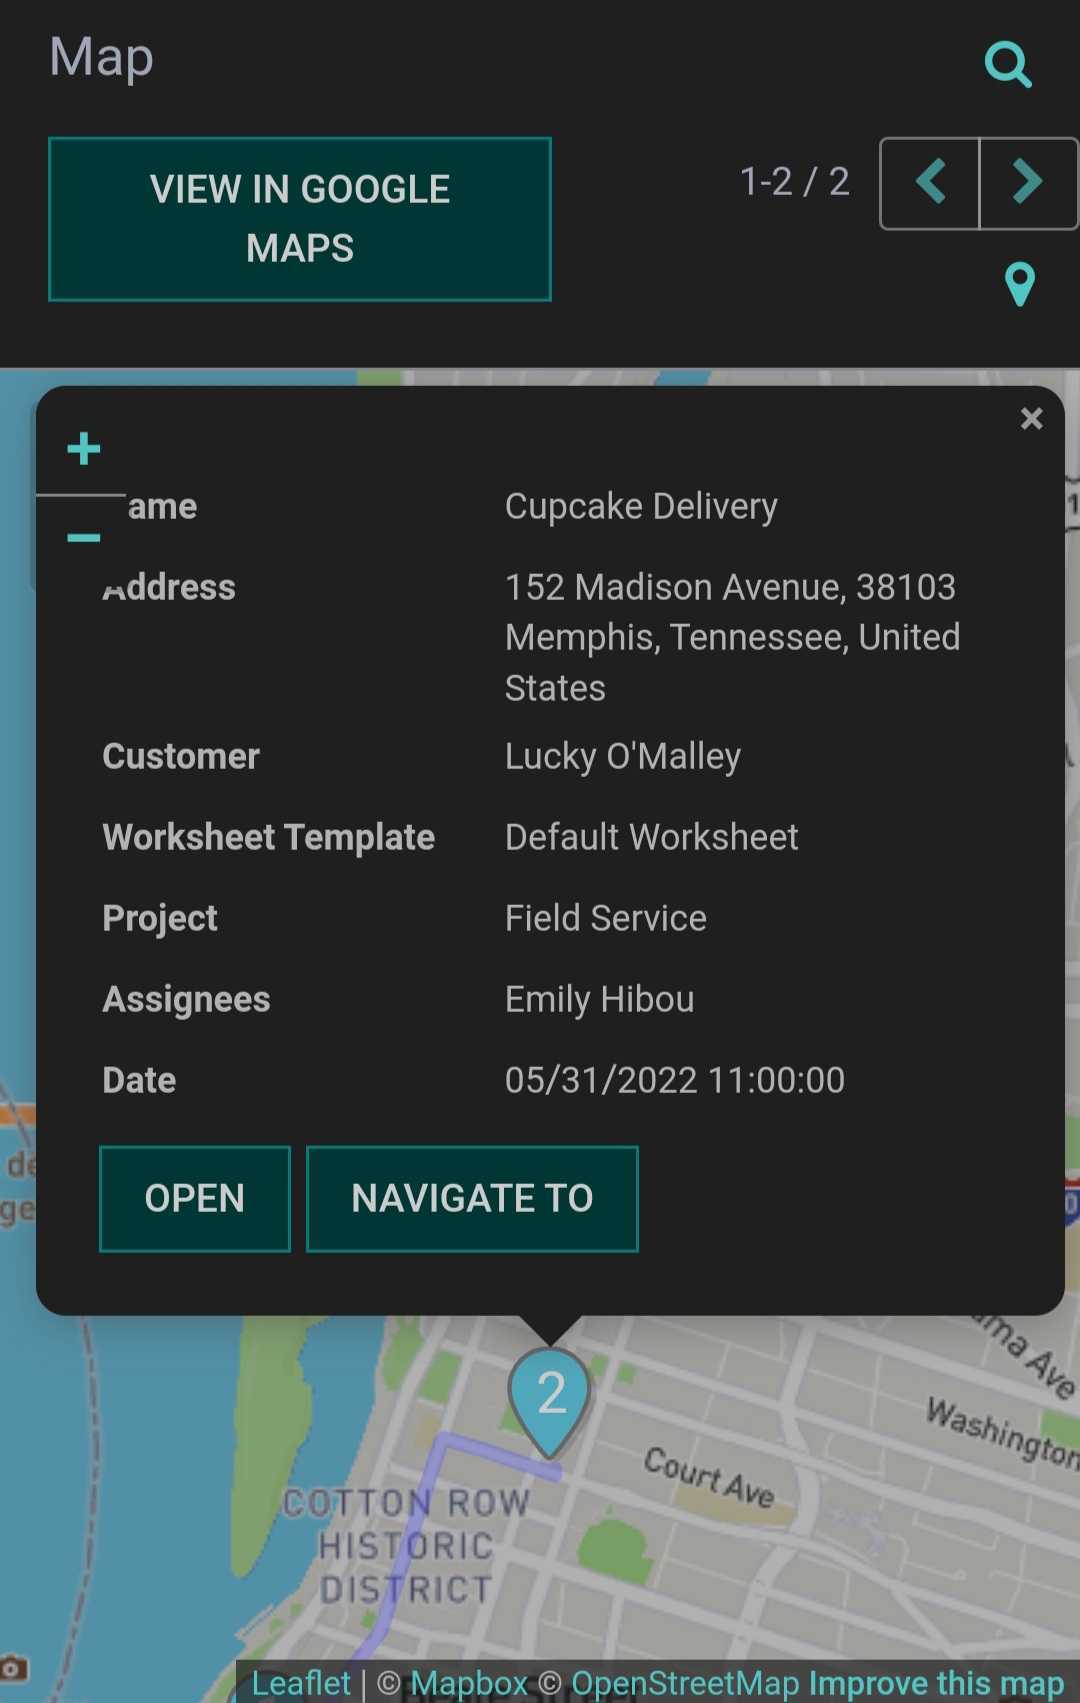
Mobile View
To see the task list in mobile view, click the map marker on the top right, then select list view. You can also see the task details by clicking the corresponding map marker on the map.
 |  |