Point of Sale (POS): Configuration: Point of Sale
Purpose
The purpose of this documentation it to go over creating and managing the physical Point of Sale (PoS) stations in the Point of Sale app of Odoo 16.
Process
To get started, navigate to the Point of Sale app.
Once there, go to Configuration > SETTINGS. This brings you to a list of existing PoS locations within your organization. Select an existing shop or use + New Shop to create a new one.

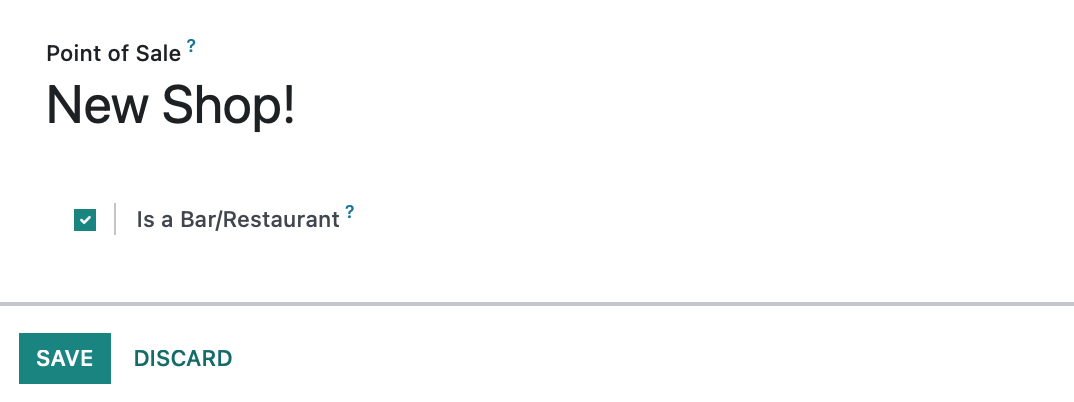
This will open a new window for you to name your new shop and set whether or not the shop is a bar or restaurant. This setting will display further configuration options if set.
Return to the Dashboard, click the ellipsis menu and then select Settings. Don't forget to save when ready!
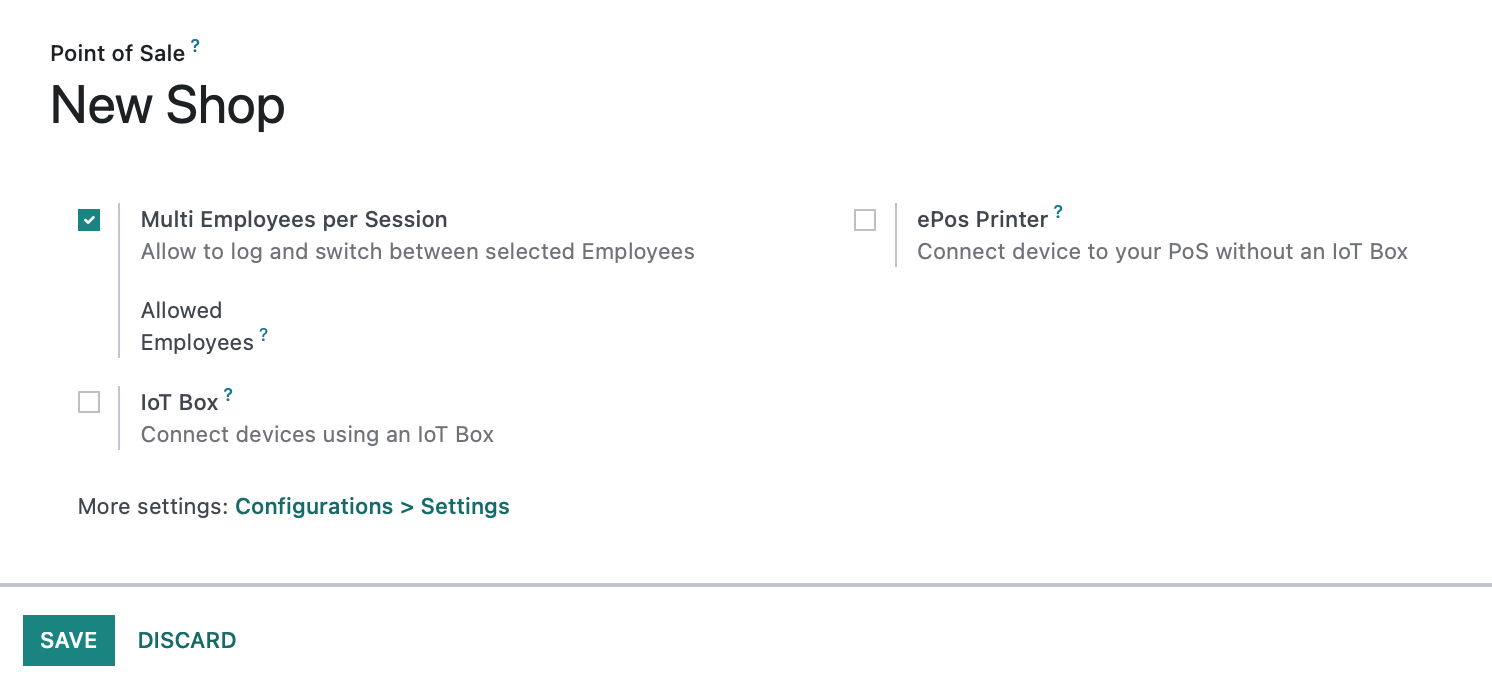
Point of Sale: The name/location of this PoS.
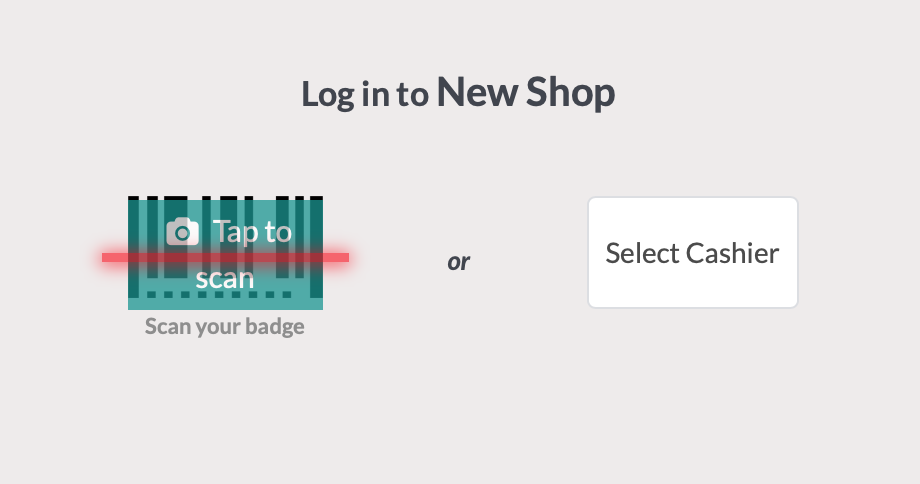
Allowed Employees: Select the employees allowed to use a session under this PoS. After this is enabled, employees will see the following screen upon starting a session.
IoT Box: Connect devices using an IoT Box
IoT Box IP Address: The hostname or IP address of the hardware proxy, will be autodetected if left empty.
Barcode Scanner/Card Reader: Enable barcode scanning with a remotely connected barcode scanner and card swiping with a vantiv card reader.
Electronic Scale: Enables electronic scale integration.
Receipt Printer: Bypass browser printing and prints via the hardware proxy.
Customer Display: Show checkout to customers with a remotely-connected screen.
ePos Printer: Connect device to your PoS without an IoT Box
Navigate back to Configuration > Settings.
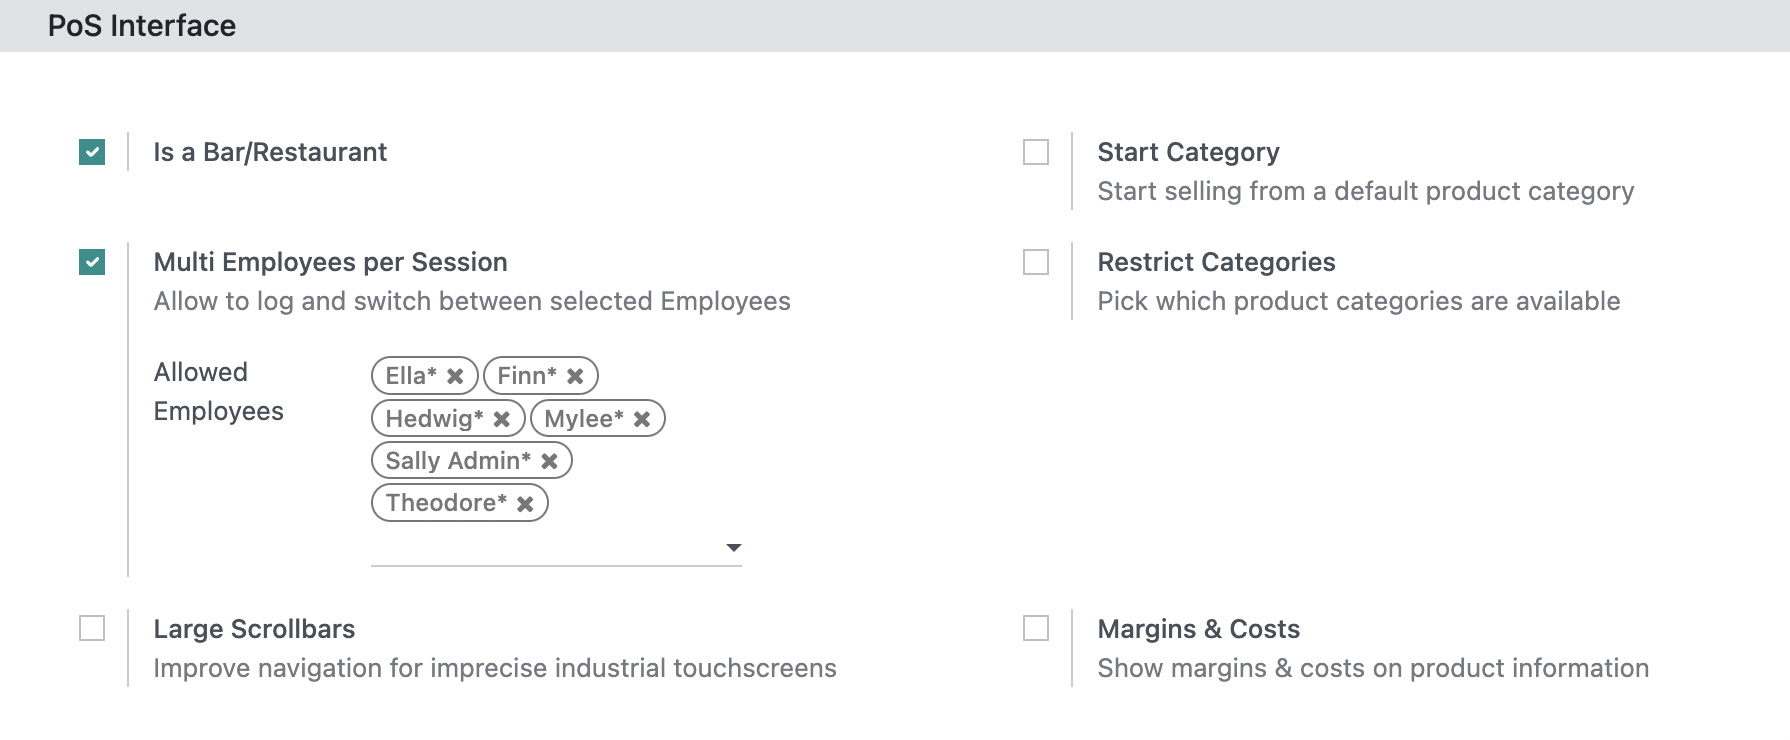
PoS Interface
- Is a Bar/ Restaurant
- Multi Employees per session: Determine if more than one employee can use the shop at a time. You can also set or modify the Allowed Employees from here just as we did in the settings above.
- Large Scrollbars: Improve navigation for imprecise industrial touchscreens.
Start Category: When selected, you can select the category you'll see when the PoS session begins.
Restrict Categories: When enabled, you can select all categories to display on this PoS. You can also click the POS PRODUCT CATEGORIES button to access categories, as needed.
- Margins & Costs: Show margins & costs on product information.
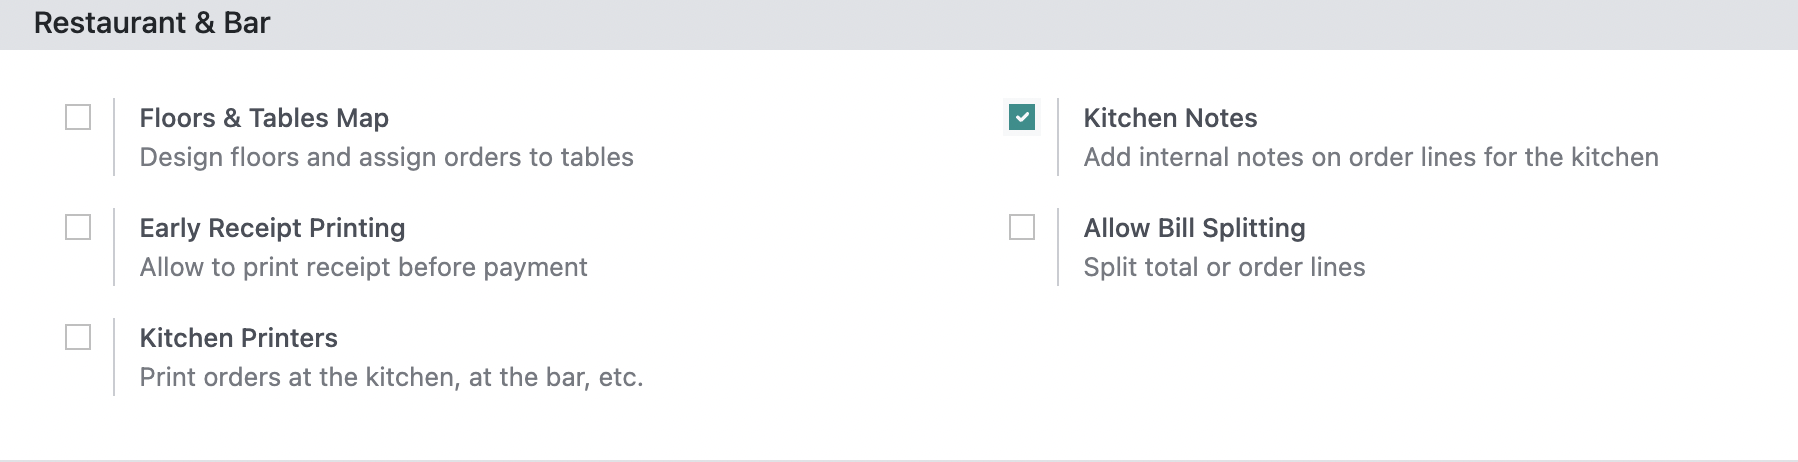
Restaurant & Bar
- Floors & Tables Map : Allows you to create floors and table layouts specific to your real shop floorplans.
- Early Receipt Printing: Allows you to print receipts before payment is made.
- Kitchen Printers: Print orders in the kitchen, at the bar, etc.
- Kitchen Notes: Add internal notes on order lines for the kitchen
- Allow Bill Splitting: Split total or order lines
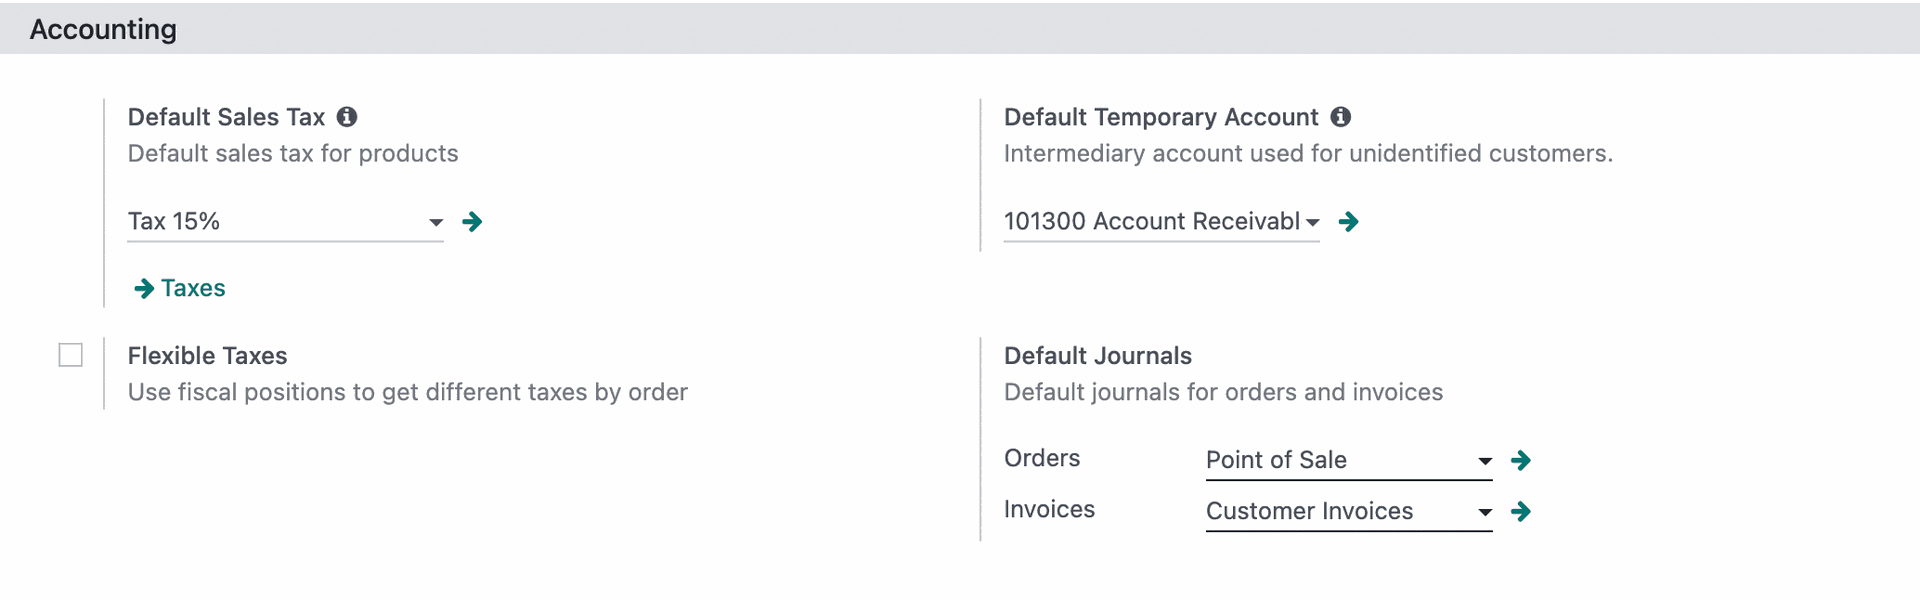
Accounting
- Default Sales Tax: Default sales tax for products.
- Flexible Taxes: Use fiscal positions to get different taxes by order.
- Default Temporary Account: intermediary account used for unidentified customers.
Default Journals: Default journals for orders and invoices
Sales
- Sales Team: Select a Sales Team to assign to this PoS, if desired.
- Down Payment Product: This product will be used as a downpayment on sale order.

Pricing
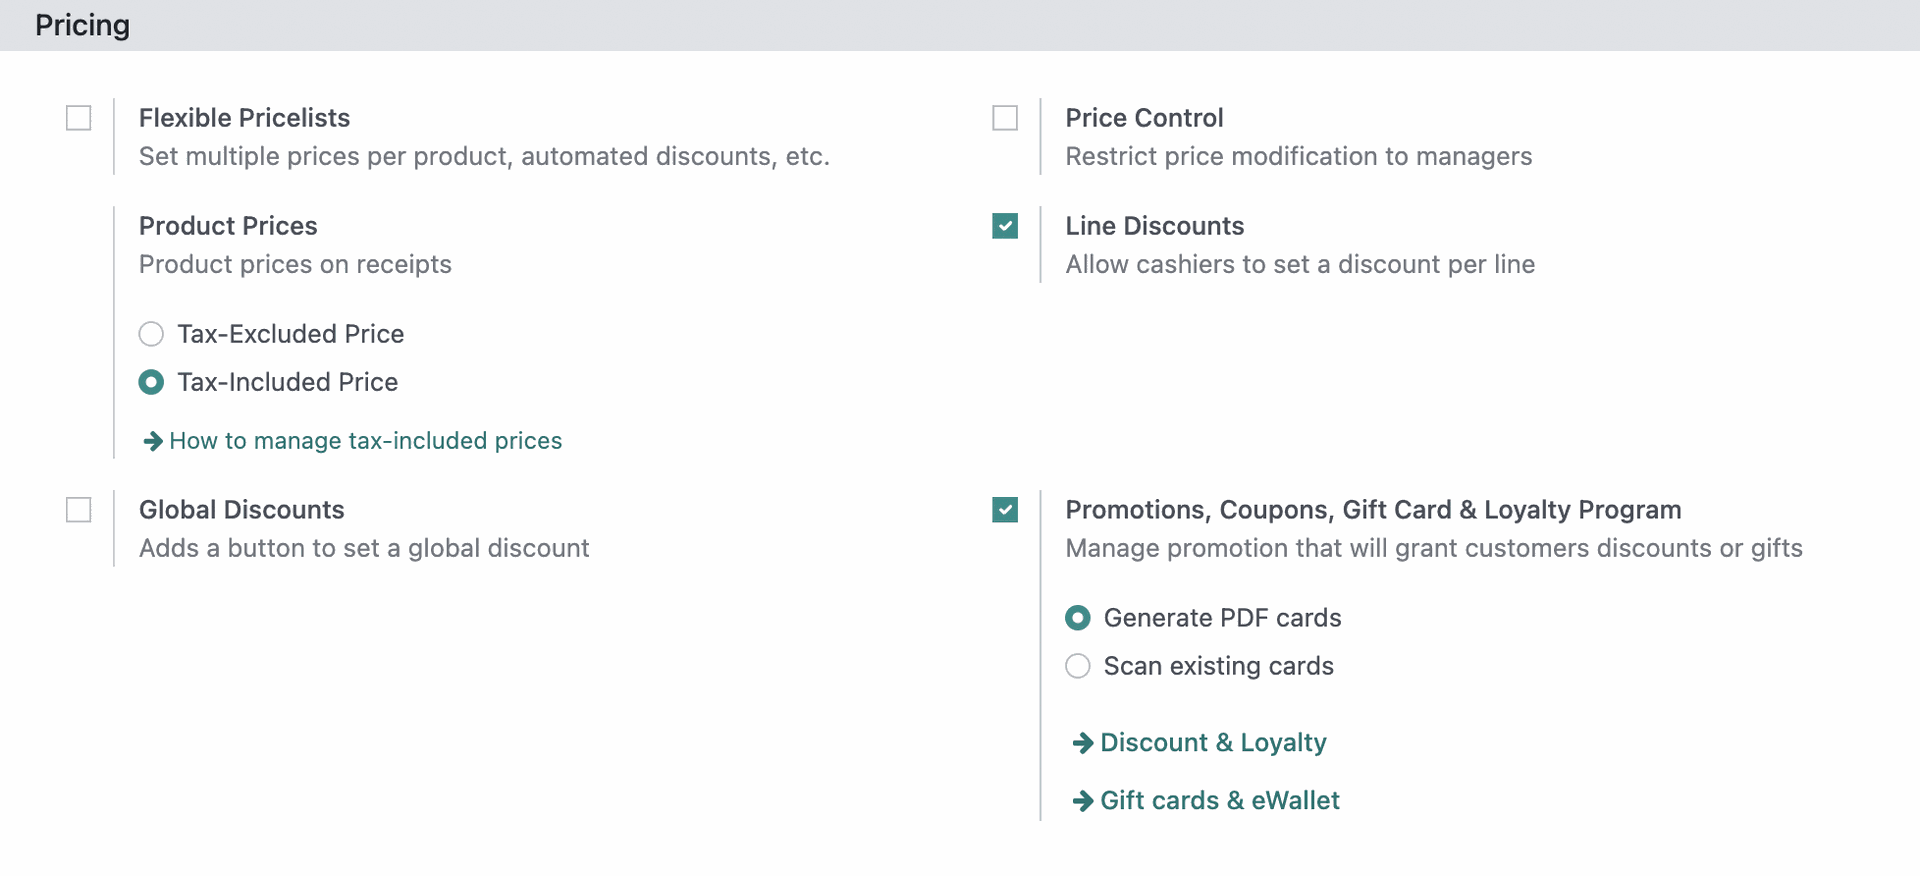
Product Prices: Choose to have tax-excluded or tax-included prices show on receipts.
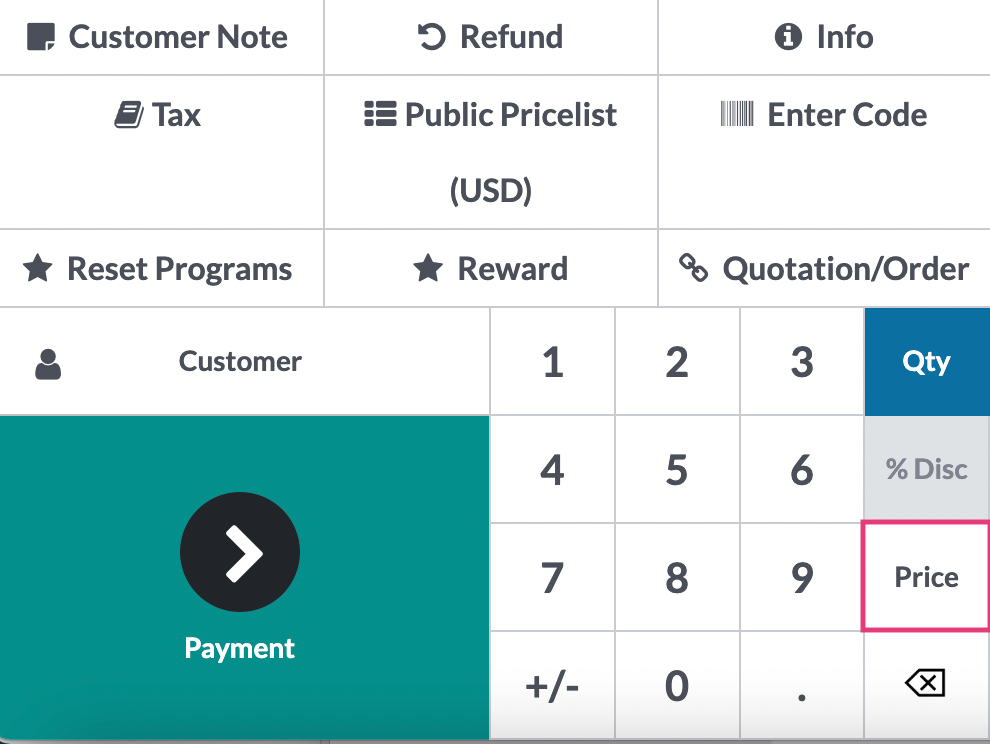
Line Discounts: Allow a discount to be added per order line. If this feature is not enabled, the DISC button will be grayed out and cannot be used on the PoS keypad.
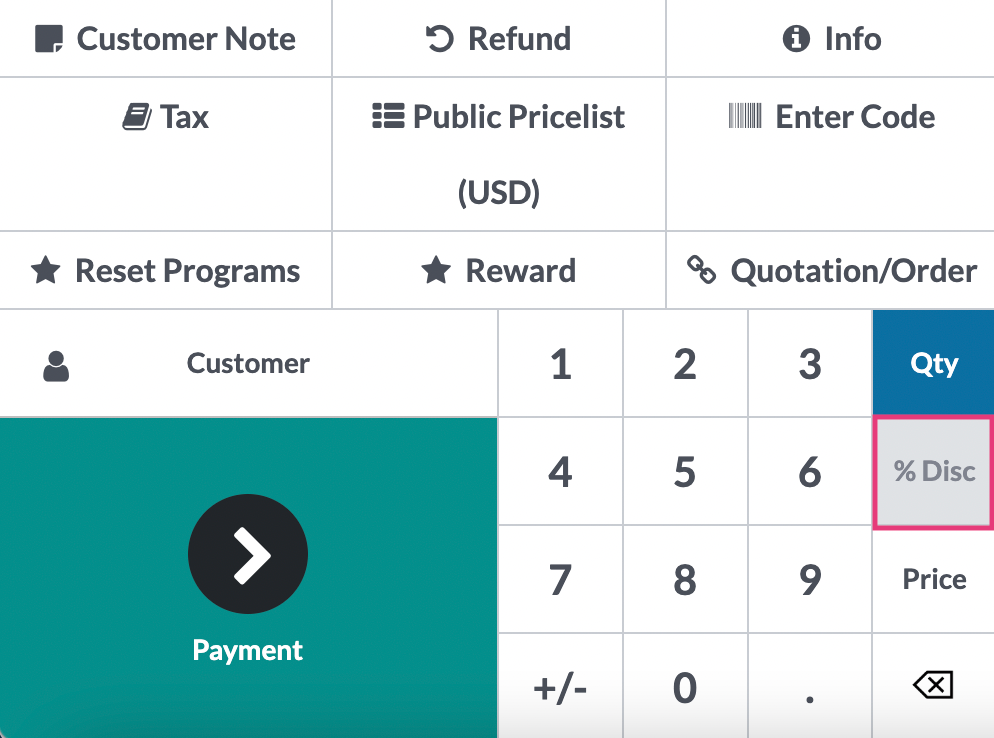
Price Control: Restrict price modifications to managers only. If this feature enabled, the PRICE button will be grayed out and cannot be used on the PoS keypad.
- Flexible Pricelists: Select the pricelists you want to be available for selection at this PoS.
Global Discounts: Enables a global discount on orders. Odoo prompts you to save immediately when enabled, and will then expose the following fields:
Discount Product: The product associated with this discount. This will be added as a line-item to the order.
Discount %: The discount percentage to be applied. This can be changed per-order.
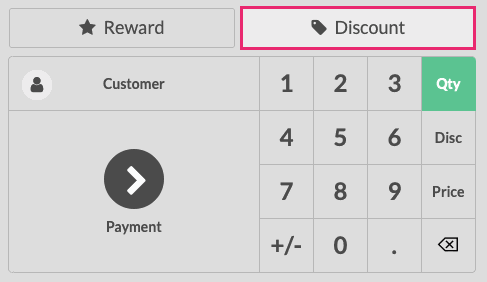
When Global Discounts are enabled, a new DISCOUNT button is added to the PoS keypad.
Promotions, Coupons, Gift Card & Loyalty Program: Allow the use of gift cards, coupons and promotions at this PoS. Also allows customers to gain points with each purchase. When enabled, an additional field will display: Select the Loyalty Program associated with this PoS. See the Loyalty Programs documentation for further instructions.
Bills & Receipts
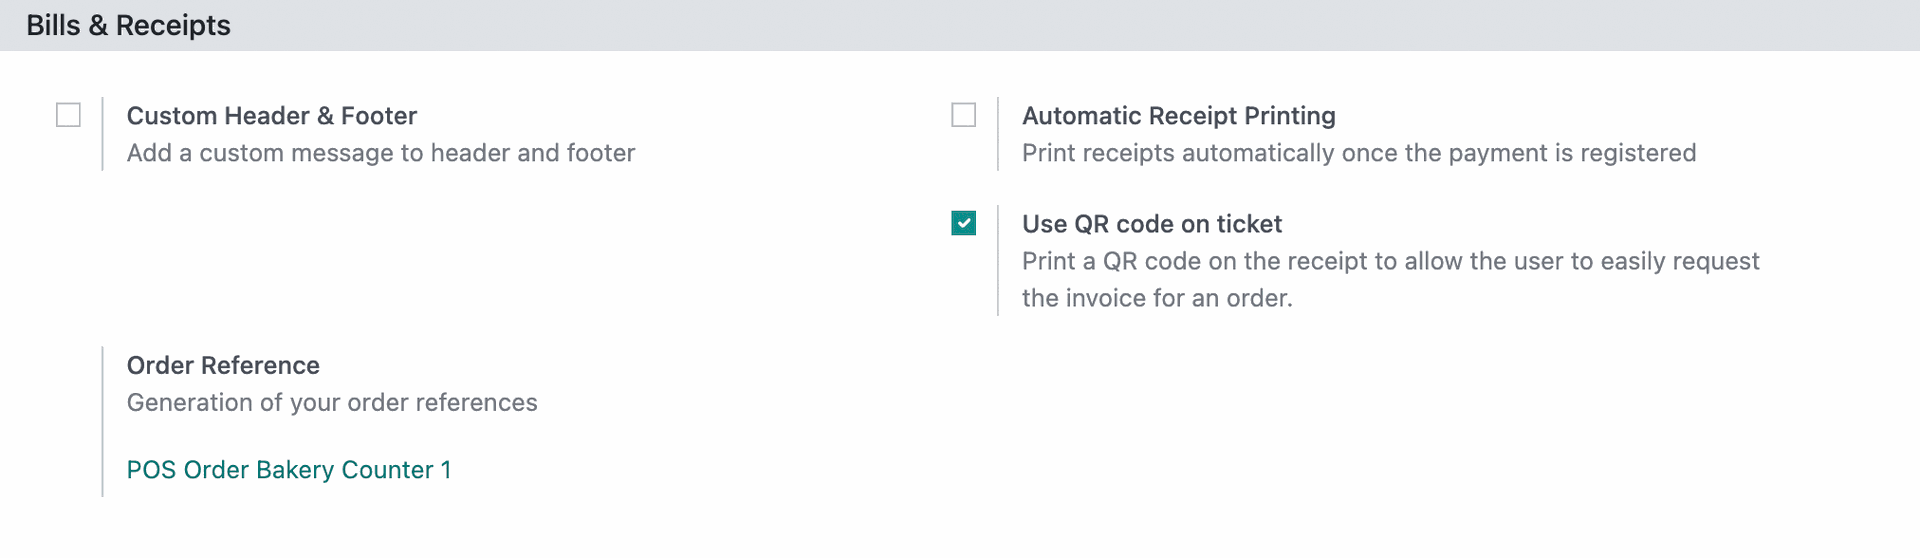
Order Reference: This setting cannot be disabled but does display the POS ORDER button that allows you to customize the reference ID used on your bills and receipts.
Automatic Receipt Printing: When enabled, receipts will print automatically when payment is registered. When enabled, you can opt to Skip Preview Screen during the checkout process.
Custom Header & Footer: Allows you to add a custom message to header and footer of your bills and receipts. When enabled, you'll see the following fields:
Header: Enter the information to display on the header of your bills and receipts.
Footer: Enter the information to display on the footer of your bills and receipts.
Use QR Code on Ticket: Print a QR Code on the receipt to allow the user to easily request the invoice for an order.
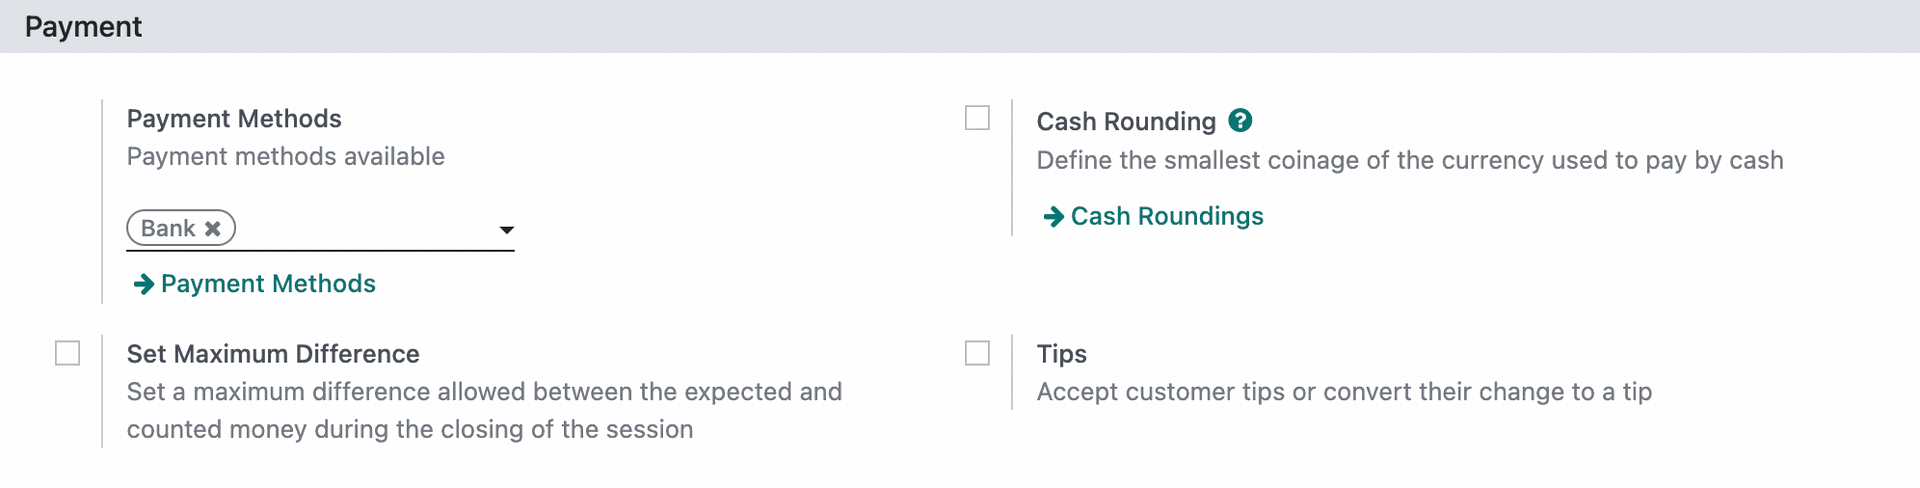
Payment
Payment Methods: Select payment methods accepted at this PoS. You can add and manage these by clicking the PAYMENT METHODS button.
Set Maximum Difference: Enter the maximum difference allowed. If the amount is higher than this setting, the cashier will see an error at closing and will need to contact a manager.
Tips: Allows you to accept customer tips or convert their change to a tip. When enabled, you'll see one additional field:
Tip Products: Indicate which product to associate with tips.
Add tip after payment: Select this to allow customers to add a tip after the customer has left, or at the close of the PoS session.
Cash Rounding: This setting is present in PoS settings, but can also be set per-PoS on this form. When enabled, this allows you to indicate the lowest denomination of currency accepted through PoS. If your organization rounds up to the nearest .05 cents, then it's important to configure Odoo to recognize this.
Payment Terminal
Here you can enable settings to accept payments based on the terminals you use or intend to use in your shop.

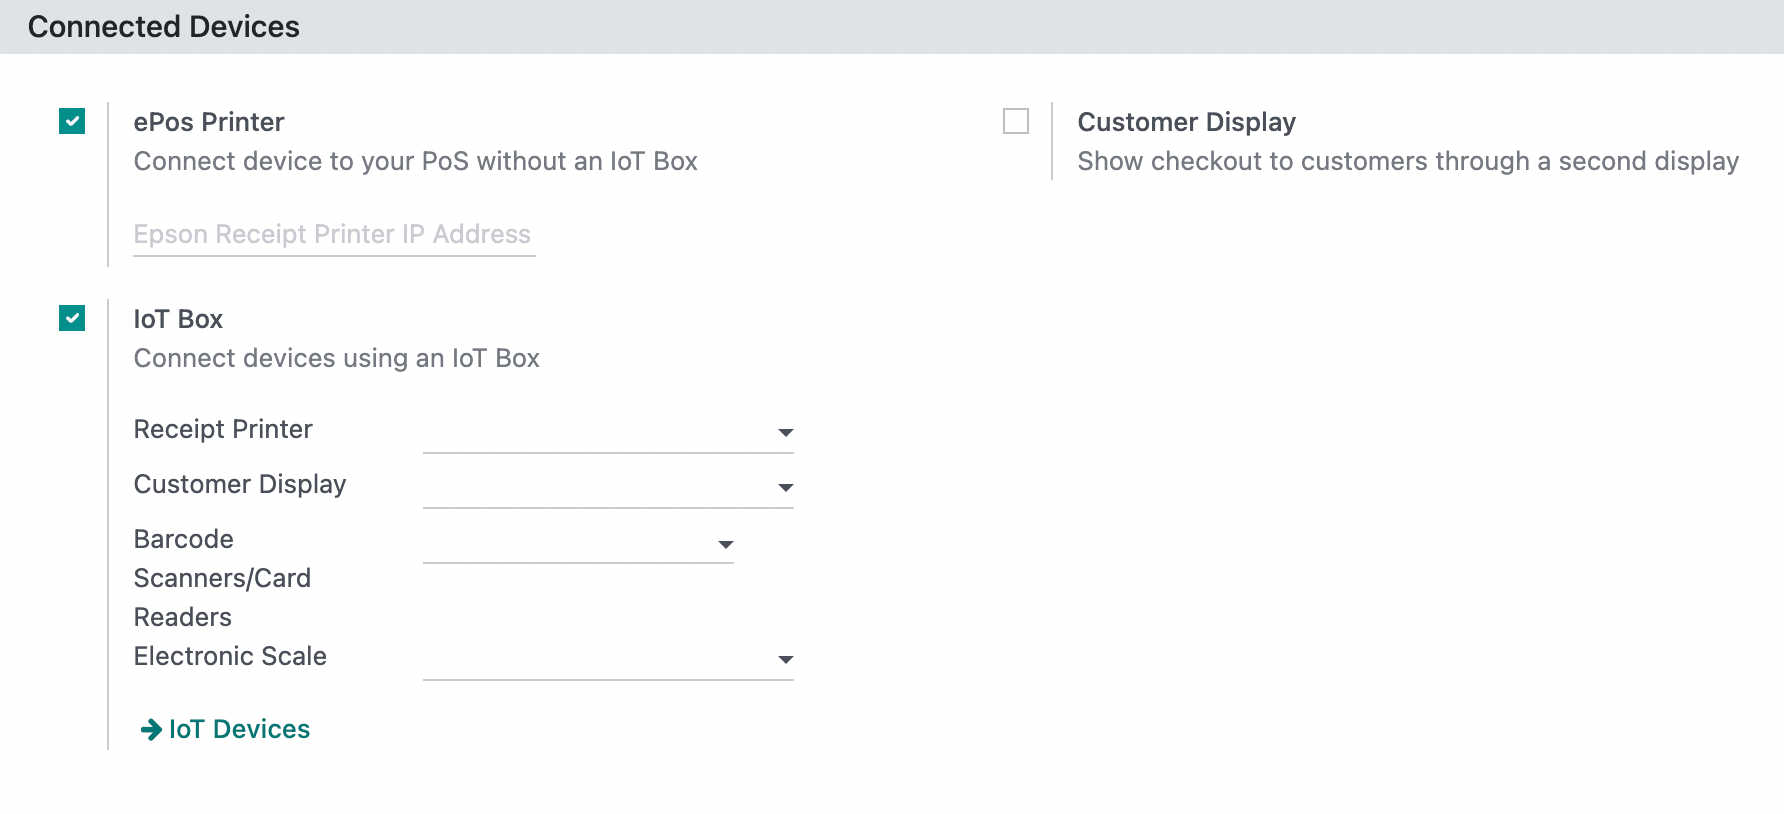
Connected Devices
- ePos Printer: Connect the device to your PoS without an IoT Box.
IoT: Connect devices using an IoT (Internet of Things) Box. Odoo will prompt you to save immediately when this is enabled. For assistance in adding devices not listed here, get in touch with Hibou support.
Customer Display: Show checkout to customers.
Good to Know!
PAX Integration
We have not migrated our PAX Module to any version of Odoo beyond 15, but for a video walkthrough to add PAX terminals to your Odoo 15 instance, see our PoS PAX Integration page.
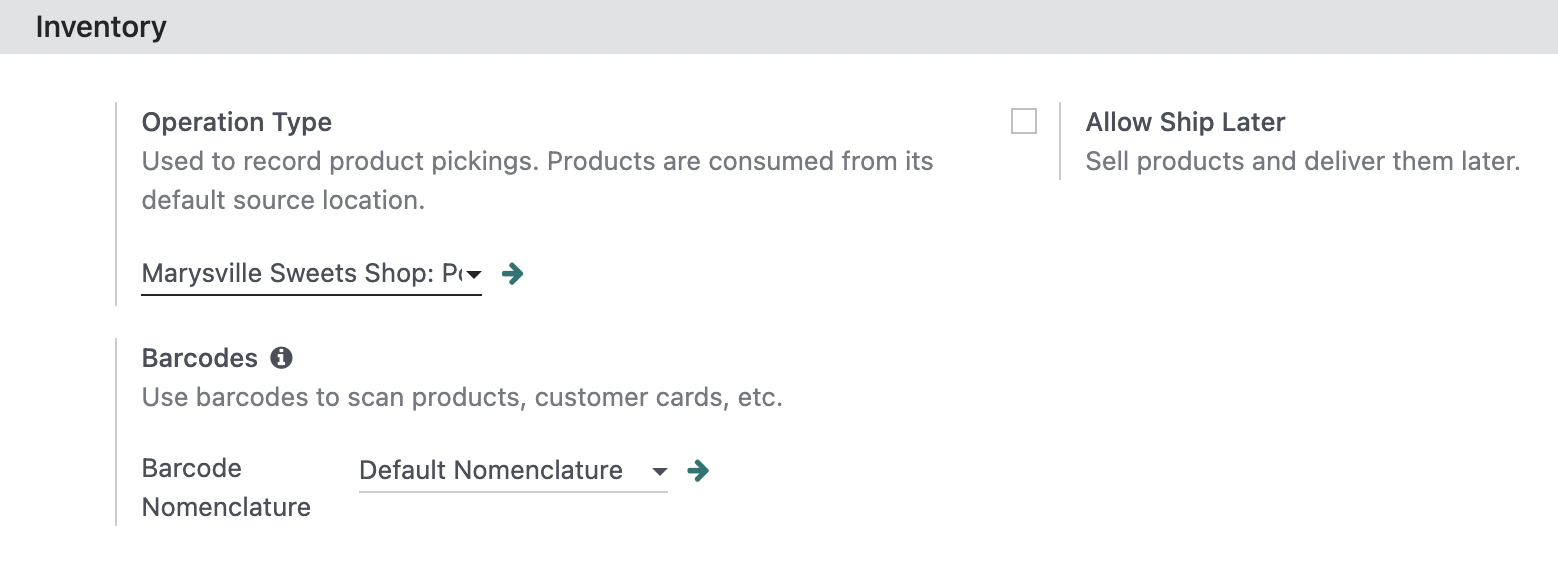
Inventory
Operation Type: Select the operation type used to record product pickings. Products will be taken from the location indicated here.
Barcodes: If the Barcodes module is installed, this section will display. Barcode Nomenclature is the only configurable option for Barcodes in this section. For more information, refer to our Barcodes documentation.
Allow Ship Later: Sell products and schedule them for a later delivery.
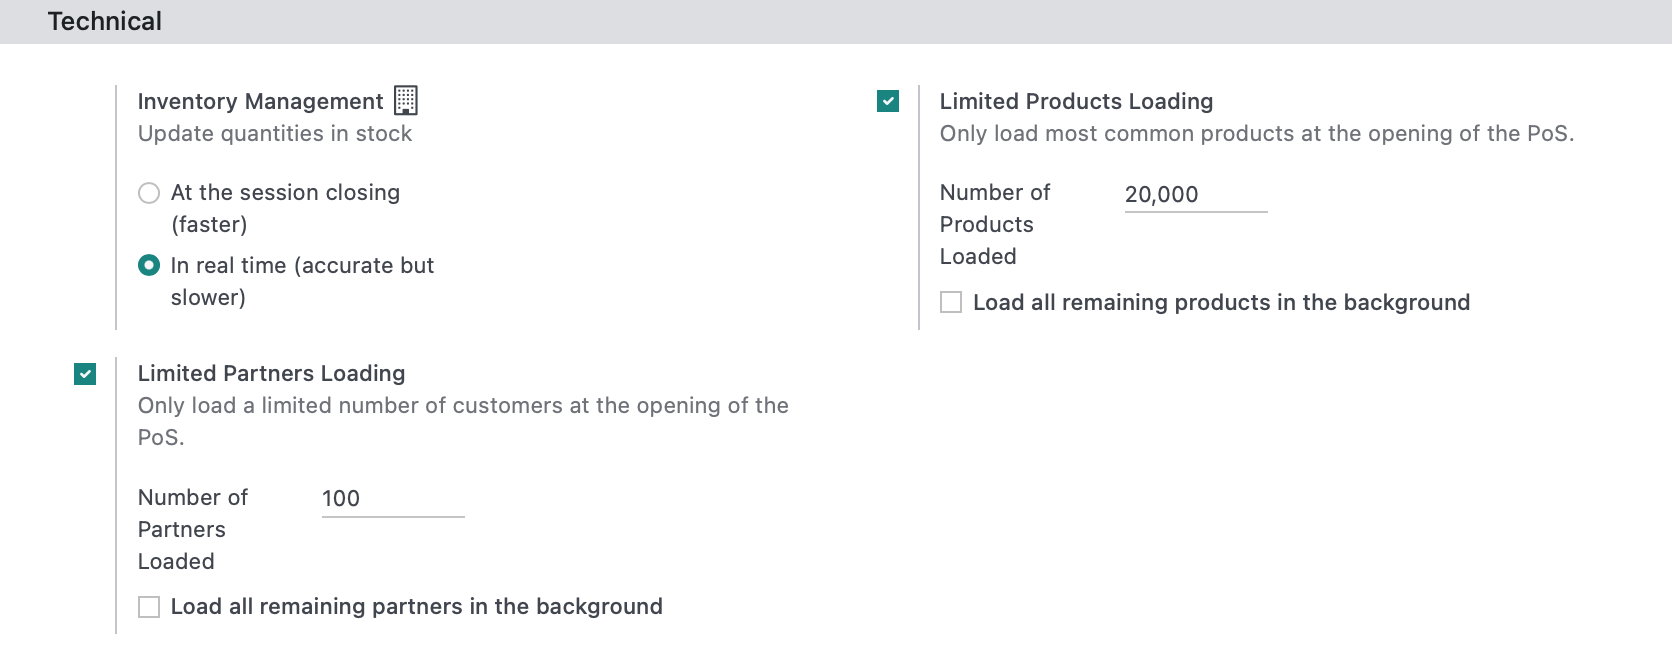
Technical
These settings are all available to help performance of your database when using PoS. The fewer records that load at one time, the more responsive your system will be.
- Inventory Management: Determine if you would like inventory quantities to update during the session (In real time) or when you close the session(at session closing).
- Limited Partners Loading: Determine the number of Partners loaded upon opening a new session.
- Limited Products Loading: Determine the number of products loaded upon opening a new session.
When you've configured your Point of Sale, click Save.