Point of Sale (POS): Workflows: PoS Set Maximum Difference (Previously Advanced Cash Control)
Purpose
This document will review the opening and closing procedures with a Set Maximum Difference for a PoS session in the Odoo 15 Point of Sale application.
Process
To get started, navigate to the Point of Sale app.

Enable Set Maximum Difference
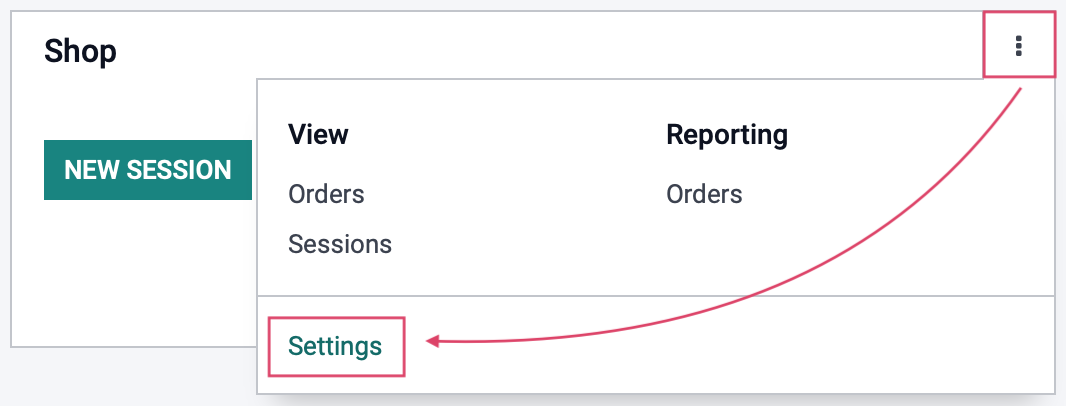
Set Maximum Difference must be enabled before a session can have the opening and closing balance accounted for. To do this, click the ellipses menu on a session kanban card, then select Settings. Make sure this session is not currently open or you won't be able to make changes.
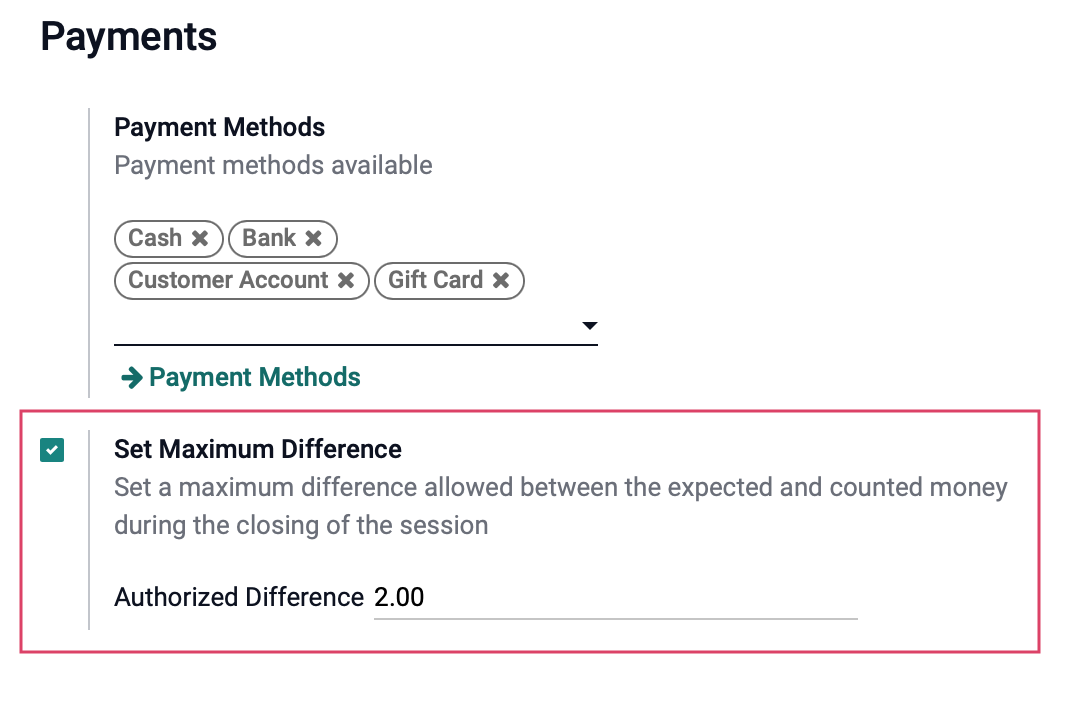
Click Edit, then under the Payments section, enable Set Maximum Difference. If you'd like to indicate an Authorized Difference, you can do so here. We will show the effects of setting an Authorized Difference in the next section.
When you're ready, click Save.
Set a Cash Opening
Click Dashboard, then click New Session on the session with Set Maximum Difference enabled.
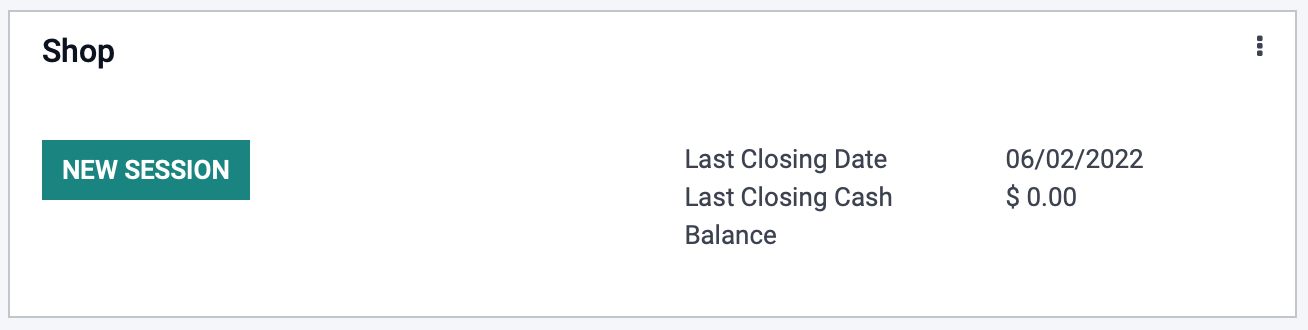
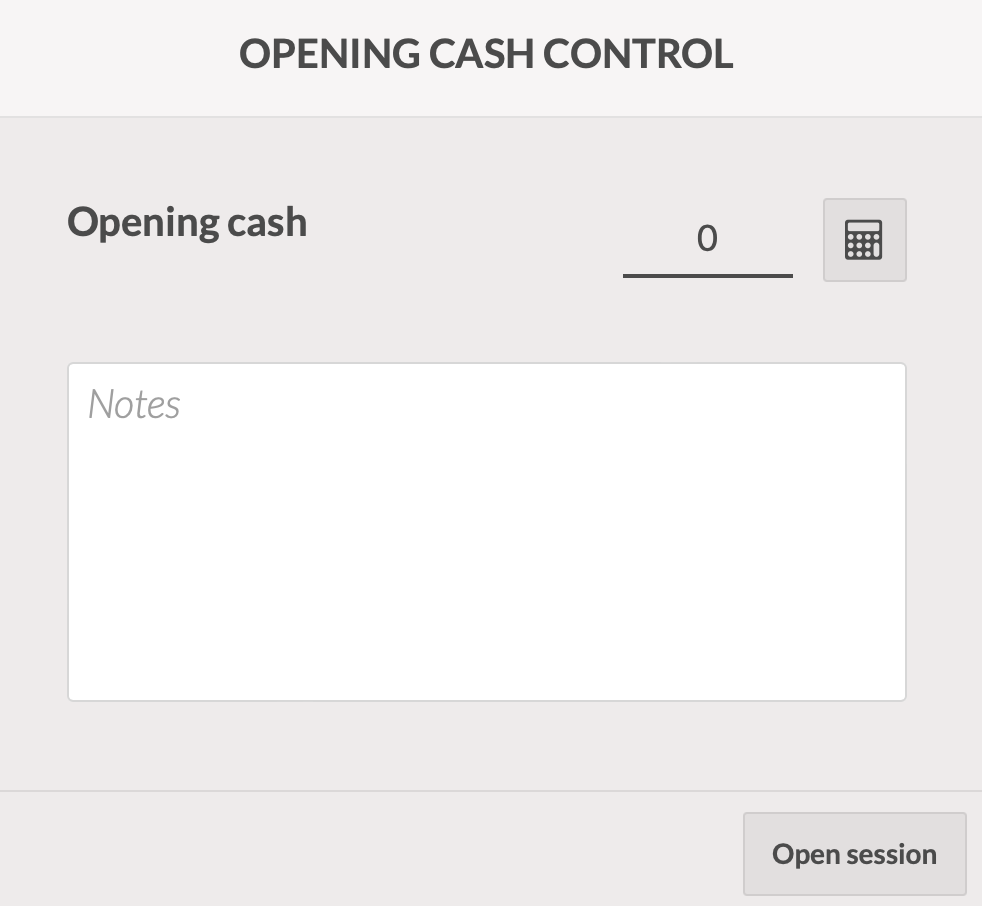
Here you'll be asked to verify or set the starting cash. This amount will auto-populate based on the last closed session. Select Open Session.
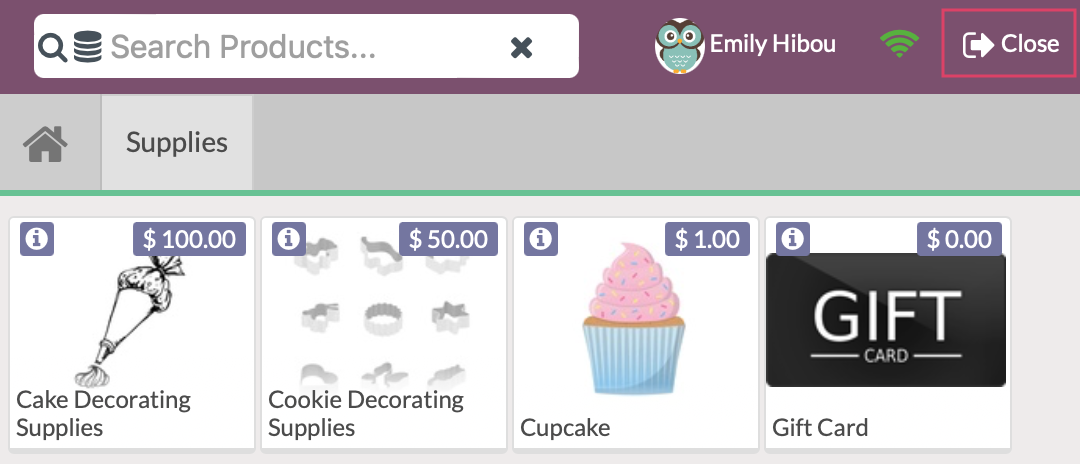
You're now ready to start selling!
Set a Cash Closing
When you are ready to close the session, select Close in the top right corner of the PoS screen.
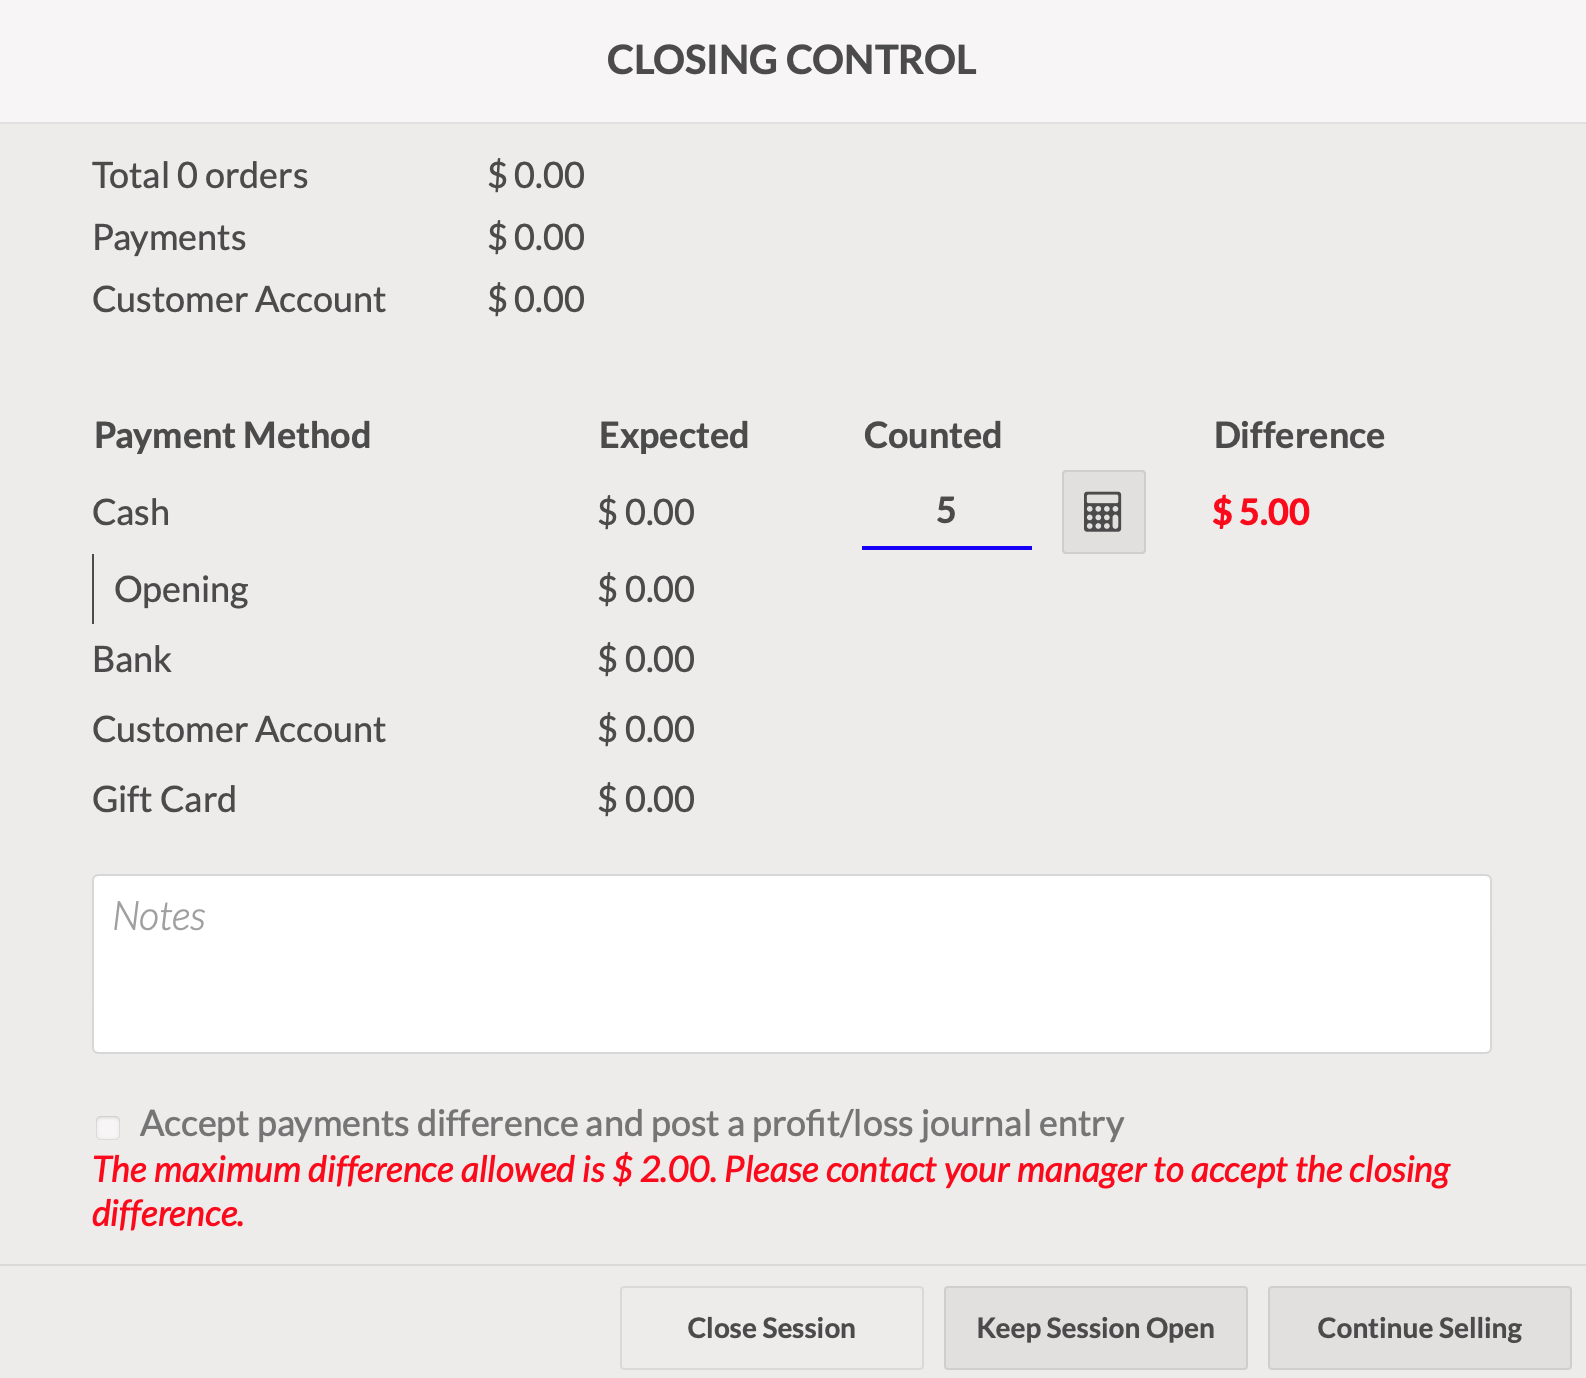
This opens the Closing Control window. If a difference is recorded when closing out a session, and you have administrative permissions, it must be recorded in a journal before the session can be closed.
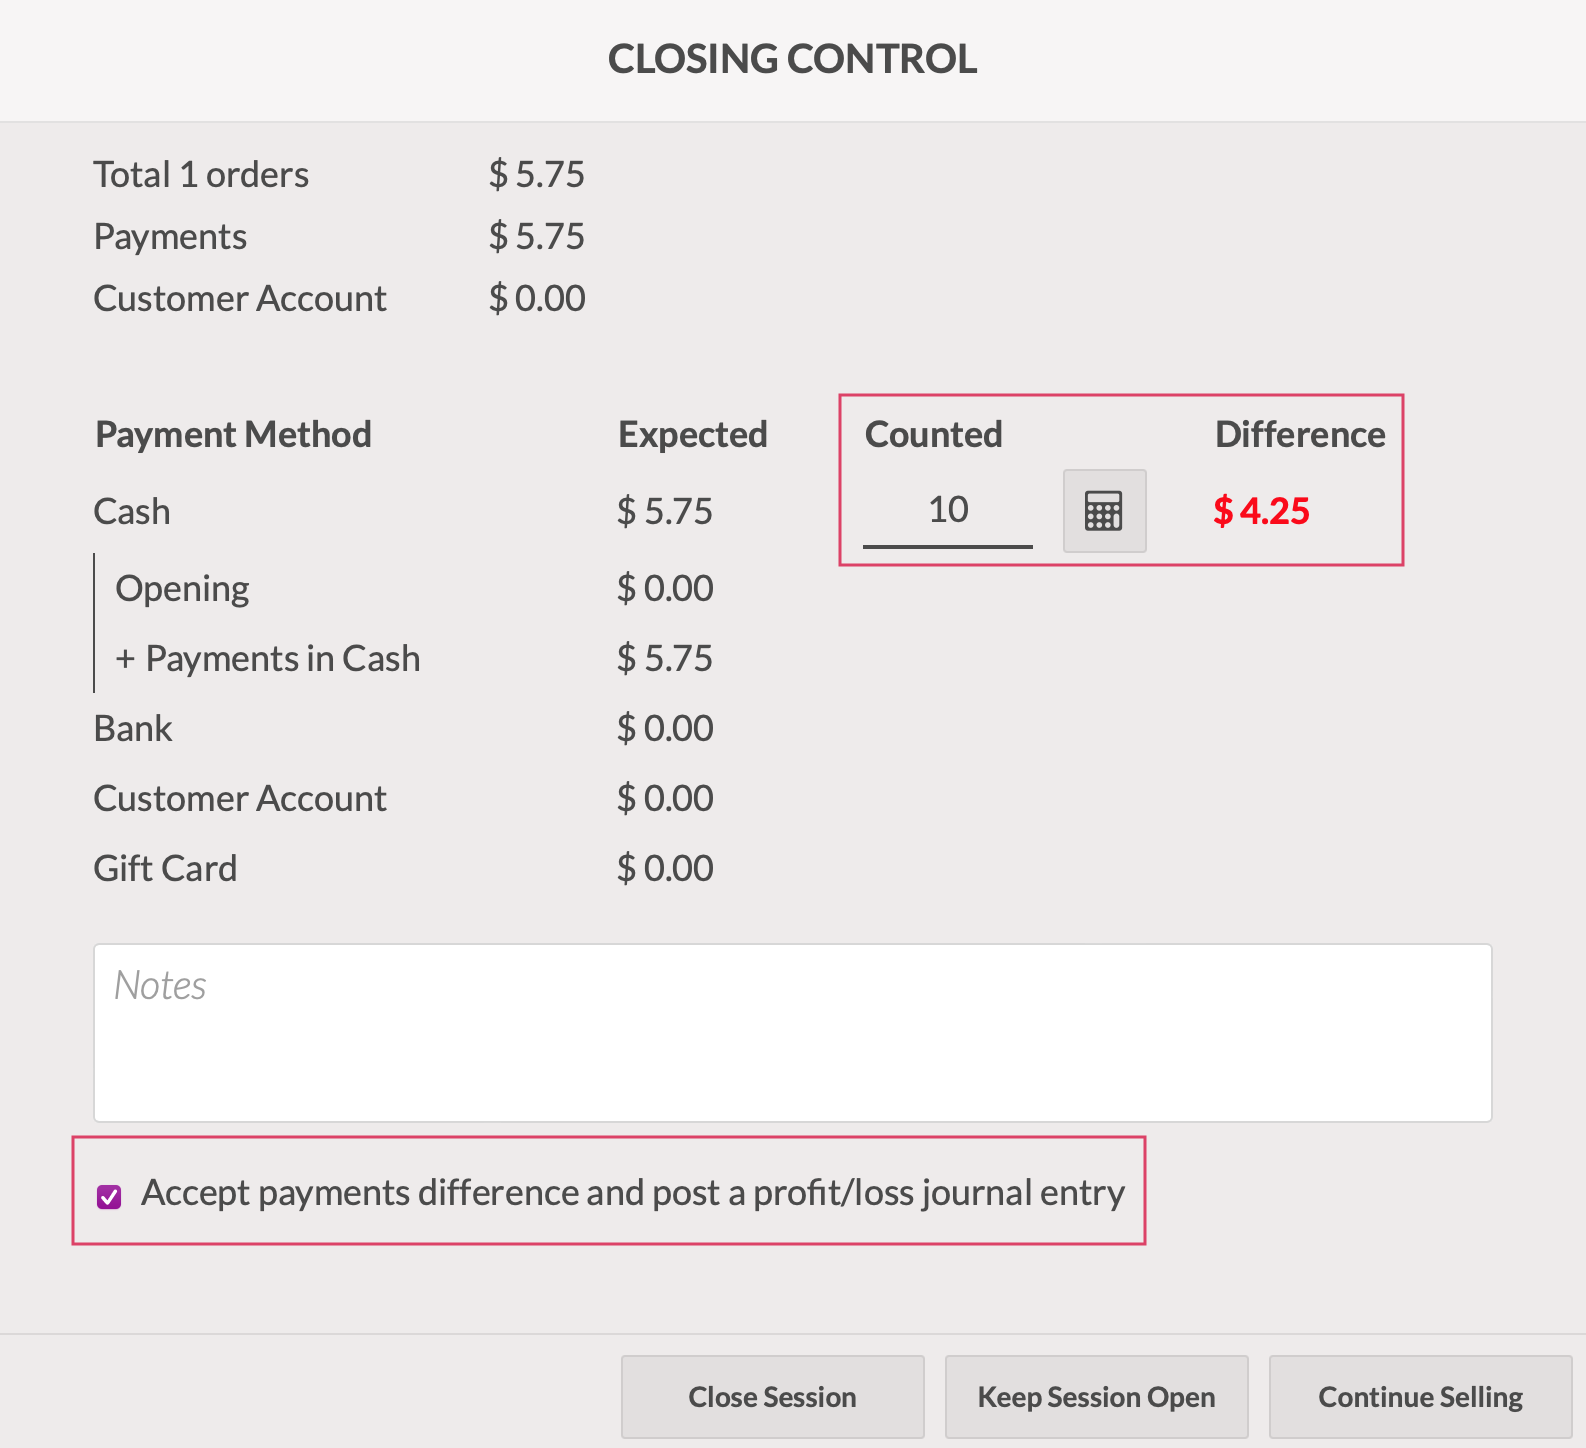
However, the Closing Control will lock if a non-admin user enters a difference that exceeds the authorized difference. A manager must approve the closing.
Once the session has been closed out, it can be viewed by returning to the ellipsis on the Kanban card and selecting Sessions under View. This will take you to the sessions page.
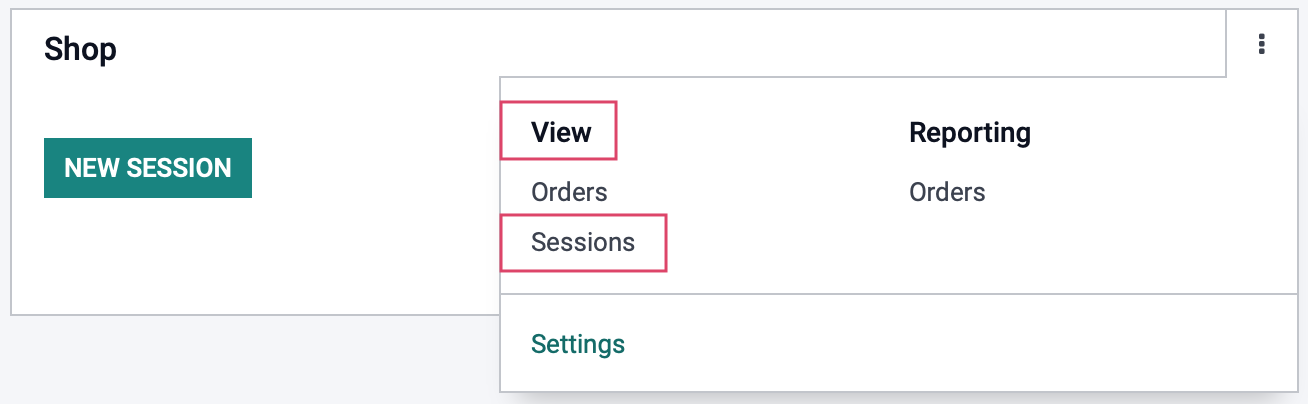
Note: This can also be reached using Orders > Sessions. However using the Kanban card will immediately filter to show only sessions from this PoS.

Open the session you wish to review, this will take you to a details page. From here, you will see smart buttons that will show you how many orders were taken, what inventory movements were made during this session, and the total in payments made. For this we're going to look at the Journal Items and Cash Register smart buttons.
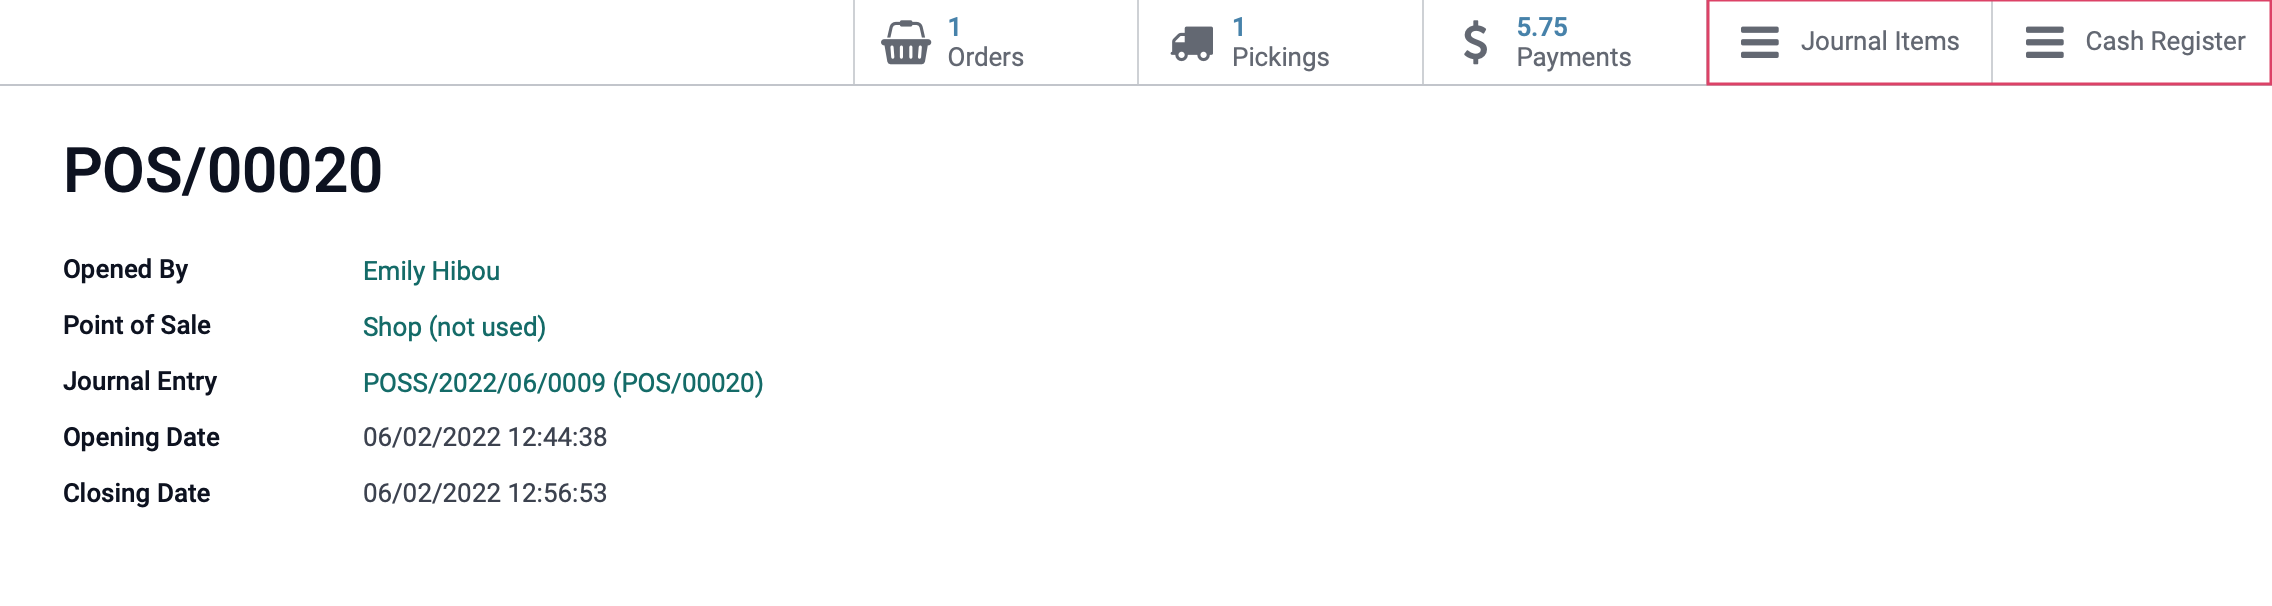
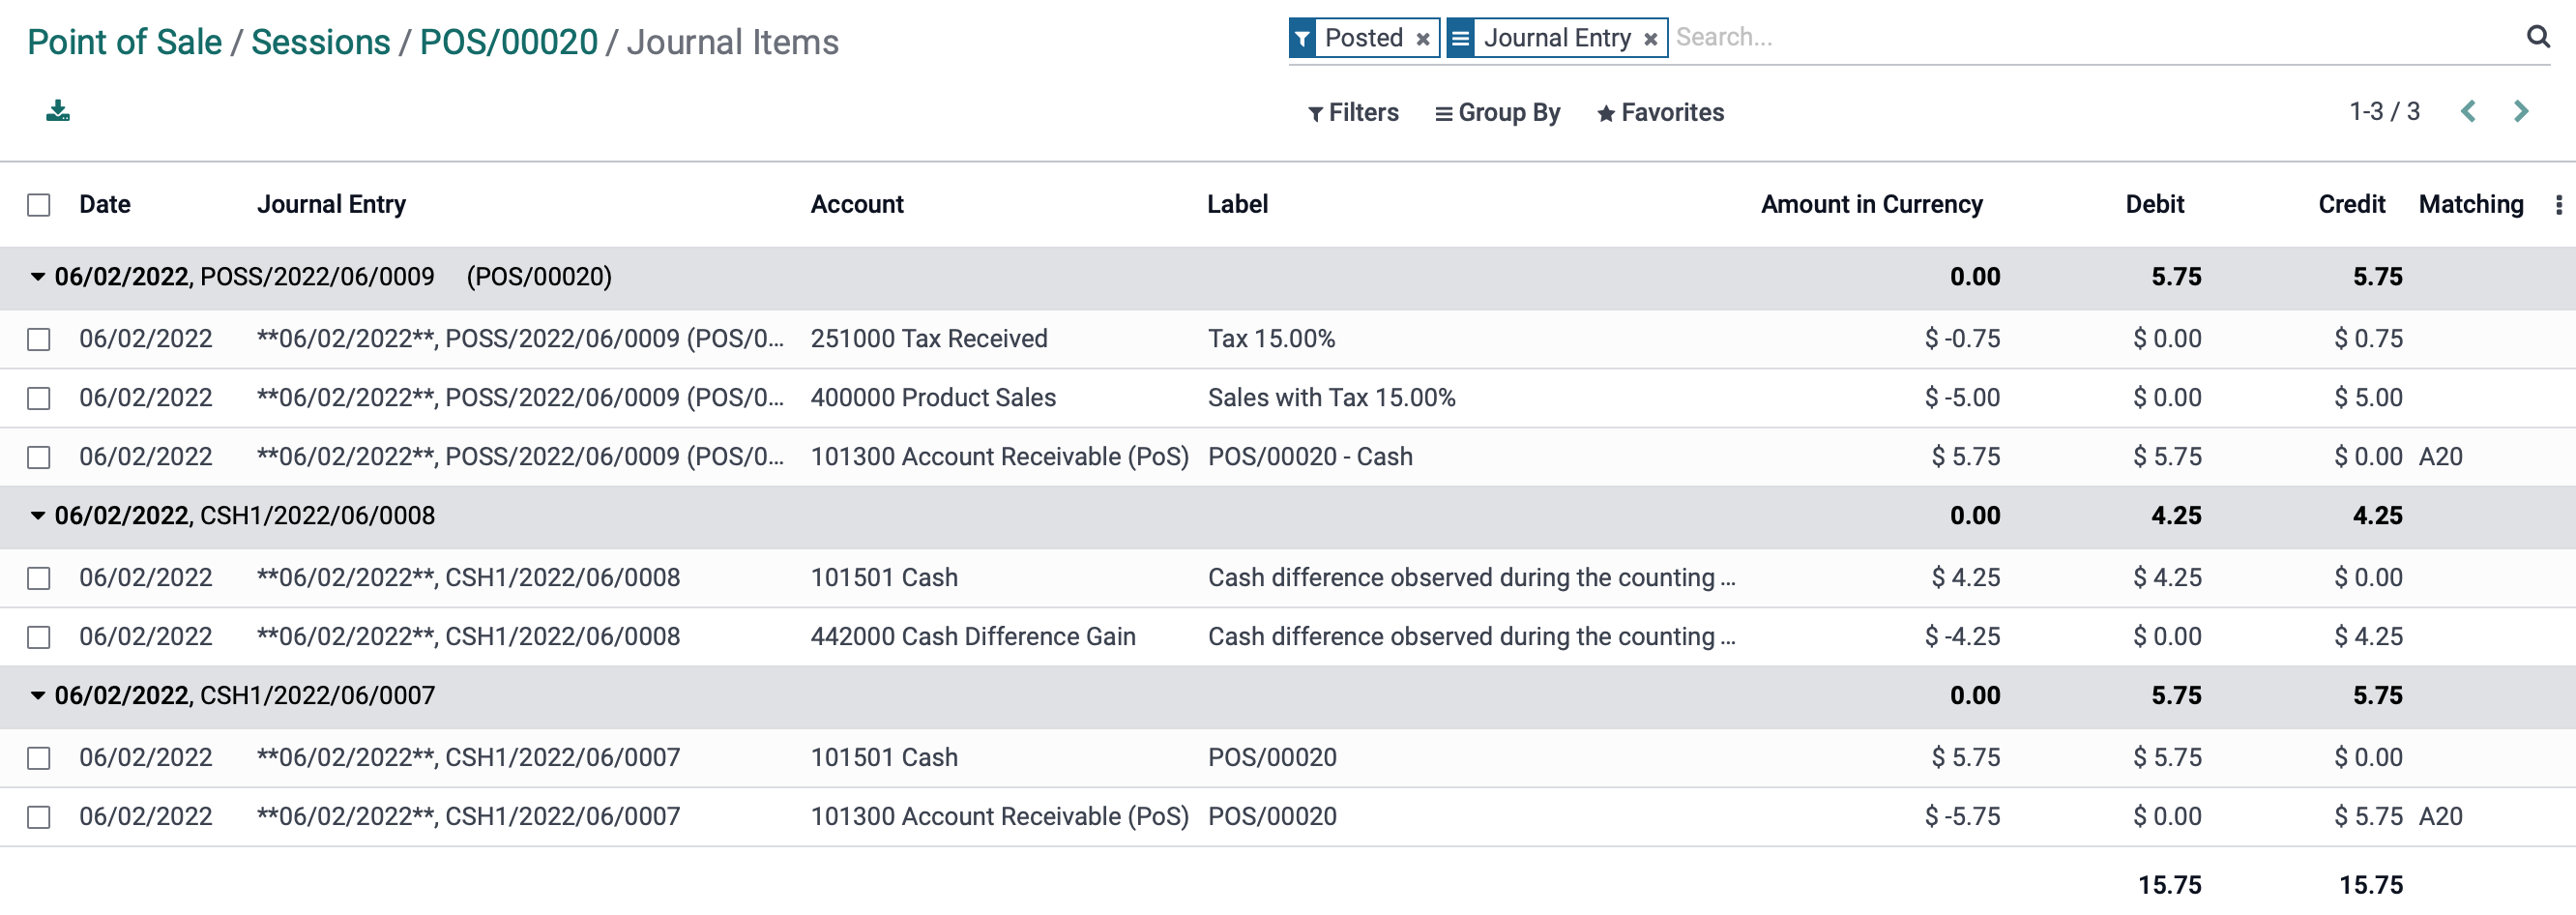
Select the Journal Items smart button. From this page, you will be able to review the sales made and there will be a notice stating that a difference was recorded.
Use your breadcrumbs to navigate back the session's details page.

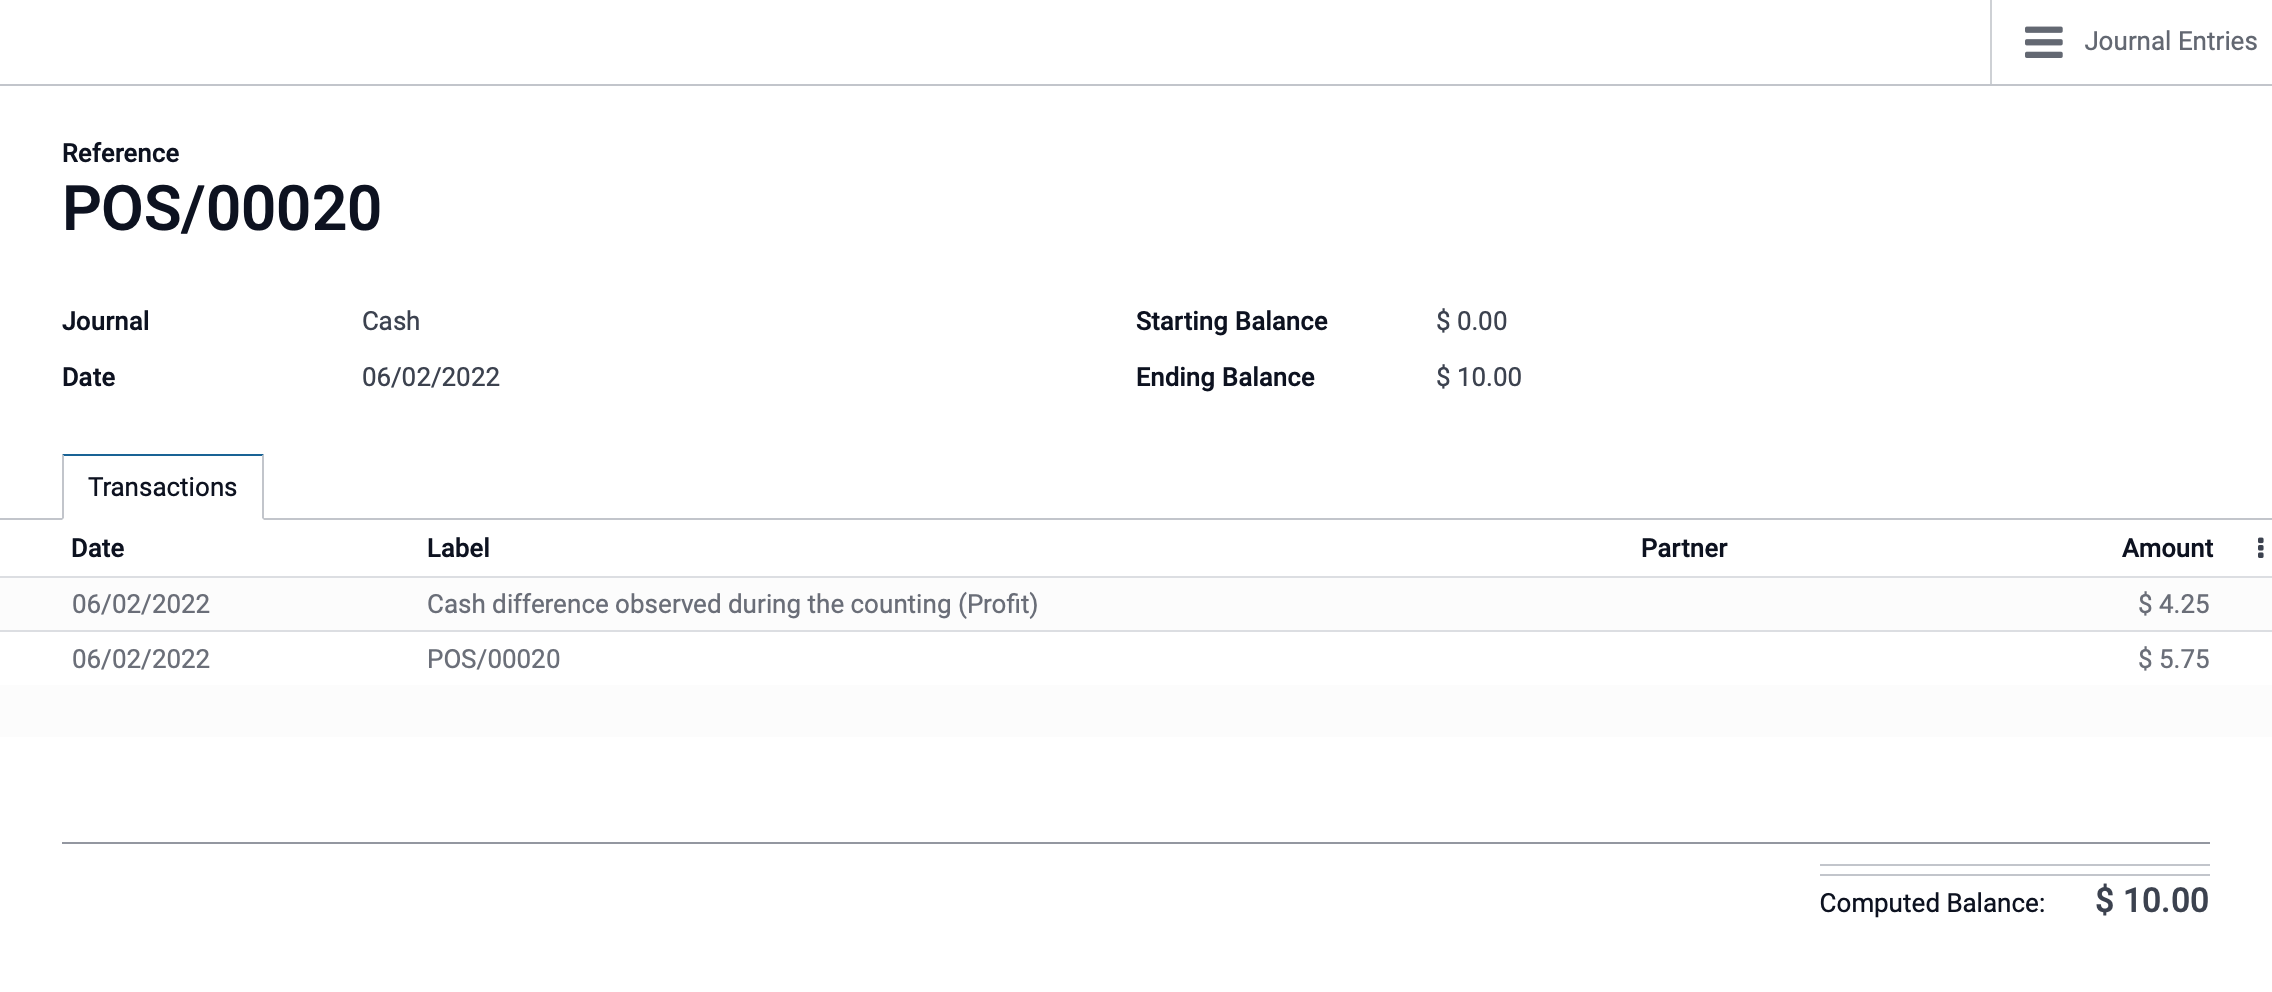
Now select the Cash Register smart button. This will open the following page with each sale order and payment amount listed along with any discrepancies.
Follow your breadcrumbs to return to the session. Depending on your desktop setup, you will notice the difference was also recorded in the chatter.
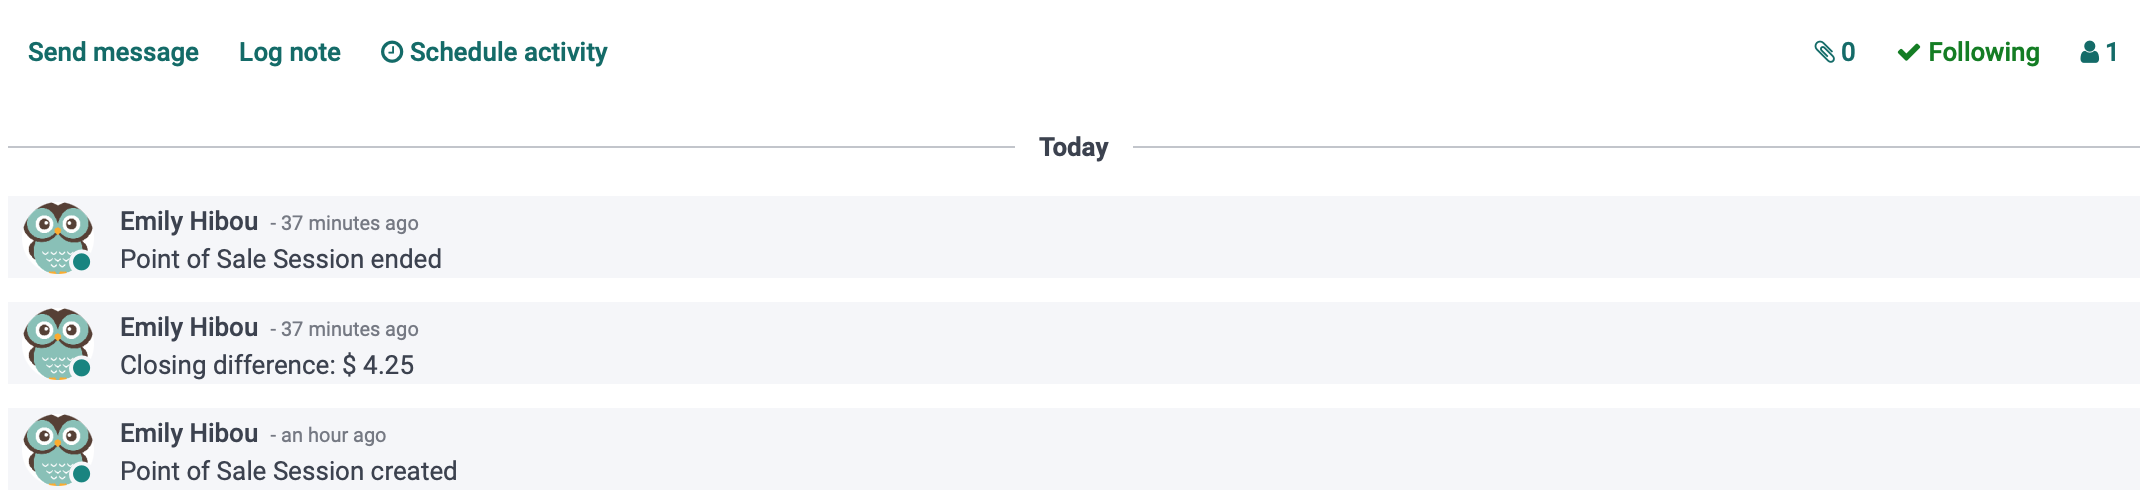
From the chatter, you or the user will be able to leave a log note or schedule an activity to figure out where the difference came from or went.
