Employees: Employees Workflows: Employee Setup Guide
Purpose
The purpose of this documentation is to review the process for setting up your Employees in the Employees application of Odoo 15. We will also be reviewing how to create Users within the Settings application.
Process
There are mulitple ways to add employees. Navigate to the appropriate section of this documentation, based on your company's needs.
Create an Employee with Database Access: Follow these instructions if your new employee does need access to your Odoo database as part of their job function. After this process, you'll also follow the Add an Employee to Your Company instructions for configuration guidelines.
Add an Employee to Your Company: Follow these instructions if your new employee does not need access to your Odoo database as part of their job function.
Good to Know!
Adding Database Access to Existing Employee
If you've created an employee without database access, you can easily add this access later. Simply follow the instructions under Create an Employee with Database Access, then open the employee's record and assign this record to the HR Settings tab > Related User field.
Be sure to save the Employee record when you're done.
Create an Employee with Database Access
To get started, navigate to the Settings app.
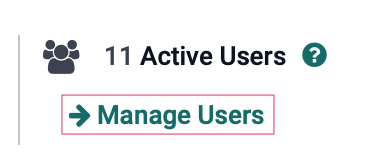
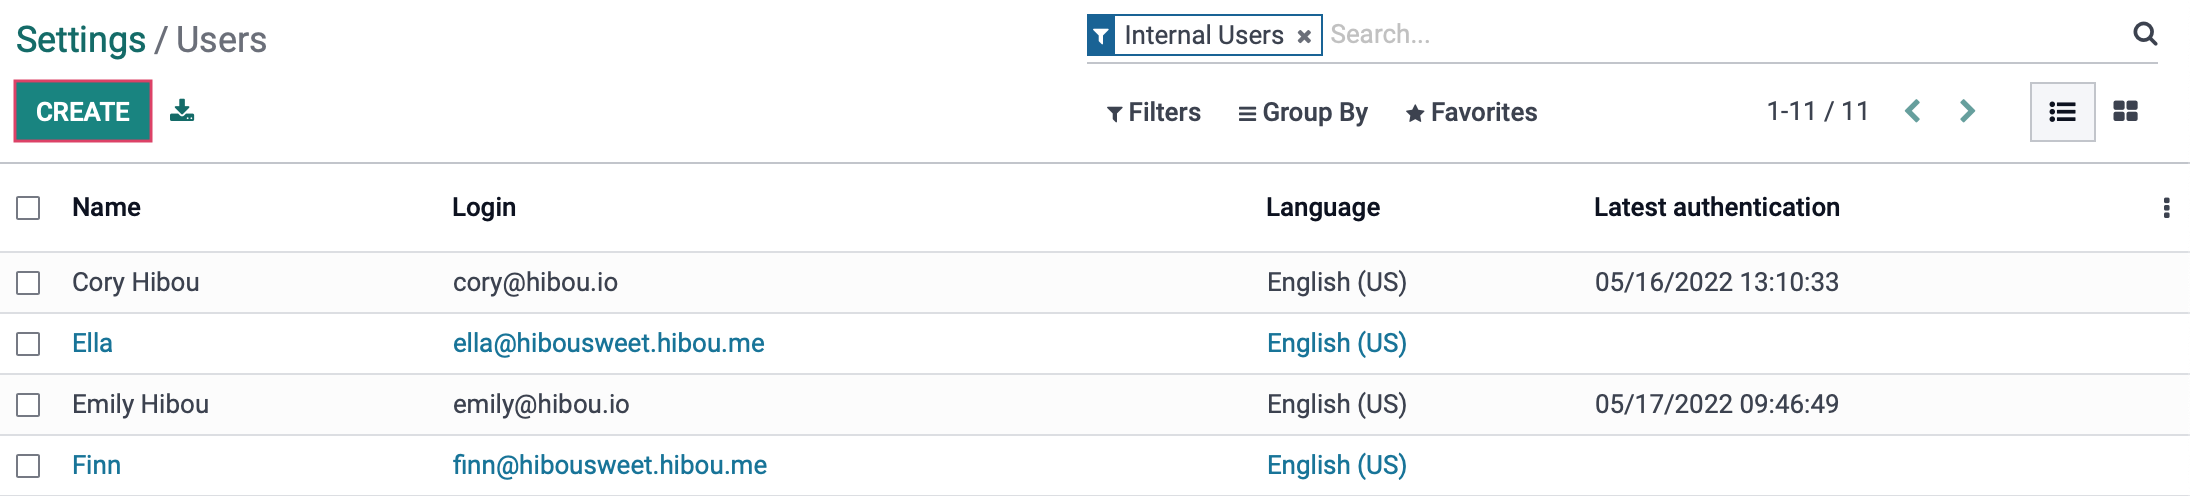
Once there, click Manage Users under the Users section.
This will bring you to a list of all existing Database users. To create a new user, click Create.
This opens a new user form where you'll be prompted to fill in the user's details and permission levels.
Name: Enter the Employee's name.
Email Address: Enter the employee's email address.
: Upload a photo of the employee, if desired.

Under theAccess Rights tab, you'll have the ability to set permissions for this user. Depending on the apps installed on your database, what you see on this page will vary. For more comprehensive instructions, review the Managing Users documentation and set all accesses accordingly.
Technical
For a non-admin employee, scroll to the bottom and uncheck Access to Private Addresses. Doing so ensures they will not have access to the private details of employees. Note: Technical settings are only visible when in Debug Mode.

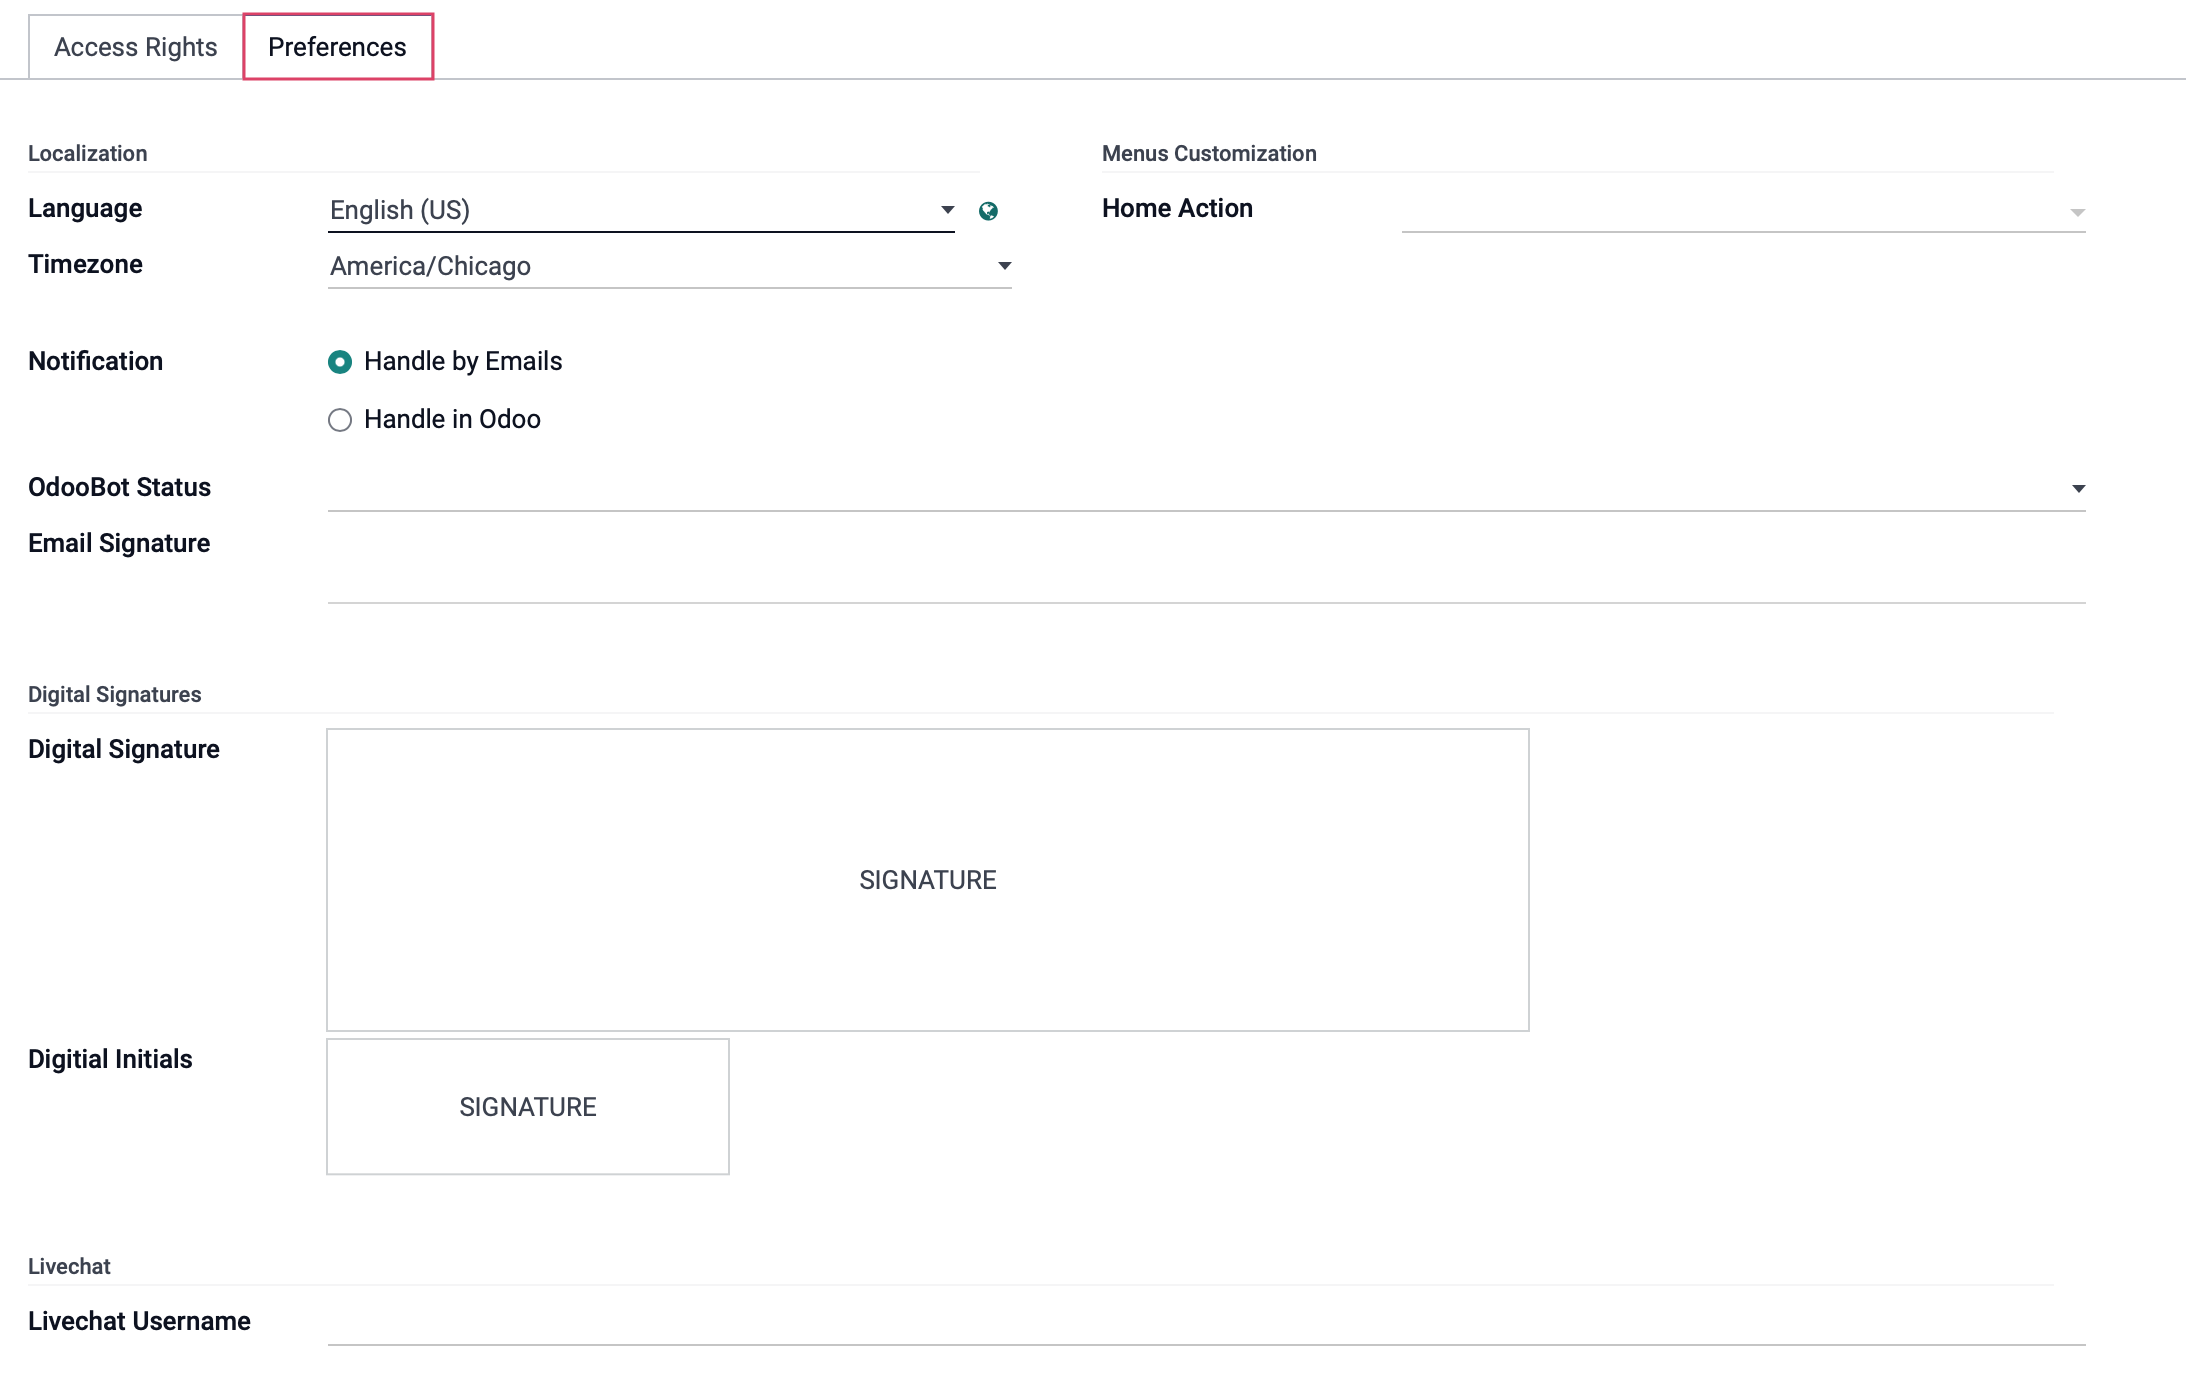
Under the Preferences tab, you'll see the following fields:
Localization
Language: Set the user's preferred language, generally that which matches your Odoo database.
Timezone: Set the user's timezone.
Notification: Set the preferred notification style. The user can modify this later.
Handle by Emails: This setting allows the user to receive and send correspondence via email.
Handle in Odoo: This setting allows the user to receive and send correspondence via Odoo's Discuss app.
OdooBot Status: This field may be set for your new employees so that OdooBot may help them learn their way around Odoo.
Email Signature: Enter the email signature preferred by your company, or leave this blank to allow the user to create their own.
Digital Signatures
Digital Signature: This field may be filled so your employee may save their signature digitally for future use.
Digital Initials: Similar to the digital signature, your employee may add their initials as a shorthand for future signing needs.
Livechat Username: This username will be used as your employee's name in the Livechat Channels.
Menus Customization
Home Action: If specified, this action will be opened at log on for this user, in addition to the standard menu.
Important!
Timezones
It's crucial to set the employee's timezone to the most accurate for their region. Not doing so will cause discrepancies in scheduling, planning, payroll, and more. The common US timezones that are most reliable in Odoo are in the following format:
EST5EDT - Eastern
CST6CDT - Central
MST7MDT - Mountain
PST8PDT - Pacific
When you're ready, click SAVE. You will then receive a notification stating that a link was sent to the user to set up their account.

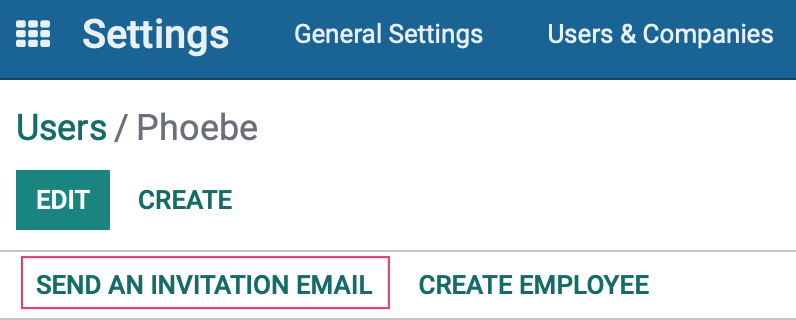
Should you need to resend this email, select Send an invitation email.
Good to Know!
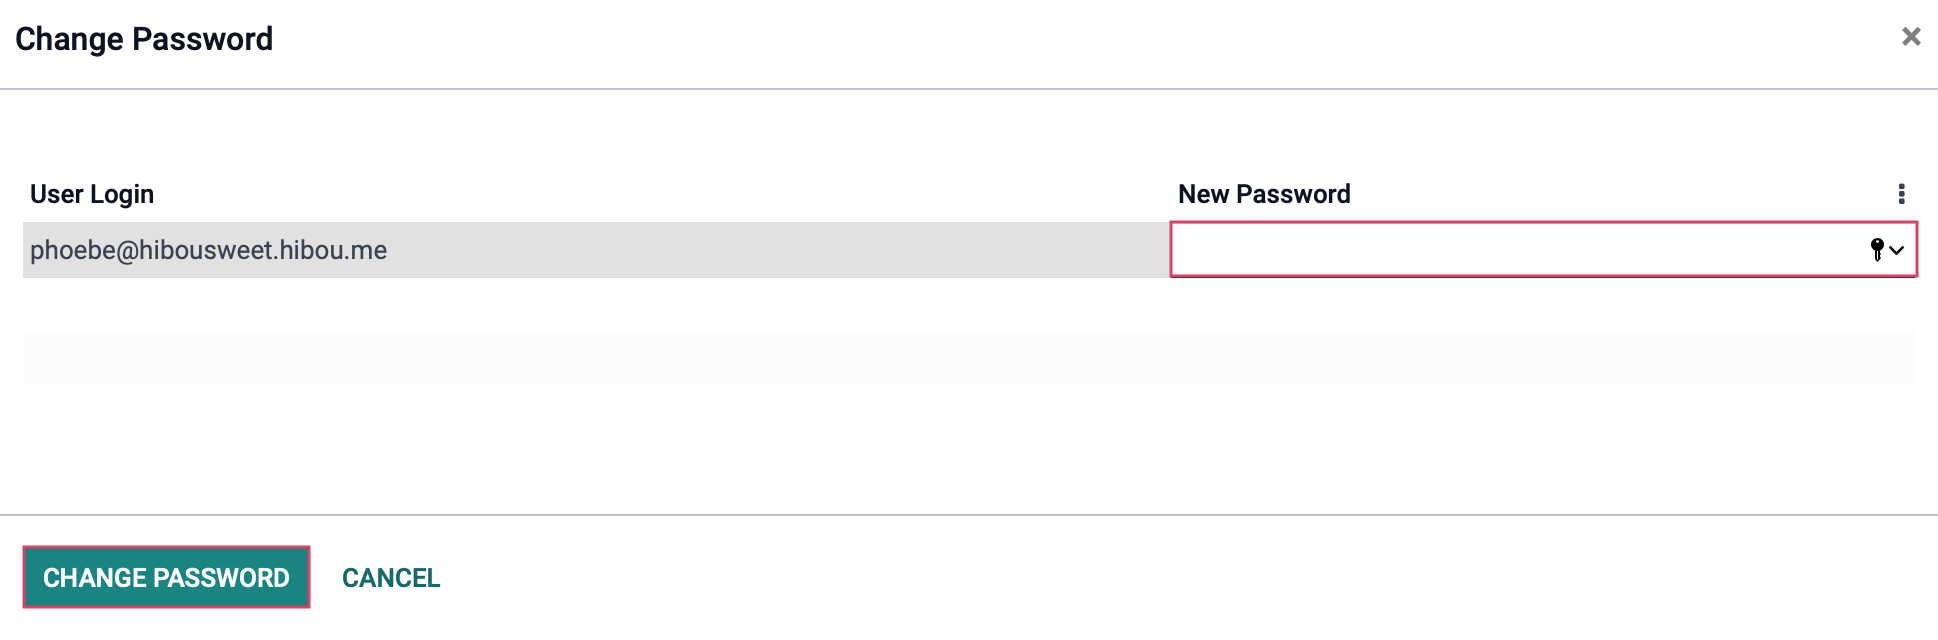
Setting a Password
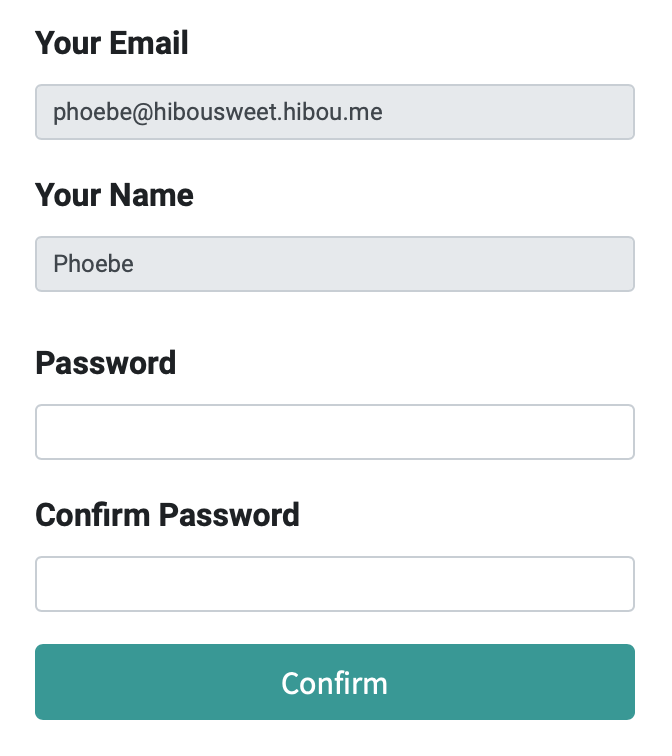
Upon clicking that invitation link, the new user will see the form, below, and be prompted to create a database password.
As an administrator, you can also set a password for the user from their user page by clicking Action > Change Password.
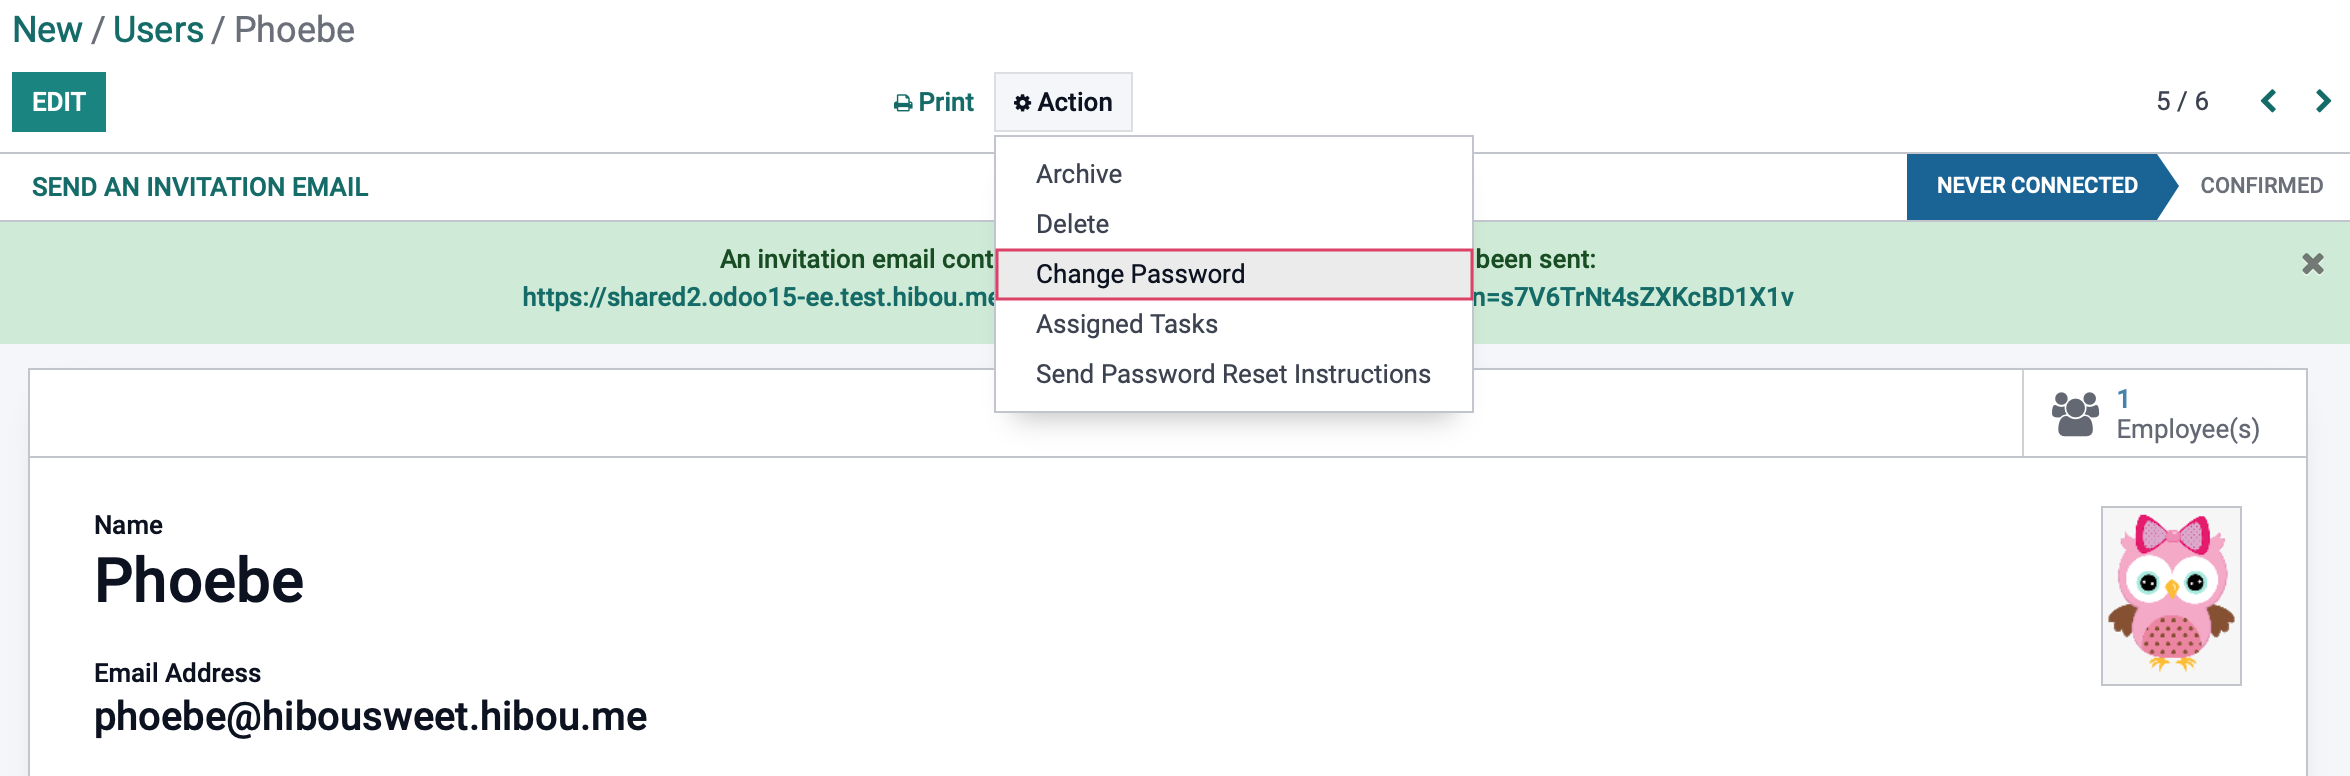
Click the password field and enter a new password, then click change password.
Create an Employee from a User
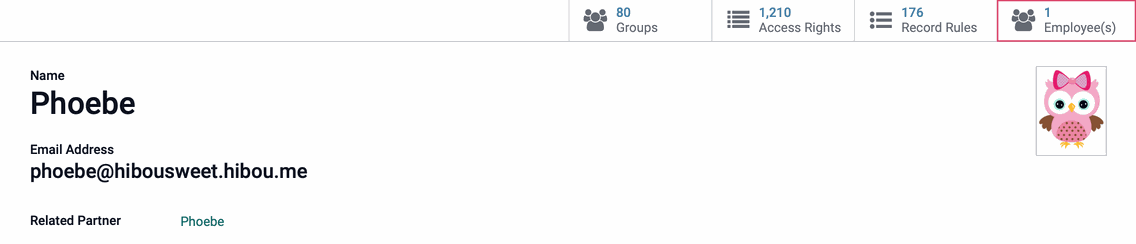
Once you've saved the new user, easily add them as an employee by clicking Create Employee.
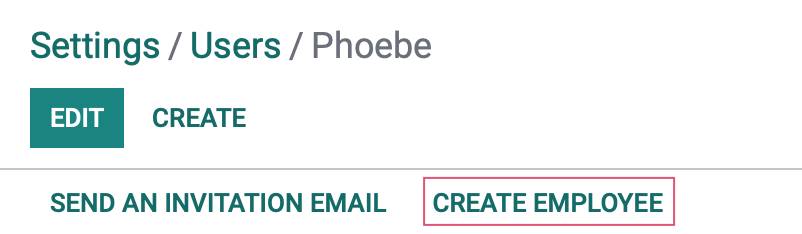
You'll then see the new Employee(s) smart button on the top of the page. Click this button to open the new employee record within the Employees app, and then click on the tile of the created employee record.
Once there, click Edit and follow the instructions in the Add an Employee to Your Company section (below) to further configure your new employee's record.
Add an Employee to Your Company
To get started, navigate to the Employees app.
When you land on the main screen, you will see kanban view cards for all of your current employees. To create a new employee, click create.
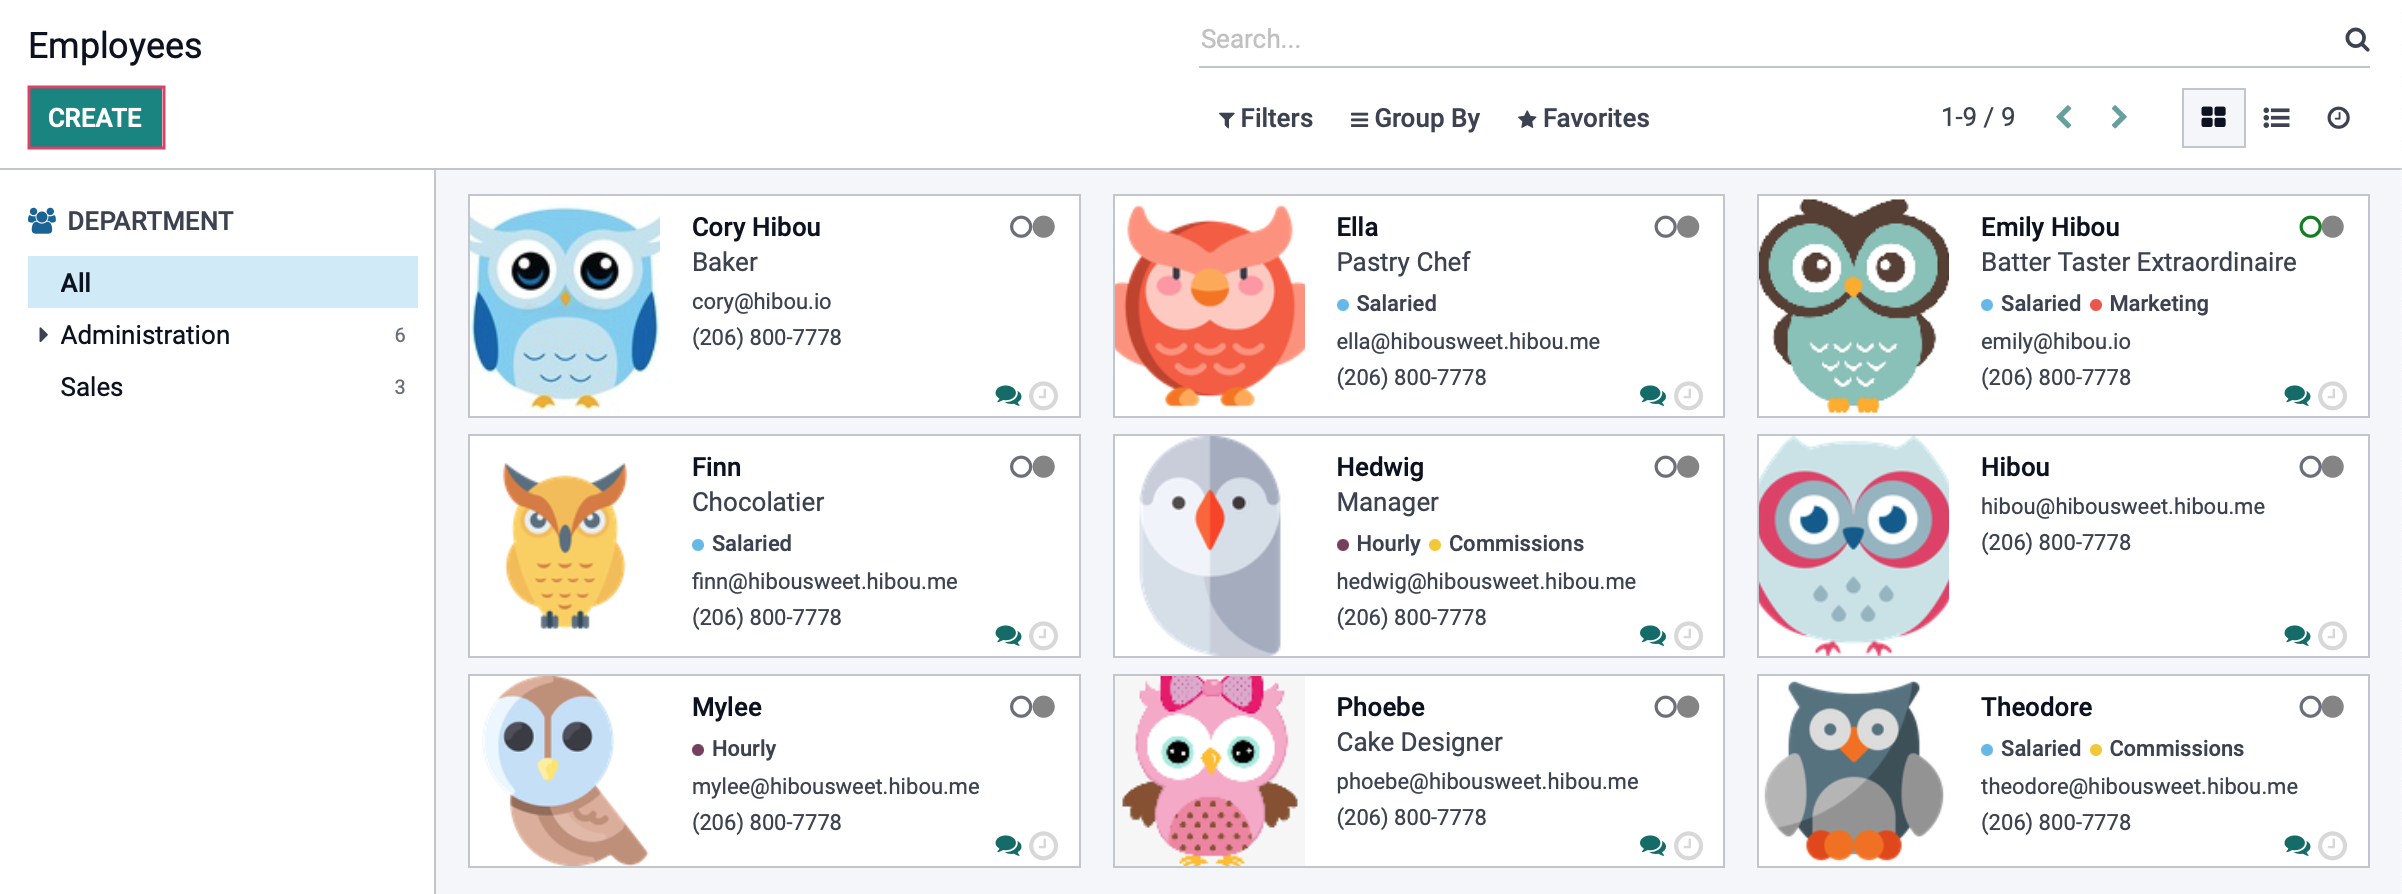
This will bring you to the New Employee form where you'll configure the following sections.
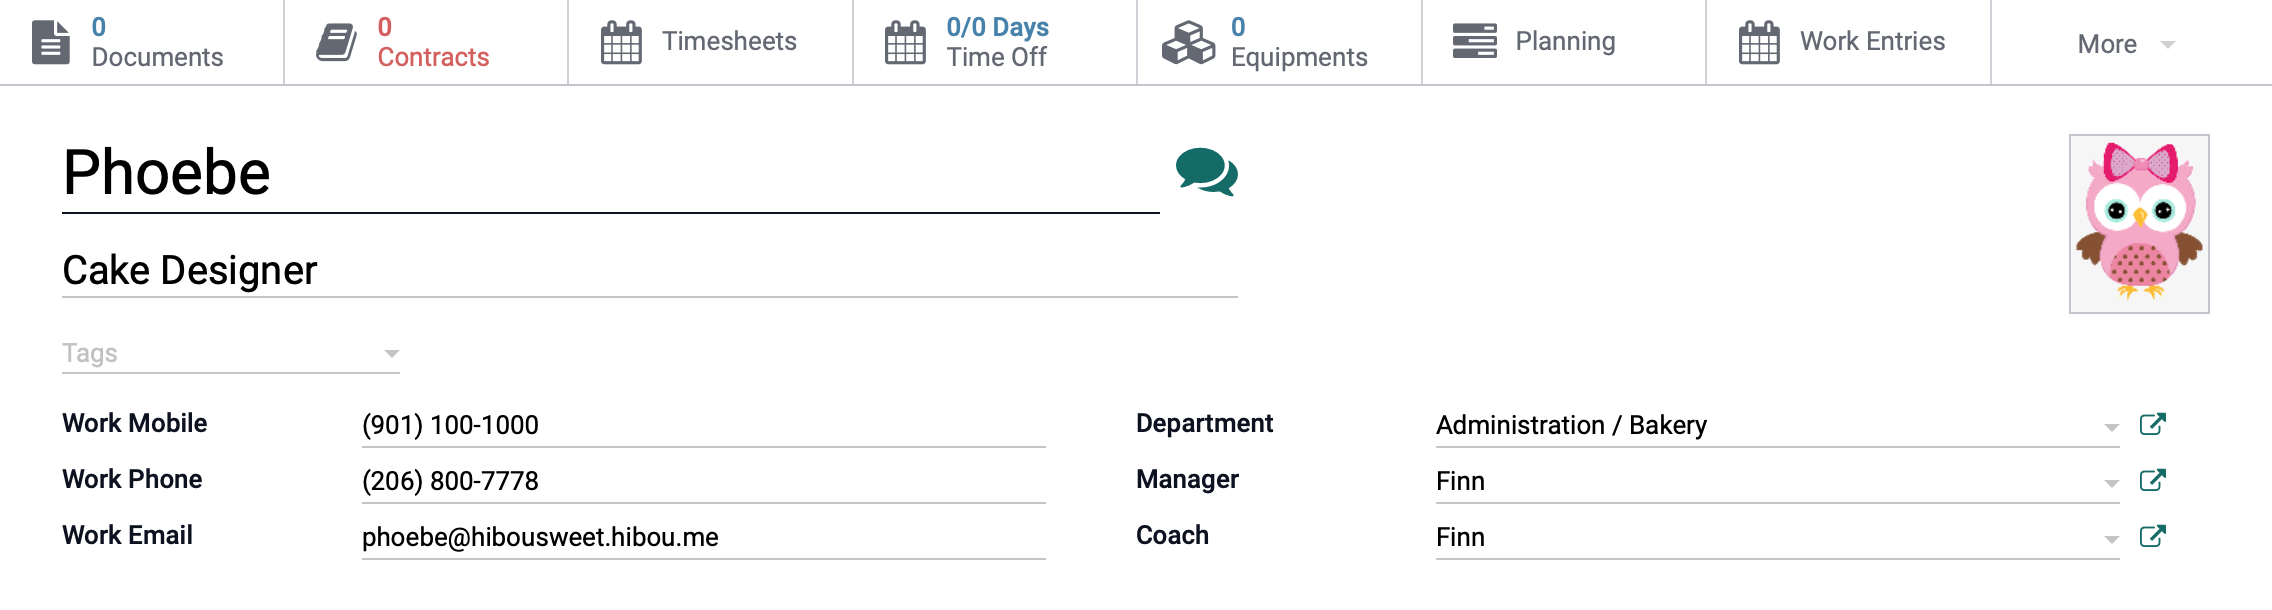
Employee's Name: Enter the employee's full name.
Job Position: This field indicates the employee's job position. These job positions come directly from the recruiting application’s positions that you have hired for. For more information on recruiting, read our Recruitment Overview documentation.
Tags: Employee tags are used to indicate each employee's skillset in a searchable manner. This way, you can easily search for employees by skillset for special projects. These tags are created in the database immediately after you hit enter.
: You can upload a photo of the employee if desired.
Work Mobile: If your employee will have a dedicated mobile line for work, enter that here.
Work Phone: This field will auto-populate from the company's main phone number, but you can enter the employee's dedicated work phone line here.
Work Email: Enter the employee's work email in this field.
Department: This field indicates the department this employee will be working in. To see how to create departments, read our Adding Departments documentation.
Manager: Select the employee this new user will report to.
Coach: Select an employee to coach the new employee. The coach has no specific rights or responsibilities by default.
Good to Know!
Color-Coding Employee Tags
Once you create a new employee tag, you can click on it to set a color for quick visual reference when seeing your employees in kanban view. You'll also have the option not to show a specific tag in kanban view by leaving the Hide in Kanban ticked. This box is unchecked as soon as you select a color.
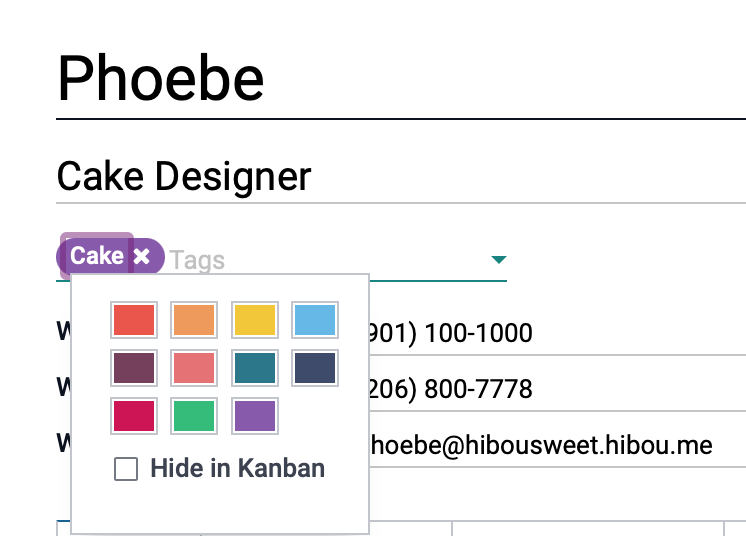
If you hide a tag in the kanban view, the color will be removed as it won't be utilized.
Resumé
If Skills Management is enabled in the Employee app configuration, you'll see the Resumé tab. To learn more about the options and settings on this tab, review the Skills Management documentation.
![]()
Work Information
The Work Information tab is where you'll enter details about the employment details of this individual.
Location
Work Address: Select the address where this employee works. You will need to have a Contact within your database for this work address already. If you do not have one created, you can select the Create and Edit... button on the drop-down menu and create a new Contact for this work address.
Work Location:
Approvers
Time Off: Select the user who will approve this employee's time-off requests. The drop-down will only display users with permission to approve time-off.
Expense: Select the user who will approve this employee's reimbursed expenses. The drop-down will only display users with permission to approve expenses.
Timesheets: Select the user who will approve this employee's timesheets. The drop-down will only display users with permission to approve timesheets. For more information on timesheet entries, read our Timesheets documentation.
Schedule
Working Hours: The schedule of the employee.
Timezone: The timezone of the employee.
Planning
Default Planning Role: Select the capacity in which this user will be added when planning work schedules.
Planning Roles: These will be alternative roles that the employee may perform in.
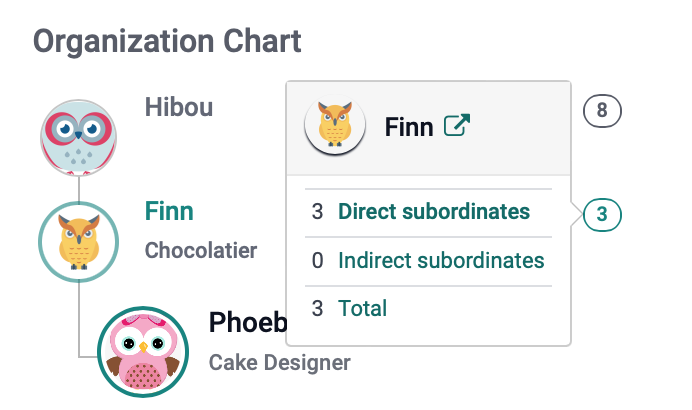
Organization Chart: If the Organizational Chart has been enabled in the Employees application configuration, you'll see the hierarchy on the right-hand side of this tab on a saved record. Whenever you see a number next to an employee's name in the organizational chart, you can select it to see a more detailed breakdown of that employee's organizational structure.

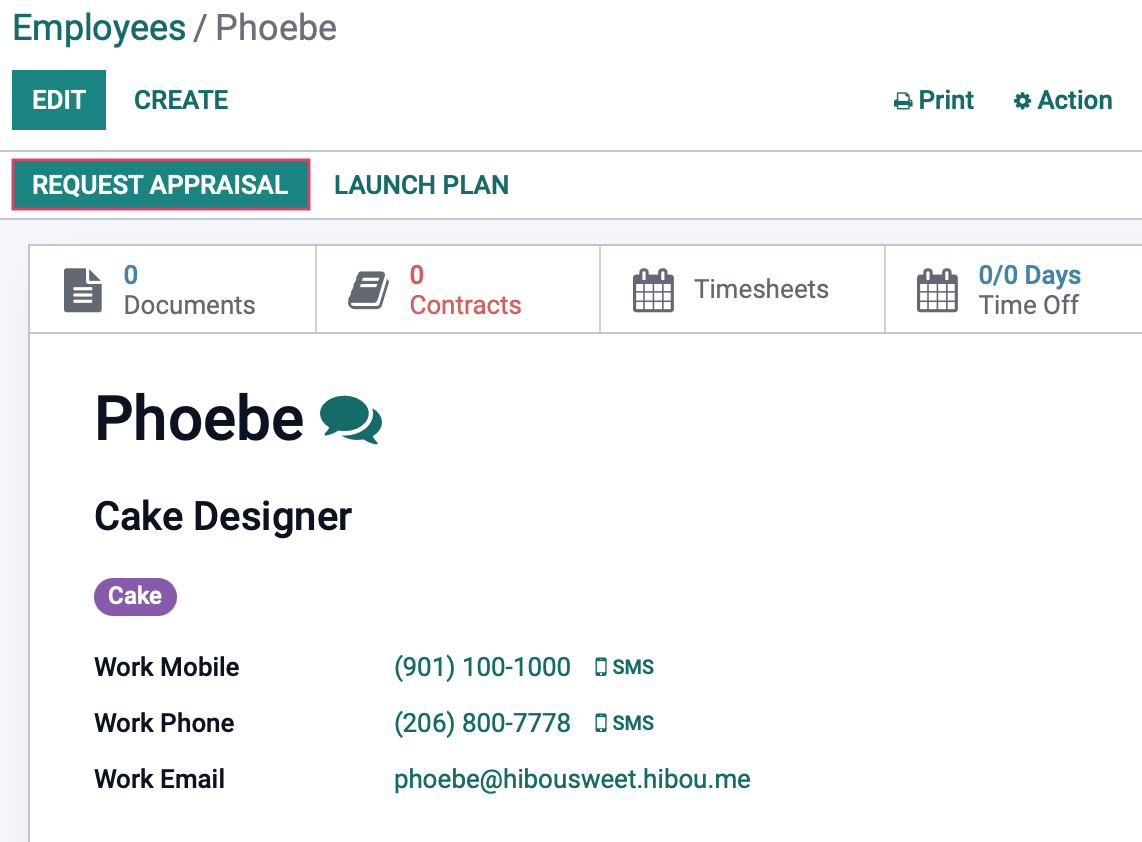
Appraisals
The REquest Appraisal button will display if the Appraisal app is installed and configured. This section allows you to choose appraisals that you have created and select who should receive the form in relation to this employee. For more information about appraisals, read our Creating & Conducting Employee Appraisals documentation.
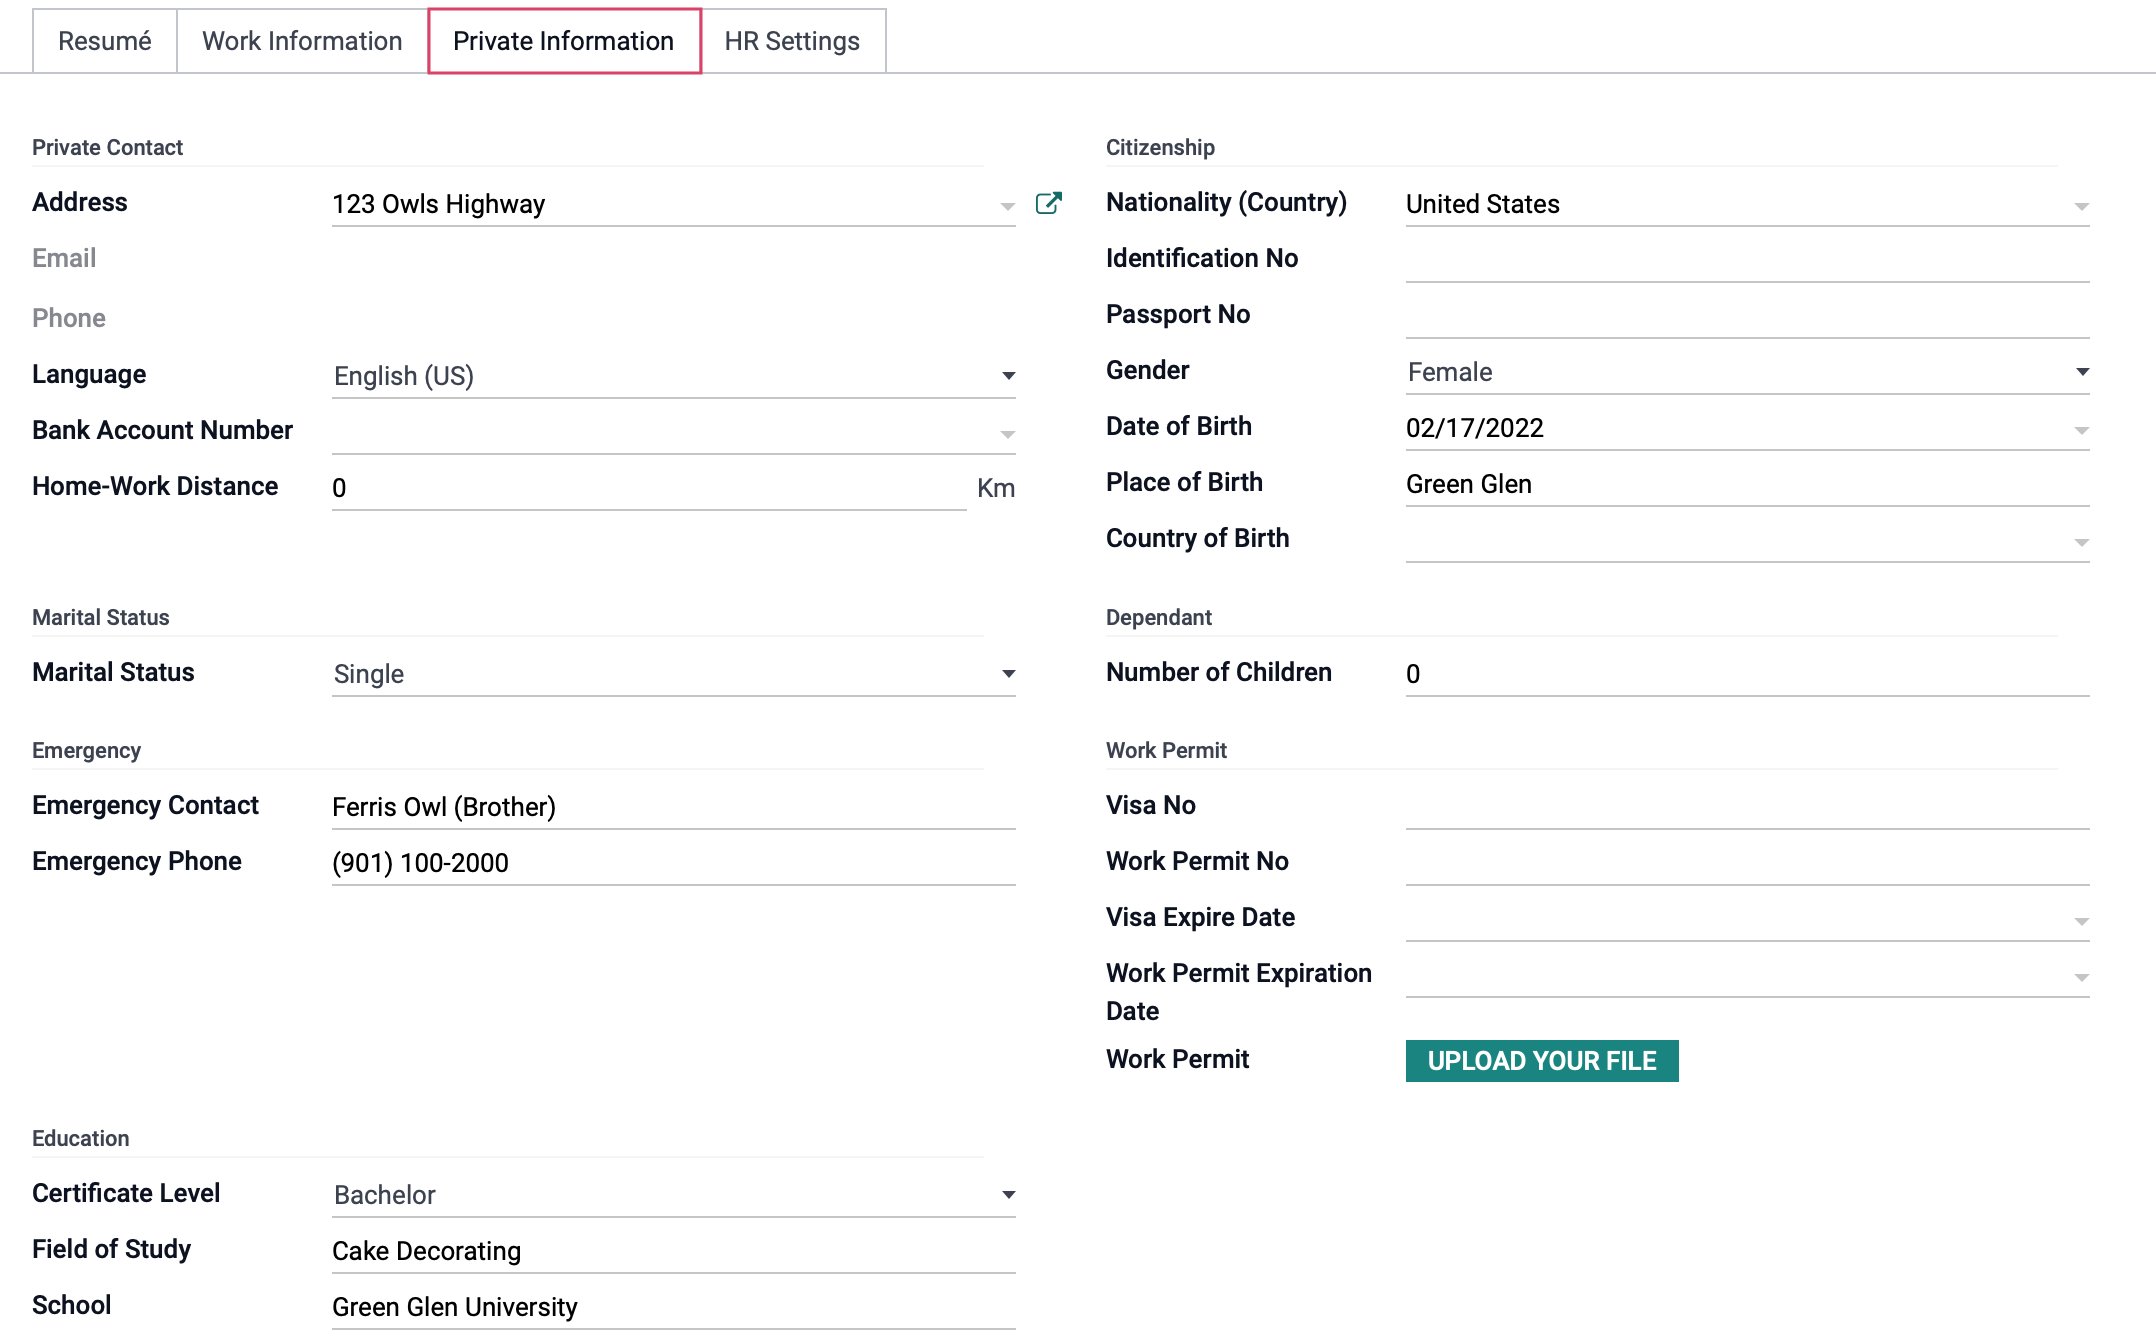
Private Information
The Private Information tab will only be visible to Database Users who have been granted access.
This section houses the employee’s personal details and information that you do not want other employees to have access to. The details on this page will be used for things like running payroll, creating partner ledgers for the employee, and any other processes that will make an accounting entry. All of these fields are optional, so as the employer, you can choose those you'd like to maintain.
Private Contact
Address: If there is no address listed, click the drop-down and select Create and Edit... to enter the employee's home address if a contact card has not been created for them already. The Bank Account Number field will appear once the contact has been added for this employee.
Email: This field will populate based on the contact card of the selected address.
Phone: This field will populate based on the contact card of the selected address.
Home-Work Distance: Indicate the distance this employee lives from the workplace.
Marital Status
Marital Status: Select the employee's marital status.
Emergency
Emergency Contact: Enter the name for this employee's emergency contact.
Emergency Phone: Enter the phone number for this employee's emergency contact.
Education
Certificate Level: Enter the type of certification they received.
Field of Study: Enter their field of study.
School: Enter the school from which this certificate was attained.
Citizenship
Nationality (Country): Select the country where this employee has their citizenship.
Identification No: Enter the identification number that verifies citizenship.
Passport No: Enter the employee's passport number.
Gender: Select the employee's gender.
Date of Birth: Select the employee's date of birth.
Place of Birth: Select the employee's place of birth (state/province).
Country of Birth: Select the employee's country of birth.
Dependant
Number of Children: Enter the number of children (or dependants) this employee has.
Work Permit
Visa No: Enter this employee's work visa number.
Work Permit No: Enter this employee's work permit number.
Visa Expire Date: Select this employee's work visa expiration date.
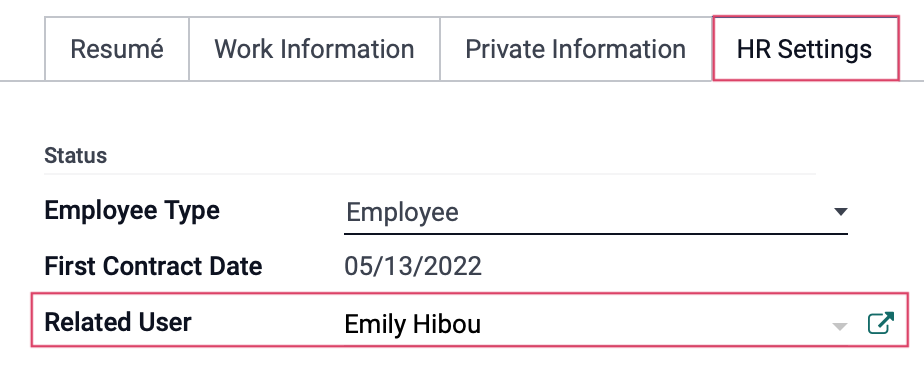
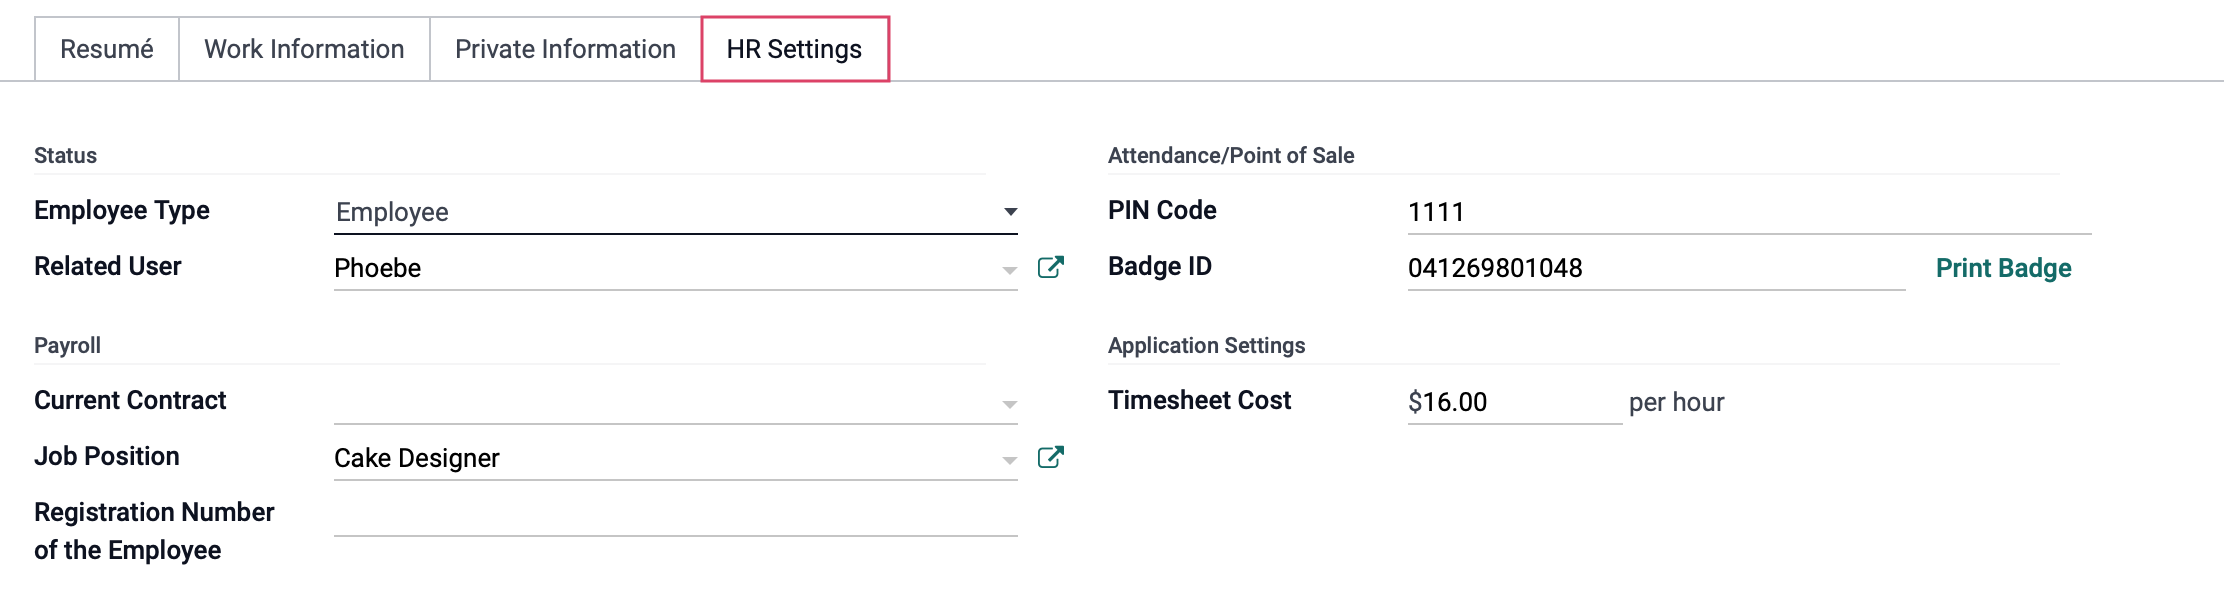
HR Settings
Under the HR Settings tab you will have the following options:
Status
Related User: If this employee is associated with a database user, it should be selected here. When you create an employee from a user record, this field will auto-populate.
Job Position: The position of the employee.
Registration Number of the Employee: Enter the number that identifies this employee is within your company.
Timesheets
Timesheet Cost: Enter the estimated cost to your company for this employee’s timesheet entries per hour.
Send Appraisals Form To: This field will display if the Appraisals application is installed and configured. Select all employee levels to which you want to send this employee's appraisal form at the next appraisal date. Once selected, you'll then have the opportunity to select specific employees.
Last Appraisal Date: Select the date of the last appraisal.
Attendance: This field will display depending on the Employee app configuration for Presence Control. For further instruction, read the Attendances documentation.
PIN Code: Enter the PIN number the employee will use to clock-in and clock-out of the Attendances application. This PIN can be used in lieu of scanning the employee's badge barcode.
Badge ID: Enter the employee's badge ID. When you click Generate, this will establish the badge ID within the database. Once established, you'll then have the option to Print Badge. This will generate a PDF that can be printed. The employee will use this badge to scan in the Attendances application in lieu of entering a PIN code.
Once you’ve selected all of the necessary options, click Save.
Managing Employees
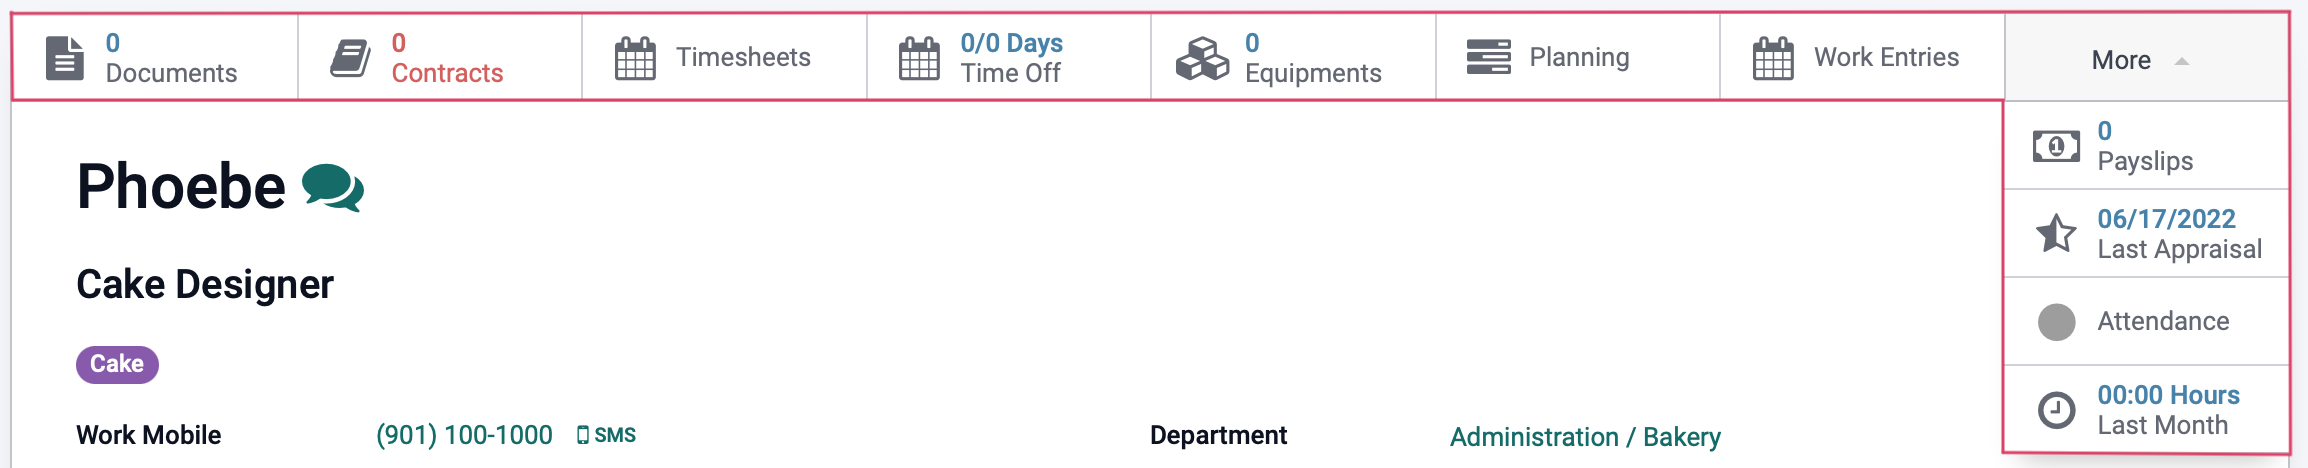
At the top of the employee record, you will see a series of smart buttons that will allow you to manage specific actions or review specific information for this employee. These will vary based on the applications you have installed and configured.
Time Off: This displays the allotted days off used (used/allotted). For more information on Leaves allocation and management, see our Time Off documentation.
Planning: This will show the employees scheduled/planned time.
Contracts: This will take you to the Contracts screen and will allow you to set the contract for this employee. Contracts are how Odoo knows the rules and conditions for running payroll for this employee. For more information on setting up contracts, read our Employee Contracts documentation.
Payslips: This will display all payslips that have been generated for this employee. For more information on creating payslips for your employees, read our Payroll documentation.
Equipments: This will track the equipment this employee is currently using.
Last Appraisal: This shows the date of the employee's last appraisal, and will take you to all appraisals for this employee. For more information about appraisals, read our Creating & Conducting Employee Appraisals documentation.
Timesheets: This will take you to all of the employee's entered timesheets.
Attendance: This shows you, at a glance, if the employee is active or not. The icon(s) shown here will differ, depending on the Employee application's Presence Control configuration. For more information on Attendances, read our Attendances documentation.
Hours Last Month: This will display the number of hours this employee worked in the previous month. Note: If you track time worked in days, this will adjust accordingly.