Employees: Employees Workflows: Employee Setup Guide
Purpose
The purpose of this documentation is to review the process for setting up your Employees in Odoo’s Employees application. We will also be reviewing how to create Users within the Settings application.
Process
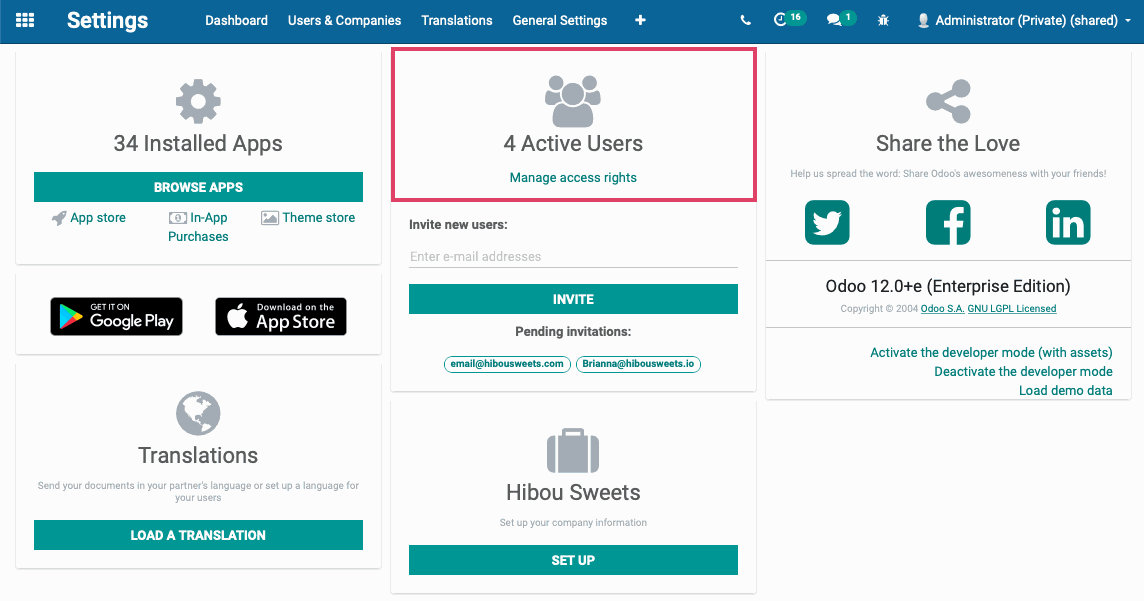
Creating Users
Once there, click on Manage access rights and you will see a list view of all of your current users.
Good to Know!
You do not need to create database users for all of your employees, only the employees that will need to access Odoo for their job function.
To create a new user, click create. You will be prompted to fill in the user's details.
Enter the employee’s Name and Email Address. They will receive an email invitation to choose their password at this email address. Administrators can change a user's password as needed from this window.
For more information on permissions and managing users, read our Managing Users documentation.
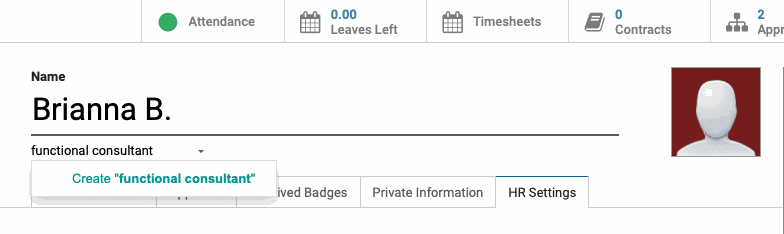
Employee Tags
Directly below the Employee Name field, you can add tags to designate your employees with special classifications like “trainer” without changing their main position.
To create new employee tags, simply start typing the tag that you want in the field and select the Create "tag name" option that appears in the dropdown menu underneath the field.
The tag will then be created and applied to this employee. Once a tag is created it can be selected for any other employee that you want it to be applied to.
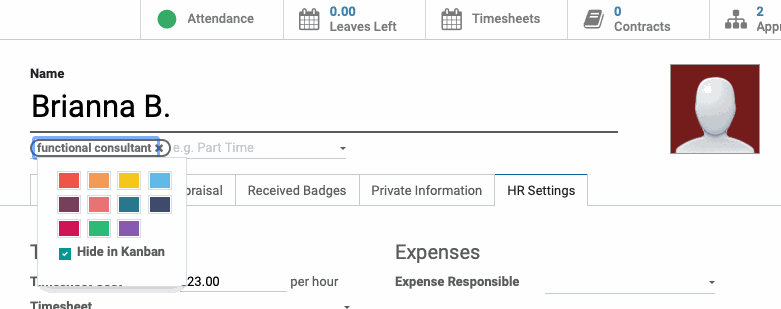
Once the tag is applied to the employee it will be black and white, you can select the tag and choose a different color for the tag from the list. You can also decide if you want the tag to be hidden when viewing the employee in the Kanban view.
The tags are automatically saved as you edit them so there is no need to press the save button to retain your tags in the database.
Adding Employees to Your Company
To add employees to your company, navigate to Employees.
When you land on the main screen, you will see kanban cards for all of your current employees. To create a new employee, click the create button.
On the next page, you will be prompted to enter the employee’s details:
Name: Enter the employee’s full name.
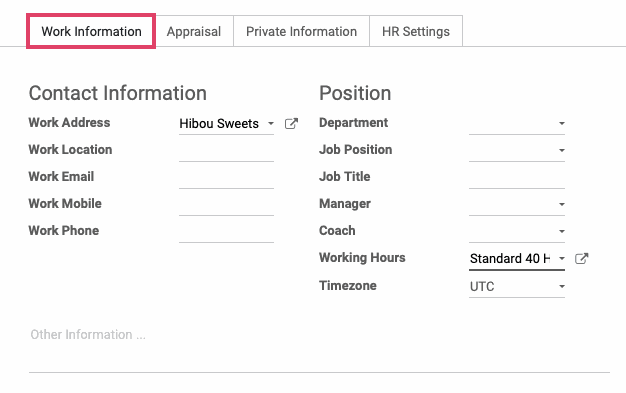
On the Work Information tab you will see the below options:
Work Address: Select the address where this employee works. You will need to have a Contact within your database for this work address already. If you do not have one created, you can select the Create and Edit... button on the drop down menu and create a new Contact for this work address.
Work Location: Enter in the specific location within the address your employee works.
Work Email: Enter in the employee’s work email.
Work Mobile: Enter in the employee’s work mobile number.
Work Phone: Enter in the employee’s work desk phone.
Department: Select the department that this employee should be assigned to. To see how to create departments, read our Adding Departments documentation.
Job Position: Select the employee’s job position. These job positions come directly from the recruiting application’s positions that you have hired for. For more information on recruiting, read our Recruitment Overview documentation.
If you have not used the recruiting application for this position and do not plan to, you can simply enter in the employee's Job Title in the next field.
Job Title: Enter in the employee’s job title.
Manager: Select the employee’s manager from the dropdown menu.
Coach: Select the person responsible for coaching this employee’s performance from the dropdown menu.
Working Hours: This is where you can select and input this employees expected working hours per week. To see how to utilize working hours, read our Company and Employee Working Hours documentation.
Timezone: Select the appropriate timezone for your employee.
Other Information: If you would like to enter in any notes about the employee, you can enter it here.
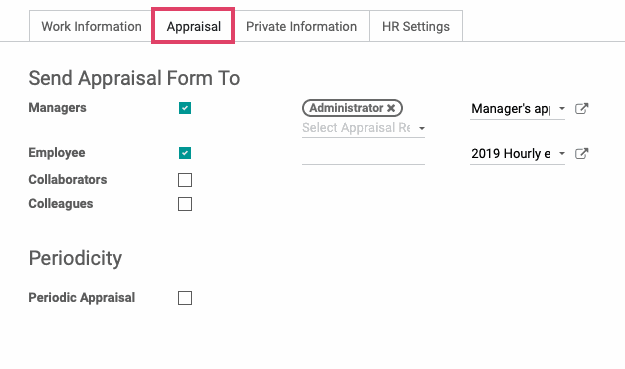
The appraisal tab allows you to choose appraisals that you have created and select who should receive the form in relation to this employee. For more information about appraisals, read our Appraisal documentation.
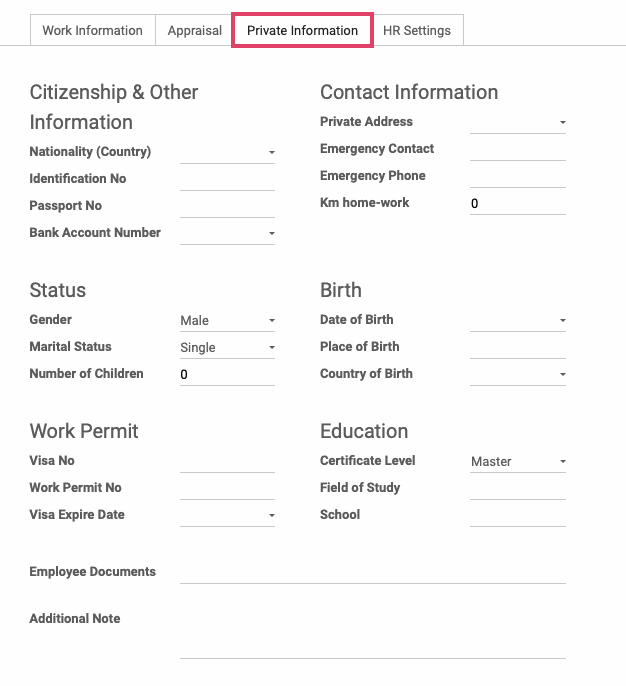
Private Information tab: Only people who are granted access to view private addresses can view this information.
The private information tab allows you to input your employee’s personal details and information that you do not want other employees to have access to. The details on this page will be used for things like running payroll, creating partner ledgers for the employee, and any other processes that will make an accounting entry.
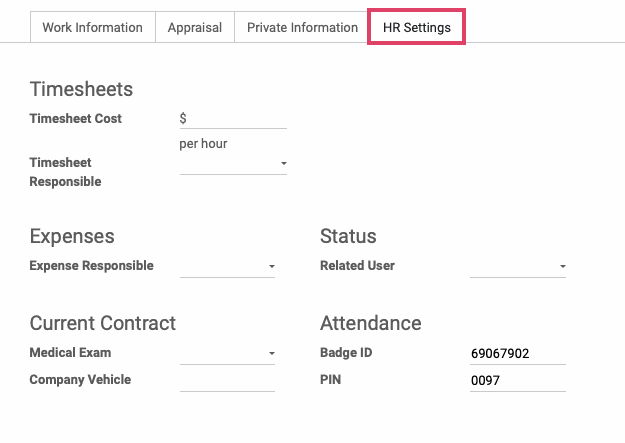
Under the HR Settings tab you will have the below options:
Timesheet Cost: You can input the cost to your company for this employee’s timesheet entries per hour.
Timesheet Responsible: Select the person responsible for approving this employee’s timesheets. If this is not selected, anyone with the permission to approve timesheets can approve timesheets for this employee. For more information on timesheet entries, read our Timesheets documentation.
Expense Responsible: Select the person who is responsible for approving this employee’s expense reports.
Related User: Select the related user for this employee. The related user is the Odoo database user you created using this employee’s email.
Medical Exam: You can input when this employee is next scheduled for a medical exam.
Company Vehicle: If this employee has an employee vehicle, you can enter the vehicle information here.
Badge ID and PIN: Input the employee’s badge ID and PIN and the employee can use this information to clock in and out of the attendances app. For more information on attendances, read our Attendance documentation.
Once you’ve selected all of the necessary options, click Save.
Once you’ve selected all of the necessary options, click SAVE.
Organizational Chart
You have the option to have Odoo automatically create organizational charts on your employee records as you add employees and define your hierarchy.
To activate this option, go to Configuration > Settings and put a checkmark next to the Show Organizational Chart option.
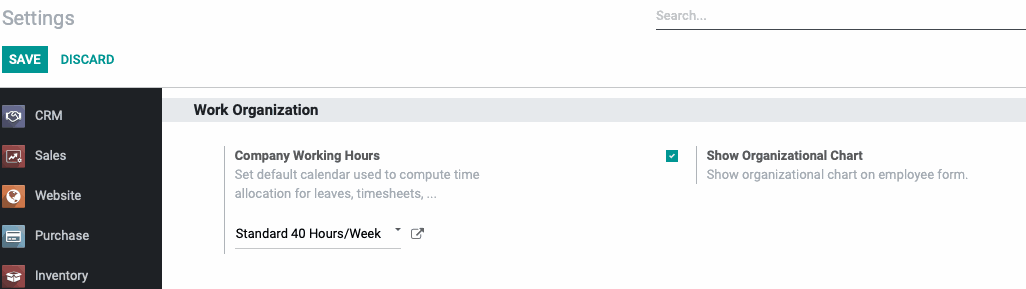
Once selected, click Save.
Now, when you save your employee records, you will an organizational chart laid out based on the hierarchy that you have programmed into Odoo with your selections.
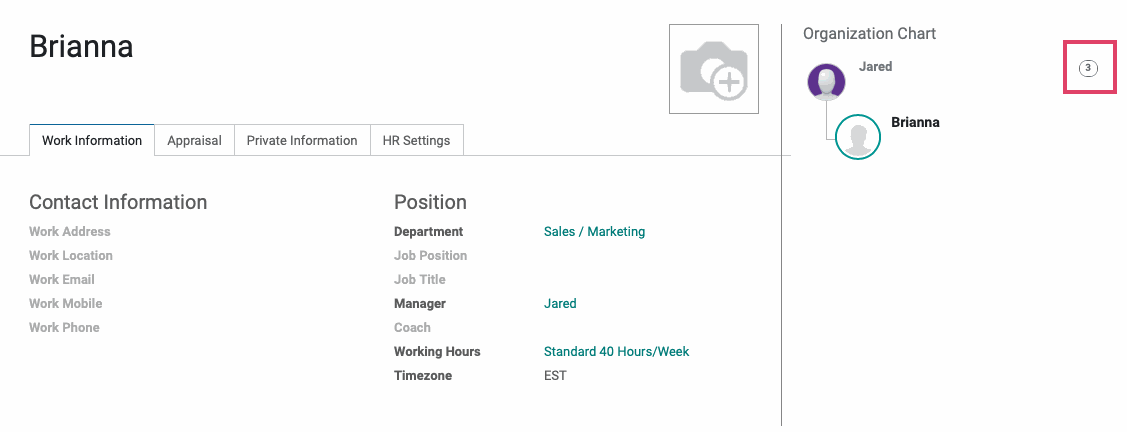
Whenever you see a number next to an employee's name in the organizational chart, you can select it to see a more detailed breakdown of that employee's organizational structure.
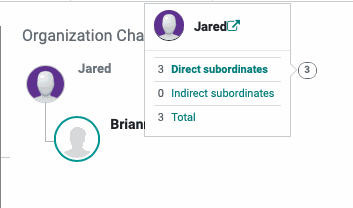
So, here we can see that Jared has 3 direct subordinates and 0 indirect subordinates and the total subordinates he has.
Managing Employees
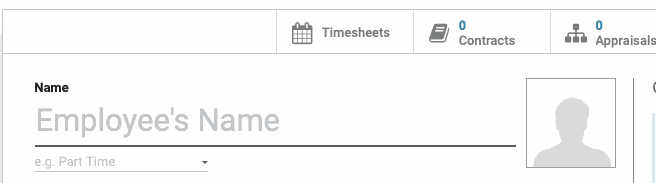
On the top of the employee record, you will see a series of smart buttons that will allow you to manage specific actions or review specific information for this employee.
Attendances: If this employee is hourly and you have them selected to use the Attendances application to track their hours, you can use this button to review all of their attendances. For more information on Attendances, read our Attendances documentation.
Leaves Left: This button will take you to the number of days for the current year that this employee has left for Leaves. For more information on Leaves allocation and management, see our Leaves documentation.
Timesheets: This button will take you to this employee’s timesheets for the current month.
Contracts: This button will take you to the Contracts screen and will allow you to set the contract for this employee. Contracts are how Odoo knows the rules and conditions for running payroll for this employee. For more information on setting up contracts, read our Contracts documentation.
Appraisals: This button will take you to all of the appraisals for this employee. For more information about appraisals, read our Appraisals documentation.
Payslips: This button will take you to all payslips that have been generated for this employee. For more information on creating payslips for your employees, read our Payroll documentation.
