Employees: Employees Workflows: Creating + Conducting Employee Appraisals
Purpose
The purpose of this documentation is to outline the use and processes associated with creating, completing, and sending employee appraisal forms in Odoo's Appraisal application.
Process
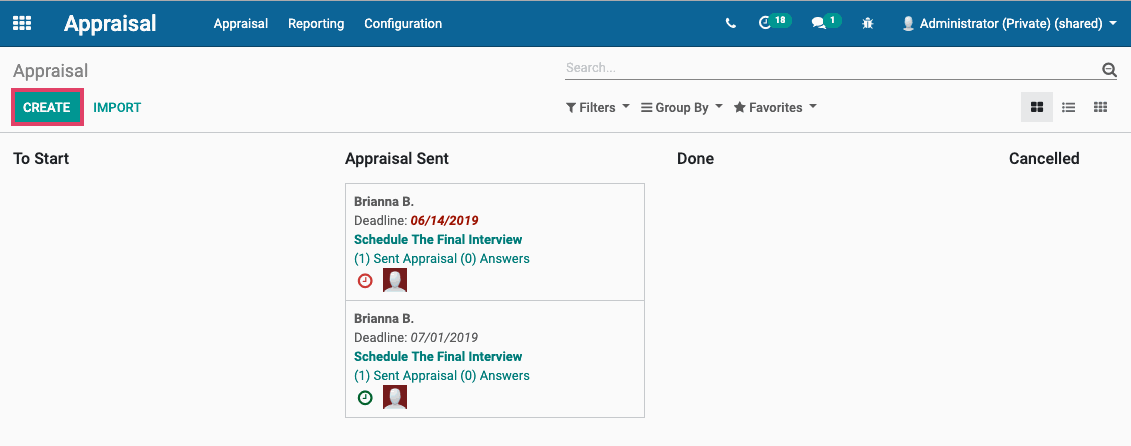
To get started, navigate to the Appraisal application.

Creating and Conducting Employee Appraisal
Once there, click on CREATE.
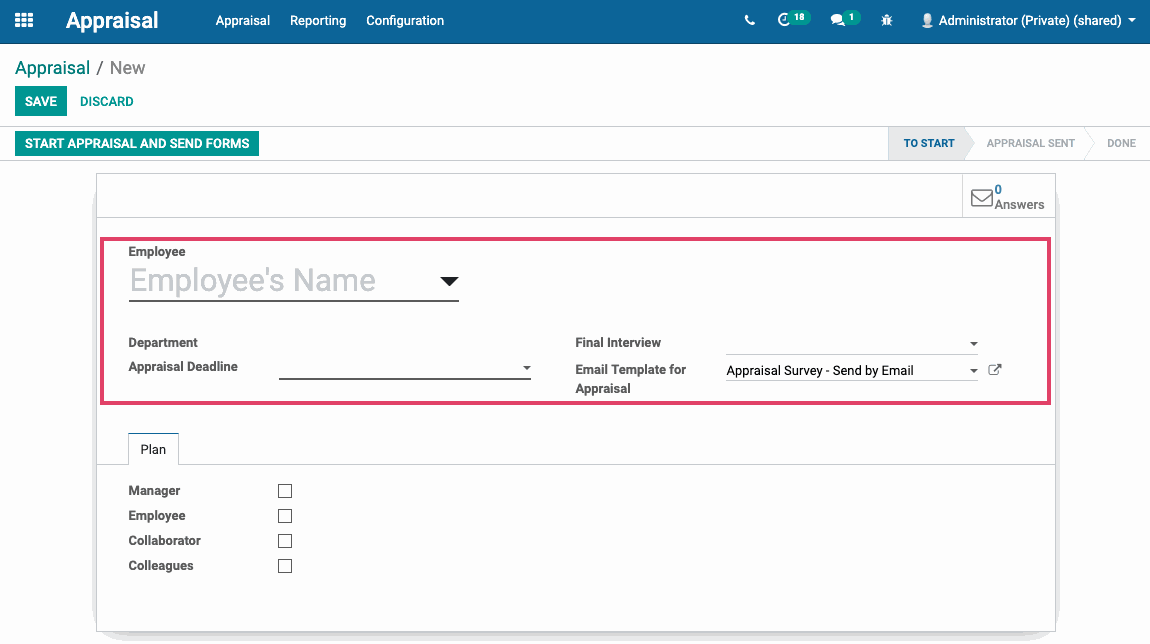
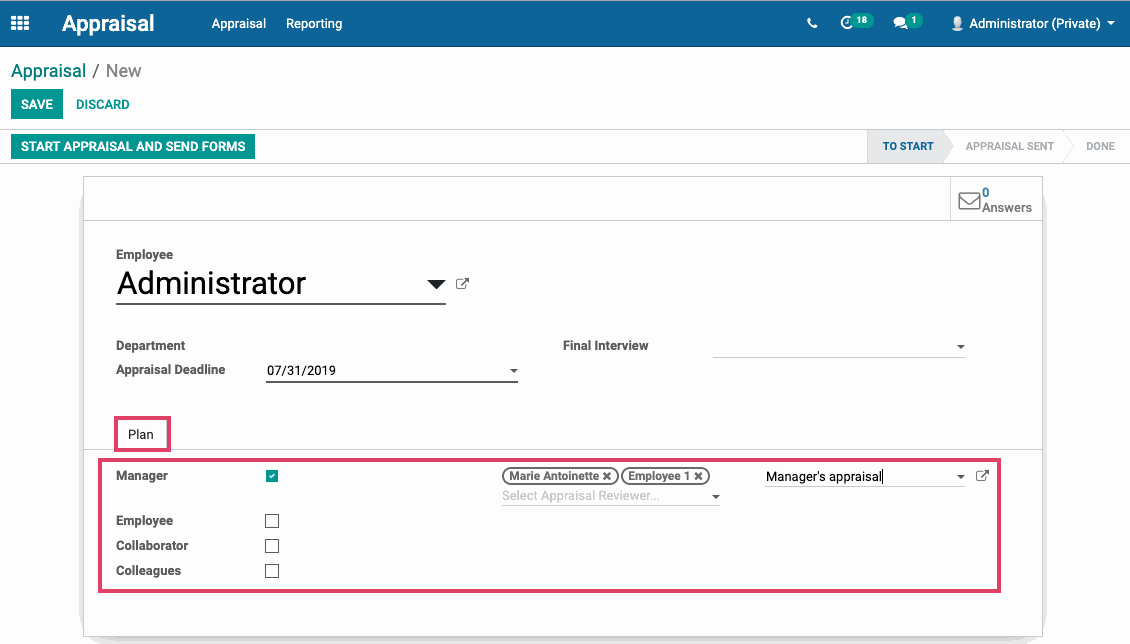
On the following form view screen fill in the following information:
Employee: Select an employee name.
Department: If used, select an employee's corresponding department. This is not a required field.
Appraisal Deadline: Select the due date for the appraisal to be completed.
Final Interview: Select a date if this appraisal is a final interview.
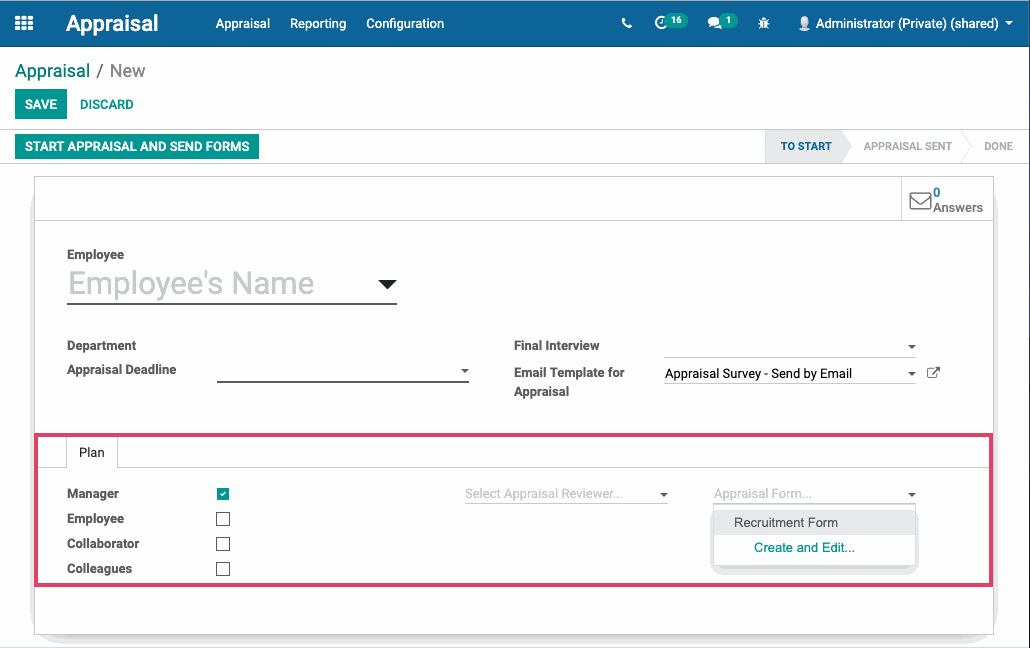
Under the Plan tab, you can select who you are sending the appraisal form to and who will be doing the review.
Manager: With this selected, you are creating an appraisal for the employee whose name you entered at the top of the page, and it will be conducted by their manager. You will be given the option to select the reviewer that will conduct this appraisal and select the appraisal form. Select the Create and Edit... option to create the appraisal form.
Employee: With this selected, you are creating an appraisal for the employee whose name you entered at the top of the page to conduct for themselves. Select the Create and Edit... option to create the appraisal form.
Collaborator: With this selected, you are creating an appraisal for the employee whose name you entered at the top of the page to conduct for themselves. Select the Create and Edit...option to create the appraisal form.
Colleagues: With this selected, you are creating an appraisal for the employee whose name you entered at the top of the page to conduct for themselves. Select the Create and Edit... option to create the appraisal form.
Good to Know!
Appraisal Forms can also be created in the Survey application
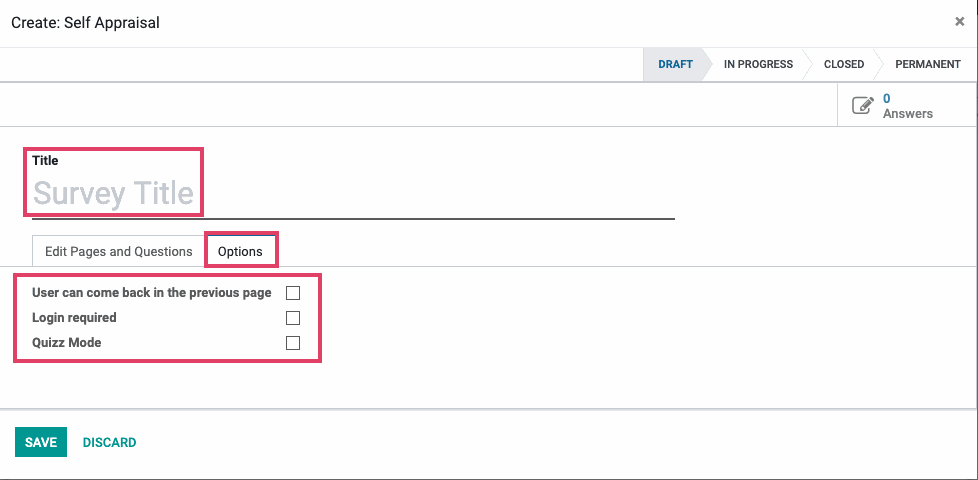
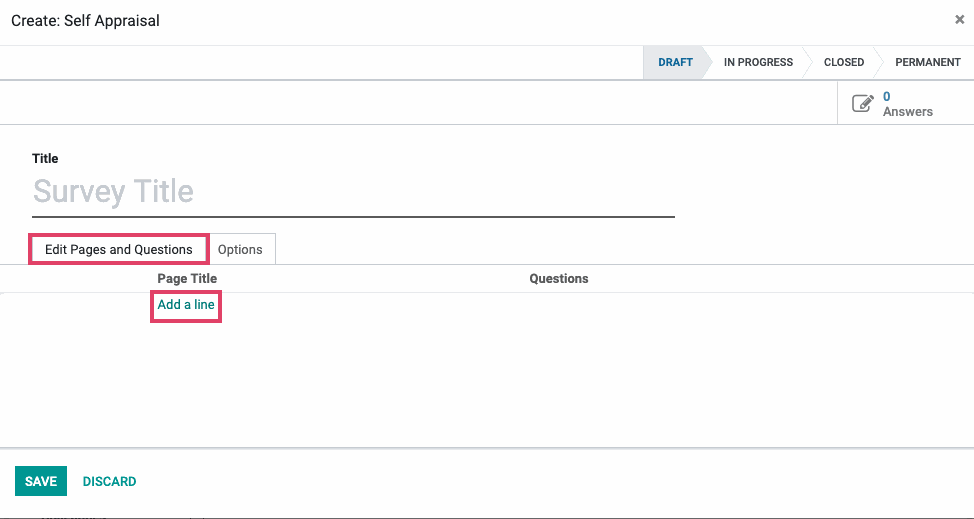
You will prompted to fill in the details of the survey you are creating.
Title: Enter the title of the survey that you are creating.
Under the Options tab:
User can come back in the previous page: If checked, users can go back to previous pages.
Login required: Users with a public link will be requested to log in before taking part in the survey.
Quizz Mode: Adds pass/fail parameters and a score.
Under the Edit Pages and Questions tab, click on Add a line.
Good to Know!
You can create multiple pages with different Question Names and different Types of Questions.
You will prompted to fill in the details of the Question you are creating.
Title: Enter the title of the Question that you are creating.
Type of Question:
Multiple Lines Text Box: Click circle to create multiple lines text box questions.
Singe Line Text Box: Click circle to create single line text box question.
Numerical Value: Click circle to create a numerical value question.
Date: Click circle to create a date question.
Multiple choice: only one answer: Click circle to create a multiple choice question which accepts only one answer.
Multiple choice: multiple answers allowed: Click circle to create a multiple choice question which accepts multiple answers.
Matrix: Click circle to create a matrix question.

Good to Know!
When type of question is selected by clicking circle, an example is displayed in a grey box to the right.
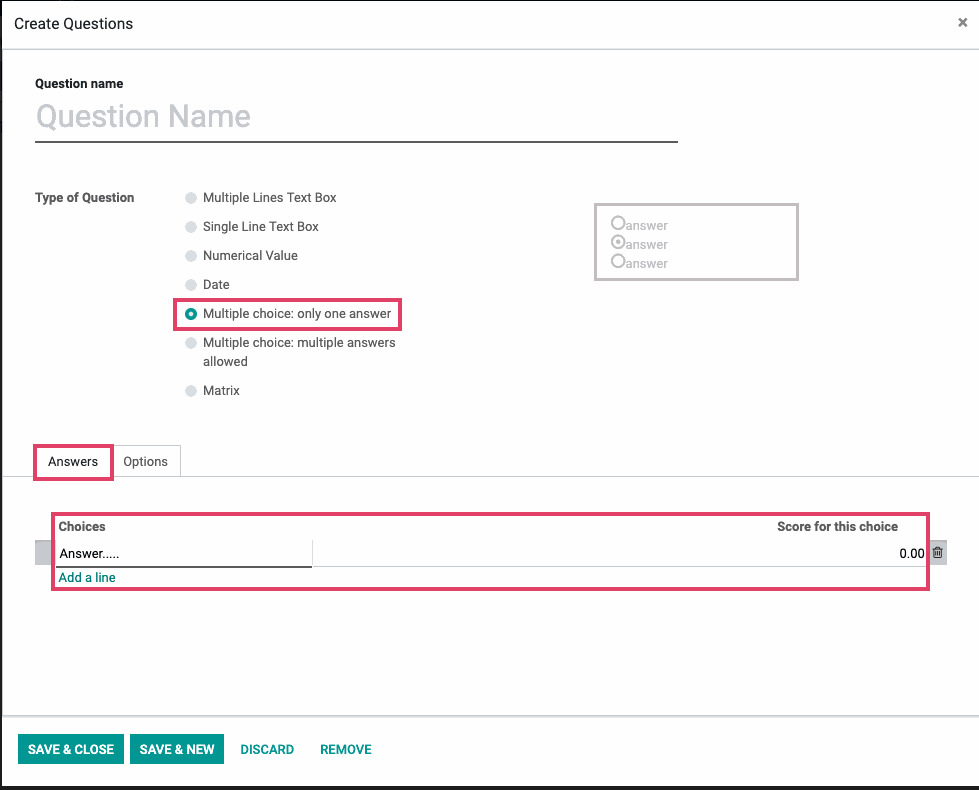
Depending on the Type of Question selected, different choices will appear under the Answers and Options tabs. As an illustration, we have selected a Multiple choice: only one answer as Type of Question.
Under the Answers tab, click on Add a line under Choices and add answer(s). You can also add a Score for this choice.
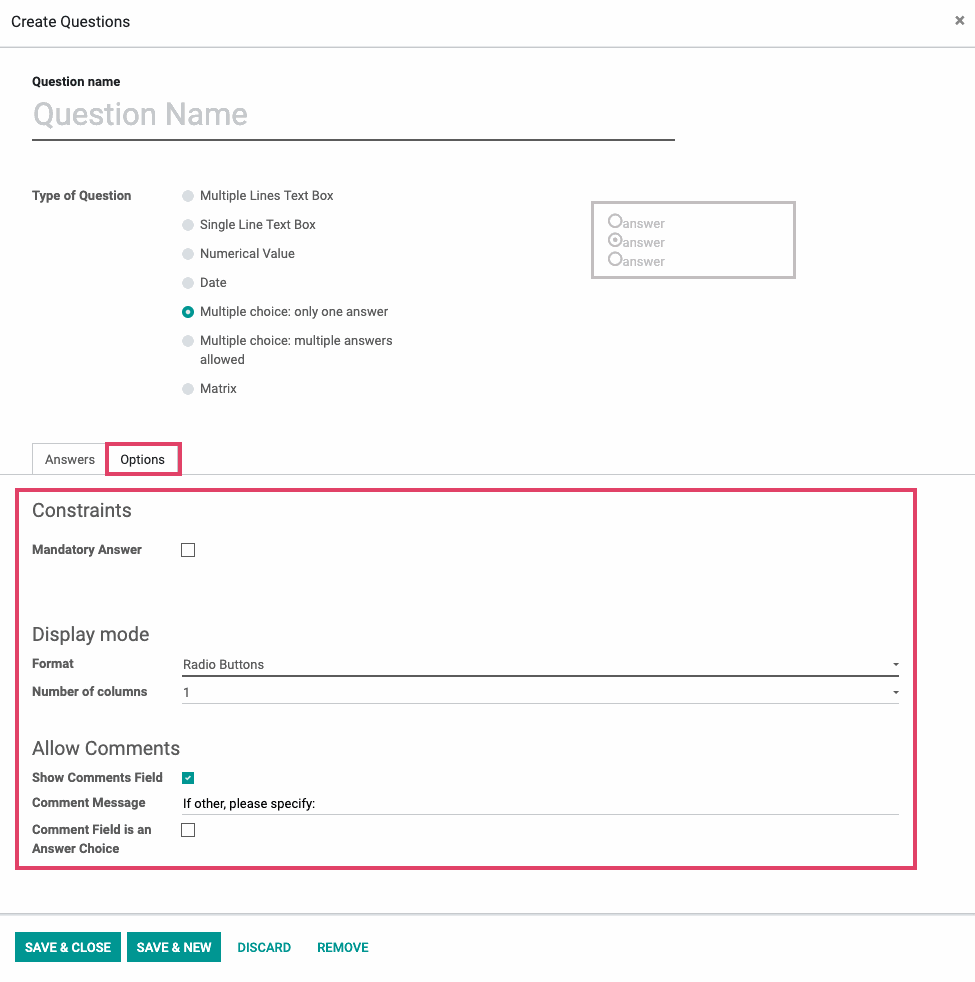
Under the Options tab and Constraints, you can check the box next to Mandatory Answer if the answer is required.
Under Display mode, you can choose Format (Radio Buttons or Selection Box) and Number of columns.
In order to Allow Comments, check the box next to Show Comments.
Comment Message: Comment field instructions.
Comment Field is an Answer Choice: Check this box if the comment field is allowed to be an answer choice.
Once the question is completed, click on SAVE & NEW to save the current question, and you will immediately be given a blank question to start over with creating another question.
Click on SAVE & CLOSE, and you will be taken back to the Page form view where you can either click on Save and new to create another page of questions or Save and close to complete the survey creation.
Testing Appraisals
In order to test the appraisal, navigate to the Surveys application.
On the following Kanban screen, locate the appraisal and then click on Test.
Click on Start Survey. You will be viewing the appraisal as it will be presented to the Appraisal Reviewer. After reviewing the pages and questions of the appraisal, click on Back To Survey.
Important!
After testing appraisal, do not click on Submit survey as it skew results.
After you close out of the Survey creating and testing windows, go back to Appraisal application to complete filling out appraisal form.
After completing appraisal details, click on SAVE.
When ready, click on Start Appraisal and Send Forms. This action will e-mail the appraisal form to the selected Appraisal Reviewer(s) and create a planned activity in the chatter box. If the employee will be self-assessing, they will also receive an e-mailed appraisal form.