Purchase: Purchase Workflows: Receiving Products
Purpose
The purpose of this documentation is to cover how to receive products from a Purchase Order in the Purchase app of Odoo 14.
Process
To get started, navigate to the Purchase application.
![]()
Receive Products
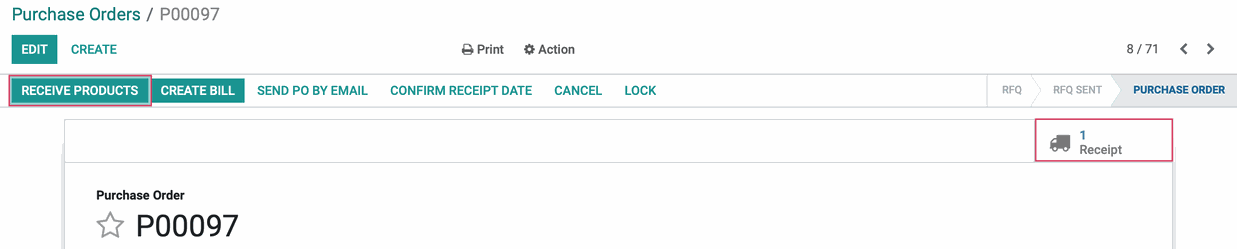
Go to ORDERS > PURCHASE ORDERS. Here you can see there are some outstanding purchase orders. Select a purchase order from the list.
If the PO is ready to do so, you'll see the RECEIVE PRODUCTS button. Click this button to continue. If you see a solid Create Bill button, you'll need to create the bill before receiving product.
Good to Know!
Receipt Smart Button
The receipt smart button indicates that there is one or more receipt records. Clicking this button will either display completed receipts, or allow you to start the receipt process. If there us more than one receipt, that will be shown in a list view.
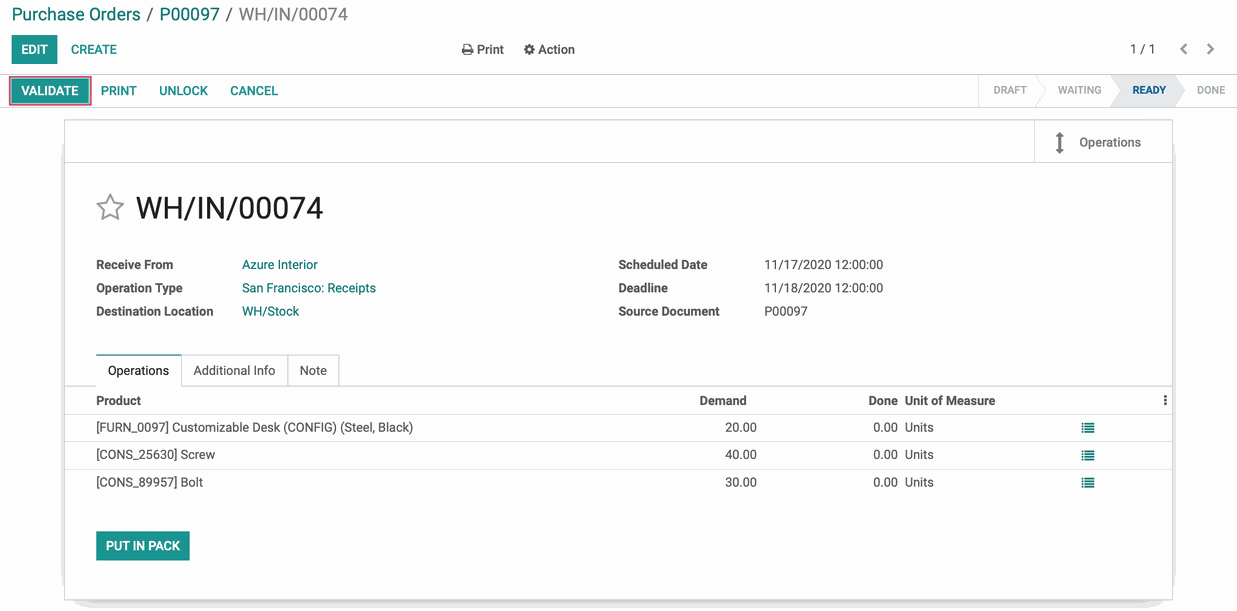
Clicking receive products opens a new Inbound Transfer record. You'll have two options on how to proceed.
Option 1: Full Receipt
If all the products are being received, click validate.
The Immediate Transfer? window will appear stating "You have not recorded done quantities yet, by clicking on apply and Odoo will process all the quantities."
Click APPLY to proceed with receiving all products.

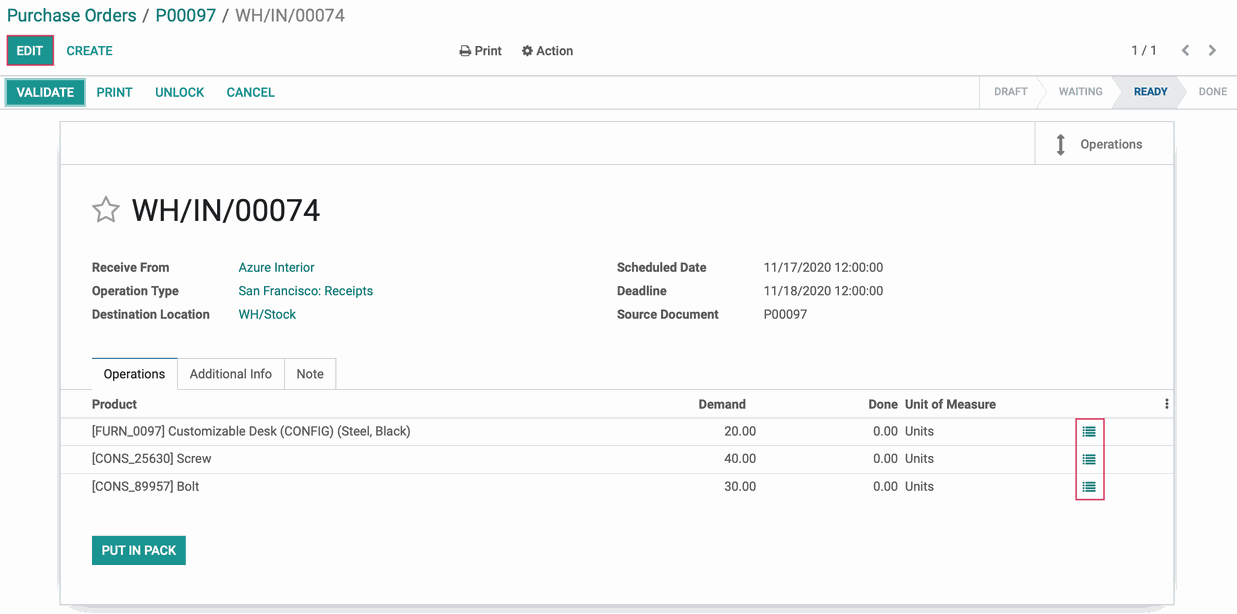
Option 2: Partial Receipt
If a different quantity is received than what was ordered, you would need to manually enter the amount. To do so, first click EDIT, then under the OPERATIONS tab, click the stock picking icon in the line of the product you received. The Detailed Operations model window will appear. In the window, click Add a line, then edit the following fields:
To: Select the location where the products have been received.
Destination Package: If incoming products are repackaged when received, select that package here.
Done: Enter the quantity of this product that you received. For the purpose of this walkthrough, enter a number fewer than the quantity ordered for at least one of the products.
Unit of Measure: This is how the product quantity is measured, it will auto-populate based on the product settings.
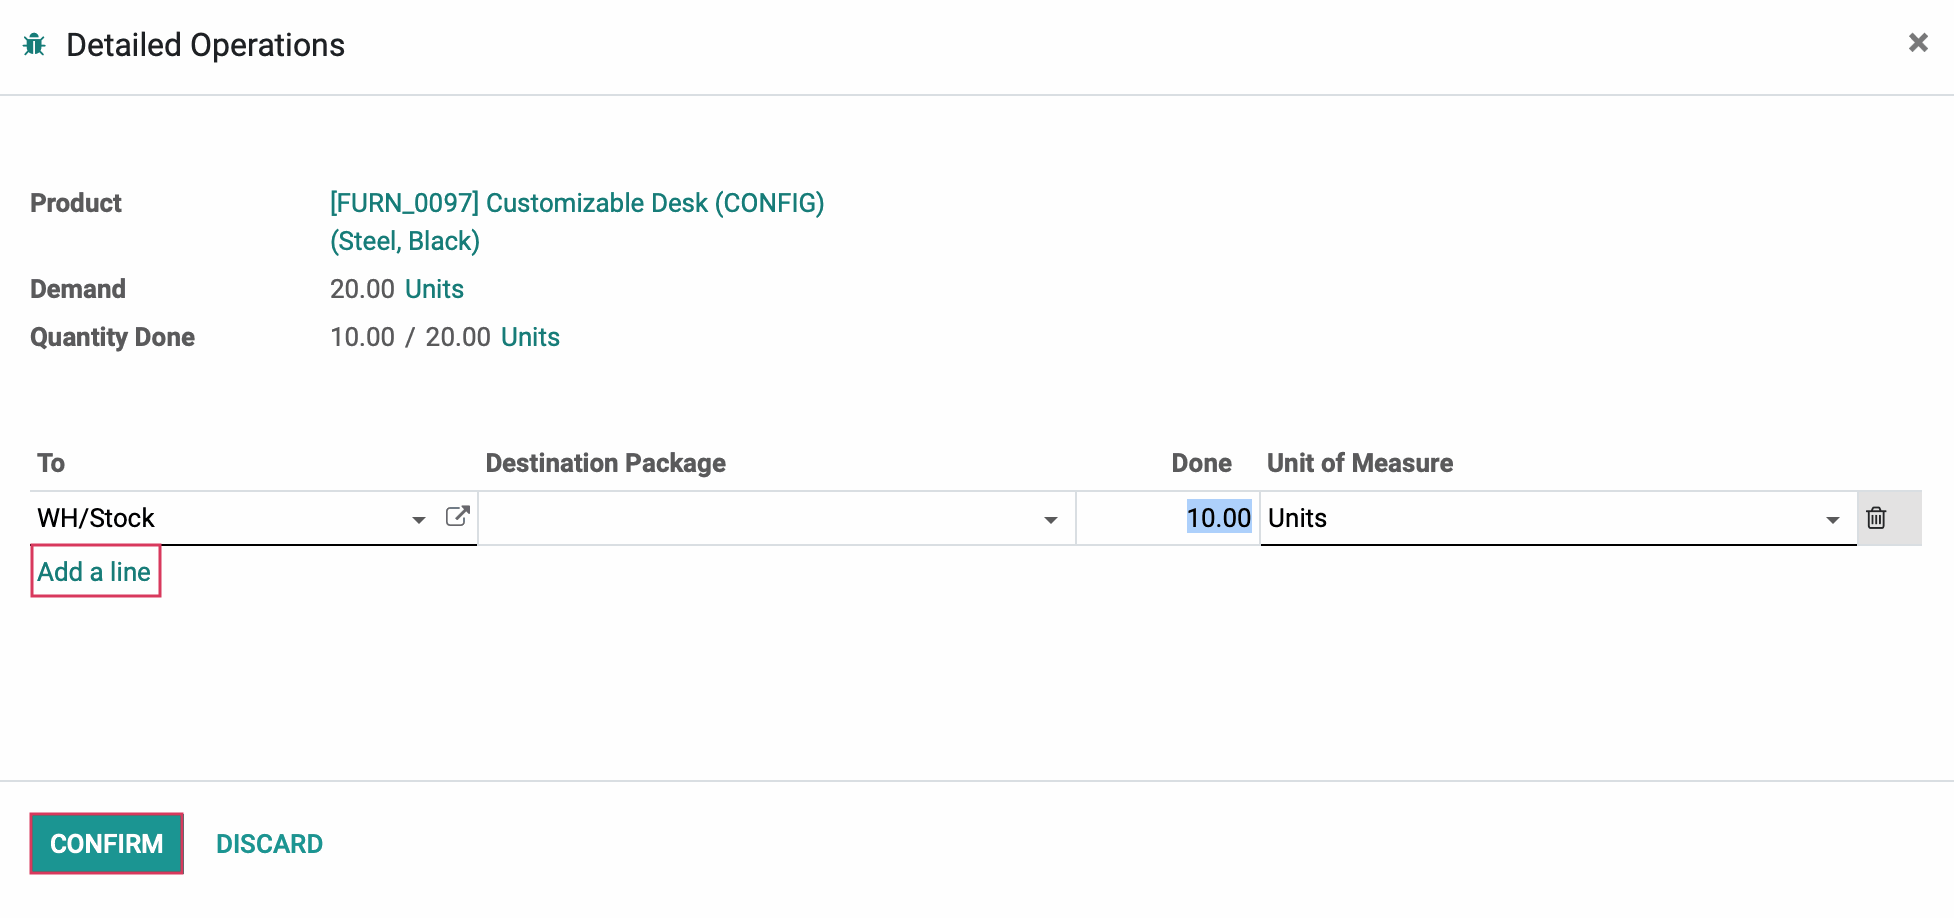
When you're done, click confirm, then after repeating for each product on the purchase order, click Save, then click Validate to record the inbound transfer.

Since a demand quantity is less than a Done quantity, you'll see the following modal window.
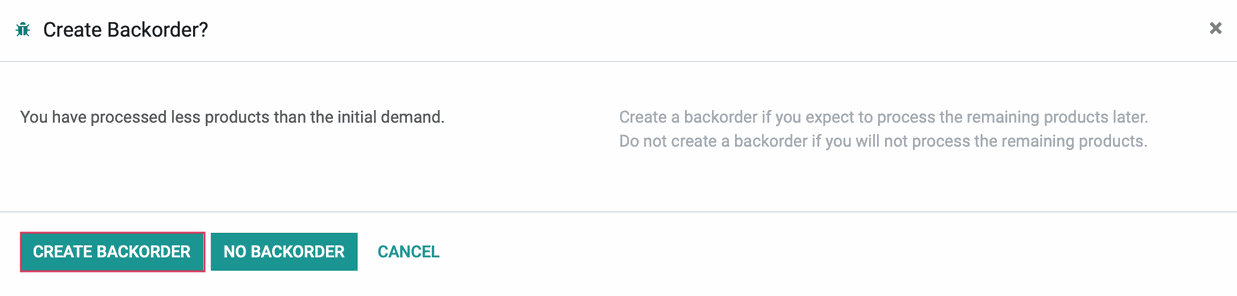
The option to accept the order for what was received can be performed by clicking NO BACKORDER. In the instance where you only receive a partial order, Odoo gives you the option to create a backorder to later receive the products needed to fully complete the original demand.
We want to receive the remaining items in the future, therefore we must click create backorder. This returns us to the inbound transfer.
Under the Operations tab, you'll now see the Demand has been adjusted to match the Done quantities.

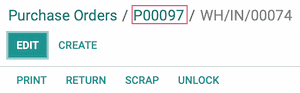
Next, use the breadcrumbs to navigate back to the originating Purchase Order.
To receive the remaining qualities, repeat the steps under Option 2: Partial Receipt above.