Purchase: Orders: Purchase Agreements
Purpose
The purpose of this documentation is to outline how to create and manage a Purchase Agreement, as well as how to create a Request for Quotation (RFQ) from a Purchase Agreement in the Purchase app for Odoo 14.
A Purchase Agreement is a contract between the buyer and the seller that outlines the pricing, terms, and conditions relating to the sale of goods. When creating a Purchase Agreement from the Purchase app, you are making a record of the agreement(s) a vendor has made with you. This will also allow you to track the purchases made from this agreement.
It is recommended that you review the Purchase Agreement Types document prior to continuing.
Process
To get started, navigate to the Purchase app.
![]()
Creating a Purchase Agreement
Go to Orders > purchase agreements, then click Create . This will open the New Purchase Agreements form whereyou can edit the following fields:
Purchase Representative: Select the contact responsible for this purchase agreement. By default, this will be the person creating the Purchase Agreement.
Agreement Type: Select the Purchase Agreement Type that applies.
Vendor: Select the vendor you wish to purchase from. This field is only required if you're creating a Blanket Order. You can leave it empty when creating a Call for Tender as you'll complete that field upon creating each new RFQ.
Currency: Select the currency that applies to this purchase. This field will pre-populate based on your business location and settings.
Agreement Deadline: Enter the date in which this offer is no longer valid.
Ordering Date: Enter the anticipated order date.
Delivery Date: Enter the anticipated delivery date.
Source Document: If applicable, enter an order reference number (e.g. Purchase Order number).
Operation Type: indicates the type of transfer and the warehouse location involved.
Under the Products tab:
Product: Enter the product(s) you wish to purchase. If the product has variants, you'll be prompted to select the quantity of each.
Custom Description: Enter a custom description about what you're specifically looking for with each product.
Quantity: Select the quantity of the product you wish to purchase.
Ordered Quantity: This indicates the number of products already purchased based on this agreement and uses the historical data in Odoo. For this reason, you will not be able to edit this field.
UoM (Unit of Measure): This field auto-populates with how the product is measured in quantity, but may be edited.
Scheduled Date: Enter the date for scheduled delivery. If the Delivery Date field above is filled, this field will auto-populate with that same date.
Unit Price: If you're creating a Blanket Order, you must enter a product price. Leave this field empty when creating a Call for Tenders because that's the information you're requesting from the vendor.
Terms and Conditions: Add any terms and conditions that apply to this purchase agreement.
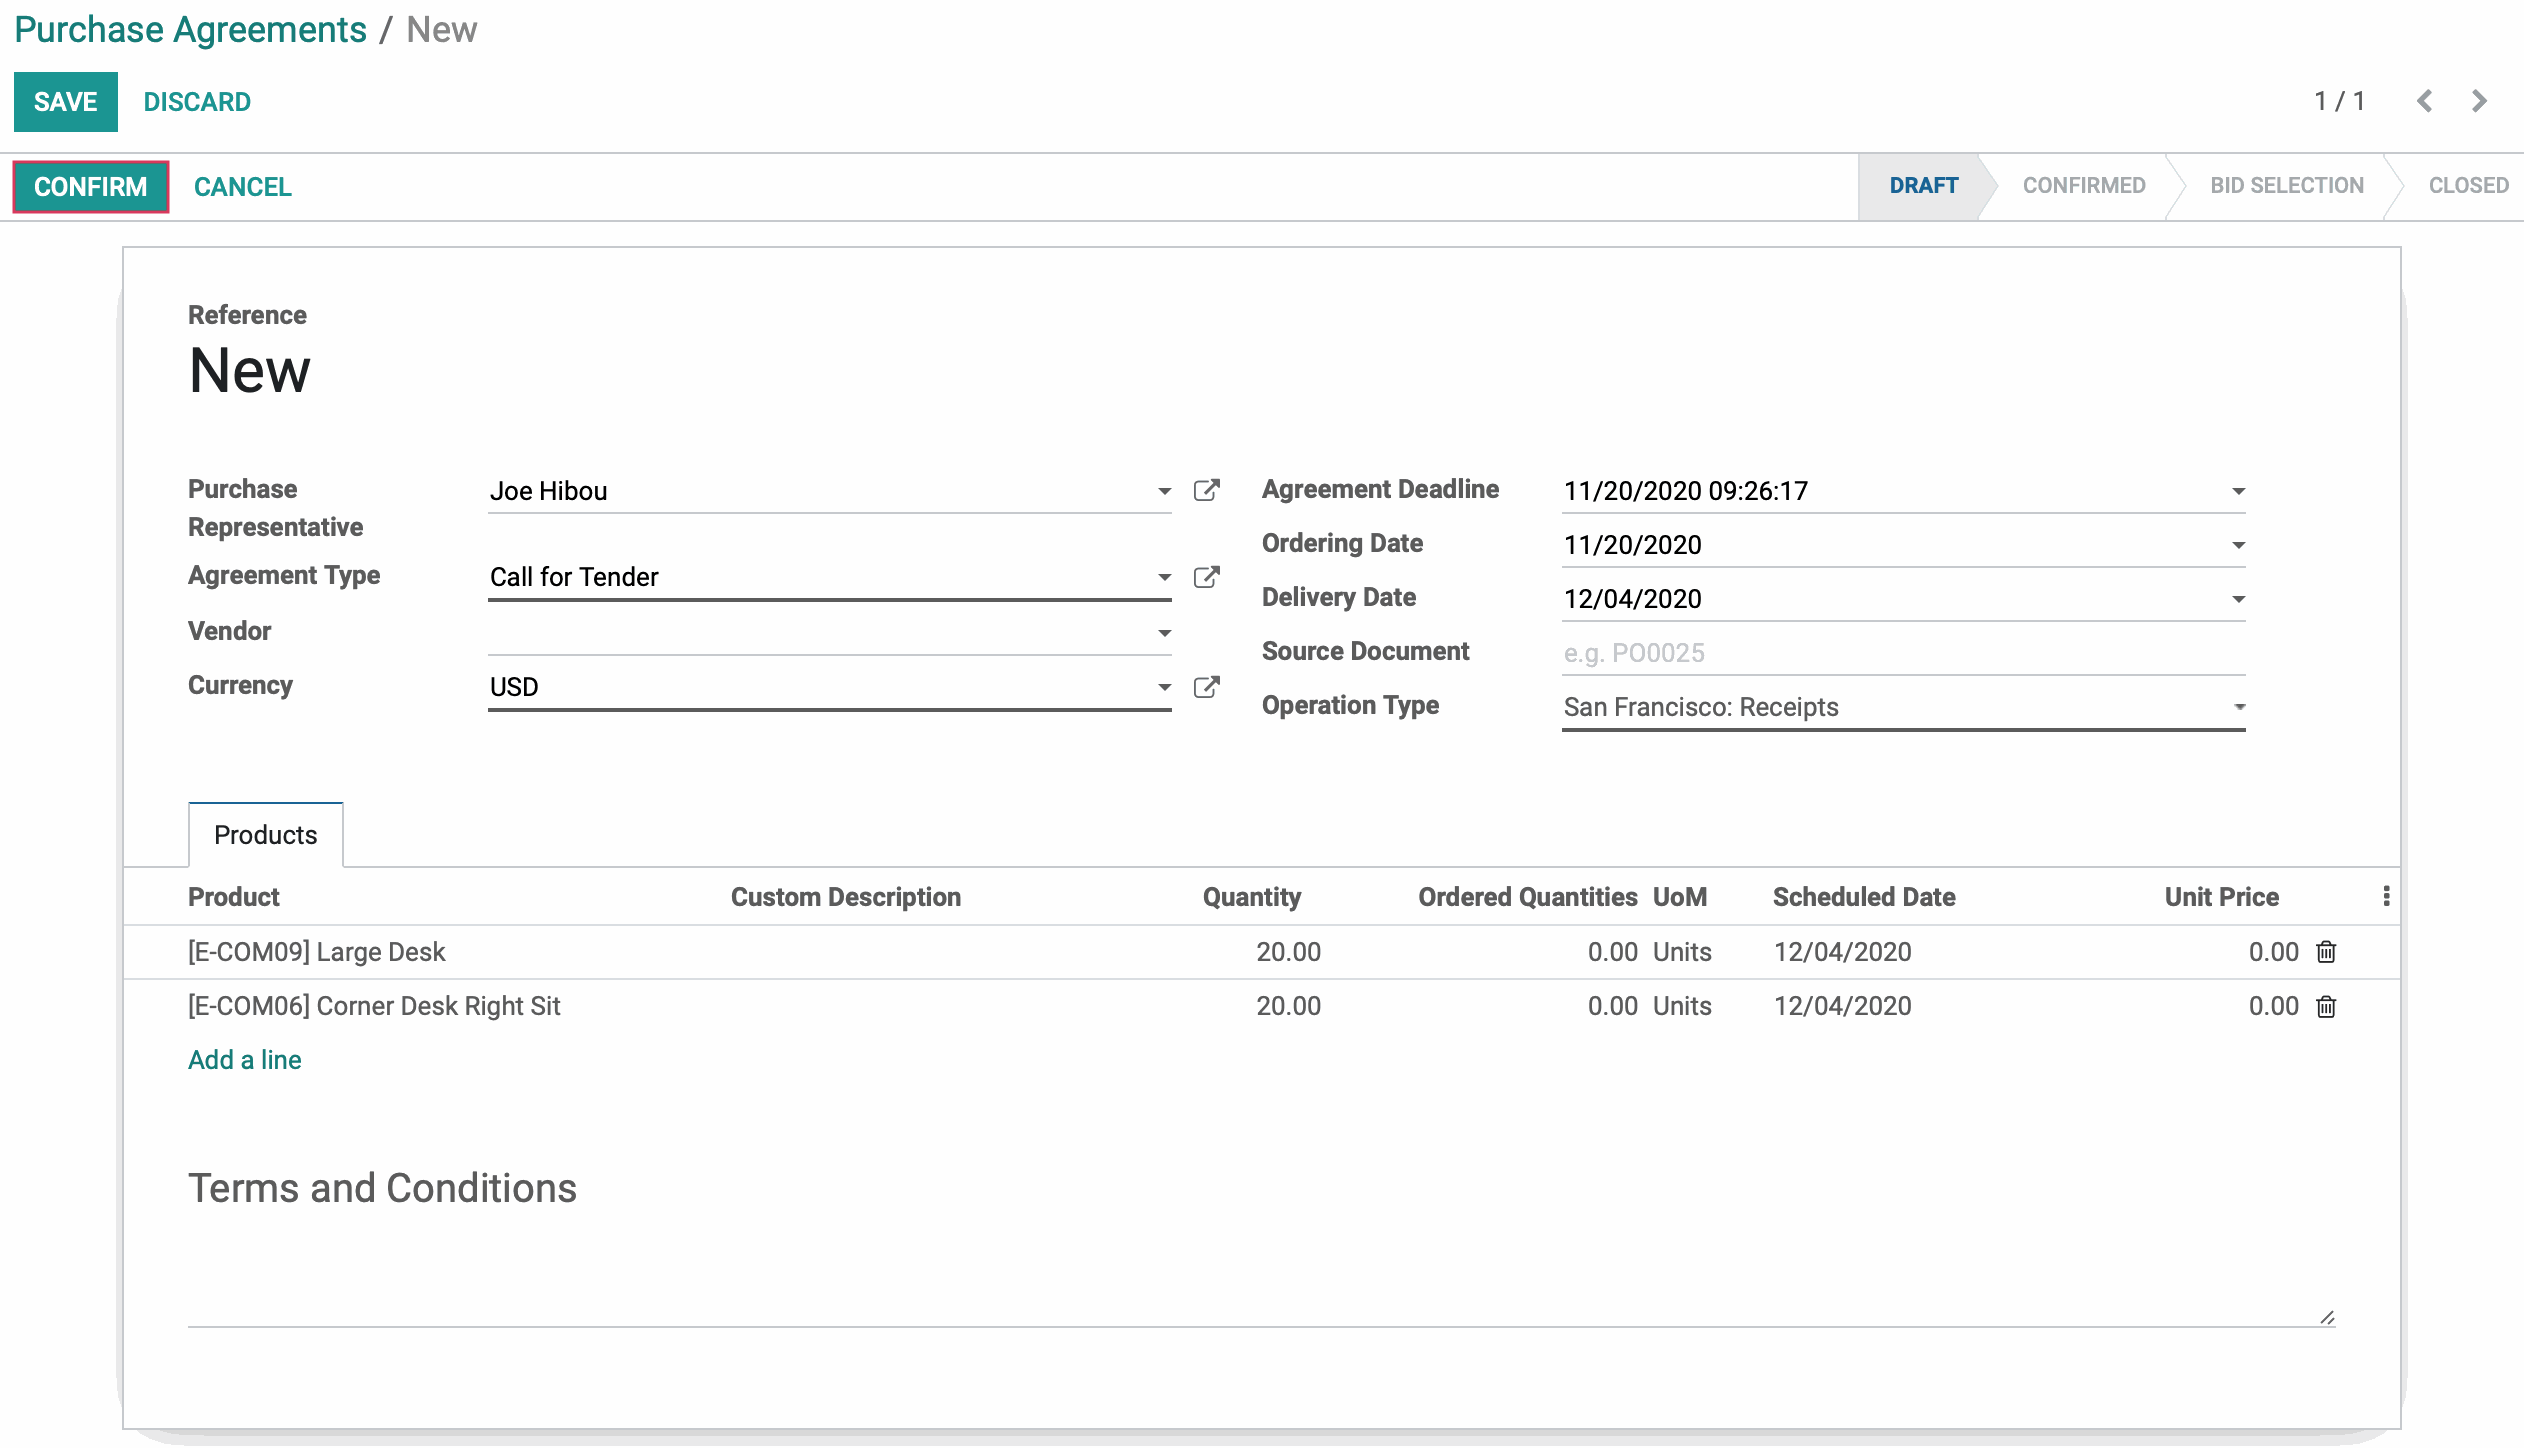
When you're ready, click CONFIRM to save the Purchase Agreement.
Good to Know!
There are two Purchase Agreements that already exist!
It's important to understand what happens when selecting one of the pre-existing agreement types in Odoo:
Blanket Order: A Blanket Order allows multiple delivery dates over a period of time. The pricing and terms are set within the Purchase Agreement and will apply to all RFQs created from the initial agreement
Call for Tender: A Call for Tender allows you to request pricing offers from multiple vendors. Depending on the configuration of your Call for Tender, you can select one exclusive offer or several.
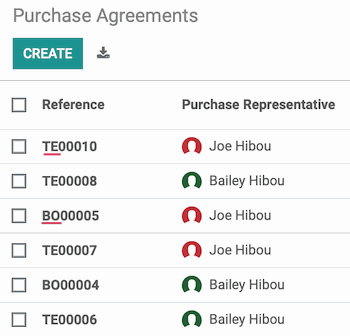
When you go to Orders > Purchase Agreements, you can tell which Purchase Agreement applies to each line by looking at the Reference column. Blanket Orders will start with 'BO' and Call for Tenders will start with 'TE'.
Call for Tender: Requesting a Quote
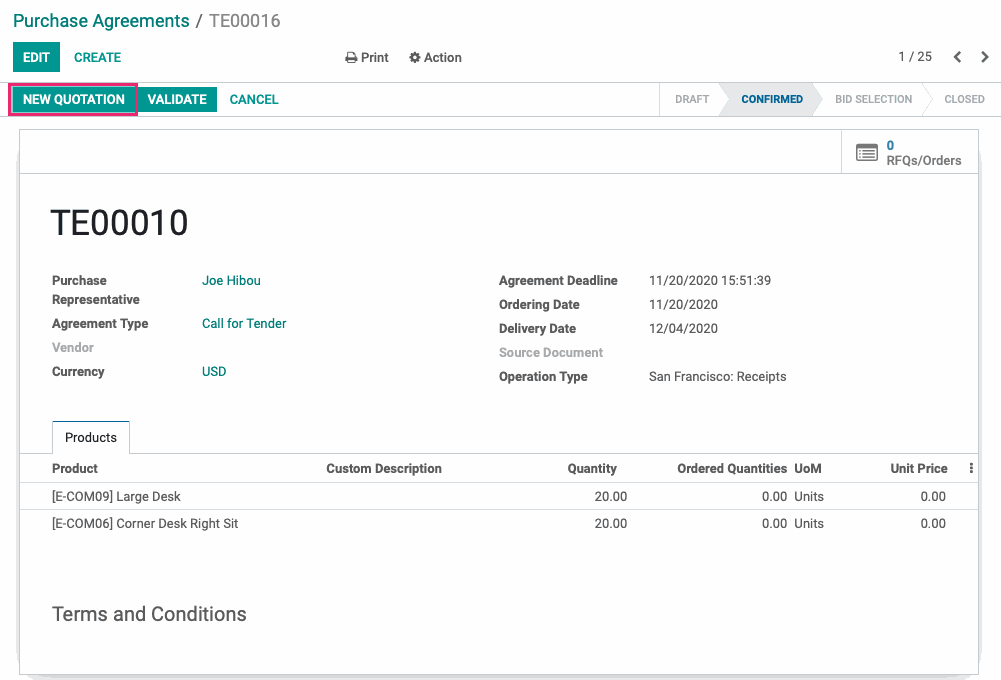
Once you've saved a Call for Tender Purchase Agreement, you can use it to create RFQs for multiple vendors. To do so, click New Quotation.
This opens a New Quotation form with several fields auto-populated based on the Purchase Agreement you started with. At this point you should only need to select a Vendor, but you can change most fields before sending.
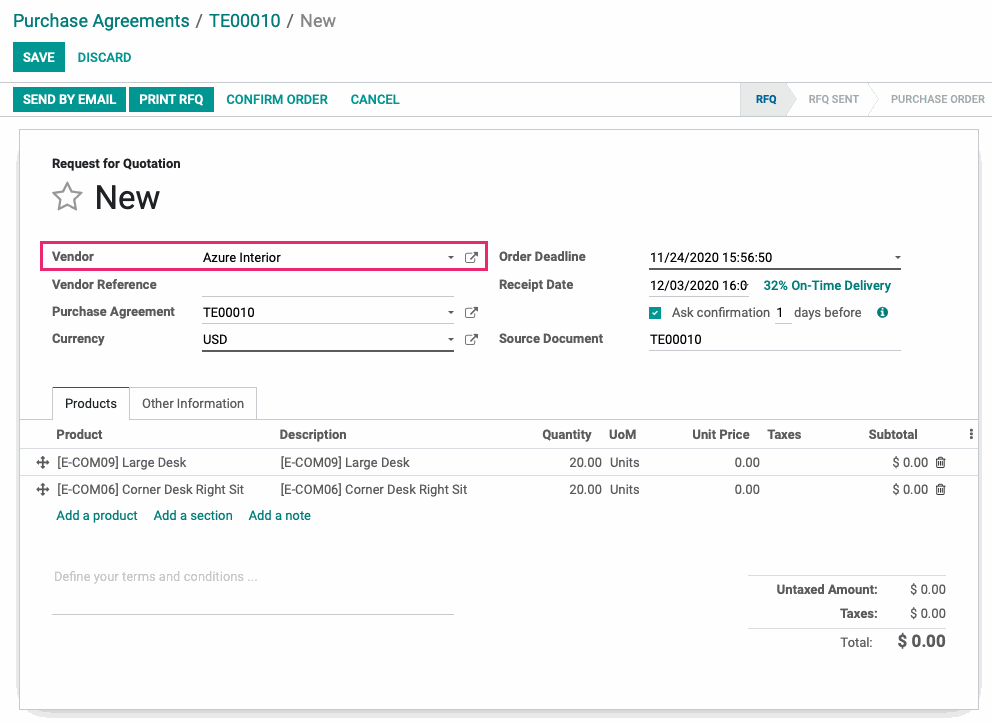
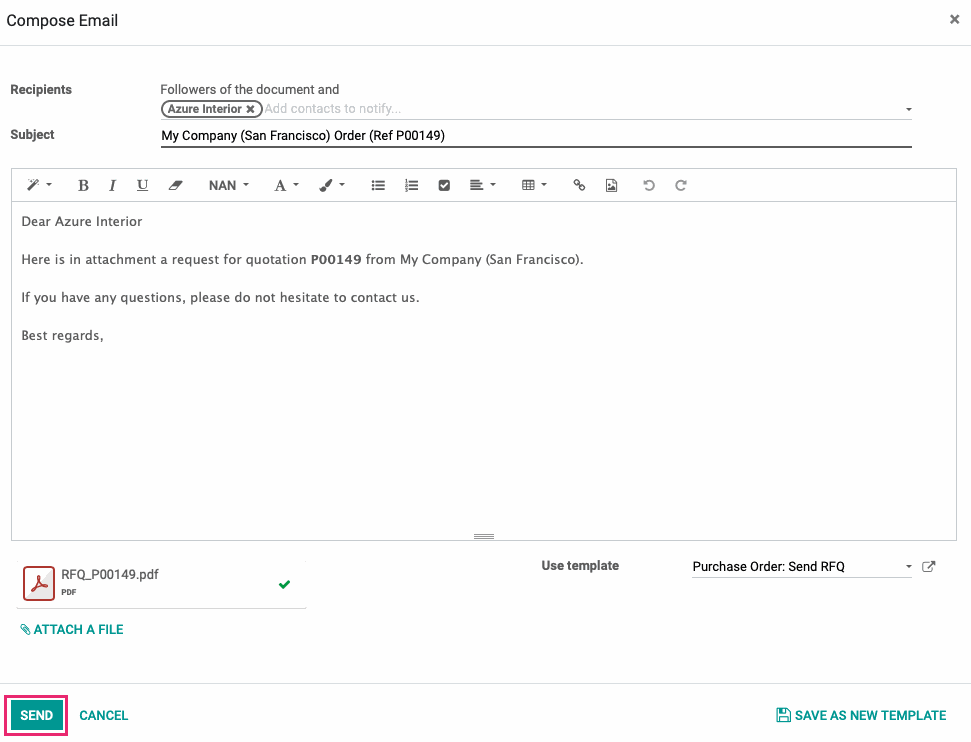
When you're ready, click Save, then click Send by Email. This brings up the Compose Email modal window where you'll click Send to finalize this RFQ.
The stage will be moved to RFQ Sent. Now, use the breadcrumbs to navigate back to the Call for Tender Purchase Agreement and create as many RFQs as you need for different vendors. Once you've received all quotations, you can then select an offer.

Call for Tender: Selecting an Offer
To see the RFQs on your Call for Tender, go to Orders >Purchase Agreements, select the applicable Purchase Agreement, then click RFQs/Orders smart button.
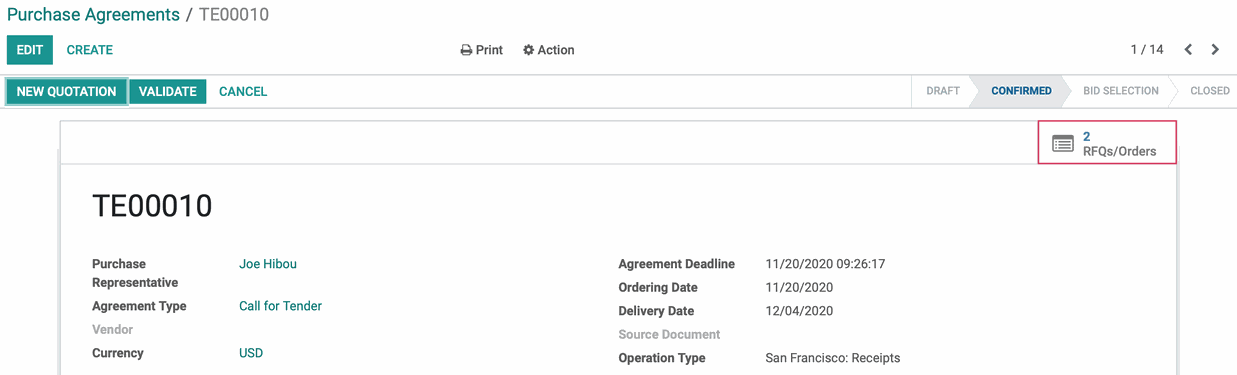
This will give you a list of the vendor offers received based off of this Purchase Agreement. Evaluate all of your offers and click the one you'd like to confirm.

This will open the RFQ where you can then click Confirm Order, you will see the stage of this RFQ change from RFQ Sent to Purchase Order.

At this point, you're ready to create a bill and pay the vendor, or receive products upon delivery, depending on the terms you have with that particular vendor.
Good to Know!
If your Call for Tenders is configured to allow multiple RFQ selections, then you can go back and confirm orders on other RFQs. Otherwise, all other RFQs based on this purchase agreement will be automatically canceled. For this example, our Call for Tender purchase agreement's settings are configured as follows:

The exclusive selection option is selected, therefore by confirming the RFQ above, all other RFQs for our Call for Tender will be automatically canceled.
Blanket Orders: Creating RFQs from Your Purchase Agreement
To create an RFQ from a Blanket Order, go to Orders > Purchase Agreements and select the appropriate Purchase Agreement. Once there, click New Quotation.
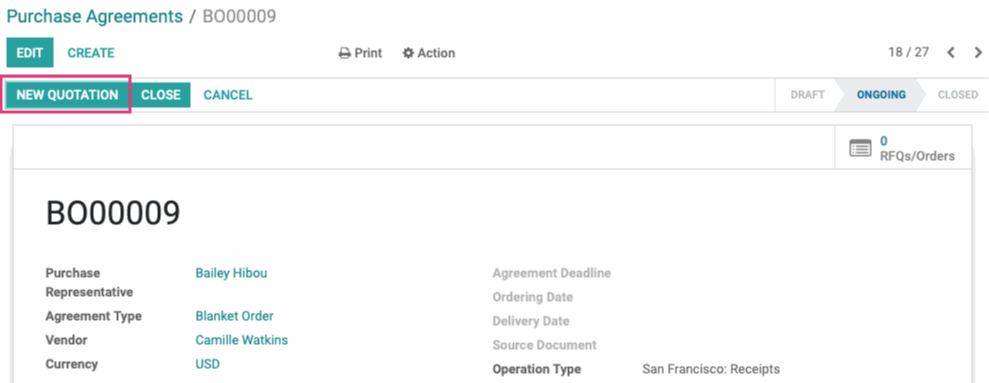
This opens the New Purchase Agreements form with fields auto-populated based on the Blanket Order you started with. From here you should only need to enter the quantity of product you're ordering, but you may modify most other fields as needed.
![]()
When you're ready, click SAVE.
Send RFQ to Vendor
You can choose to send this RFQ to the vendor by clicking SEND BY EMAIL. This brings up the Compose Email modal window where you'll click SEND to finalize this RFQ.
![]()
Confirm the Order
When you're ready to confirm this order, click Confirm Order. If you bypassed sending an email to the vendor, the Confirm Order button will be white instead of solid.
At this point, you're ready to create a bill and pay the vendor, or receive products upon delivery, depending on the terms you have with that particular vendor.
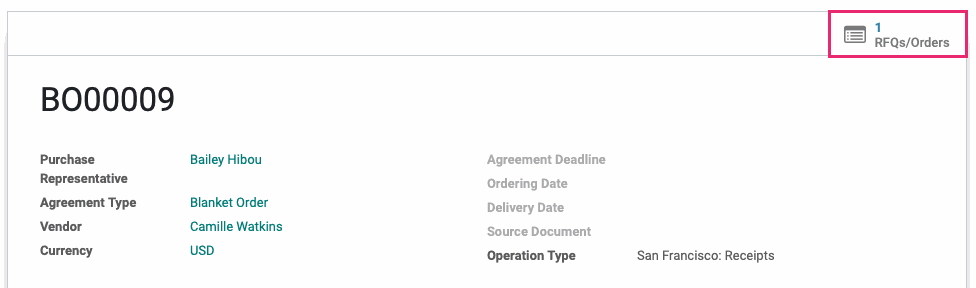
Once a Request for Quotation is created, use the breadcrumbs to navigate back to the Blanket Agreement. In this screenshot, we're navigating back after receiving the products.
![]()
Purchase Agreement Status
From the Blanket Order, you can create more Quotations or view existing RFQs and Orders by clicking RFQs/Orders.
Once the terms of the Purchase Agreement have been satisfied, you can manually close the agreement by clicking Close.
![]()
Once closed, you'll note the status change, and the Purchase Agreement can no longer be added to new RFQs.