Purchase: Orders: Purchase Orders
Purpose
The purpose of this documentation is to review the Purchase Orders feature in the Purchase application in Odoo 14.
Process
To get started, navigate to the Purchase application.
![]()
Purchase Orders
Once there, click Orders > purchase orders. This is where you will see all existing Purchase Orders and their statuses.
To add a new Purchase Order, you must start by creating a new Request for Quotation (RFQ). Click Create, this will open the new RFQ form. Complete the form as follows.
Vendor: Select the vendor you wish to purchase from.
Vendor Reference: Reference of the sales order or bid sent by the vendor it's used to do the matching when you receive the products as this reference is usually written on the delivery order sent by your vendor.
Purchase Agreement: If applicable, select the related Purchase Agreement.
Currency: Select the currency for this Purchase Order.
Order Deadline: Select the date where the Request for Quotation should be validated and converted to a Purchase Order.
Receipt Date: This is the delivery date promised by the vendor. You may select a date to request for the expected arrival of products.
Ask Confirmation: Selecting this option will automatically send a confirmation email to the vendor X days before the receipt date, asking them to confirm the exact date. After selecting you will be able to choose the number of days before the receipt date that email gets sent.
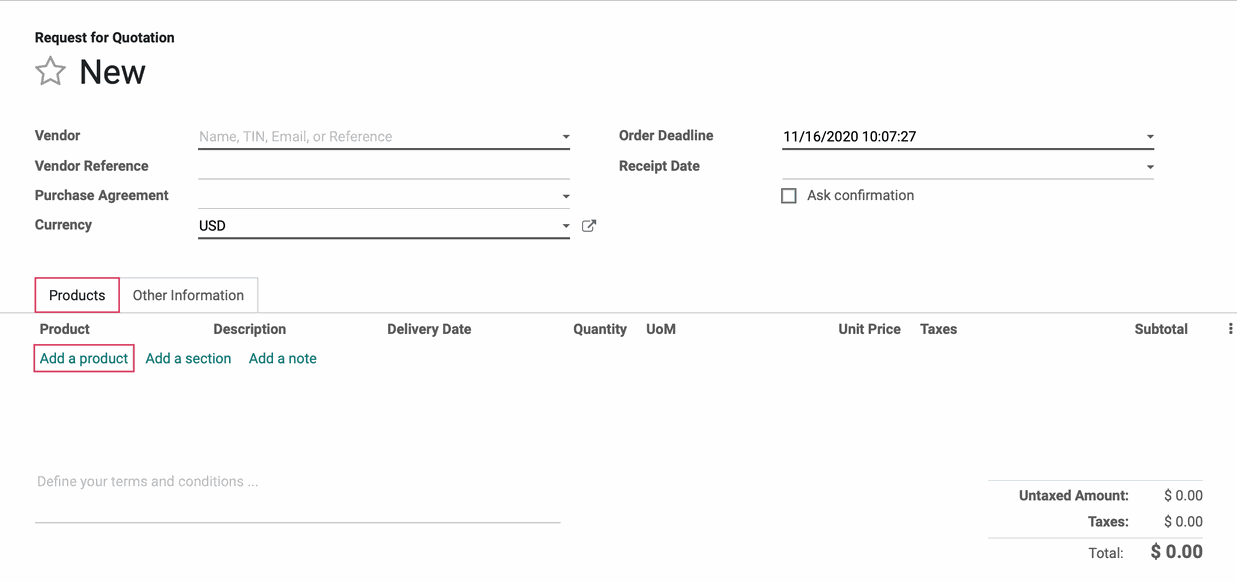
Under the Products tab, click Add a Product. This will open a new line where you can select the product(s) to add. Be sure you enter a quantity for each product.

Good to Know!
Check the Price!
If you've purchased this product from this vendor before, the Unit Price will be populated from that vendor's pricelist; however, if there is no associated vendor/pricelist, the Unit Price will set to the product cost. Be sure to review this field.
Product: Select the product you wish to order from the vendor. When a product is chosen, the Description, Delivery Date, UoM, Unit Price, and Taxes fields will all auto-populate, however you can manually change any of them.
Description: More detail about the selected product.
Delivery Date: Enter the date you would like for the product to be delivered.
Quantity: The number of the product being requested on this order.
UoM: The Unit of Measure assigned to the selected product to measure its quantity. (e.g. units)
Unit Price: The price per unit of the selected product. By default, this amount is how much a customer is charged for one of the selected product.
Taxes: Allows you to apply the necessary taxes in conjunction with the Accounting app. Taxes will be automatically applied based on the product's Customer Taxes configuration and/or the Fiscal Position (compatible with TaxCloud), which can be set on the customer or order level. A tax can also be manually selected if needed.
Subtotal: The Total untaxed amount based on the Ordered Qty.
Under the OTHER INFORMATION tab, you'll see the following fields:
Purchase Representative: The employee responsible for this purchase order. The name of the person creating the PO will be entered automatically.
Deliver To: Determines the operation type of incoming shipment.
Incoterm: This is only applicable to international transactions.
Payment Terms: If set on the vendor contact record, this will auto-populate. Otherwise, you may select which terms apply to this PO.
Fiscal Position: If set on the vendor contact record, this will auto-populate. Otherwise, you may select which Fiscal Position should apply to this PO.

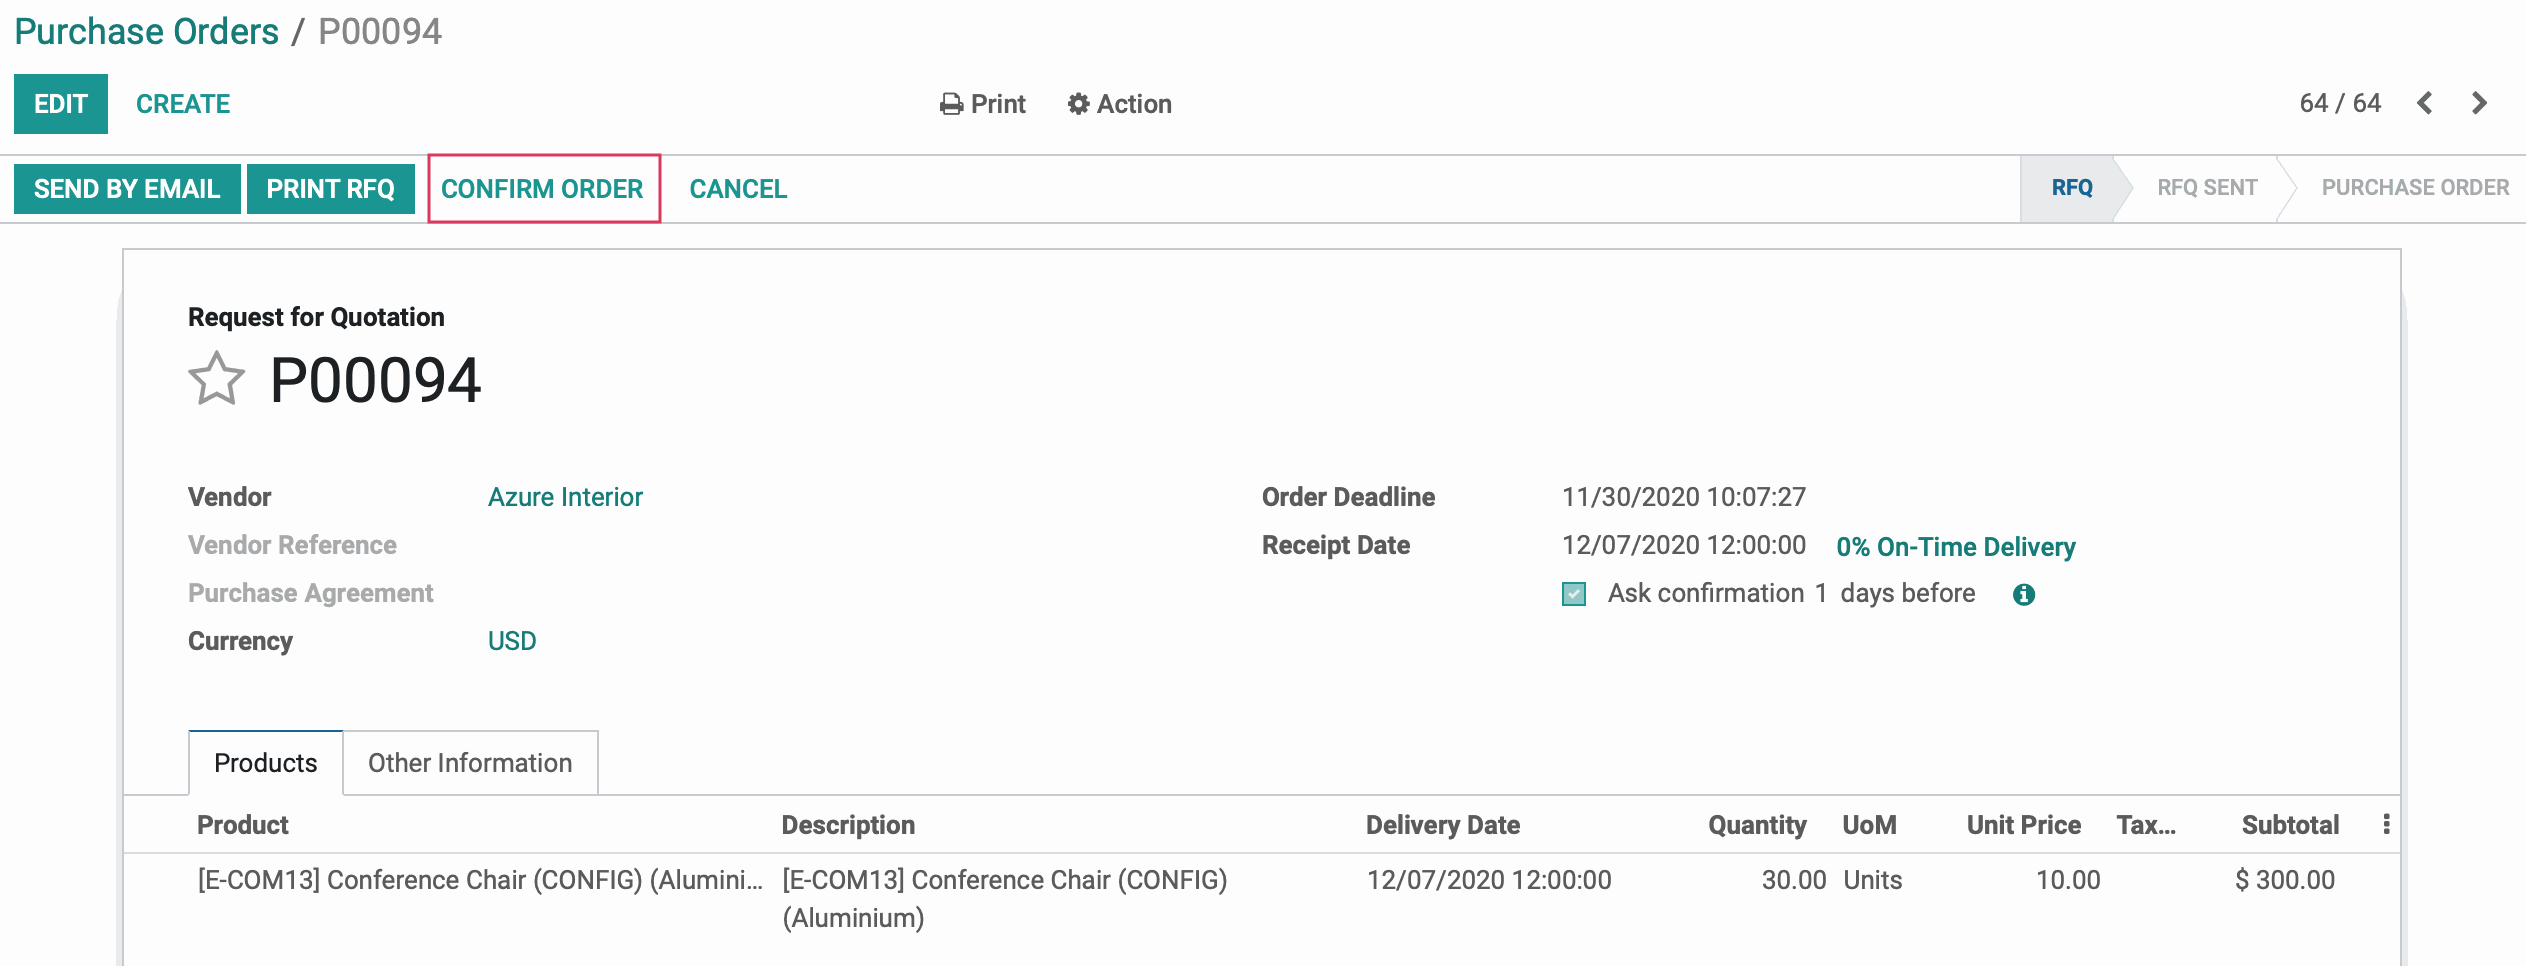
When you're ready, click SAVE to save the purchase order in a draft state. To confirm this PO, click CONFIRM ORDER. At this point you're able to either receive the products or create a bill, depending on your agreement with that vendor.
Good to Know!
A Confirmed PO May Be Locked
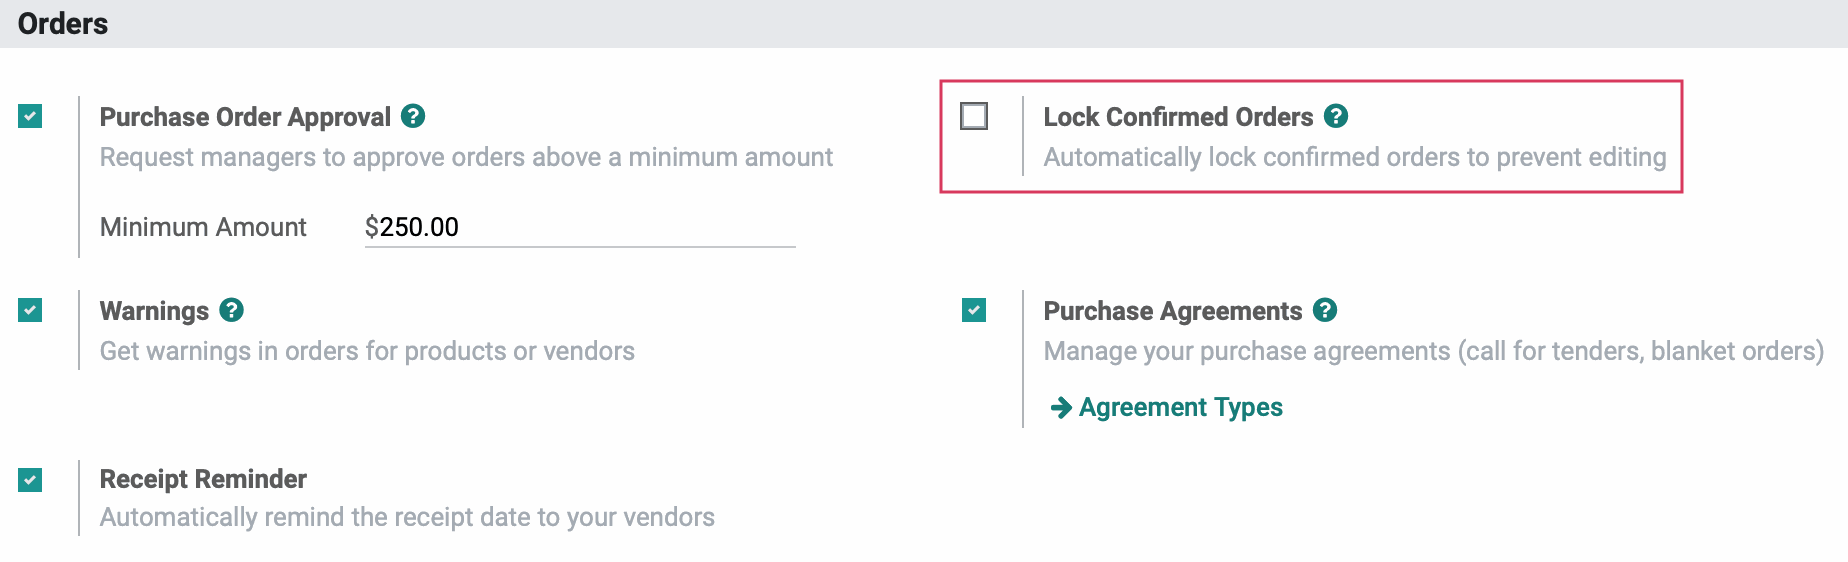
In Configuration > Settings, you have the option to Lock Confirmed Orders. If this is set, then once confirmed, the purchase order will then go into a locked state. It will need to be unlocked in order to edit the Vendor, Order Date, or Product fields.
Important!
Product Control Policy
Products that Can be Purchased have a Control Policy set on the Purchase tab. The following is the product template for the Bolt product. Here you can see that this product has a Control Policy set to On received quantities.
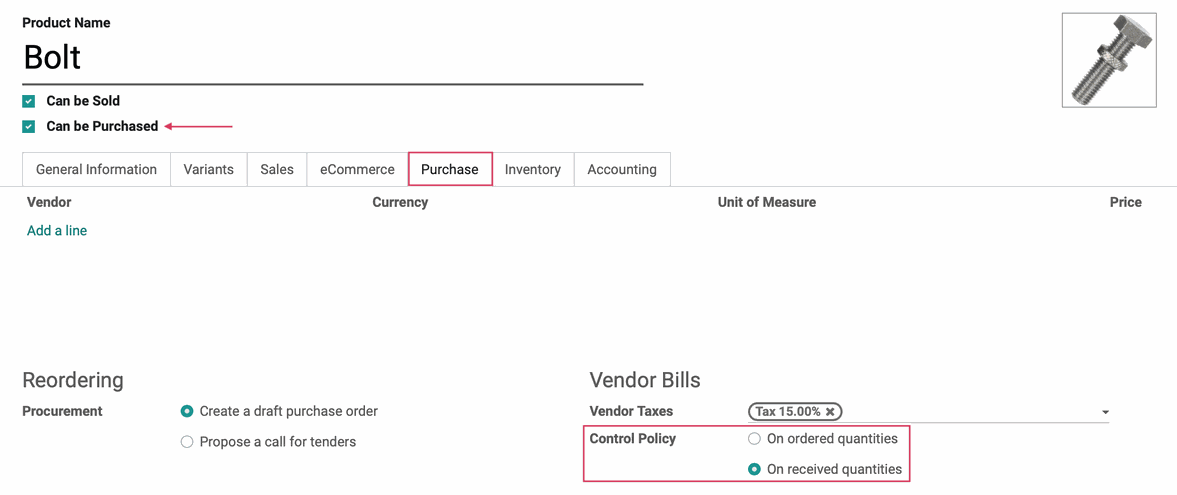
The Control Policy dictates different behavior on a confirmed Purchase Order.
On ordered quantities: When a product has this Control Policy, it means we must pay our vendor before recieving the product. A confirmed PO with these products will show both the Receive Products and Create Bill buttons as solid. Follow the steps in the Creating a Bill document to continue.

On received quantities: When a product has this Control Policy, it means we can pay our vendor after receiving the product. A confirmed PO with these products will show the Receive Products button as solid and the create Bill button in white. Follow the steps in the Receiving Products document to continue.

A confirmed PO that has both a product with a control policy set to On ordered quantities, and another set to On received quantities, the create bill button will also appear solid.