Purchase: Orders
Purpose
This document will cover RFQs, Purchase Orders, how to view Incoming Product, and create vendor bills.
Please note that in order to follow this workflow, you must have at least one contact designated as a vendor, and one product that is configured to be purchased from that vendor.
To create a new Vendor, see Managing Contacts.
To import a Vendor Pricelist, See Import/Export Overview and Pricelists.
To create a new Product and configure its variants, see the Product Creation Workflow.
Process
To get started, navigate to the Purchase app.
Requests for Quotation
The default view of the Purchasing app is a list of current Requests for Quotation. These are the draft form of purchase orders that have not yet been confirmed and sent to vendors. While in draft stage, it is possible to change the vendor you would like to purchase from, add and delete products, adjust quantities, and change the destination warehouse.
Some RFQs are generated automatically by the scheduler, based on your reordering rules per product. Odoo will compare the product’s Quantity on Hand against the Minimum Quantity on reordering rules to create an RFQ based on the difference (if the product uses the Buy route). Automatically generated RFQs from reordering rules will reflect the quantity you need to purchase to fulfill outbound transfers for this product that are waiting availability and bring you back up to your Maximum Quantity.
Click Create to start a manual RFQ. Select your Vendor, and then add the products you wish to purchase.
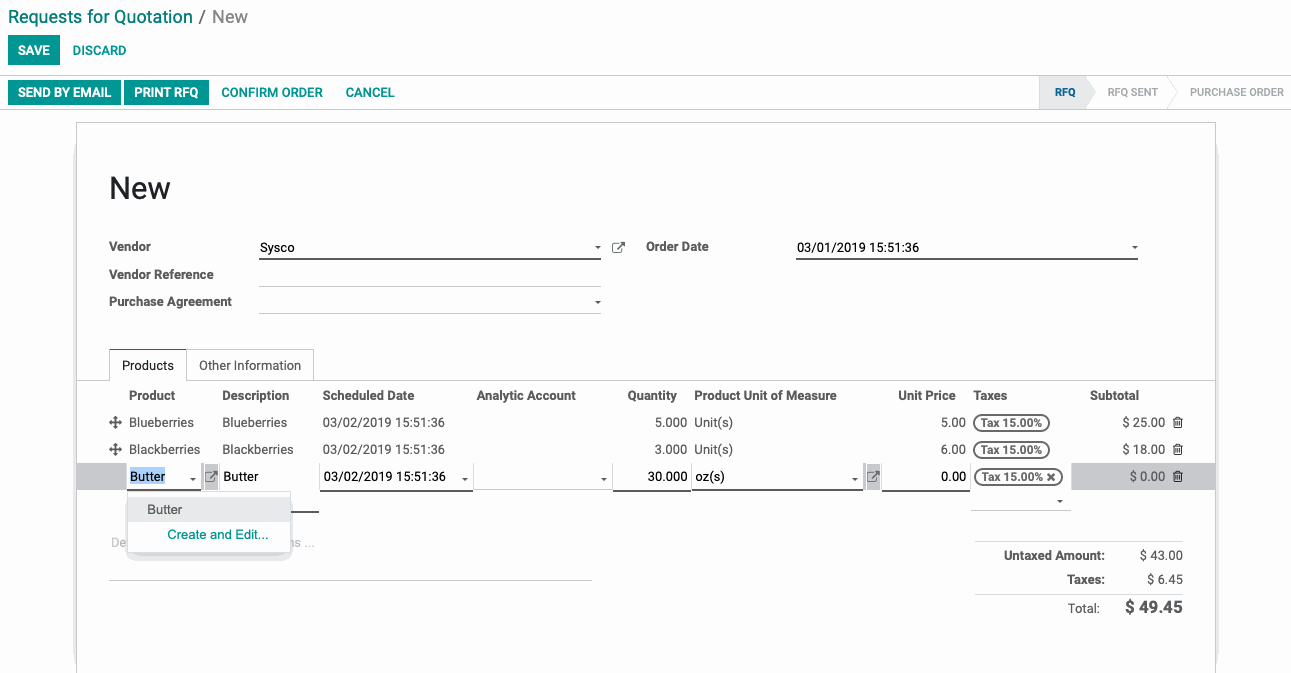
Once the products are added, you can adjust the quantities and price as needed. Once your information is complete, Click Save.
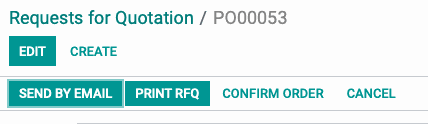
You have the option to send your RFQ to the vendor to confirm the quantities and ensure they will be able to fulfill the order by using the Send By Email function. Once confirmed, click Confirm Order at the top of the record.
Good to Know!
You can purchase products from any vendor, even if the vendor has not been setup on the product. However, if they have not been setup as a vendor for the product, the Unit Price will be $0.00 and will need to be entered manually.
Confirming the RFQ turns it into a Purchase Order. You will see a Receipts smart button appear in the top right corner.
Purchase Orders
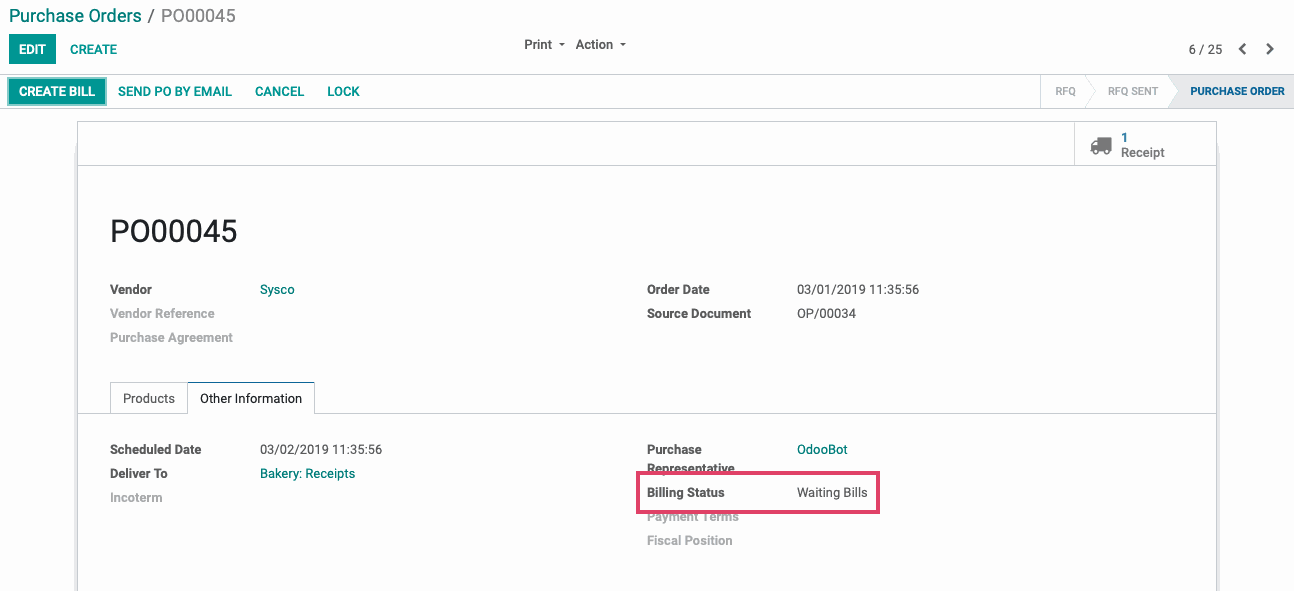
Purchase orders will offer you a quick view of the bill status, depending on how your app is configured. If the invoice policy is set to invoice on delivered quantities, then you will not be able to create a vendor bill until the product is received. Otherwise, the option to create bill based on ordered quantities will appear in the top right corner.
Receipt of Goods will be covered further in the Receiving Products section of this document.
Incoming Products
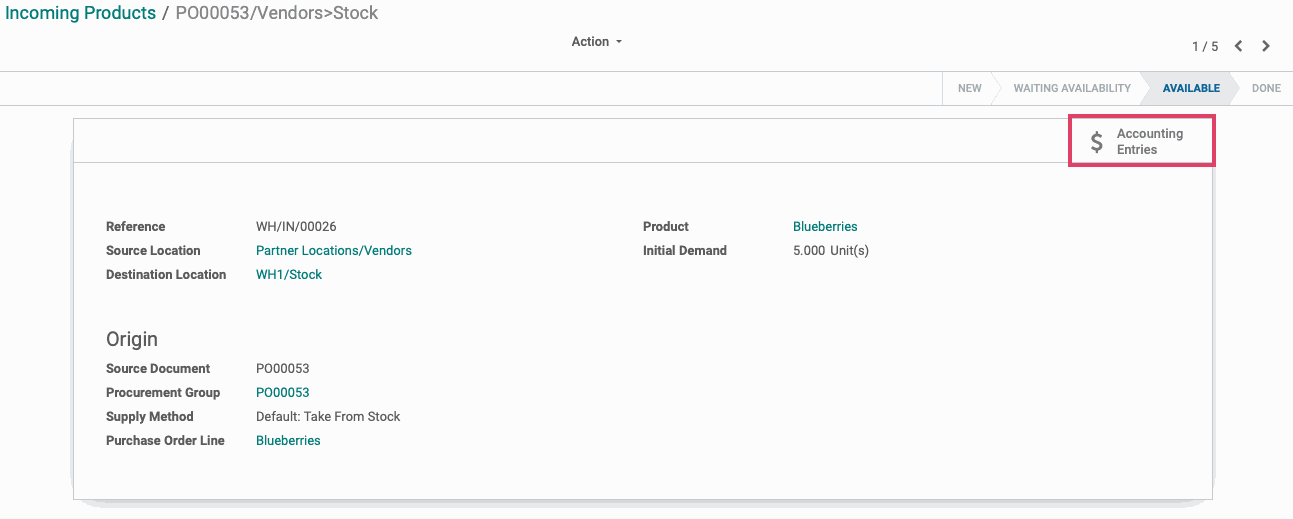
In the navigation bar, go to Control, and select Incoming Products from the dropdown menu. Here you will see the products you've ordered broken down individually with the referenced Purchase Order, to give you an idea of what product is on its way and when it will arrive.

Opening one of these records will show you the details associated with the transfer and a quick path to the associated accounting information.
Purchase Agreements
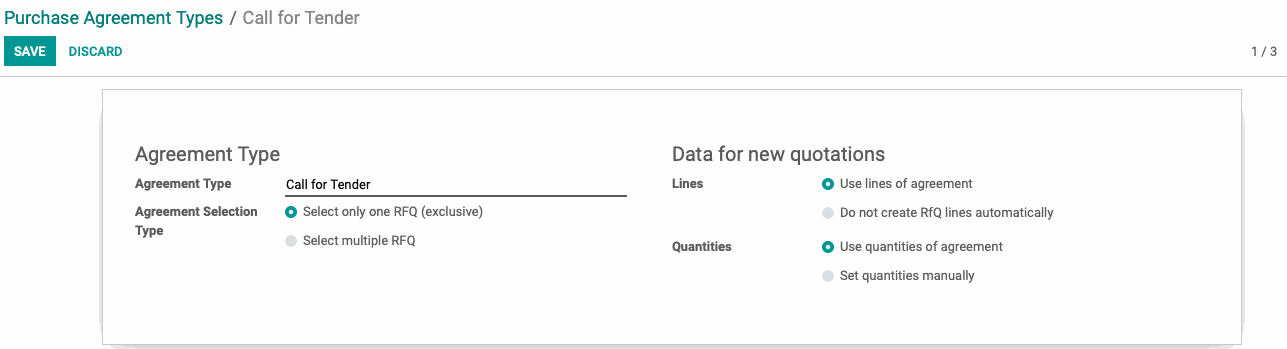
There are two types of purchase agreements in Odoo, called a Blanket Order and Call for Tender. These types are configurable in the Purchase app settings.
Blanket Order: This type of agreement is like a standing purchase order and is used to manage recurring purchases of certain products from a vendor over a set period of time or in certain quantities.
Call for Tender: This agreement type will allow you to request price updates on a product from multiple vendors to make sure you are getting the best rate. If Select only one RFQ is chosen in the configuration options, then selecting the winning bid will cancel the other RFQs.
To create a purchase order with a certain purchase agreement in place, navigate to PURCHASE >PURCHASE AGREEMENTS and click NEW.
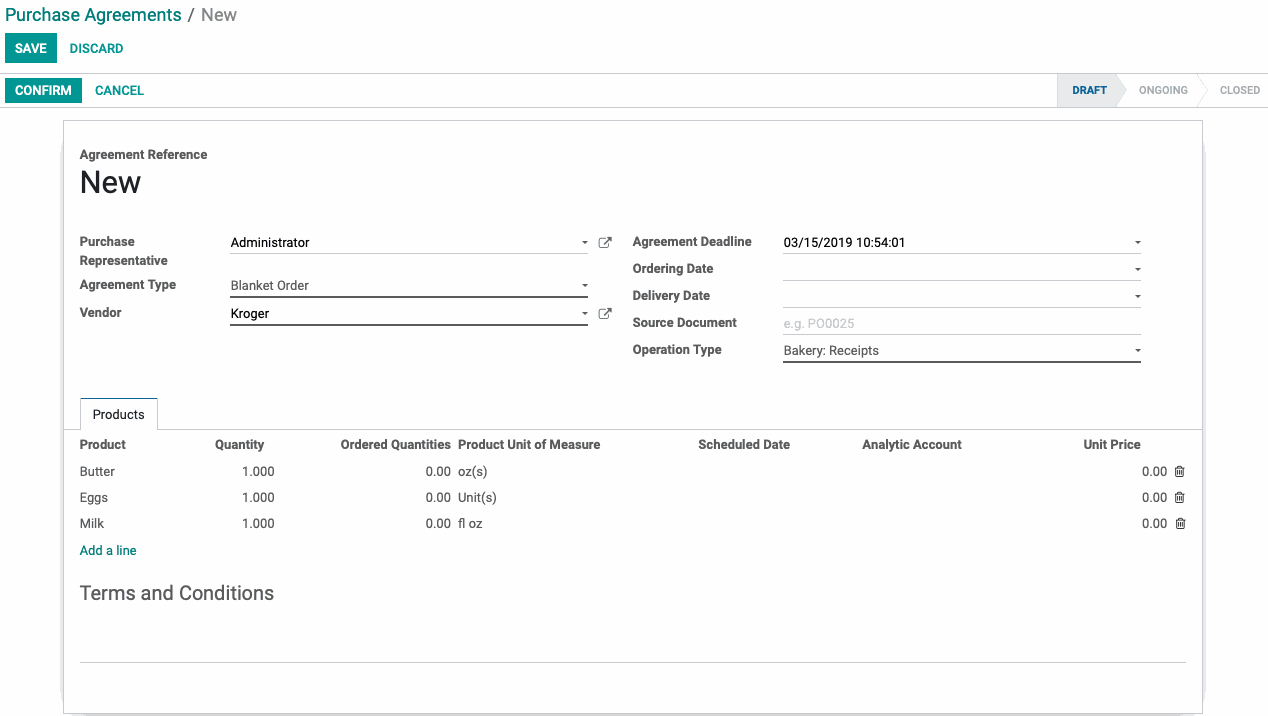
After selecting the agreement type, vendor, products and prices you'd like to include, click Confirm.
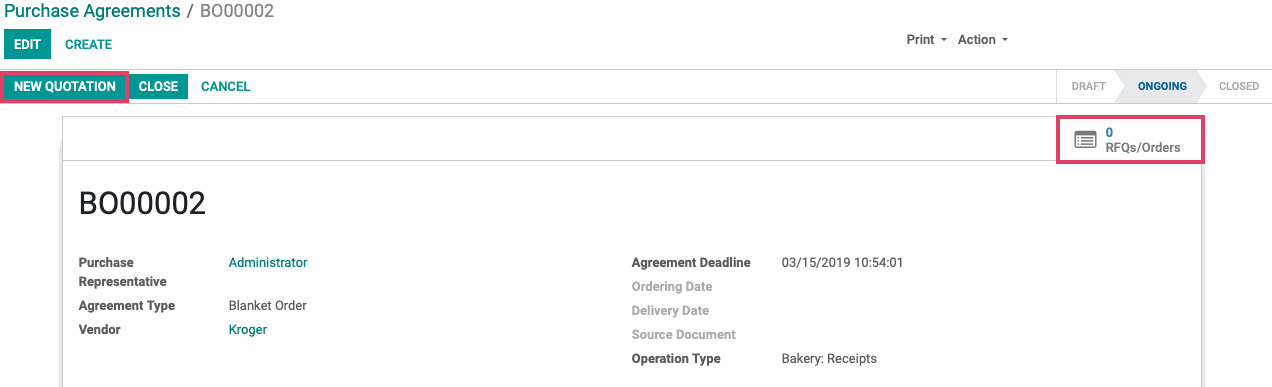
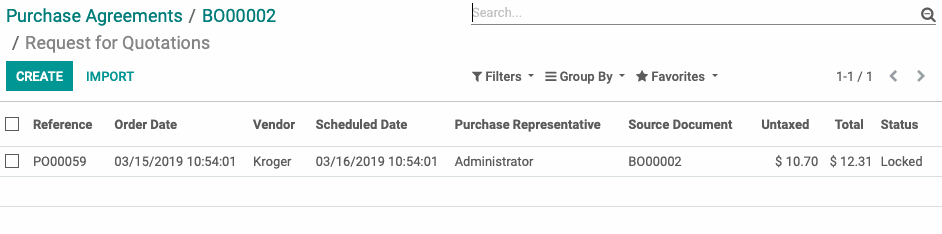
Once the agreement is saved, you will have the option to create new quotations under it. There will be a smart button in the top right corner of the record, indicating how many RFQs and POs are associated with the purchase agreement.
To create a draft quotation under this agreement, click New Quotation.
Fill out the quantities you’d like to purchase and set the expected delivery date on your new quotation and click Save, then Confirm Order.
The new purchase order will appear under the agreement's RFQs/Orders list for ease of reference.
Receiving Products
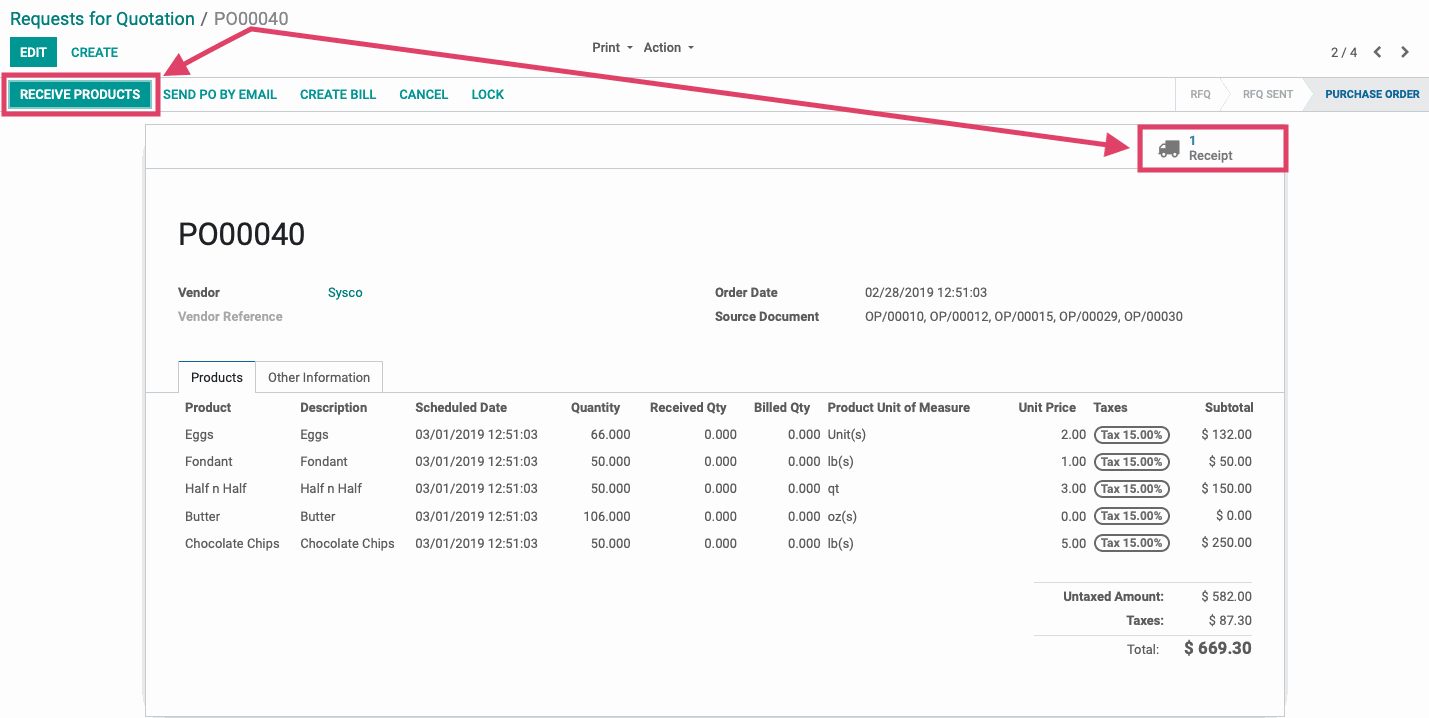
Whenever a Purchase Order is confirmed, Odoo will generate an operation type called a Receipt in the warehouse to which the products are expected to be delivered. From the purchase order, you will see a Receipt smart button appear in the top right corner of the window. You can either click RECEIVE PRODUCTS or the Receipt smart button to see the transfers and the destination warehouse.
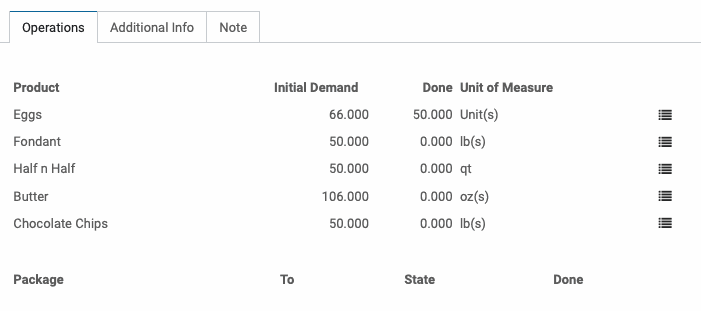
When the product arrives, open the Detailed Operations icon and set Done Quantities on the products.
If your Odoo instance is not configured to use packages or serial numbers, you may not see the Detailed Operations icon and instead will simply enter the done quantity on each line.
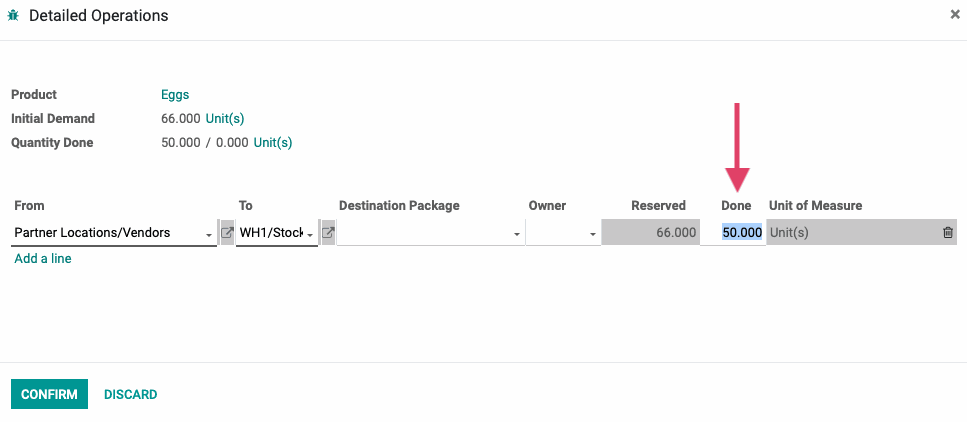
Click CONFIRM to set the quantity actually received. VALIDATE the inbound transfer, and this will add the product to your Quantity on Hand, removing it from the forecasted quantity.
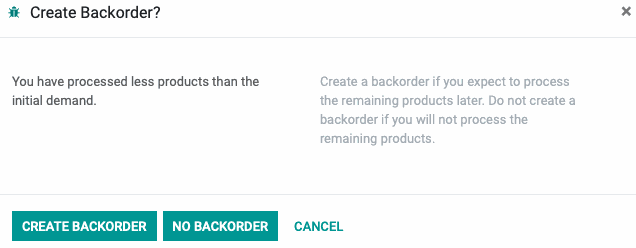
Any product that is left undone due to damage or that is missing from the shipment can be turned into an operation type called a Backorder at this point. If you will not be receiving the remaining items from the vendor in the future, select No Backorder. The Backorder option will be available anytime a transfer cannot be completed as originally configured. It will reference its source for easy follow up and scheduling.

Vendor Pricelists
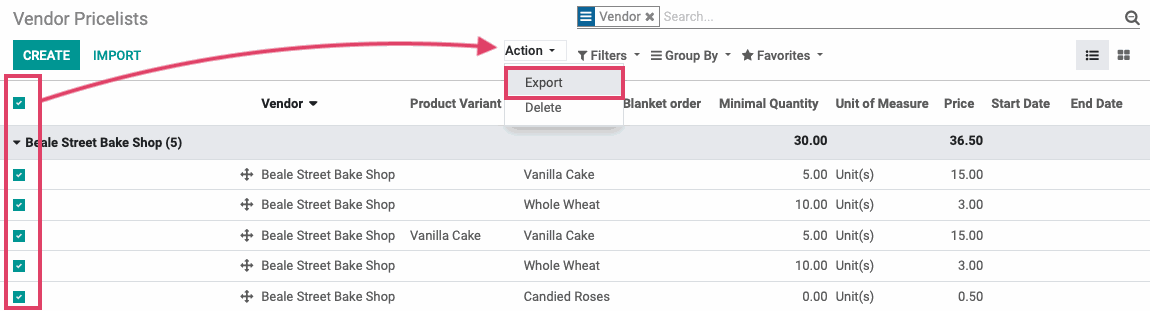
In the navigation bar, click Purchase > Vendor Pricelists. You will be shown your vendors, the products purchased and at what price. It may be helpful to group by vendor to achieve a simple list to export or print.
The Import/Export function is useful for quickly updating information in your database. Select all of the products under a vendor and check the box that selects every record. Then, under the Action menu, click export.
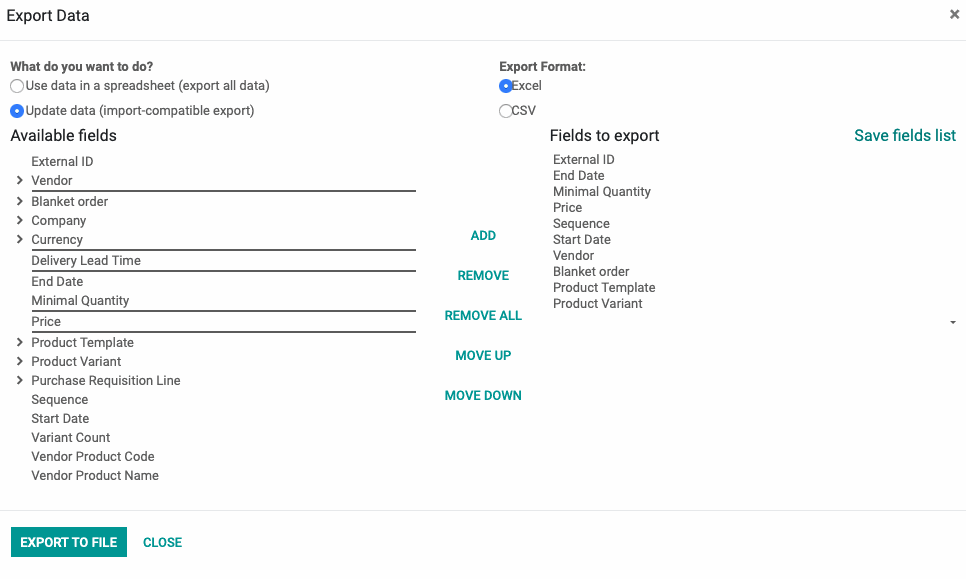
In the following window, select Update Data (Import-compatible export) and choose your export file type. Odoo will have a list of recommended fields to use in your spreadsheet. Click Export to File.
Update your data as needed. In the top left corner of the Pricelists window, you will see an Import button. Select this and upload your revised file. Odoo will try to match the headings based on the field names. If you exported from Odoo, this should be automatic, but if Odoo is mistaken on what certain columns contain, you can select them now.
Click Test Import in the top left to to make sure nothing is amiss. Warning will appear in red above the column.
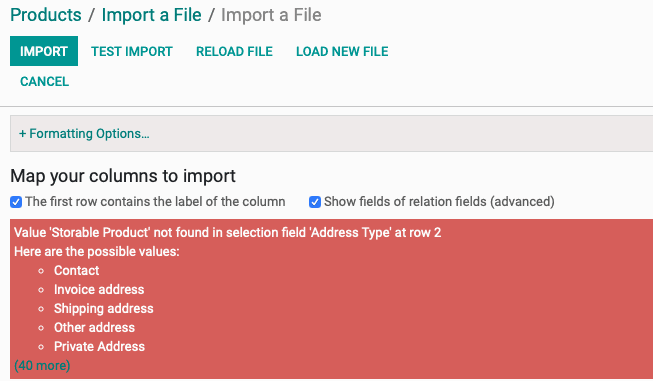
Correct any errors you encounter. If the field cannot be reconciled within Odoo, you have the option not to import it and update those fields manually. You will the blue ribbon below when the file is safe to import to your database.
