Purchase: Purchase Workflows: Creating a Bill
Purpose
The purpose of this documentation is to explain how to Create a Bill from a confirmed Purchase Order in the Odoo v14 Purchase app.
Process
To get started, navigate to the Purchase app.
Create a Vendor Bill
Once there, select ORDERS > PURCHASE ORDERS to choose the Purchase Order you'll be be creating a bill for. The status will be "Waiting Bills". Next, click Create Bill.

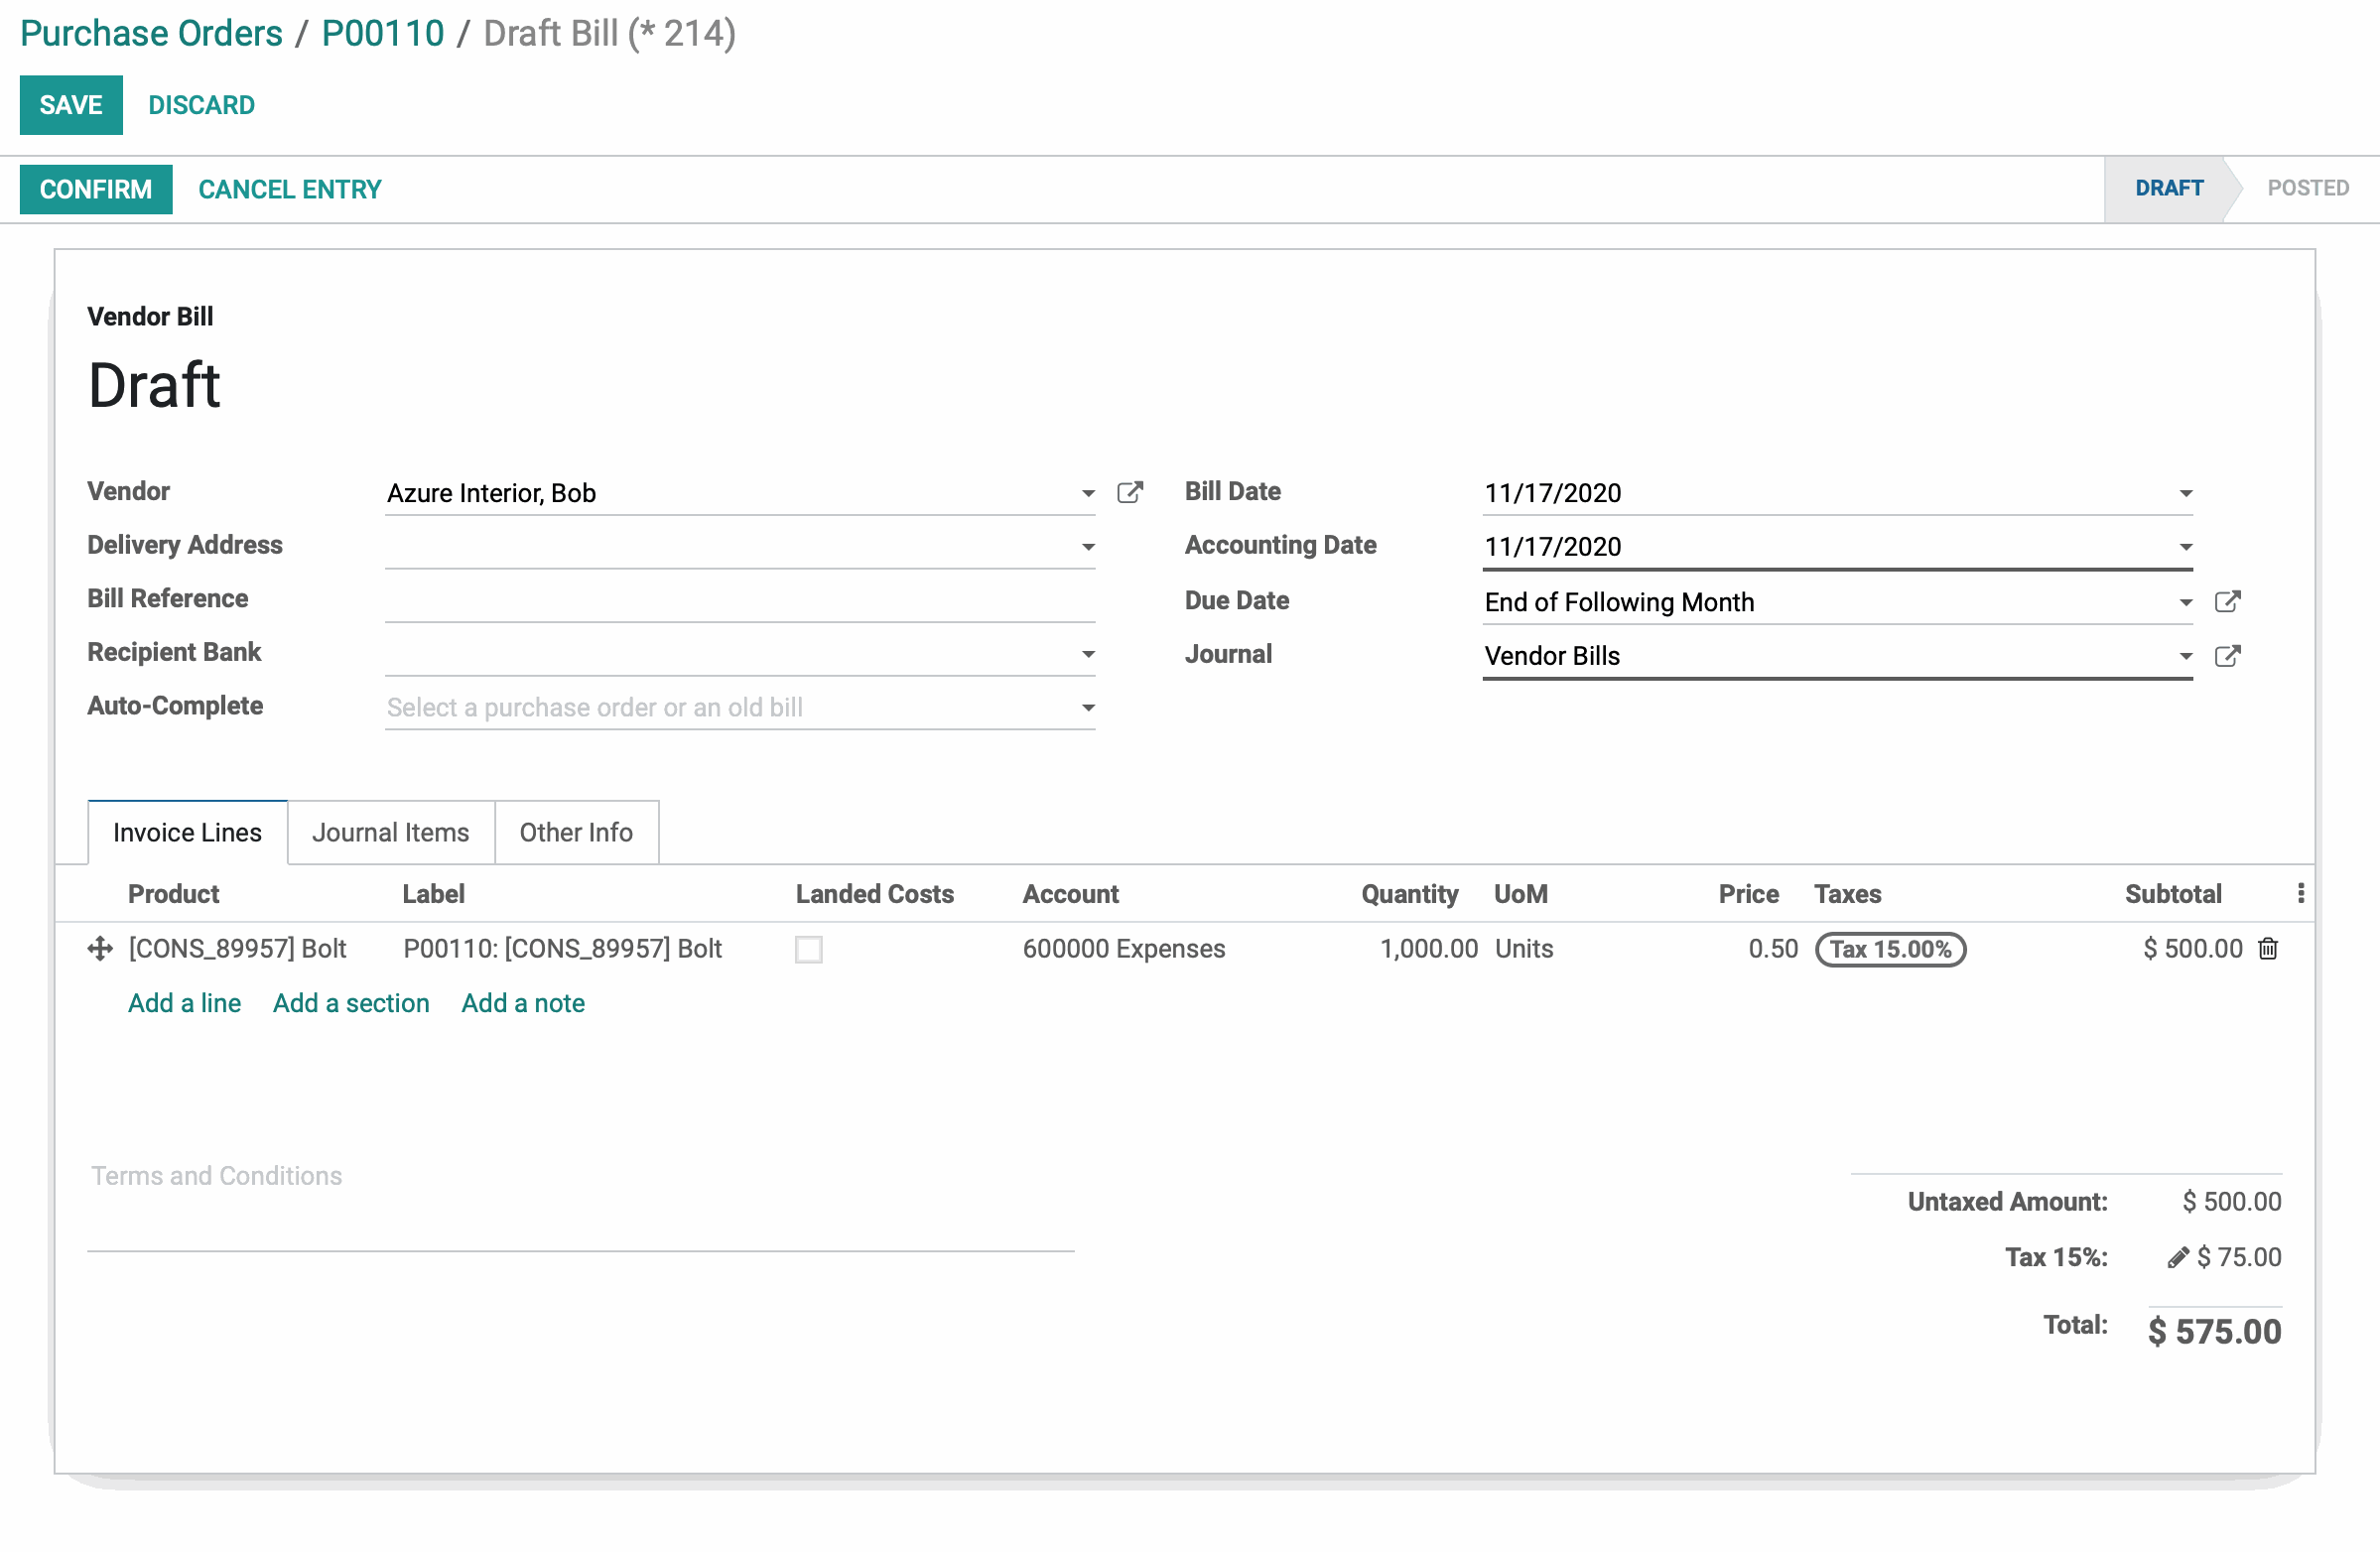
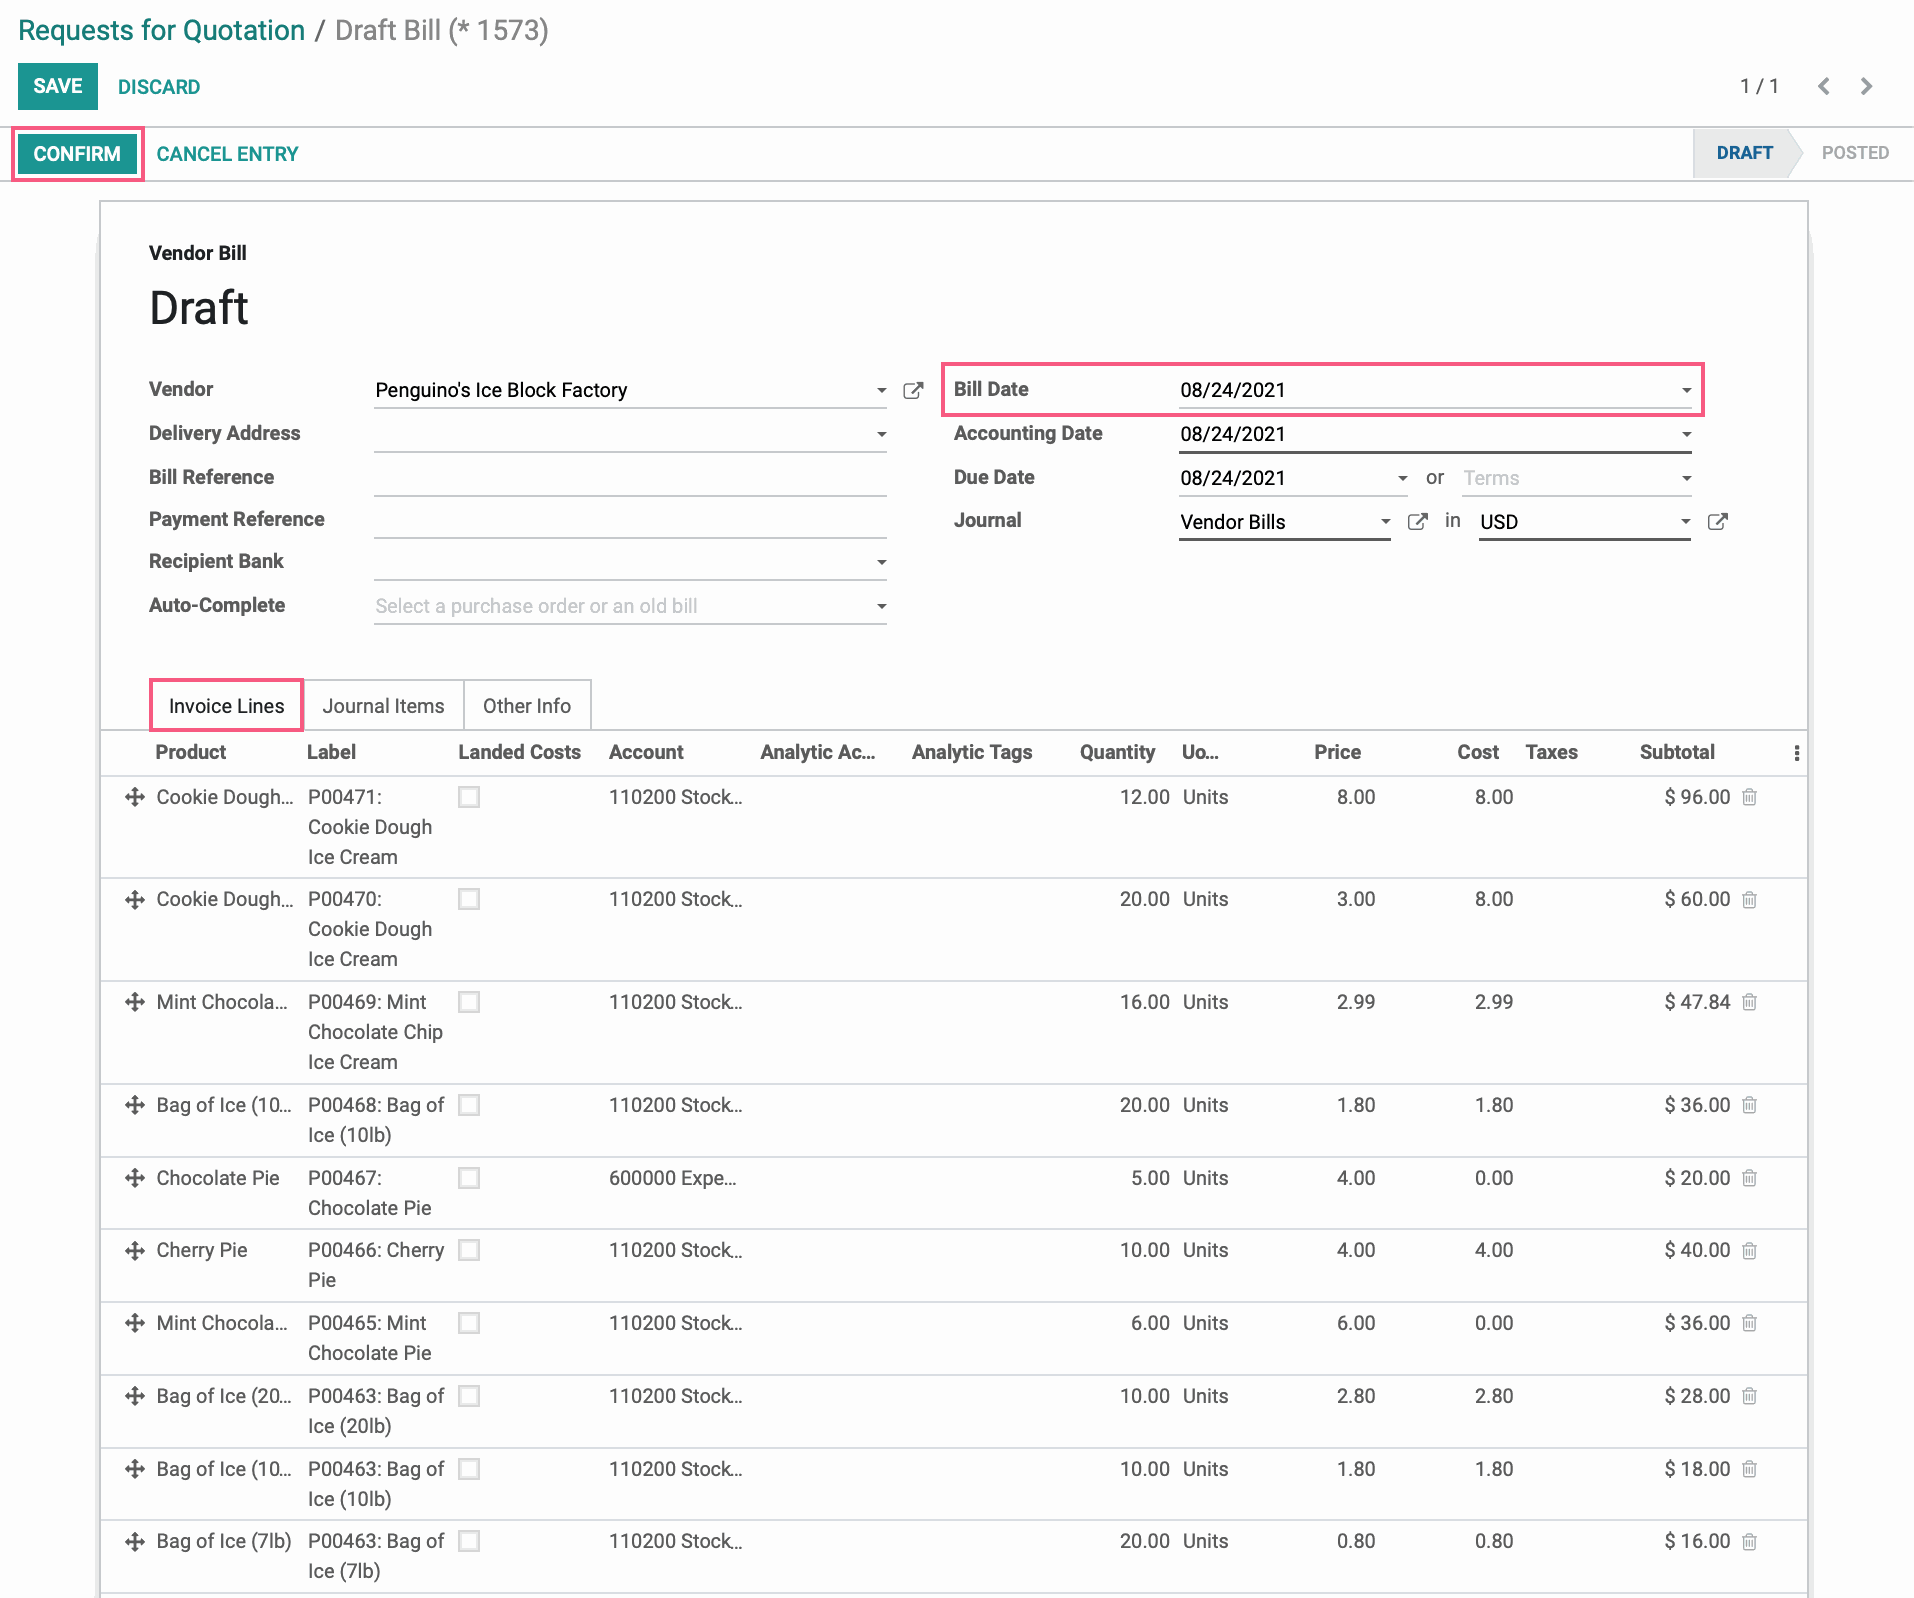
This opens the bill in draft mode. Click click EDIT to see all available options.
From this view, you can make any changes before the bill is posted to be paid. You will notice most fields have been auto-populated from the purchase order.
Vendor: This is the vendor you're paying and will be auto-populated based on the PO.
Delivery Address: This will show the location the products were delivered.
Bill Reference: Use this field to add your own reference ID, such as Purchase Order number. This is useful when matching bills to payments later on.
Recipient Bank: The recipient's bank on file that will be used to process payment.
Auto-complete: Allows you to add products from existing and completed purchase orders and bills. If you're creating this bill directly from a PO, then you won't need to use this option. Selecting a value here will overwrite details in the existing bill.
Bill Date: This is the date the bill was created.
Accounting Date: This is the date the bill is posted to the Chart of Accounts.
Due Date: The agreed-upon due date for payment.
Journal: This reflects the account in which the transaction will be recorded.
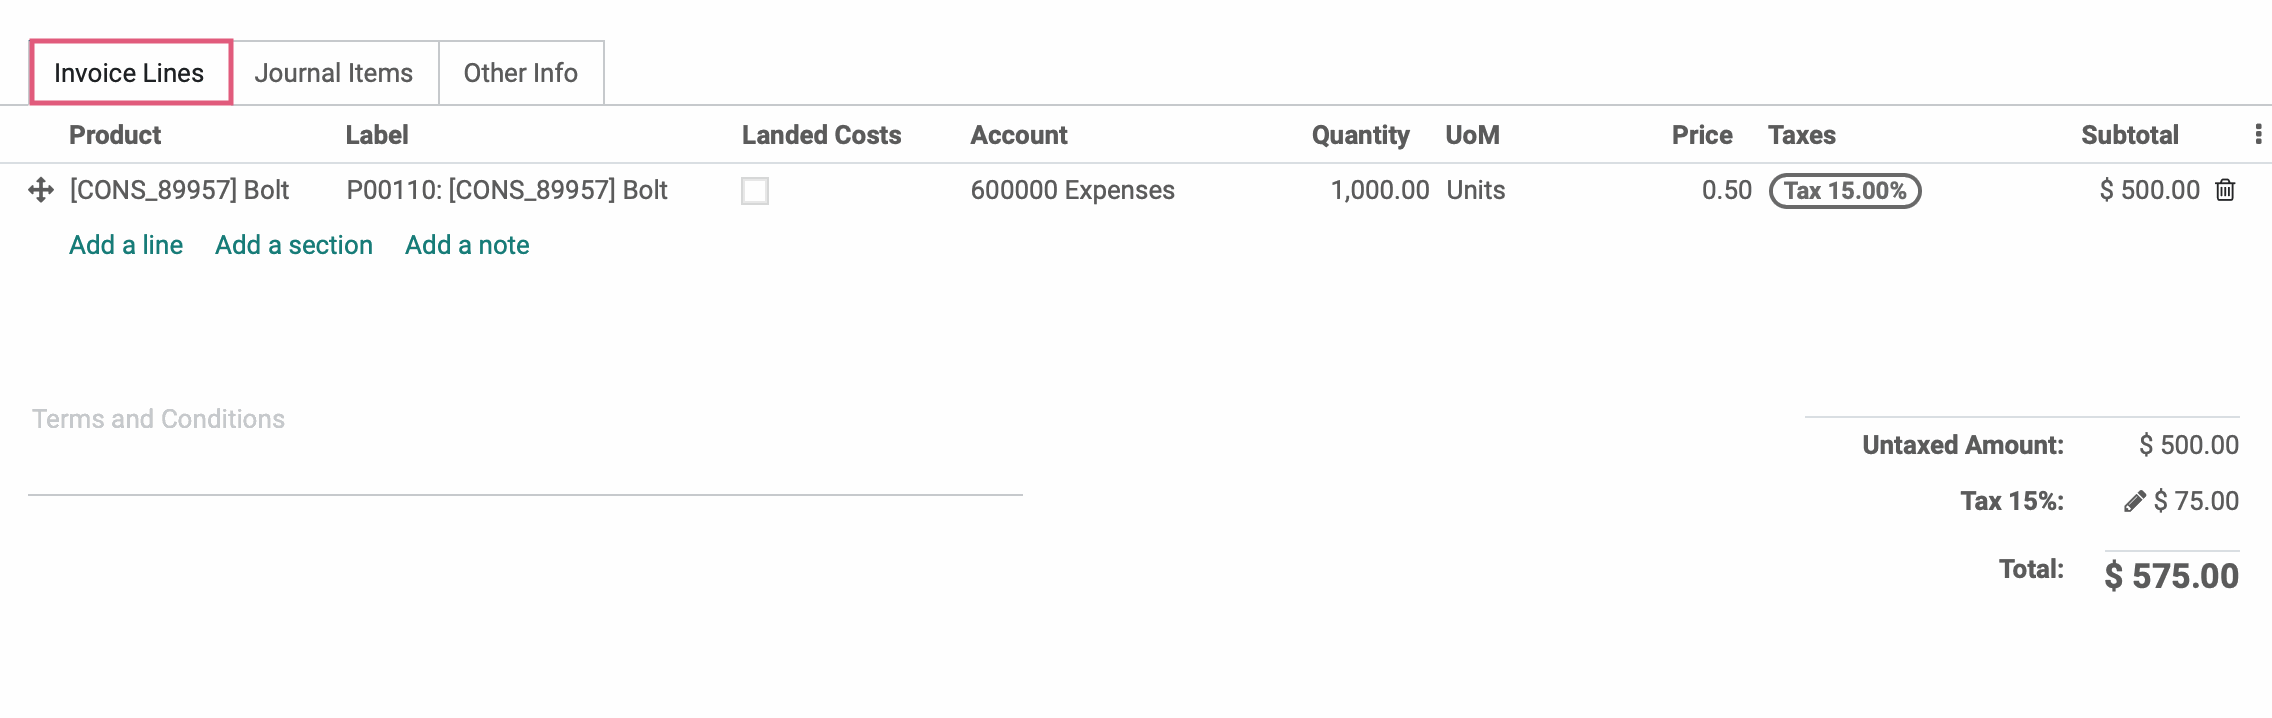
Fields under the Invoice Lines tab are auto-populated based on the the line-items from the Purchase Order.
Product: The item that will be sold to the customer. Fills in the Description, Unit of Measure, Unit Price, and Taxes depending on the product information. They can be manually edited. Note that the product field is not required. Instead, you can simply enter a label.
Label: This is a short text on how you want this product to be labeled on invoice line.
Landed Costs: Allows you to include additional costs (shipment, insurance, customs duties, etc.) into the cost of the product. This can be configured in the Inventory app, under Configurations > Settings.
Account: This is in reference to the account associated with this bill.
Quantity: The number of the product being requested by the customer.
UoM: How the product selected is measured in quantity.
Price: The price per unit of the selected product. By default, this amount is how much a customer is charged for one of the selected product.
Taxes: Allows you to apply the necessary taxes in conjunction with the Accounting app. Taxes will be automatically applied based on the product's Customer Taxes configuration and/or the Fiscal Position (compatible with TaxCloud), which can be set on the customer or order level. A tax can also be manually selected if needed.
Subtotal: The total untaxed amount based on the Ordered Quantity.
Good to Know!
Why is the Product Field Auto-Completing Upon Label Entry?
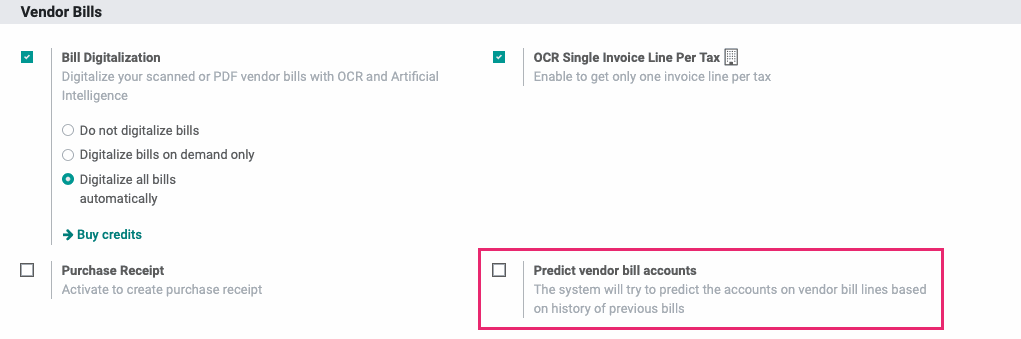
If you choose to enter a label (and no product) but find that the Product field is auto-completing with a product similar to your label after entry, this is because you have Predict vendor bill accounts enabled.
This feature predicts the accounts on vendor bill lines based on history of previous bills and the label data entered. There are two methods in which you can disable this feature.
Method 1: Navigate to the Accounting app.
Once there, go to Configuration > Settings and scroll down to the Vendor Bills section. Untick the box next to Predict vendor bill accounts, then click Save.
Method 2: Navigate to the Apps app.
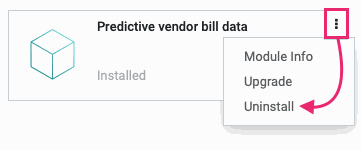
Once there, remove the Apps filter, then search for 'Predictive vendor bill data'. On the module's card, click > uninstall.
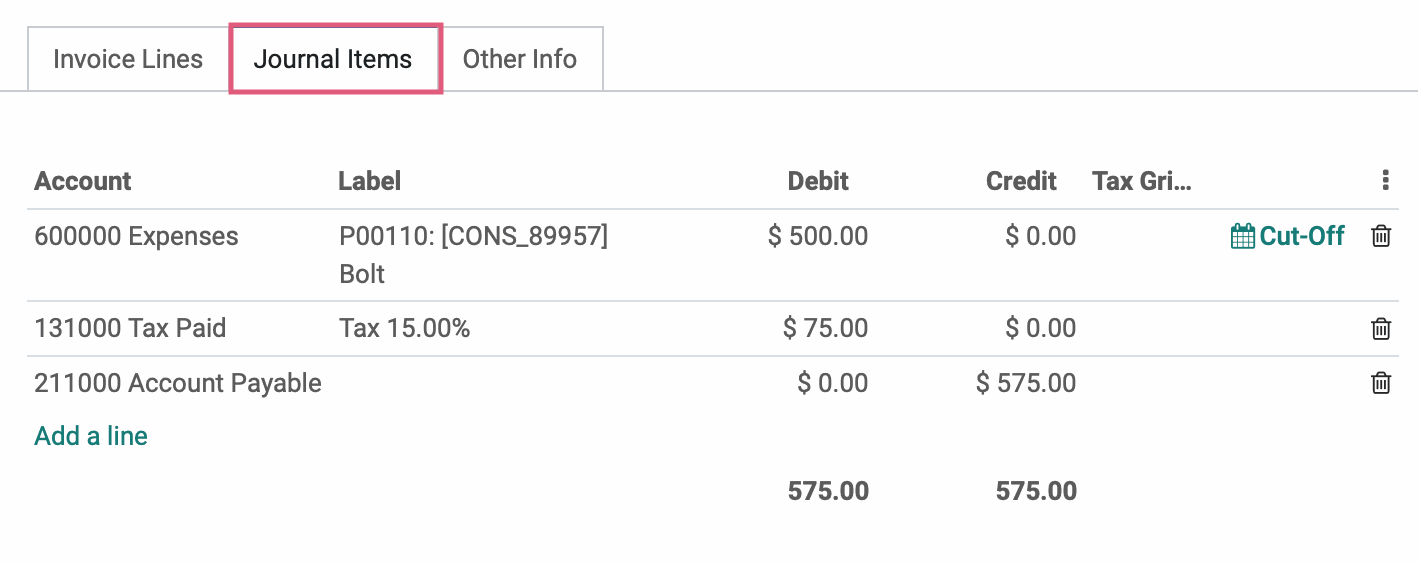
The Journal Items tab will separate the line-items into Debit and Credit columns for accounting purposes.
Account: This is in reference to the account associated with this bill.
Label: This is a short text on how you want this product to be labeled on invoice line.
Debit: This displays the cost of the product plus any other fees.Credit: This displays the amount paid for the product plus any other fees.
Tax Grids: Tax Reports are generated based on these settings. This can be configured in the Accounting app, under Configuration > Taxes.
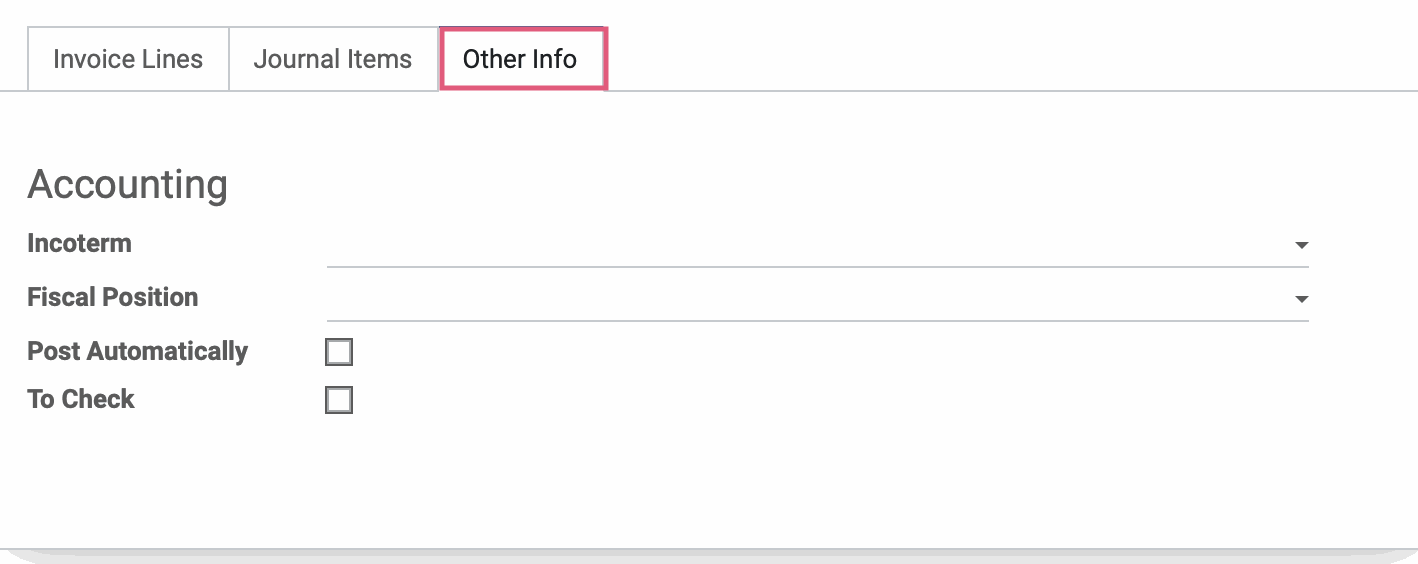
The Other Info tab shows fields that are based mostly on the initial PO. This tab may also show different sections depending on the apps installed and configured on your database.
Accounting
Incoterm: This is only applicable to international transactions.
Fiscal Position: If set on the vendor contact record, this will auto-populate. Otherwise, you may select which Fiscal Position should apply to this PO.
Post Automatically: If this checkbox is selected, this entry will be automatically posted at its date.
To Check: If this checkbox is selected, it means that the user was not sure of all the related information at the time of the creation of the move and that the move needs to be checked again.

If you've not already received products from the originating purchase order, review the Receiving Products documentation.
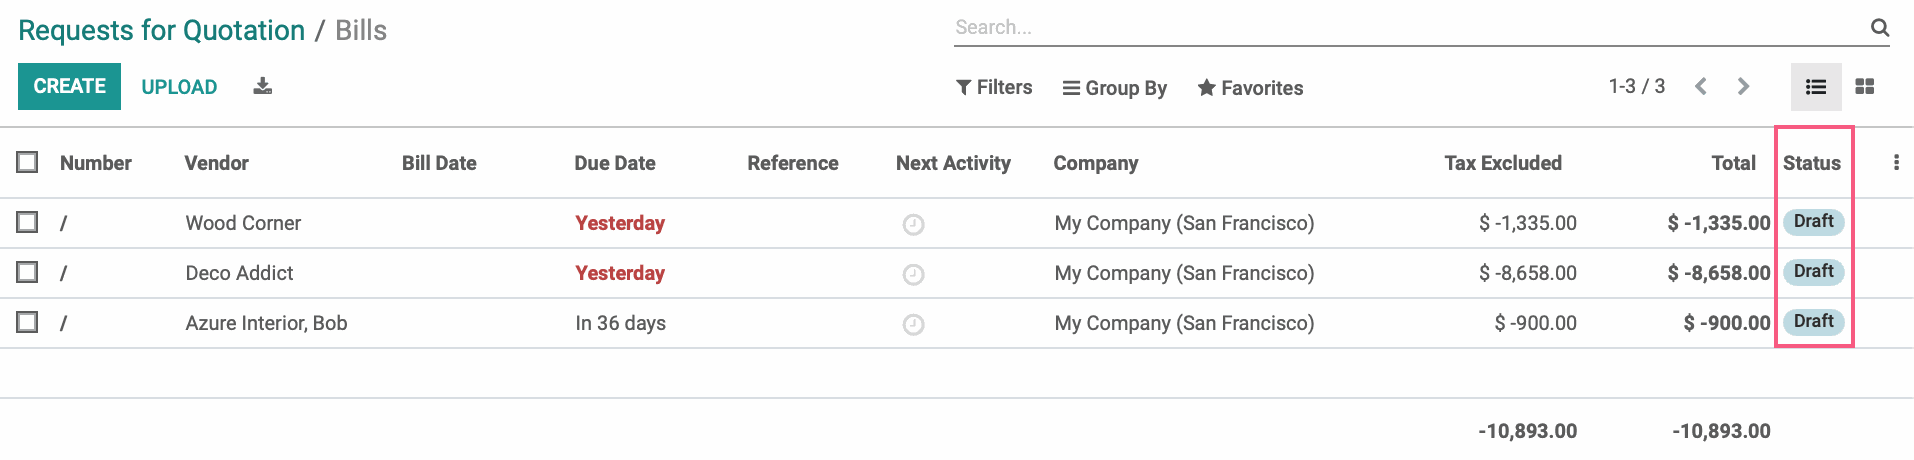
Generating Multiple Vendor Bills for One Vendor
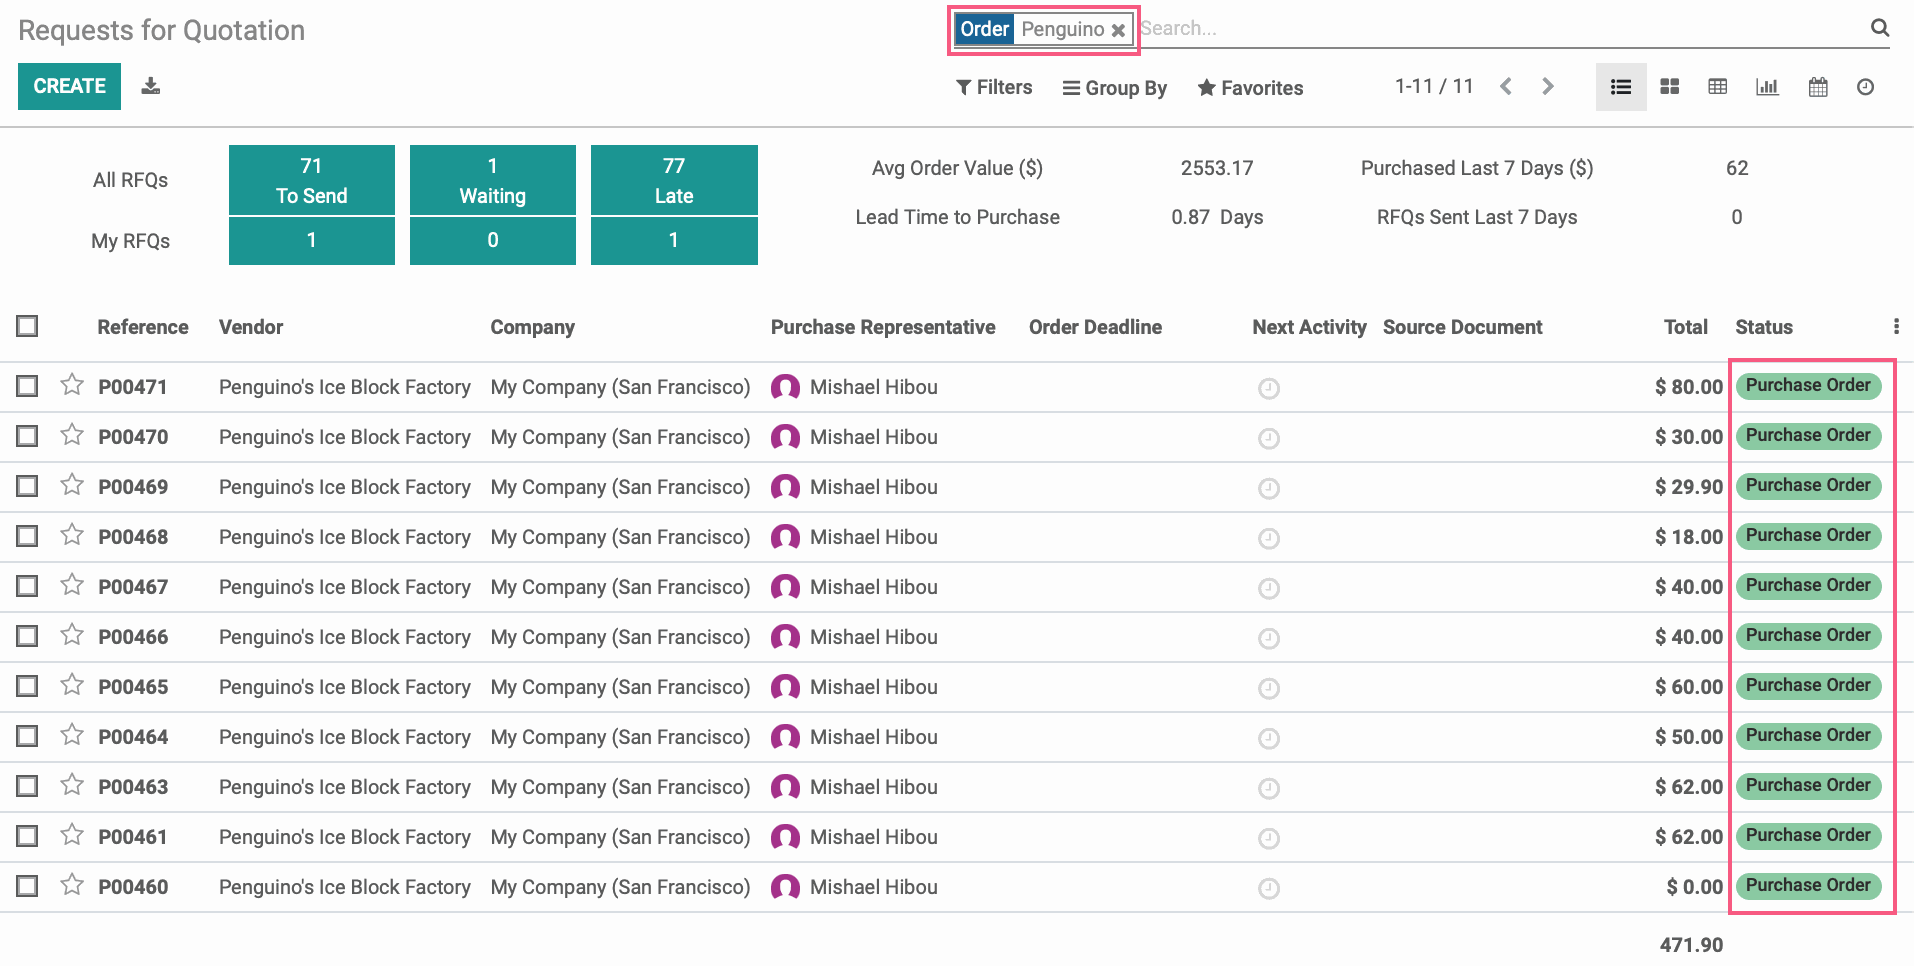
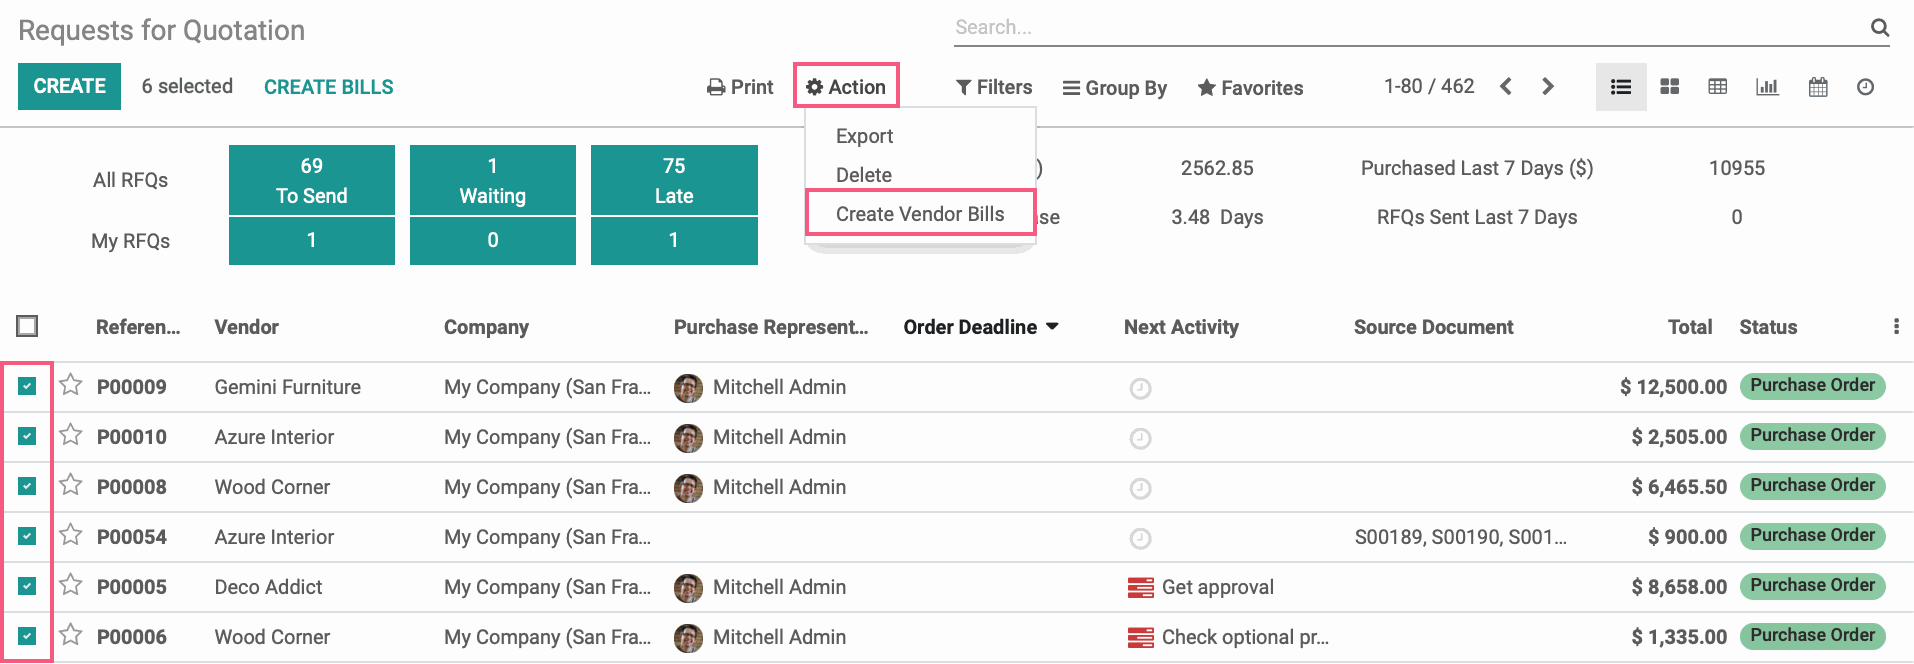
To generate multiple vendor bills, go to your Purchase menu and filter for a vendor. In order to generate a bill for a purchase order, it must be in the Purchase Order status.
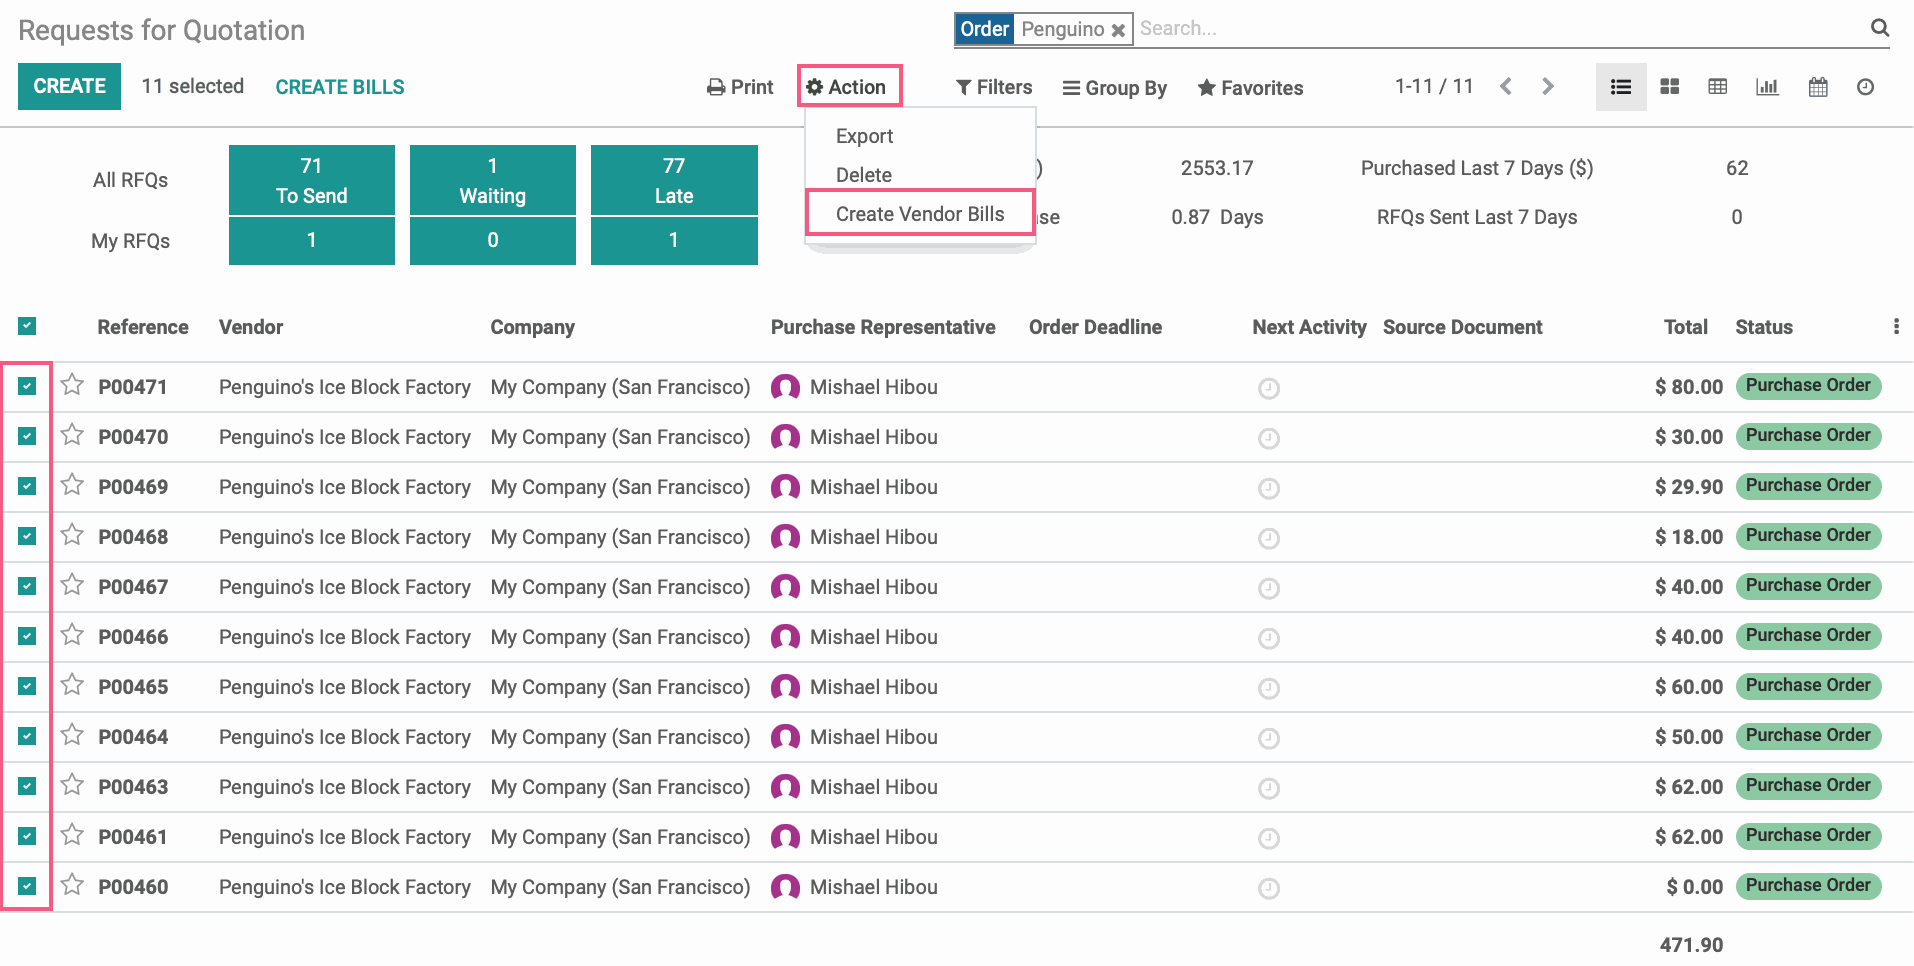
Select all the records for the vendor, click Action > Create Vendor Bills.
This will generate a bill with all the product lines from each purchase orders under the Invoice Lines tab. Verify the data and add a Bill Date, then click Confirm.
Create Multiple Vendor Bills for Multiple Vendors
To generate multiple vendor bills, go to your PURCHASE menu and select multiple vendor purchase orders. In order to generate a bill for a purchase order, it must be in the Purchase Order status. Then click ACTION > CREATE VENDOR BILLS.
This will generate multiple vendor bills, one for each vendor that was selected. Click through each vendor bill, confirm the data in the Invoice Lines tab and then Confirm.