Payroll: Payroll Workflows: How to Run Payroll
Purpose
The purpose of this documentation is to outline the use and processes associated with running payroll and creating payslips in Odoo's Payroll application. We will cover creating individual payslips as well as payslip batches.
Good to Know!
The US Payroll module requires Odoo's Payroll application. However, if you do not already have this application installed, Odoo will install it for you during this module's installation.
The payroll information outlined in this doc uses modules in the Hibou Odoo Suite. Hibou created and maintains the US Federal and State localizations for USA Payroll.
We also recommend that you install Hibou’s USA - Payroll with Accounting module, which links Rules to Accounts based on the US Accounting Localization.
Process
Installing the Payroll Payments Module
To get started, navigate to the Apps application.
In the search box, remove the Apps filter, then search for the module "Payroll Payments." When you see it in the list, click INSTALL.

Next, navigate to the Accounting application.
Go to Configuration > Invoicing > Journals. Select the Payroll journal.
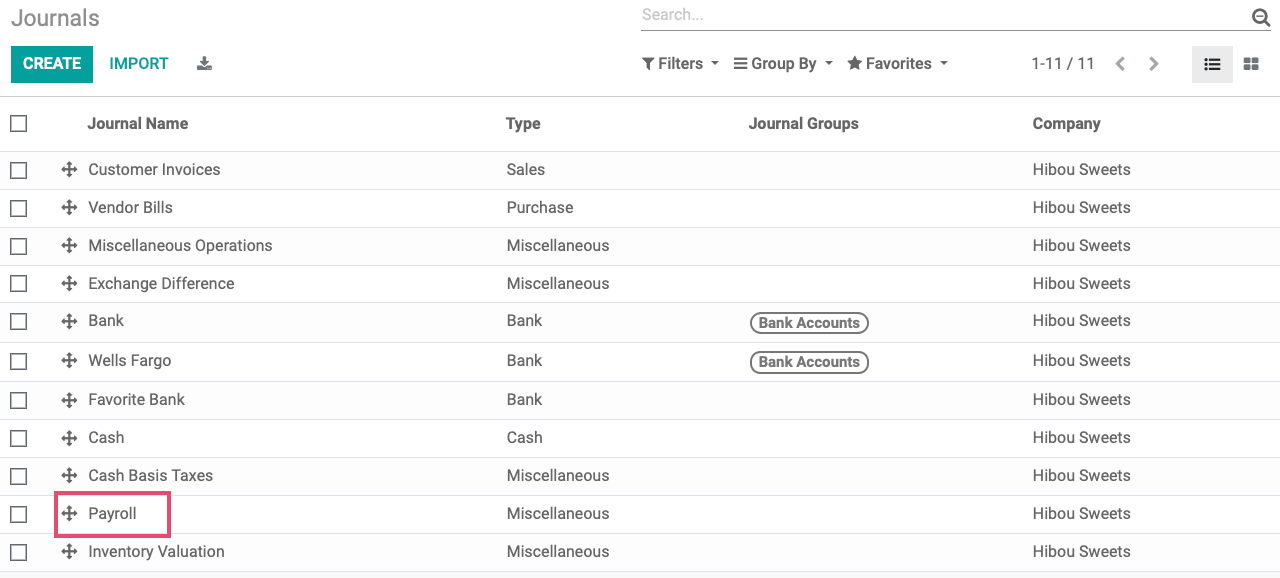
Click edit. Under ADVANCED SETTINGS, complete the following fields in the Payroll Payments section:
Payroll Entry Type: Select how you wish for the journal items on the payslip to be displayed.
Original: This option is the default display option by Odoo. Each salary rule will have its own line on the payslip.
Grouped: This option will group salary rules into the same line on a payslip, based on the Payroll Partner. This is helpful for batch payments, allowing you to see the total amount of money to be remitted to a given payment partner.
Payslip: This will generate a journal entry for every payslip.
Payroll Payment Journal: Select the journal the payment should be recorded to.
Payroll Payment Method: Select a payment method.
Check: Check indicates you wish for Odoo to print checks.
Manual: Manual encompasses any payment that happens outside Odoo, including direct deposit.
Payroll Refund Method: Select the method by which you would refund your company, should it be necessary.
Manual: This option means you will receive the refund via a system outside Odoo.
Electronic: This option means you will receive the refund via a payment gateway.
Batch Deposit: This option allows you to associate incoming refunds with other payments.

Once done, click save.
Important!
You should have installed the USA - Payroll with Accounting module when you were setting up Payroll. See the How to Set-Up Payroll documentation for more information on this process.
Once that module is installed, you will need to modify currently-running employee contracts to ensure their salary structure is correct.
To do this, navigate to the Payroll app.
![]()
Click Employees > Employees. Select an employee with a currently-running contract. Navigate to the Contracts smart button. Select the Running contract.
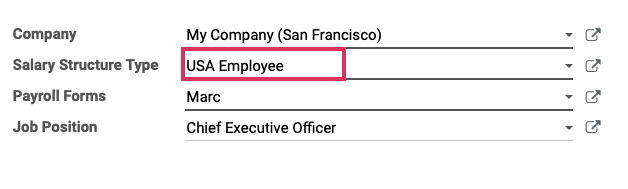
Click edit. In the Salary Structure Types field, select USA Employee.
Next to the field, click . Click the Structures smart button in the top right corner of the modal window.
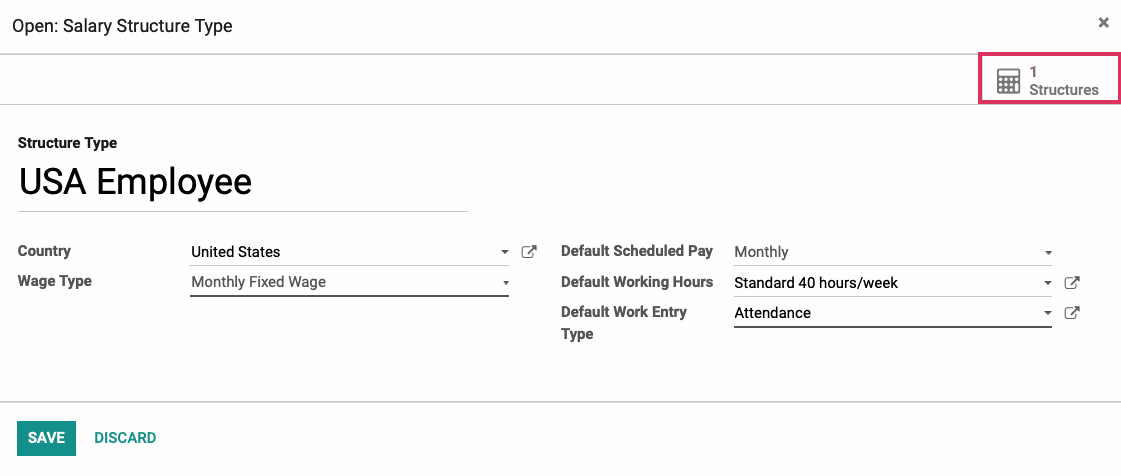
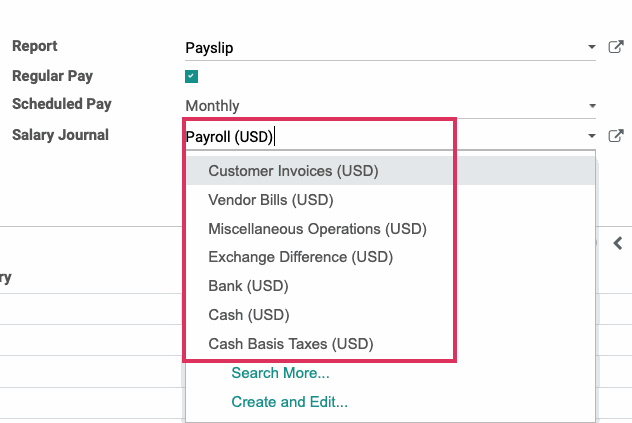
From the list, select USA Employee Standard. Click edit. In the Salary Journal field, select Payroll (USD).
Click save. Repeat this process for all employees on your payroll.
Running Payroll for Individual Employees
Navigate to the Payroll application.
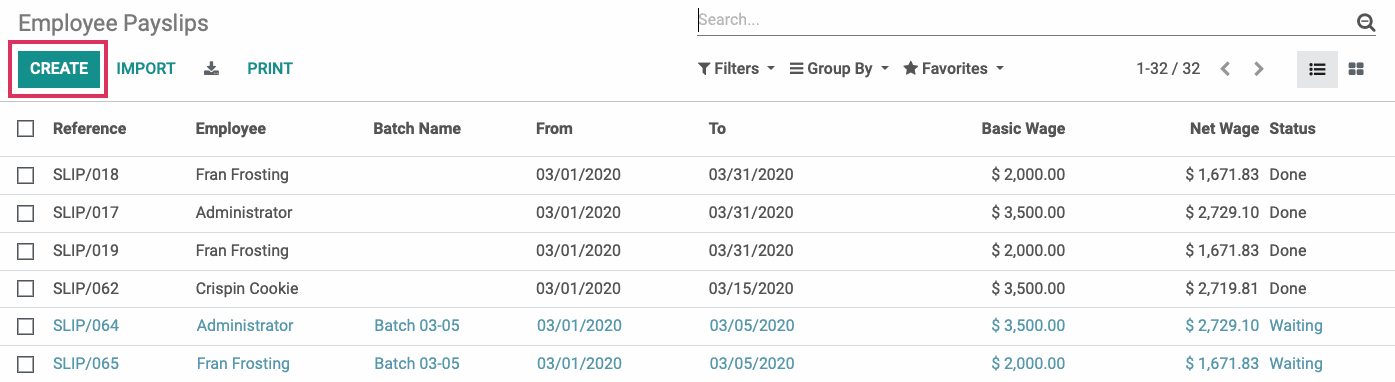
Once there, go to Payslips > all Payslips.
Select CREATE to create an individual payslip.
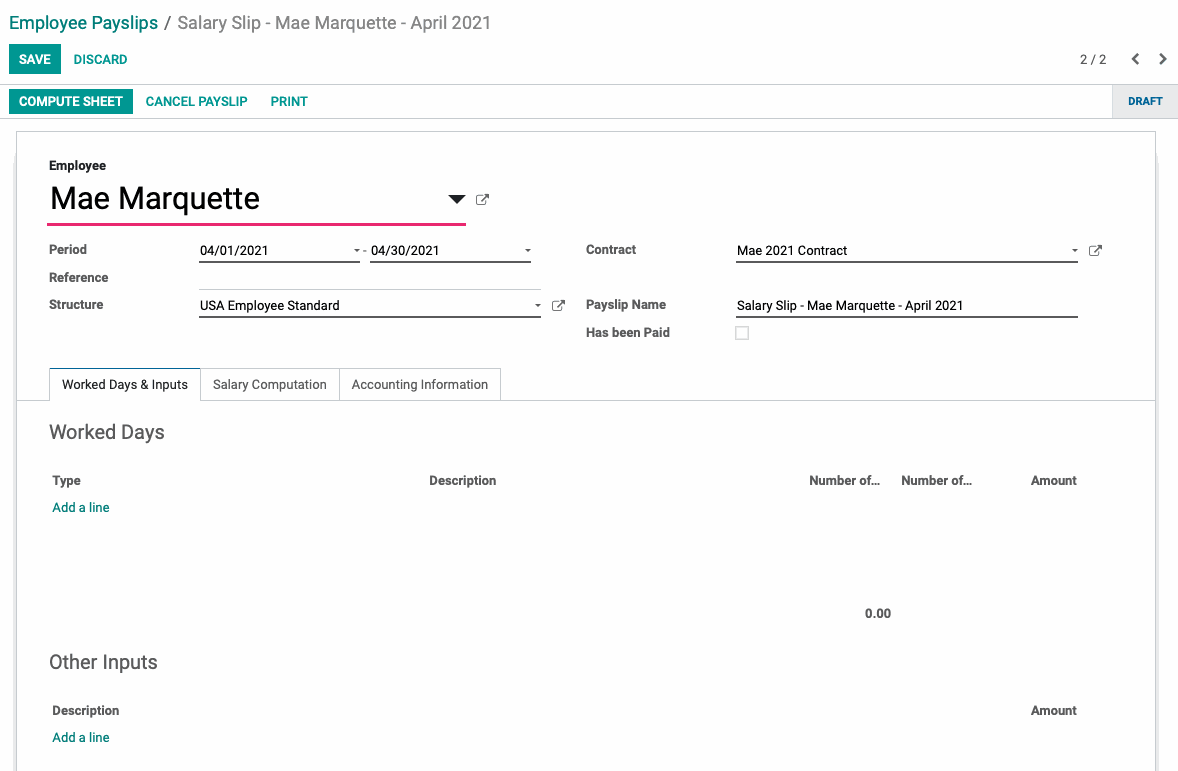
On this page, you only must fill in the Employee and Period fields. All other fields will auto-fill after you select an Employee.
Employee: Select the employee.
Period: Select the period start and end dates.
Reference: You can create a reference manually for this payslip, or you can let Odoo create one when you hit Compute Sheet.
Payslip Name: This will be pre-filled when you enter the employee name, but can be edited.
Contract: This will automatically fill based on the employee's contract configuration. For more information on Employee Contracts, see our Employee Contracts documentation.
Structure: Salary Structure will automatically be filled in based on the employee’s contract configuration. For more information on Employee Contracts, see our Employee Contracts documentation.
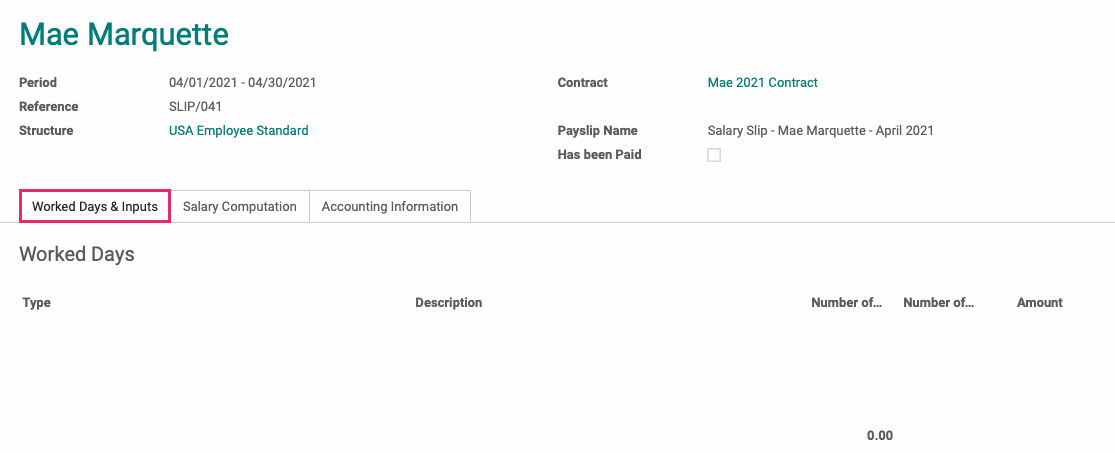
Worked Days & Inputs: The entries here will vary. If the employee is salaried, no lines will be added. If they are paid hourly or based on attendance, those lines will populate.
Other Inputs: Other payments and deductions will load or can be added here.
When you're ready, click COMPUTE SHEET, then click SAVE. You'll notice that Odoo has assigned the payslip a unique Reference.

Under Worked Days & Inputs you will see the types of activity the employee is being paid for and the number of days and hours they worked, if they are not salaried. This information is pulled from the employee's Salary Structure and the Time Off application/from the employee's Work Entries. (Our example is salaried and had no vacation time,so these lines do not display.)
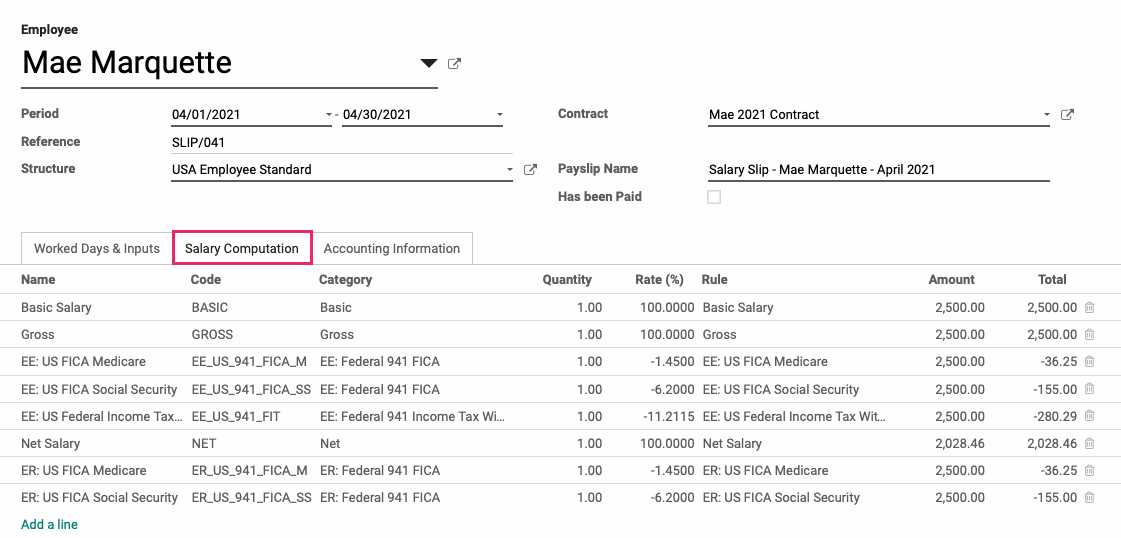
Salary Computation provides a break down of the payslip Salary Rules calculated in sequence order with associated rates.
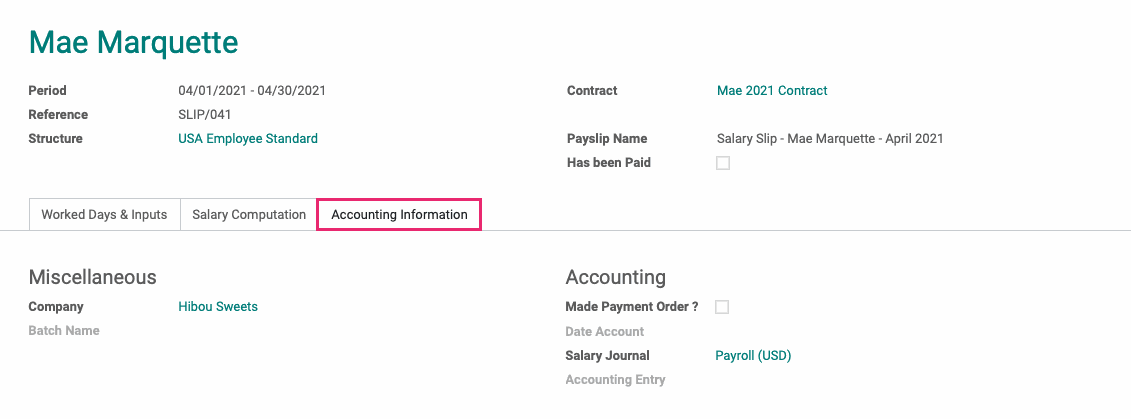
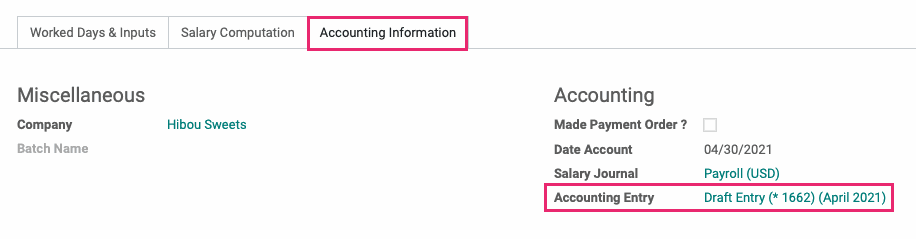
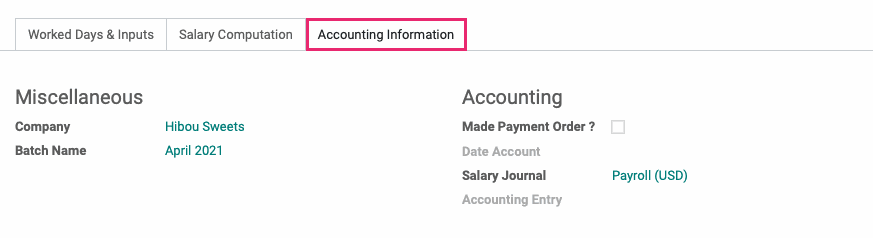
Under Accounting Information, you will find two sections:
In the Miscellaneous section:
Company: The name of your company
Batch Name: Indicates that this payslip was created or added to a Payslip Batch. Batches are discussed below, on this page.
In the Accounting section:
Made Payment Order?: Check this box if this payslip has already been paid.
Date Account: Date that the payslip journal entry will be dated. If not manually edited, this will default to the last day of the pay period once confirmed.
Salary Journal: This is your payroll journal. This should be selected by default based on the employee's contract configuration. For more information on employee contracts, see our Employee Contracts documentation.
Accounting Entry: Journal entry name (begins with your payroll journal's short code) posted to the general ledger in the Accounting application. This will automatically be filled when you create the draft entry.
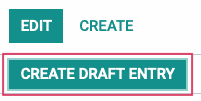
After reviewing all tabs to make sure the payslip amounts look correct, select Create draft entry. This will generate a draft entry in Accounting.
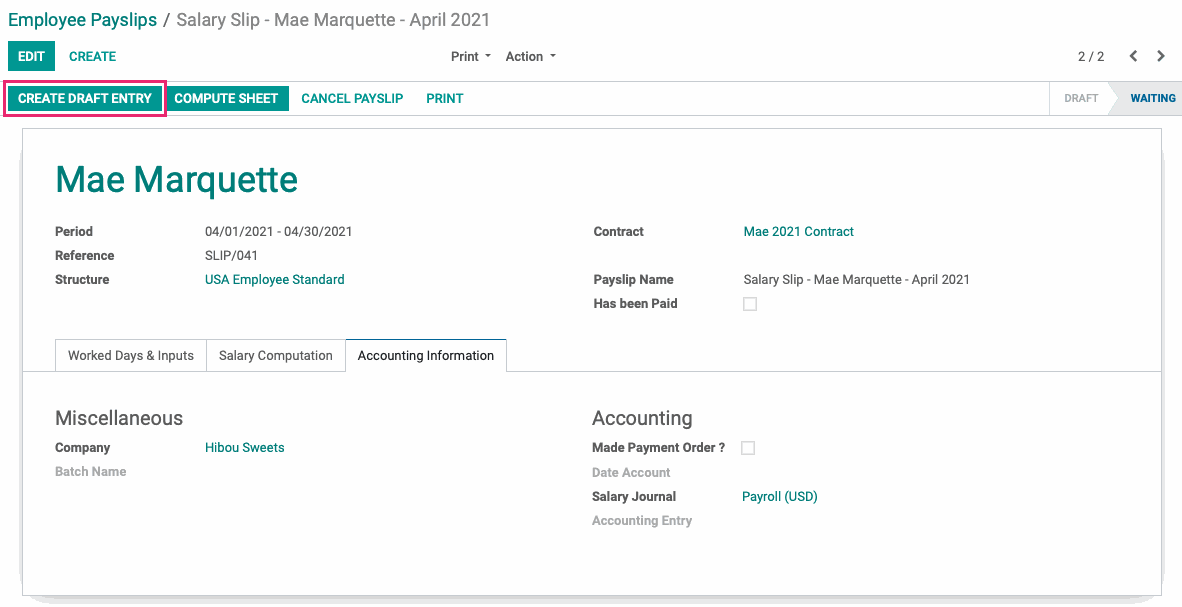
You will see under the Accounting Information tab that the Accounting Entry field is now filled with an entry. You can select this entry to see the journal items associated with this payslip.
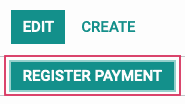
When you're ready to make this payment, click register payment. Note that this only records a payment, it does not make a payment to the employee on your behalf.
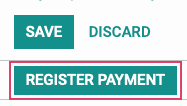
You will be taken to a window where you will see the registered payment. With that, the process is completed.

Important!
If you find that a payslip is missing hours after you've posted it, you'll need to delete that payslip and generate a new, correct version.
To create a new batch, select Create.

On the next page, fill in the following details:
Name: Create a name for this payslip batch.
Period: Select or enter the payroll period being paid.
Credit Note: If this is checked, it indicates that all payslips generated are refund payslips.
Payslips Paid: When the payslips have been paid, this box will be checked. You cannot select it manually.
Date Account: Manually set a payment date to appear on the payslip and journal entries, rather than the period end-date.
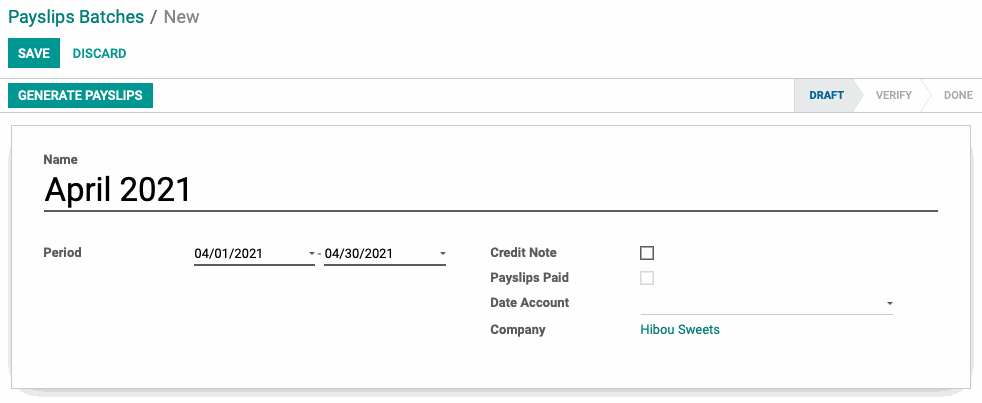
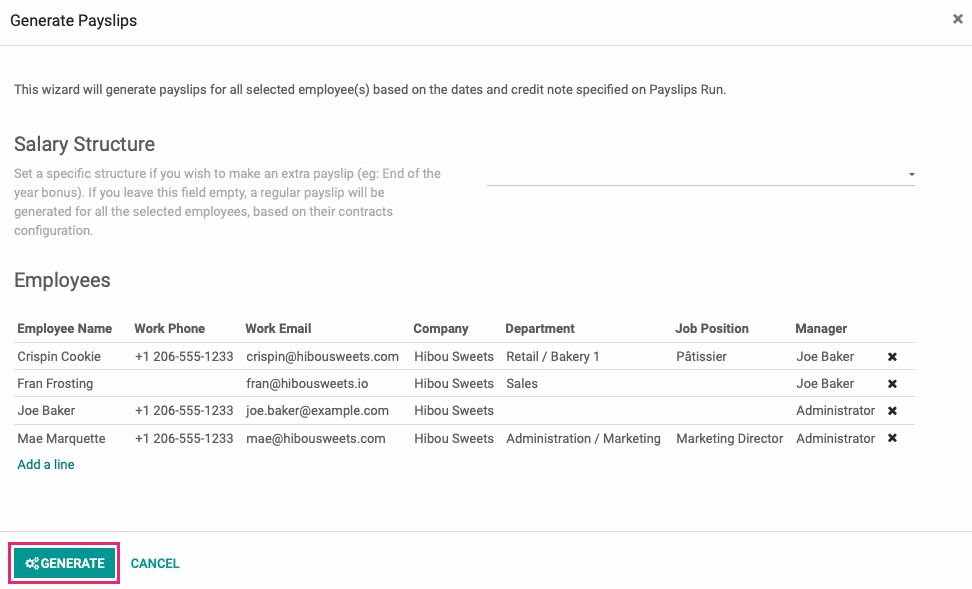
Once the above details are filled in, click Save. Once saved, click Generate Payslips. This will bring up the following modal window.
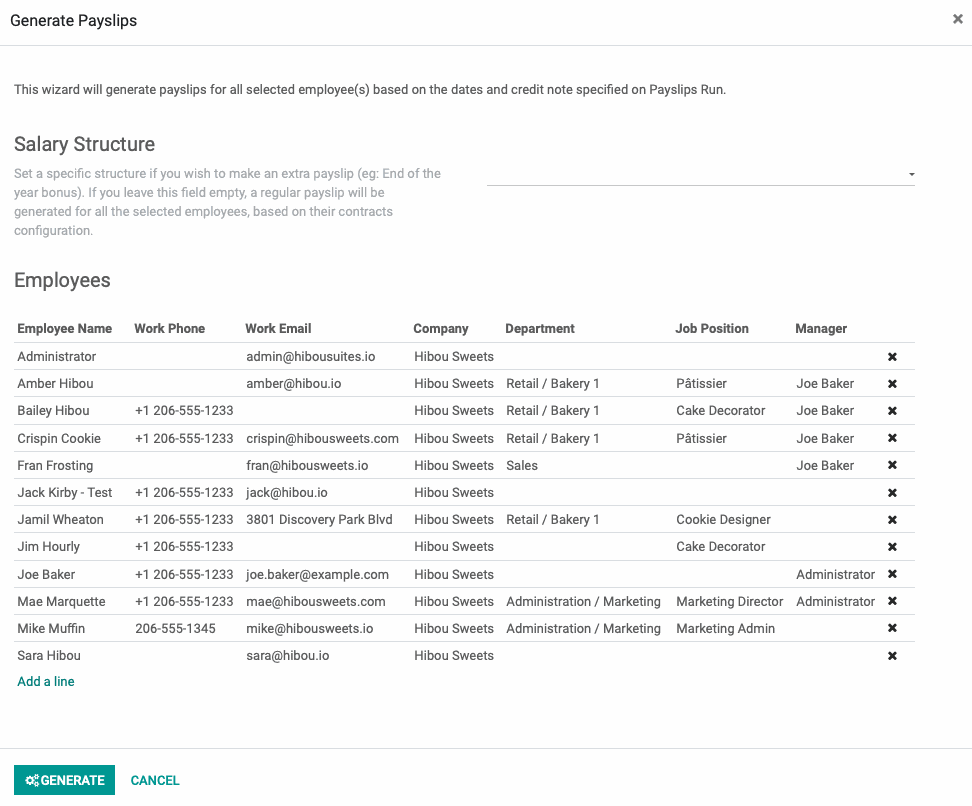
Under Employees, you will see a list of the employees who have a running contract during the period you selected. For more information about contracts, please visit the Employee Contracts page.
Under Salary Structure, you can select an extra Salary Structure to create an additional payslip that will apply to all the listed employees.
If you wish to remove an employee from the list, you can press the at the right end of the employee entry. You may need to scroll horizontally to see this . You can add an employee by clicking Add a Line.
Once you've selected all employees for the payslip batch, click Generate.
The status of the payslip will change to Verify. At this point, you have the option to review your payslips or to create draft entries and register payment right away.
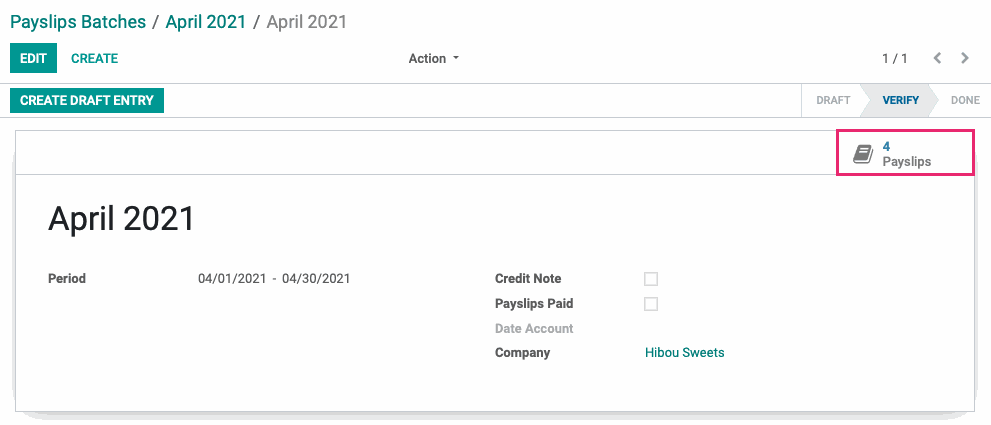
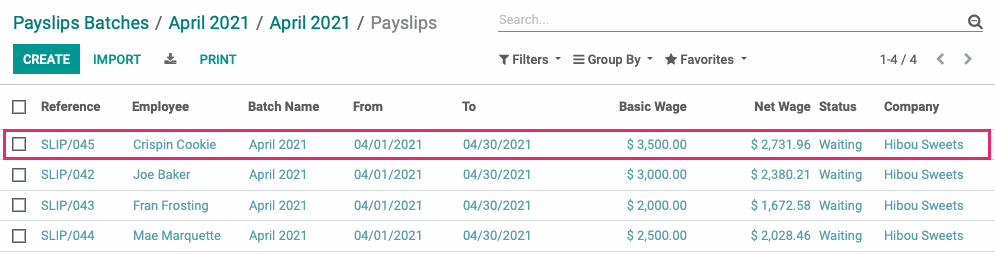
In the next window, you will see a list of payslip entries. Note they are all blue because they have not yet been invoiced. Select any payslip from the list.
On the slip, you will see several tabs:
Worked Days & Inputs: You will see the number of days and hours spent on a type of work. This information is drawn from the employee's salary structure and the Time Off application. Sick days and PTO will also appear as lines here, if applicable. (Example, below, is salaried and shows no data.)

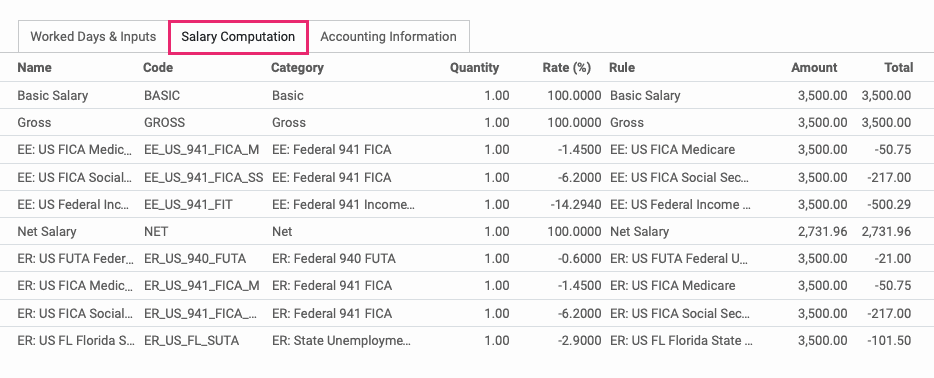
Salary Computation: Here, you will find a breakdown of the payslip Salary Rules calculated in sequence order with associated rates.
InAccounting Information you will find the following fields:
Miscellaneous
Company: This is the company to which you belong.
Batch name: If this payslip is part of a batch, the batch name will be here.
Accounting
Made Payment Order?: Indicates if this payslip has already been paid.
Date Account: Date that the payslip journal entry will be dated. If not manually edited, this will default to the last day of the pay period once confirmed.
Salary Journal: Your payroll journal. It should be selected by default based on the Employee’s Contract configuration.
Accounting Entry: Journal entry name (begins with your payroll journals short code) posted to the general ledger in the Accounting application. This will not be filled/the journal entry will not be created until you create the draft entry.
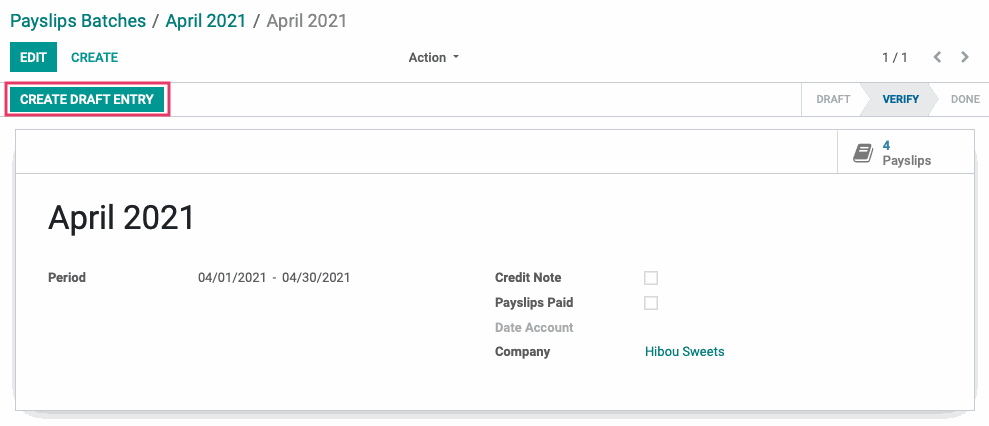
Once you have verified that this information is correct, select CREATE DRAFT ENTRY at top left. Do this for all payslips in this batch.
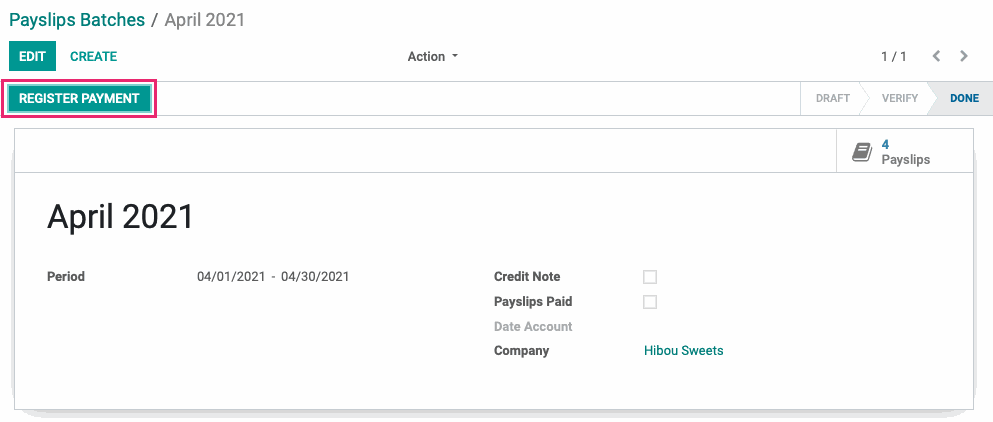
Once you have created Draft Entries for all payslips, you will be able to register payment on them. Select a payslip and click register payment.
Click register payment on all the payslips. Once you have registered payment on all the payslips, the batch is done.
Registering Payment without Reviewing Payslips
If you do not wish to review the payslips, simply click CREATE DRAFT ENTRY from the payslip batch home screen.
Once you have created a draft entry, click register payment. Note that this only records a payment, it does not make a payment to the employee on your behalf.
This completes the payroll payment process.