Payroll: Work Entries
Purpose
The purpose of this document is to outline the functionalities of Work Entries in Payroll. Work Entries are records of the time employees are scheduled to work. They do not accurately reflect the hours an employee did work; rather, they tell you when an employee will be working in theory. Paid Time Off and other commitments also appear here.
We will cover Work Entry Types as well as Work Entries.
Process
To get started, navigate to the Payroll application.
![]()
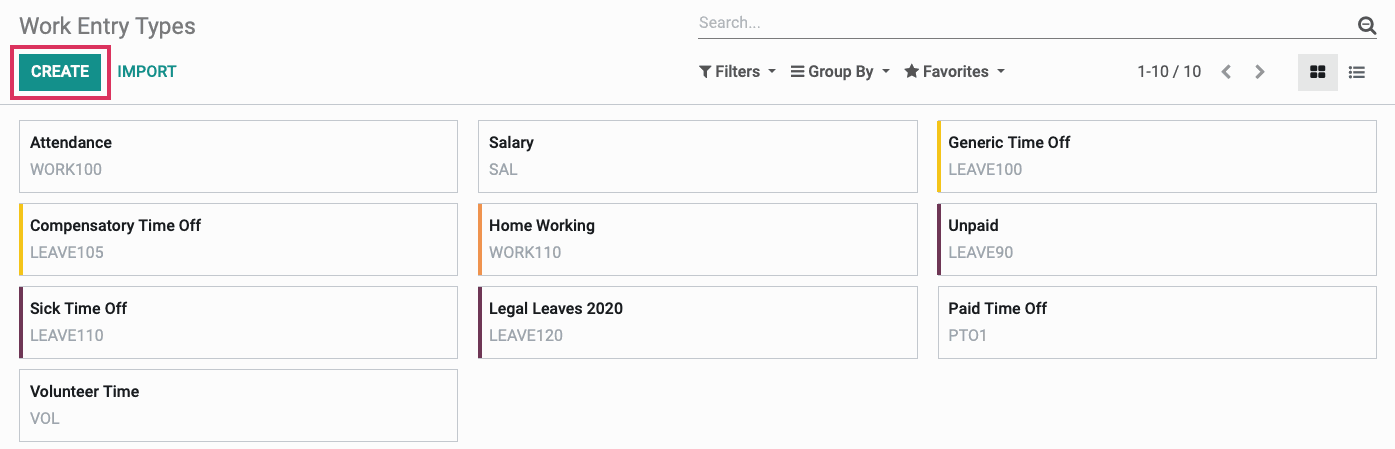
Work Entry Types
You can create distinct Work Entry Types, such as attendance, work from home, or paid time off.
Navigate to Configuration > Work Entries > Work Entry Types. Here you will see a list of existing work entry types.
To create a new Work Entry type, click CREATE.
Fill in the following information:
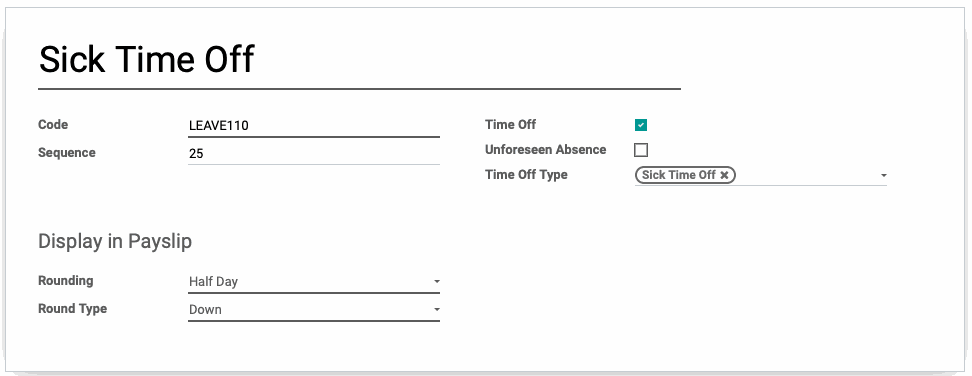
Work Entry Type Name: Give a unique name (e.g. Remote Work).
Code: Create a short code to reference this Work Entry Type.
Sequence: Enter a sequence number, if desired.
Rounding: You can choose to round to a full day, a half day, or not to round. If you round to a full or half day, you will see another field:
Round Type: Select if you wish to round to the closest day or half-day, or if you wish to round up or down.
Time Off: Check this if this Work Entry Type is for time off. If checked, you will see another field:
Time Off Type: Select a type of time off from the list.
Unforeseen Absence: Check this box if this Work Entry Type is a form of unforeseen absence.
Time Off Type: Select which type of time off this should be categorized as.
Once you have filled in the above information, press SAVE. Return to the Work Entry Types via the breadcrumbs.

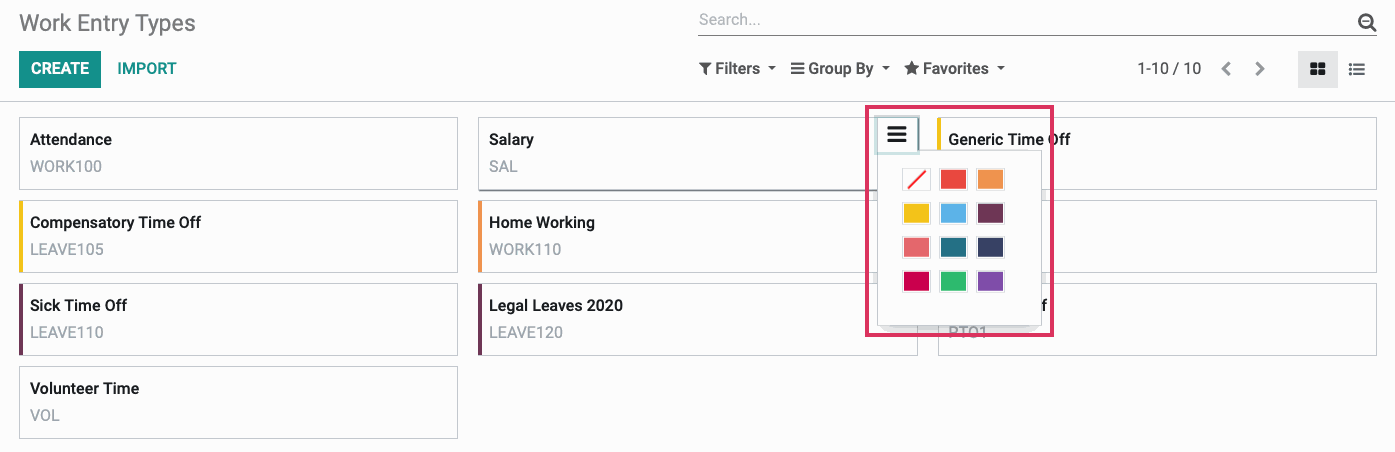
You will see your Type has been added. If you wish, you can change the color of your Type by hovering over it and selecting the three bars that appear in the upper right corner. Select your desired color. This will change the color of the Type in the Gantt view.
Work Entries
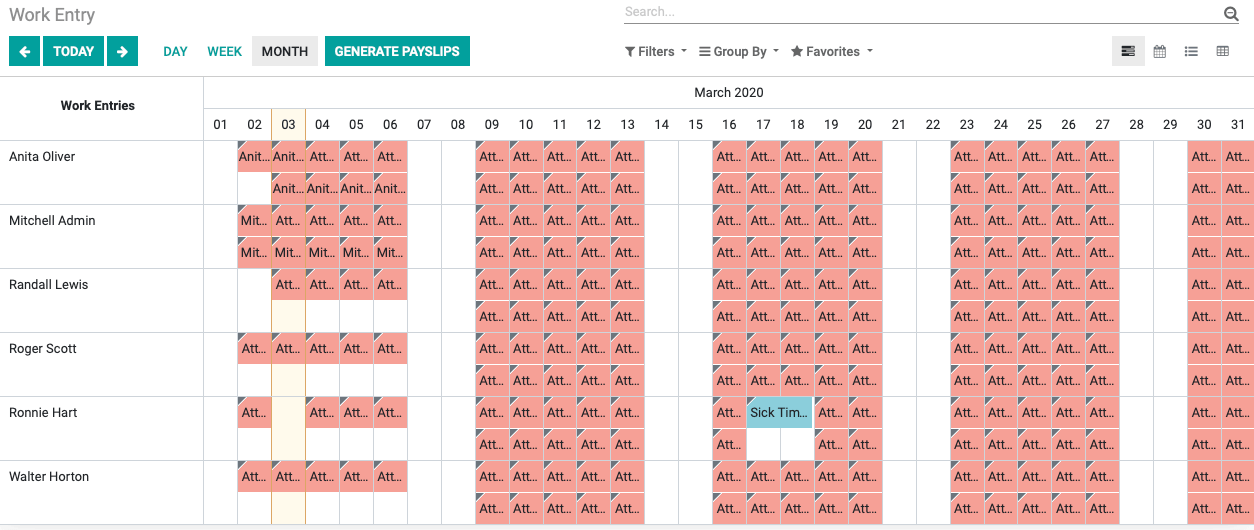
Once you have created any additional Work Entry Types you might need, you can look at your employees' schedules.
Navigate to Work Entries > Work Entries. Here you will see a Gantt chart of your employees' work schedules. Note that non-work commitments, such as sick time, also appear here.
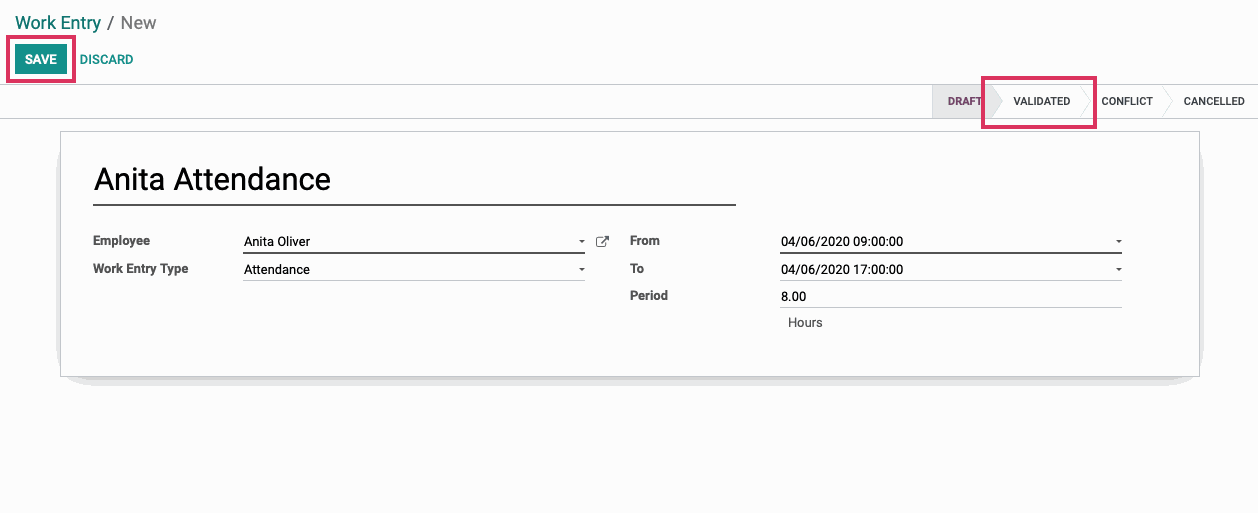
Entries that have a grey triangle at their top left are entries that have been validated.
Adding Work Entries
Work Entries must reflect the number of hours your employee has committed to working in their Contract.
Good to Know!
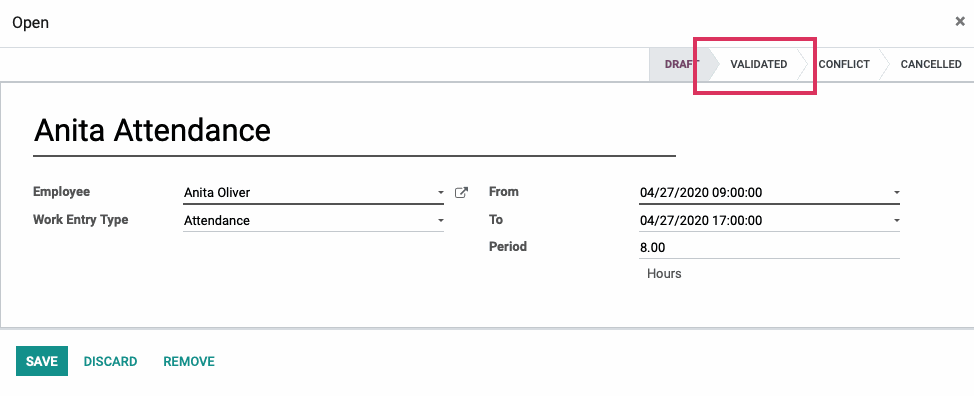
Unsure of any employee's hours? You will find an employee's hours in their Contract. To navigate to the employee's Contract, click on a Work Entry from the Gantt view and then click on the Employee Name.
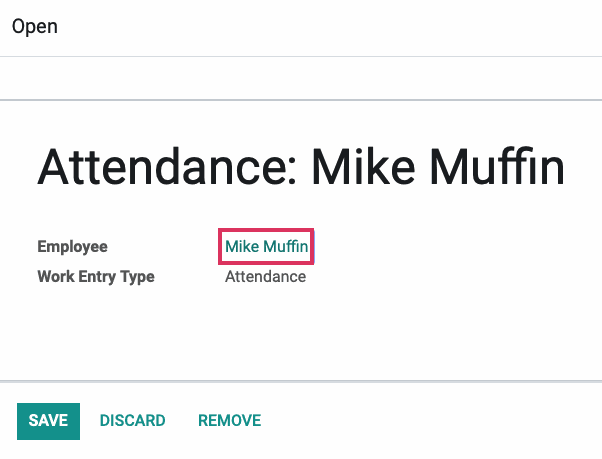
You will be ported to the Employee page. There, select the Contracts smart button. You will see a Kanban view of all the employee's contracts.
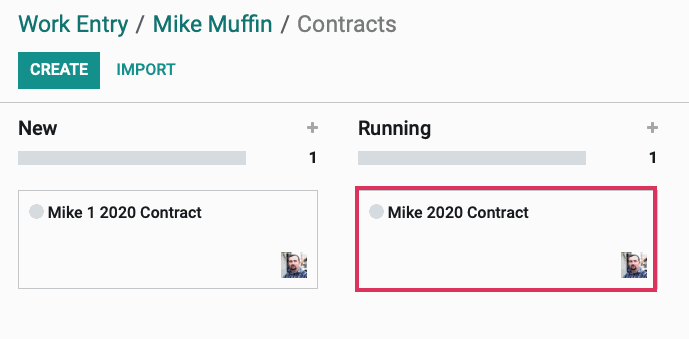
Click on the contract in the Running column. Under the Contract Details tab, you will find the Working Schedule. This will tell you how many hours the employee works in a week.
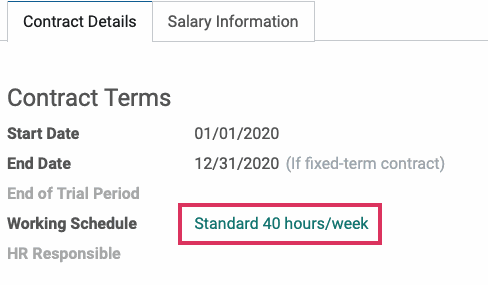
You can also refer to our Employee Contracts documentation for more information.
From the Gantt view, you can add Work Entries by navigating to the list view on the top-right. Here, you see a list of all work commitments for your employees. Click create.
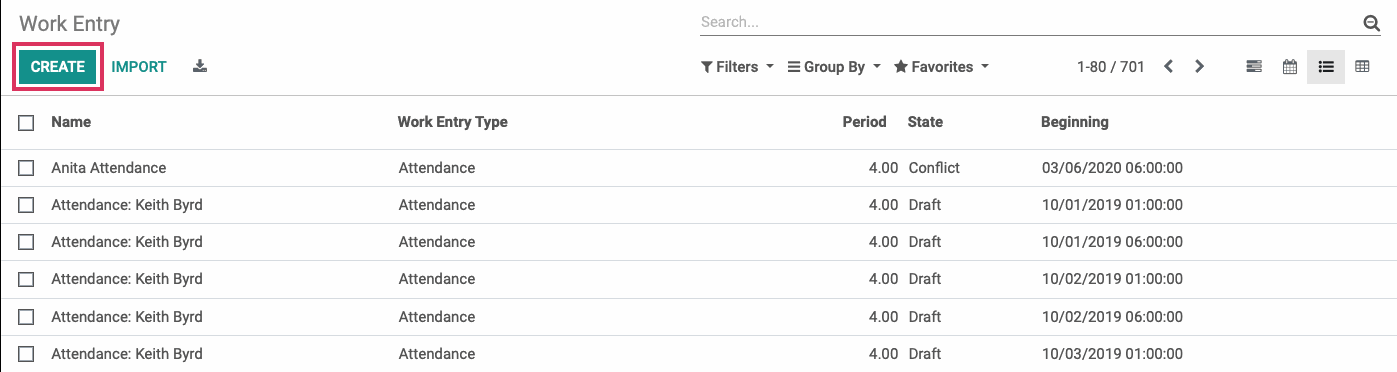
Fill in the following information:
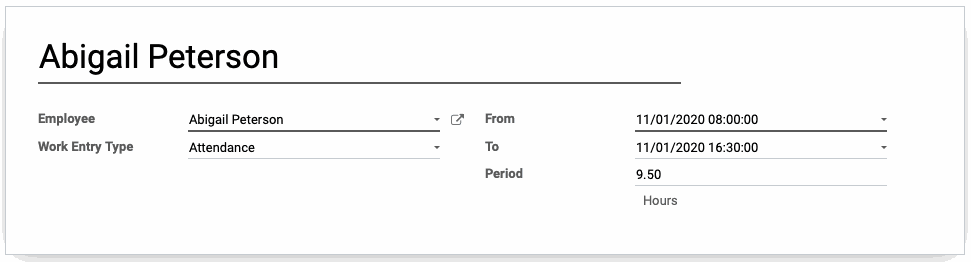
Work Entry Name: Give the Work Entry a name. It does not need to be unique.
Employee: Enter the name of the employee.
Work Entry Type: Select a work entry type.
From: Enter the start time of the employee's work.
To/Period: Enter either the end date and end time of the work, or a period of time.
Conflicts
If the Work Entry you are trying to create conflicts with an existing Work Entry, you will see a yellow warning message at the top of your screen and the stage moves to CONFLICT.

The conflicting Work Entry will still save and appear in the Gantt view with a yellow triangle in the upper left corner. You can also display only conflicting Work Entries by clicking on Work Entries > Conflicts.
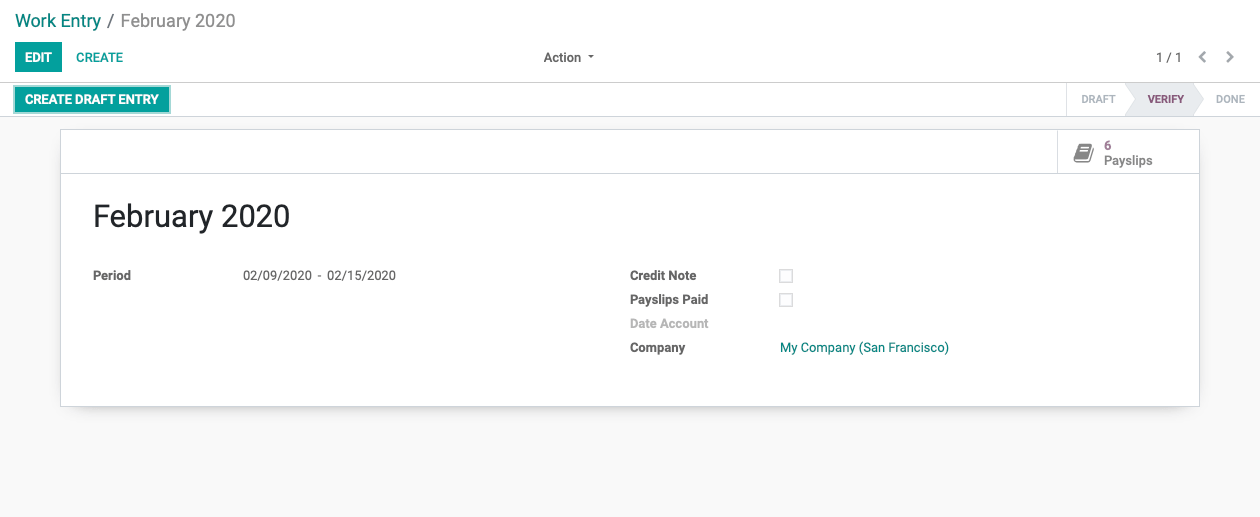
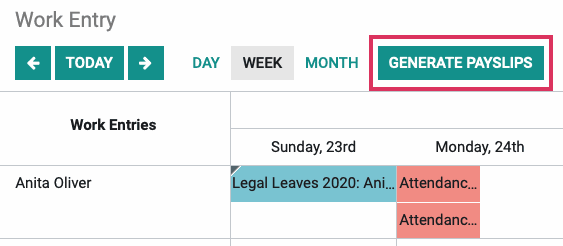
Generating Payslips
Once all employees scheduled for the period have complete schedules, you can generate payslips.
Navigate to Work Entries and, using the Today Day Week Month tools, display the time period you wish to generate payslips for.
Click GENERATE PAYSLIPS. This will generate payslips for all employees working in the period on display.
You will see the below window. Please follow the instructions for creating payslip batches in the How to Run Payroll documentation.