Contacts: Contacts Workflows: Managing Contacts
Purpose
The purpose of this document is to review the process of creating or importing a new contact within the Contacts app of Odoo 16. We will also review how to configure the record to include multiple people at a single company, multiple billing and/or shipping addresses, and how to designate them as a customer, vendor, or both.
Process
A company is capable of having multiple representatives filed together for ease of communication. Whether you're trying to reach the CEO or the Janitor, if they are represented within Odoo, you can easily manage the relationship.
For the purpose of clarity, we recommend building the parent Company contact first. The autofill function is very specific, and if one user inputs a middle initial into a customer name, a new record will be created. Luckily, Odoo has a 'Merge Contacts' option for cleaning up extra records.
To get started, navigate to the Contacts App.
Create a New Contact
Creating a new contact is very useful for populating fields in the later stages of Odoo work. If the records are completed consistently, it can make navigation, changes to orders, and communication a breeze!
Let's first create a sample Company and a few employees. To do so, click NEW to open a new form.
Enter the details you have, most importantly, the name and email.
Type: Select Company.
Note: If an individual is created as a solo entity, they can later be added to a company using the dropdown below the Name field. Simply create a record for the company and then edit the existing contact record.
Name: Enter the company name.
Address: Enter the primary address for this contact.
Good to Know!
Default Address
The address entered under the company record will become the default address for contacts created within that company. It is possible and often necessary to add shipping addresses for warehouses, retail locations, or unique event sites such as conference venues. This is covered under the Creating Multiple Addresses topic later in this document.
Tax ID or VAT: Enter the Tax ID or VAT if it applies.
Phone: Enter a phone number for the contact.
Mobile: Enter a mobile number for the contact.
Email: Enter a unique email for the contact; no other contact should use this address.
Website Link: Enter a URL for the contact, if applicable.
Language: Select a language for this contact. After saving, all emails and documents sent to this contact will be translated in this language. Note: This option will only appear if you have more than one language enabled in your Settings.
Tags: Use tags to organize contacts. This helps in searching and reporting.
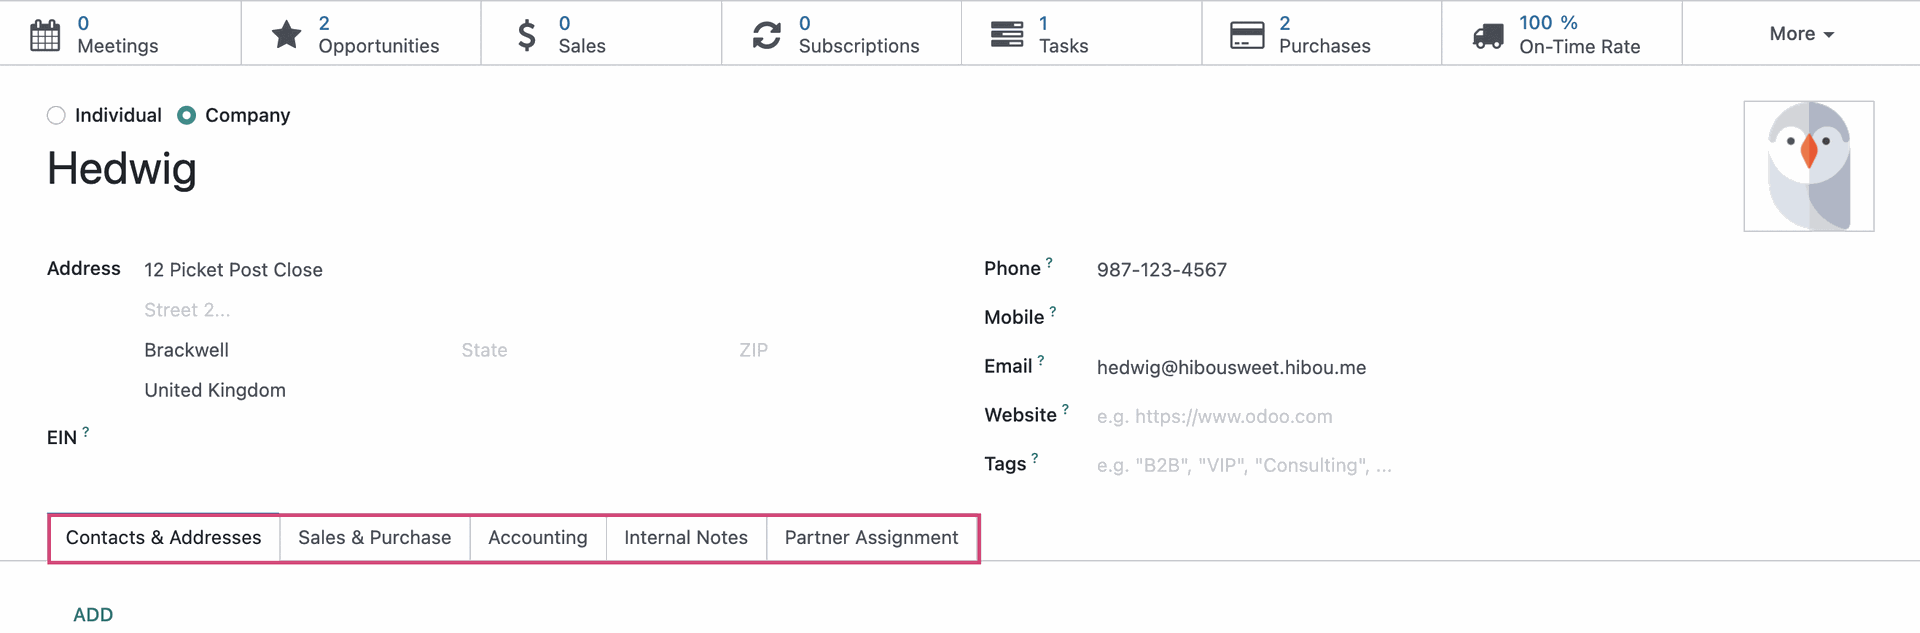
Image: You can leave this as one of Odoo's default/placeholder images. However, you can customize that image to be the company logo. If the employees have a photo associated with their email (via Gravatar), it will update when the record is saved.
Good to Know!
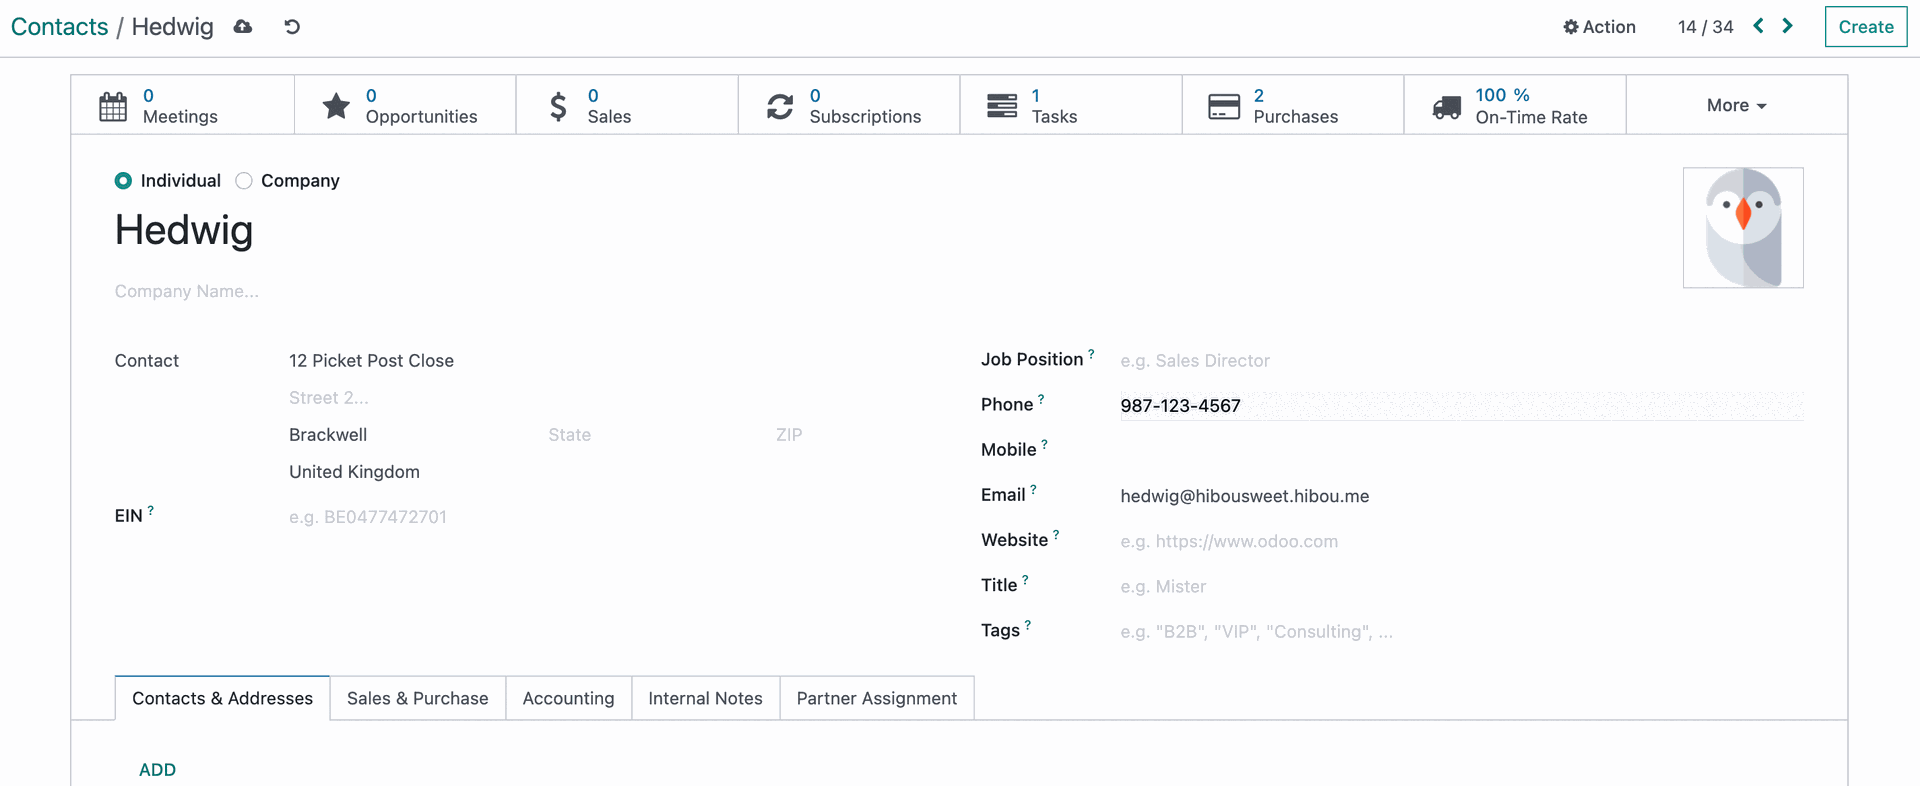
As you can see from the window above, when this contact is complete, we will be able to see some Smart Buttons, such as upcoming opportunities, meetings, the customer's ledger, previous sales, invoices, and current active/archive status. Several other apps will provide navigation from this screen as well, including the Helpdesk app

Opportunities
Opportunities within the CRM pipeline will populate in the Opportunities smart button of the contact associated with the opportunity. To see this, navigate to a company contact for which you have open opportunities. You will see a number next to Opportunities. Click the smart button to see them listed in Kanban view.
Here you will see all opportunities for all contacts associated with this Parent Company's contact. If you look at each Kanban card, you will see the Company's child contact that is specifically associated to the opportunity. In this example, we have one for the Hibou Sweets (parent contact), and one each for the child contacts Emily Hibou and Ella 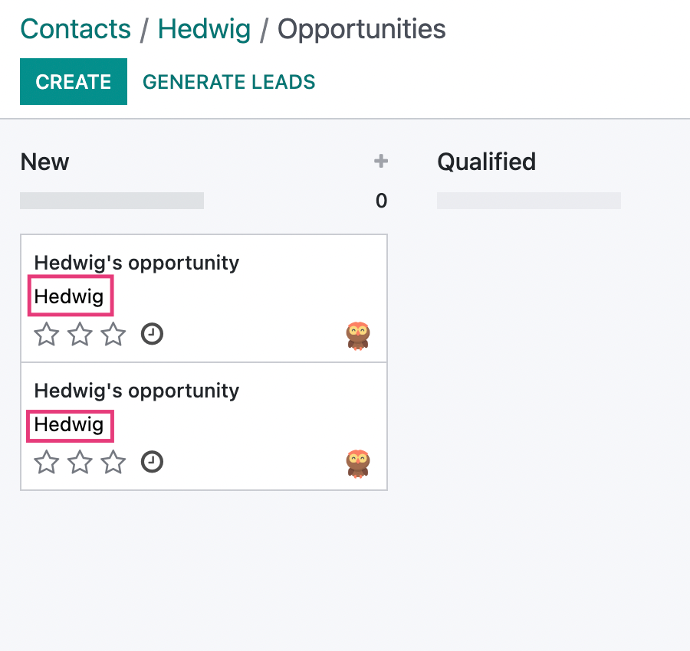
If you navigate to a child contact for which there is an open opportunity, the opportunities smart button will only show the number of opportunities open for that specific child contact. In our example, we can see that Emily Hibou has just the one opportunity open.
Configuration Tabs
Certain Odoo apps will add configuration tabs at the bottom of the contact record. This allows you to add information specific to that app for the contact.
Creating Nested/Child Contacts
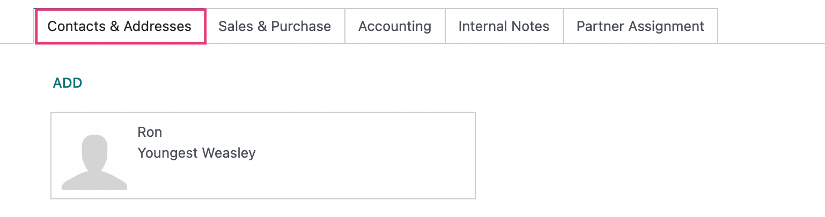
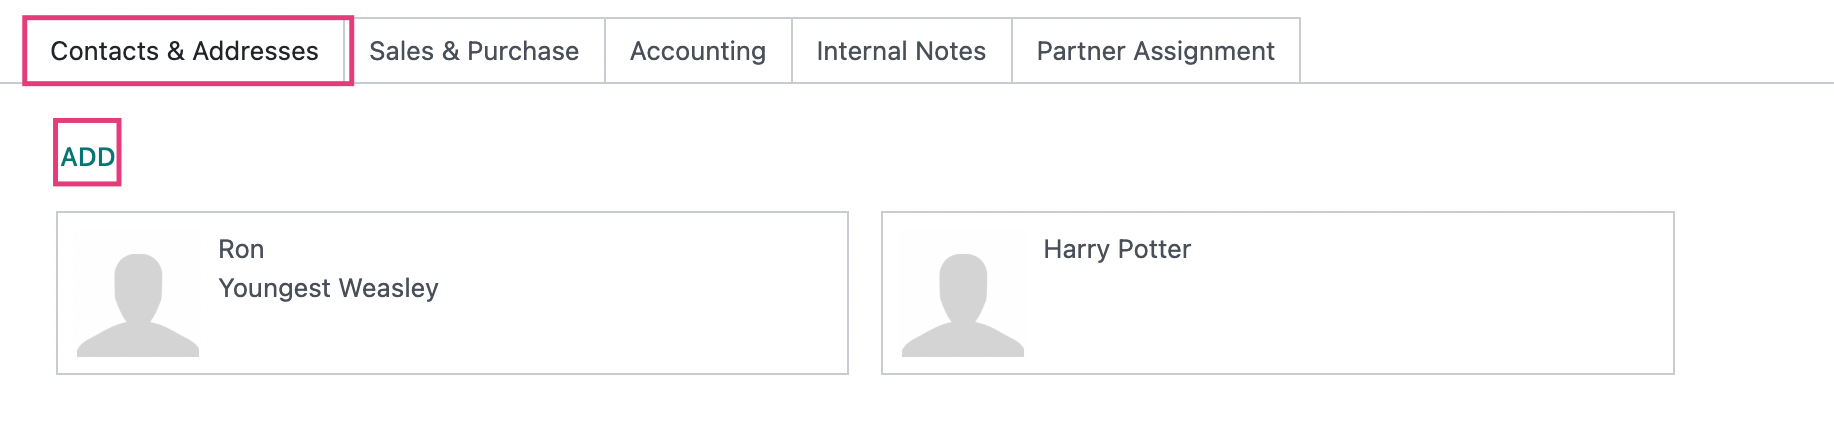
The first tab at the bottom of the card will be Contacts & Addresses, then click ADD.
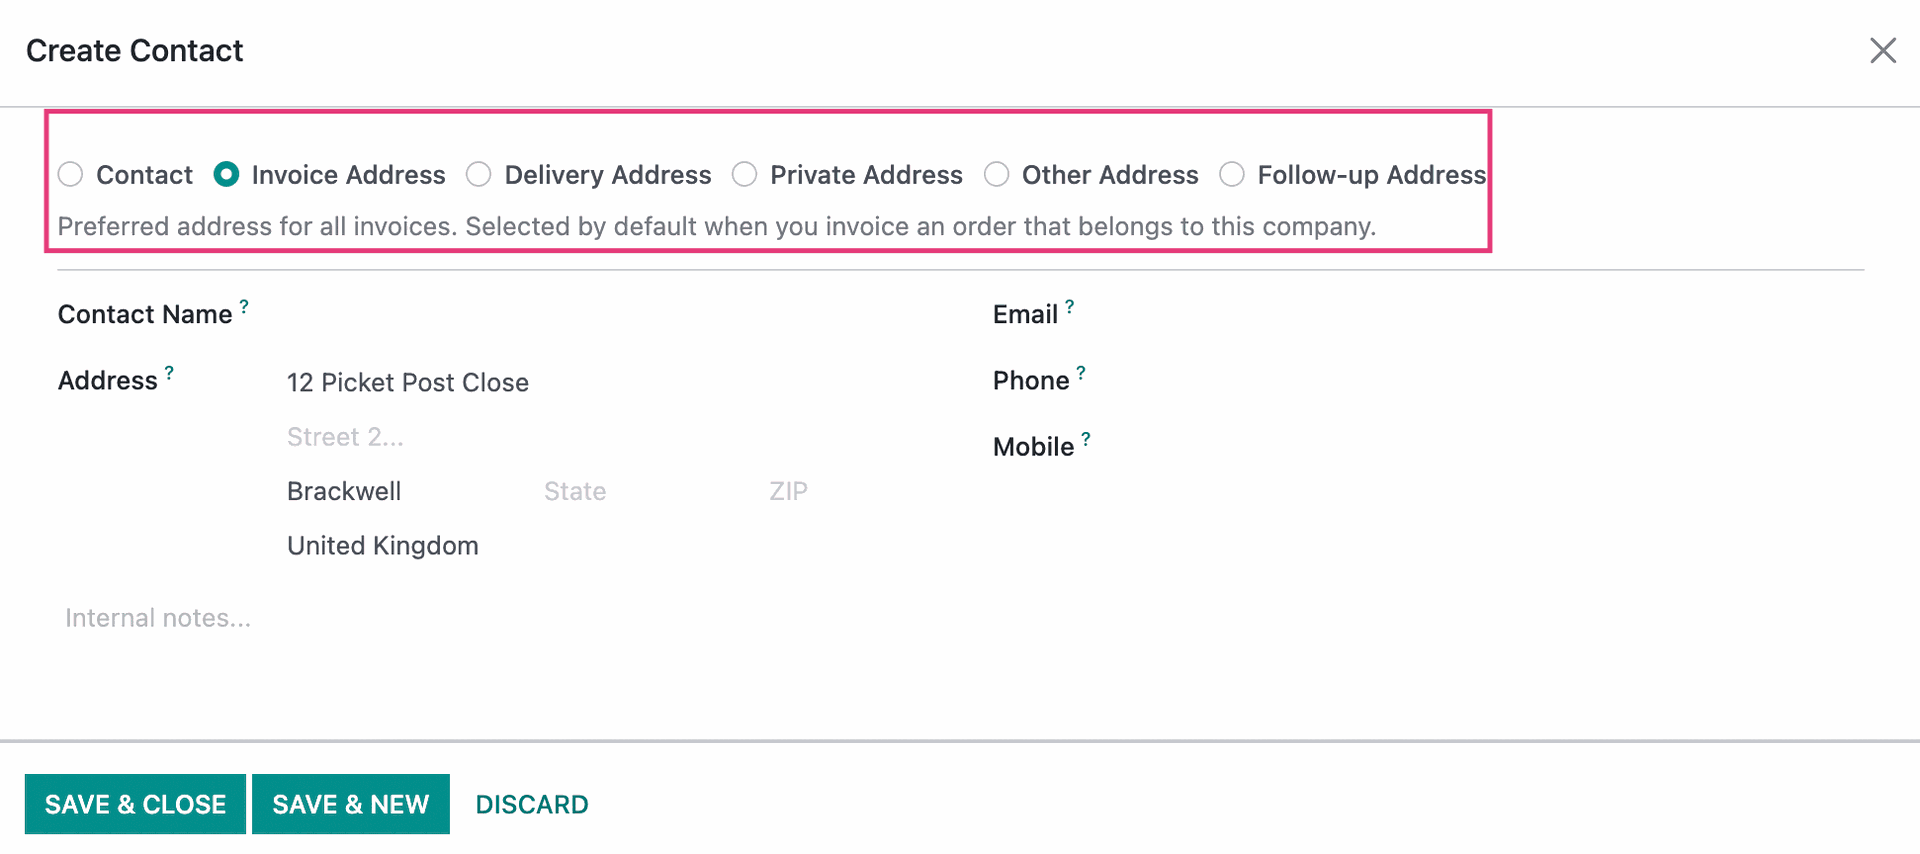
This opens the Create Contact model window.
On this modal window, be sure to select Contact as the type, then enter your contact's information just as you did for the parent contact.
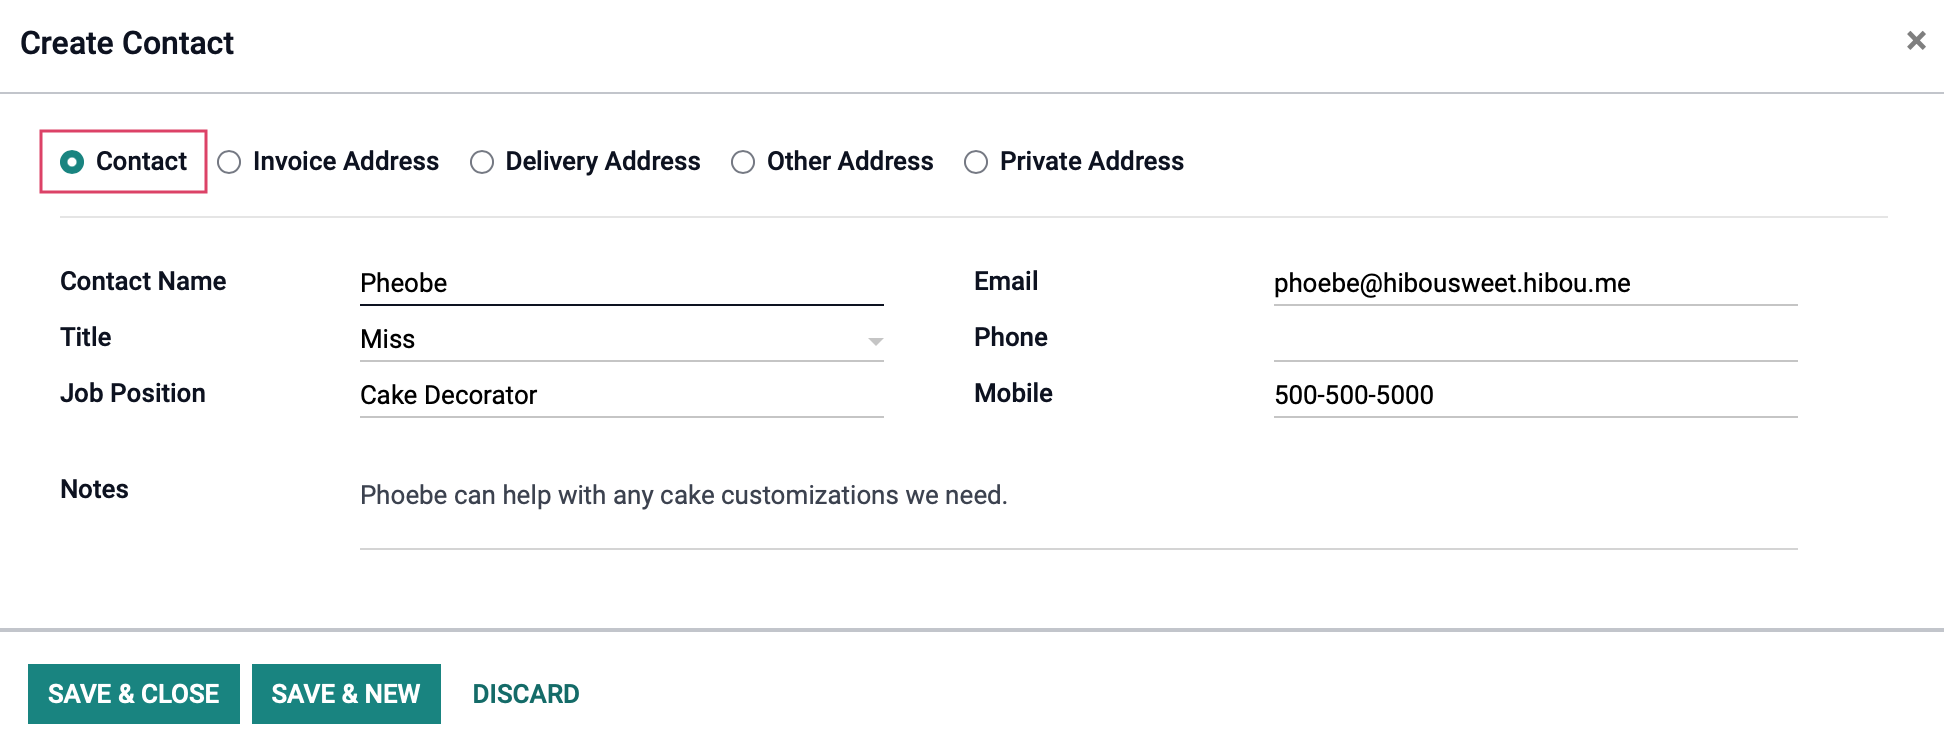
When you're done, click SAVE & CLOSE or, if you have more contacts to add, click the SAVE & NEW to move directly to a blank contact form.
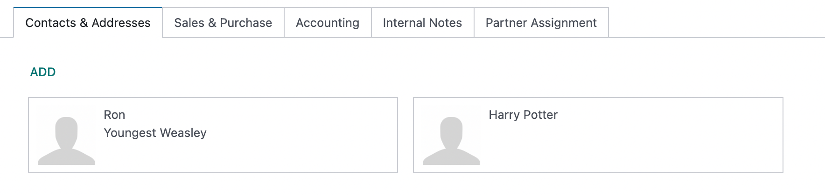
Contacts will appear side-by-side under the Contacts & Addresses tab. The information that varies between contacts will appear on their individual cards
Be sure to click SAVE again on the parent contact to save these changes.
Creating Multiple Addresses
It is possible that your customer operates from multiple locations or needs their product delivered to a specific warehouse or address that is different from the default parent contact address. We can designate billing, shipping, other, and private addresses for use in creating sales orders.
If we Edit this record again, we will be able to create another entry. Let's set up a new contact on board as a shipping contact. Under Contacts & Addresses, click Add.
This opens the Create Contact model window. Here, be sure to select an Address Type for the address you'll be entering, then enter your contact's information just as you did for the parent contact.
When you're done, click SAVE & CLOSE or, if you have more contacts to add, click the SAVE & NEW to move directly to a blank contact form.
Merging Contacts
A full walk-through of Merging and Deduplication is available.
Scenario One: If multiple contacts were created before a company was built to contain them, they can be re-assigned to the company once it has been created using the drop-down under the contact's name. If they are relevant, and the contact information is valid, it is far better to manually re-assign these errant contacts to the company than to merge them.
Scenario Two: Multiple records of the same person were created, either inside or outside the company record.
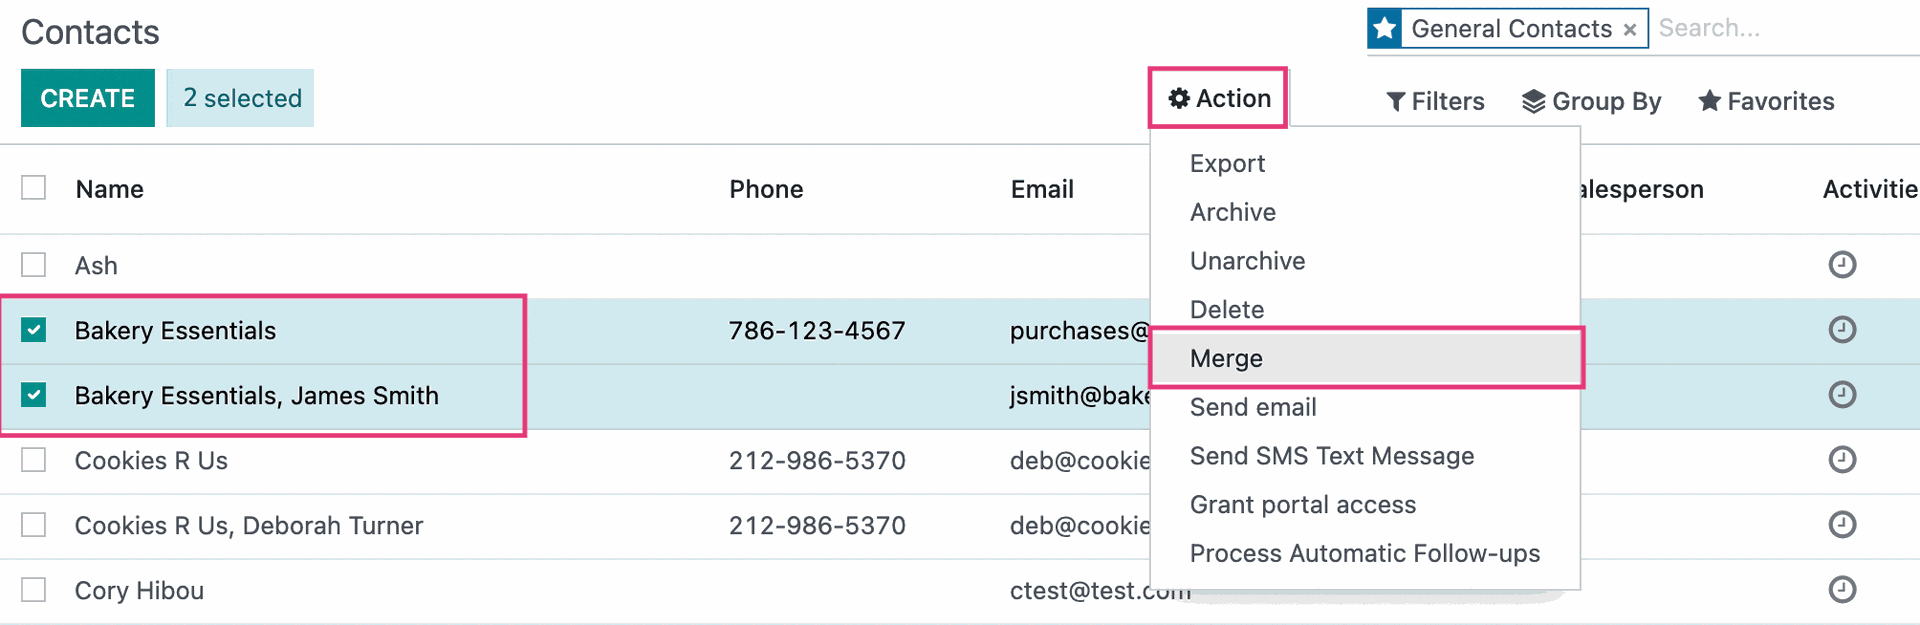
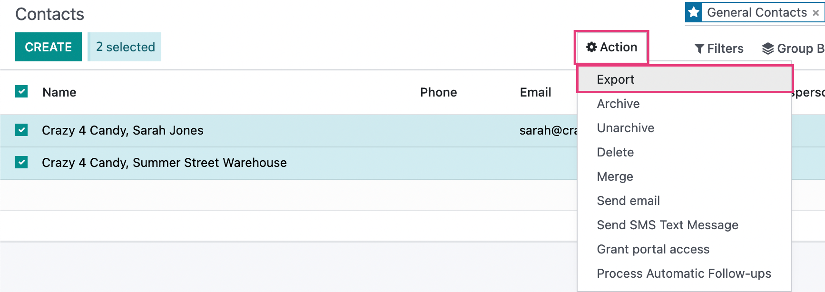
Select all of the records you wish to merge and, then click ACTION > MERGE.
The Merge Contacts window will open, asking you to select the destination contact. We will choose the most complete record. You have the option to simply delete the extra lines by clicking on the remove icon to the right. Click Merge Contacts.

Important!
Odoo will assume the Destination Contact is correct, and any information that is different on the contacts you are merging will be overwritten. Not only will you lose the individual's contact card, merging will fill any blank in the Destination Contact with the information available, potentially assigning someone's phone number or email to the wrong individual.
Contact Actions
Once the record is created, click the action menu available to you at the top of the screen.
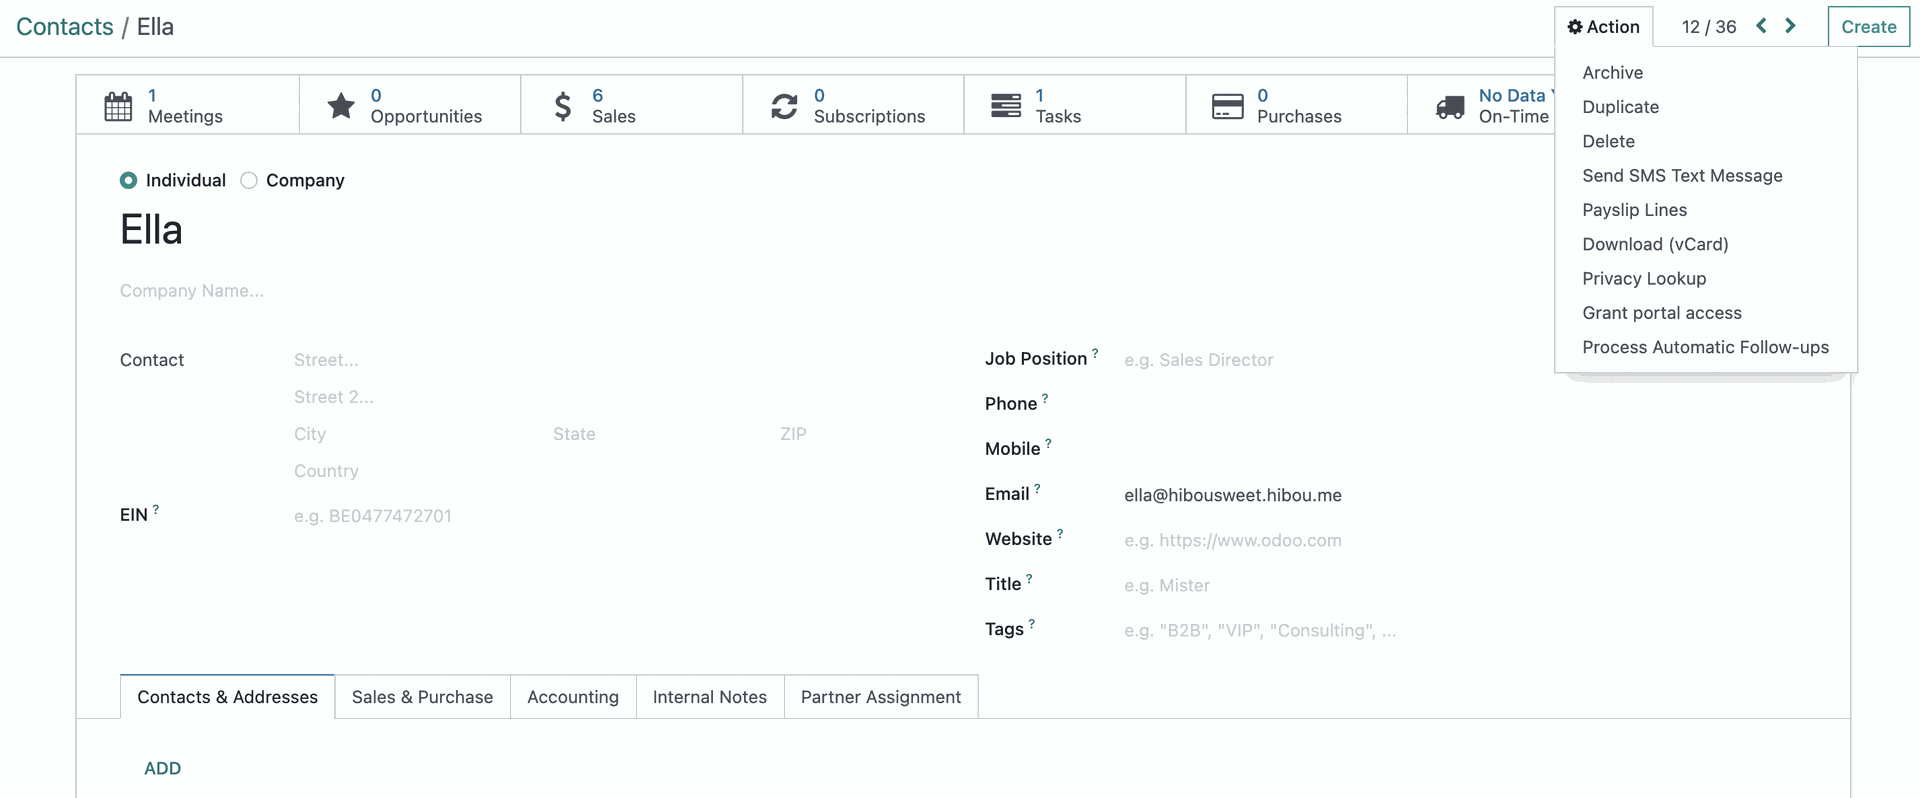
Archive: Takes the user from the active contact list and places the user in an archived list. You can find this list by clicking filters and selecting Archived.
Duplicate: Will Duplicate the record.
Delete: Will erase this record from your database as long as there are no sales, invoices or stock movements associated with it. We suggest Archiving it instead so that it is still searchable.
Send SMS Text Message: Sends an SMS message. Note that SMS messages require service credits. For more information, please refer to Odoo’s SMS Pricing.
Payslip Lines: Takes you to the payslip lines associated with an employee contact.
Download (vCard): Download a contact card to your computer.
Grant Portal Access: Provides the contact access to an online account where they can access quotations, sale orders and invoices as well as manage their payment methods.
Process Follow-ups: Selecting this action sends a payment reminder to the contact with a list of due/past due invoices. It also downloads a PDF of the payment reminder to your computer for printing and sending purposes.
Importing Contacts from a Spreadsheet
A great way to build your contacts database quickly is with Odoo's Import and Export features. Odoo is capable of exporting data for use as a template, and while it may take some trial and error to find the combination that works best for your scenario, once you've determined the necessary fields they can be saved as a favorite.
We recommend building at least three contacts to completion manually, to maximize your opportunity to import the data you want. Use filters to narrow down to the list to contacts that belong to one company to begin. Check the Name box to select all.

Good to Know!
There are submenus in the offered fields. If you click on the next to each option, you will be presented with a dropdown of sub-options that are specific to that field. Note that while we have fields for Name, Email, Phone, etc., the sheet will only display the Company information unless we add the contact variation. The variations will read Contacts/Name, Contacts/Email, etc.
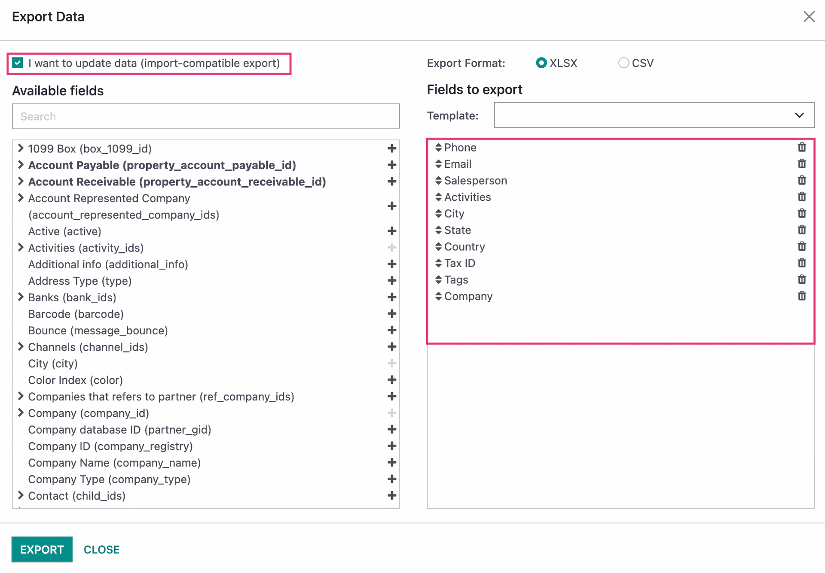
Highlighted on the image below is the best fields to export for building an Odoo compatible sheet in your chosen program. To ensure that our data remains compatible for import after it's updated, be sure to select the I want to update data (import-compatible export) option. The fields we've selected contain the information that we would like on each Contact record. With this as our template, we can save this field list for later reference. At this point, you are ready to click EXPORT.
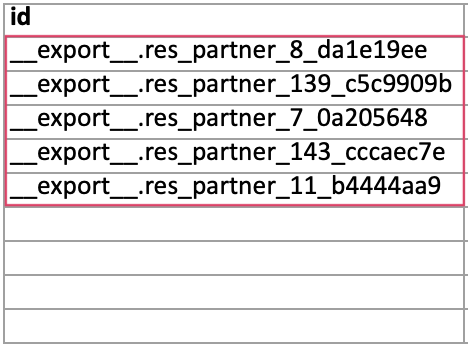
The below images are the raw data that we end up with. As you can see, the fields exported in the order they appeared in the window, which can help you navigate the spreadsheet you've created.
Important!
Resist the temptation to rename the columns! While it's okay to fill in blank cells with missing data, Odoo needs those column references exactly as they are. These correspond to fields in Odoo with specific names.

In the next display, you can see that we have updated the record to include the missing data.

We have corrected and updated our existing records. After saving our work, we will return to our Odoo window and prepare to import.
Important!
The identifying field '__export__.res_partner' MUST be filled for every entry you try to re-import to Odoo, as this is how it matches up to an existing contact instead of creating a new contact.
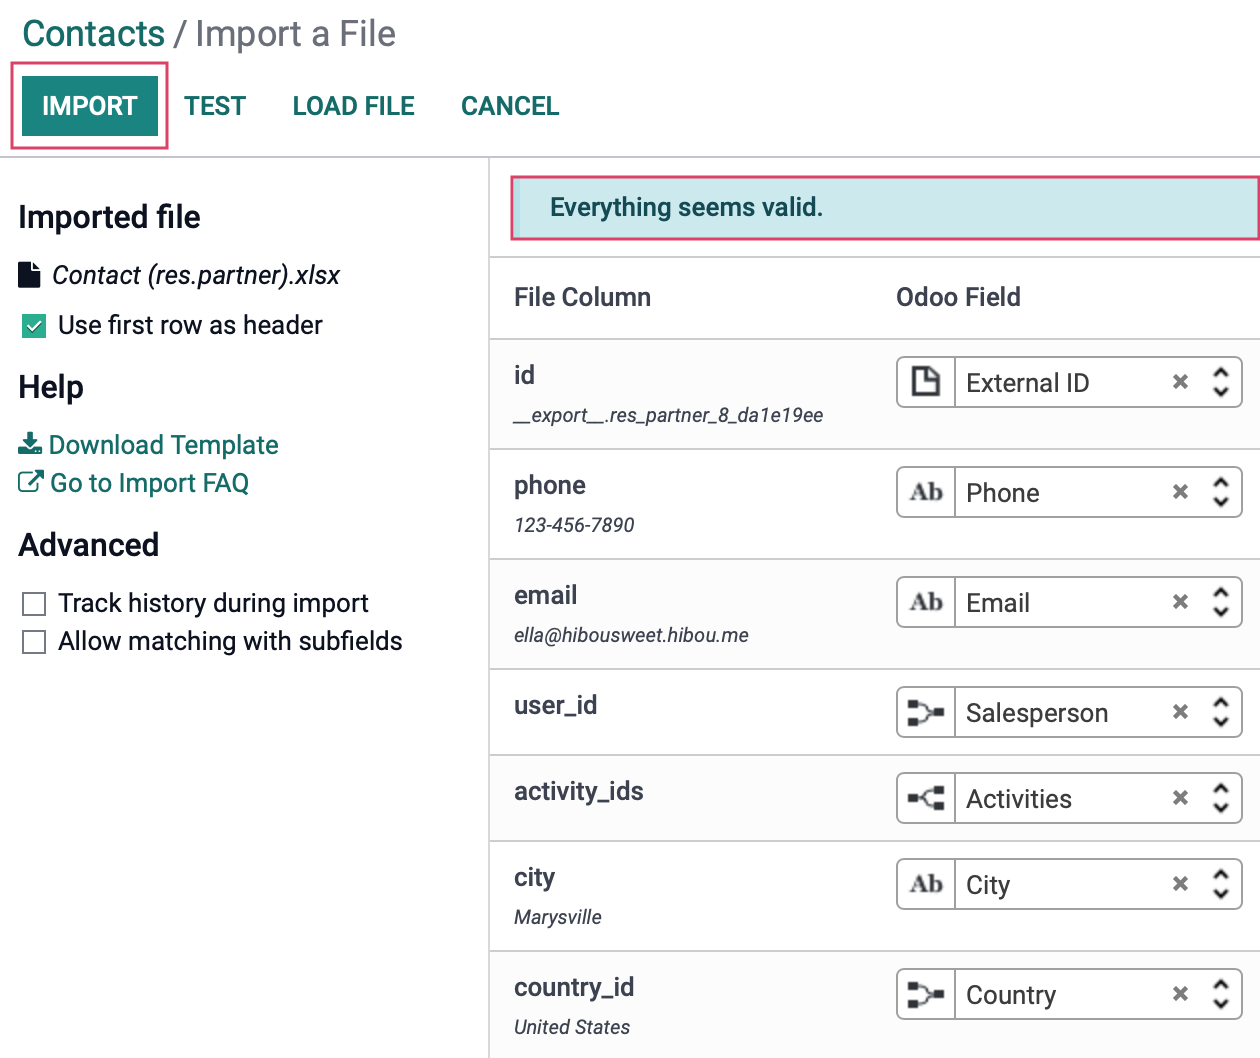
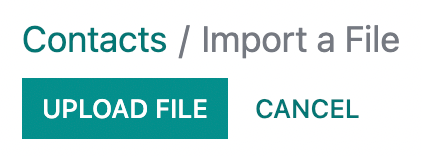
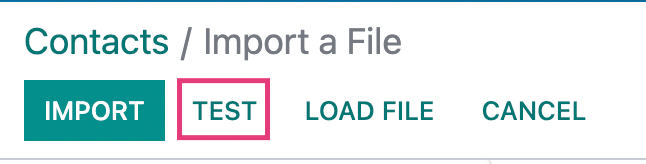
Return to the contacts list and navigate to Favorites > Import records. Then click UPLoad File and select the file created when you exported the data.

There is a Test button that will run the file against Odoo's import parameters and flag any discrepancies. You have the option at this time to cherry-pick which fields you are updating, but given the nature of this example, we want everything.
Once tested, and a banner appears that says Everything seems valid, you are good to go! Click the Import button! A quick check of the new records we made shows that our two new records were added without issue! If you ever need to change this data, you can simply edit the contacts within Odoo.