Contacts: Data Cleaning: Field Cleaning
Purpose
This document covers the Field Cleaning functionality within the Data Cleaning application in Odoo 16. This allows you to set rules that will automatically clean data, or alert someone that data needs to be cleaned. This could include things like removing extra spaces, converting to upper case, or formatting phone numbers.
Process
To get started, navigate to the Data Cleaning app.
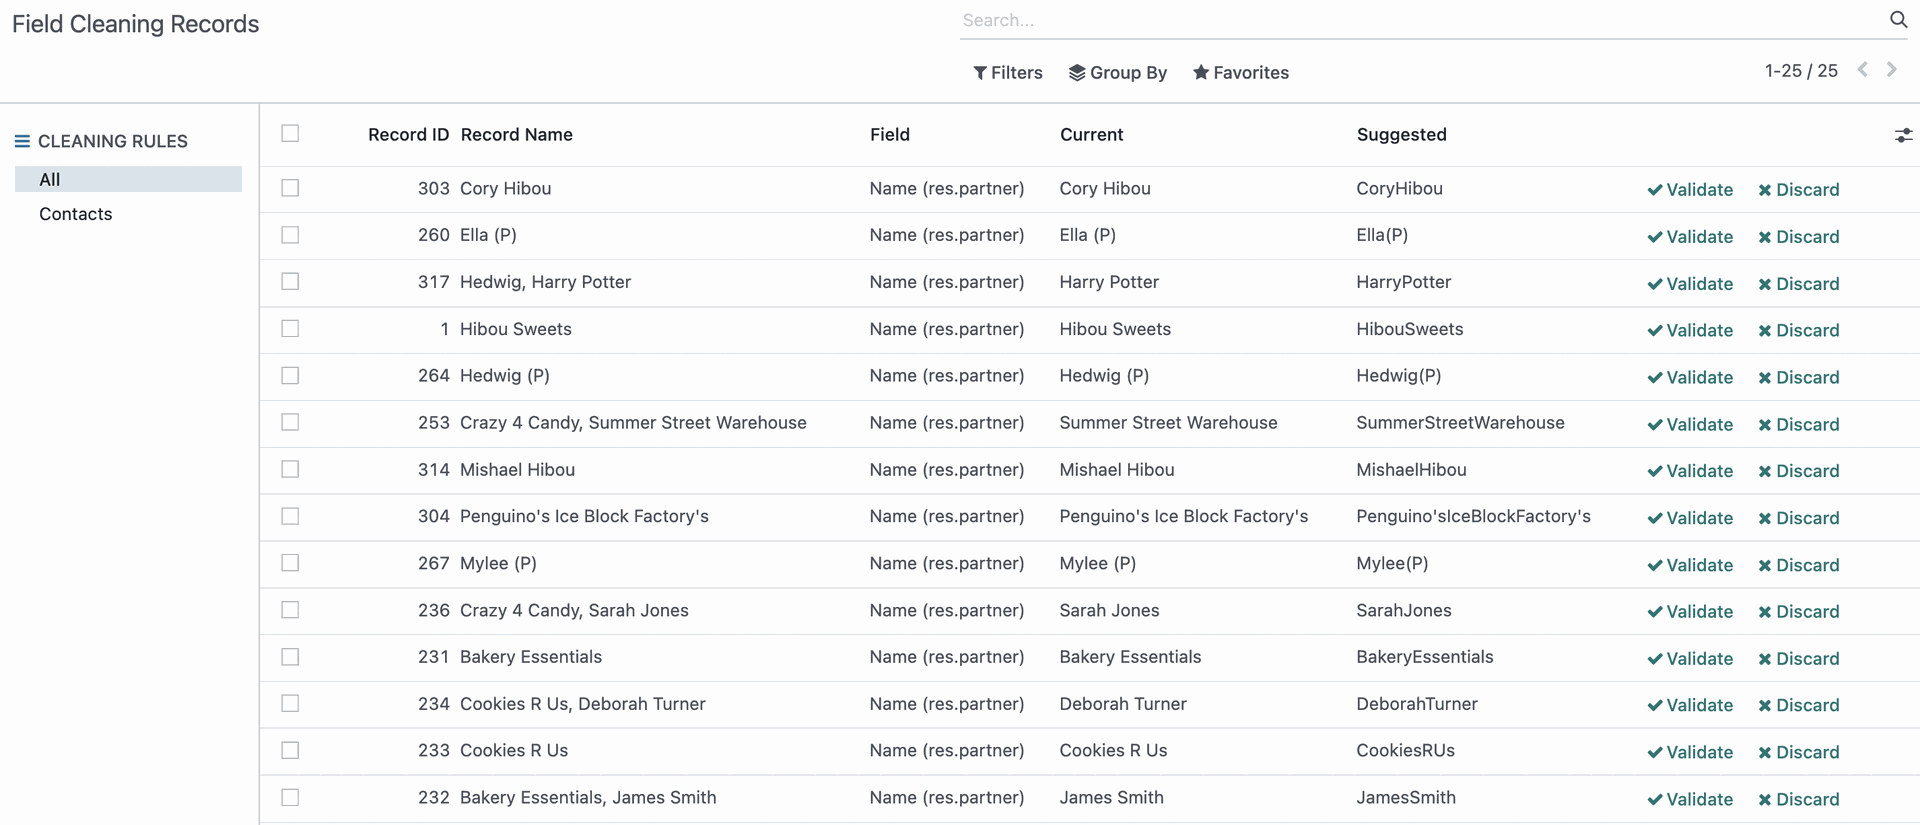
Once there, go to Field Cleaning. This displays a list of suggested changes from Odoo. These suggestions come from the configuration.
On the left-hand side, you can select the specific rule to view data for. On the right-hand side is the table view of that data. Here you can see the following details for each suggestion:
Record ID: The ID of the record.
Record Name: The name of the record. For example, if this is a contact record, this will be the name of the contact or business.
Field: This is the field that the suggested changes are based on.
Current: This is the current formatting of the field.
Suggested: This is the suggested formatting of the field.
Validate: Click to accept the suggested changes.
Discard: Click to leave the record unchanged.
To select and validate multiple records, tick the checkbox for each record, then click Validate.

Field Cleaning Rules
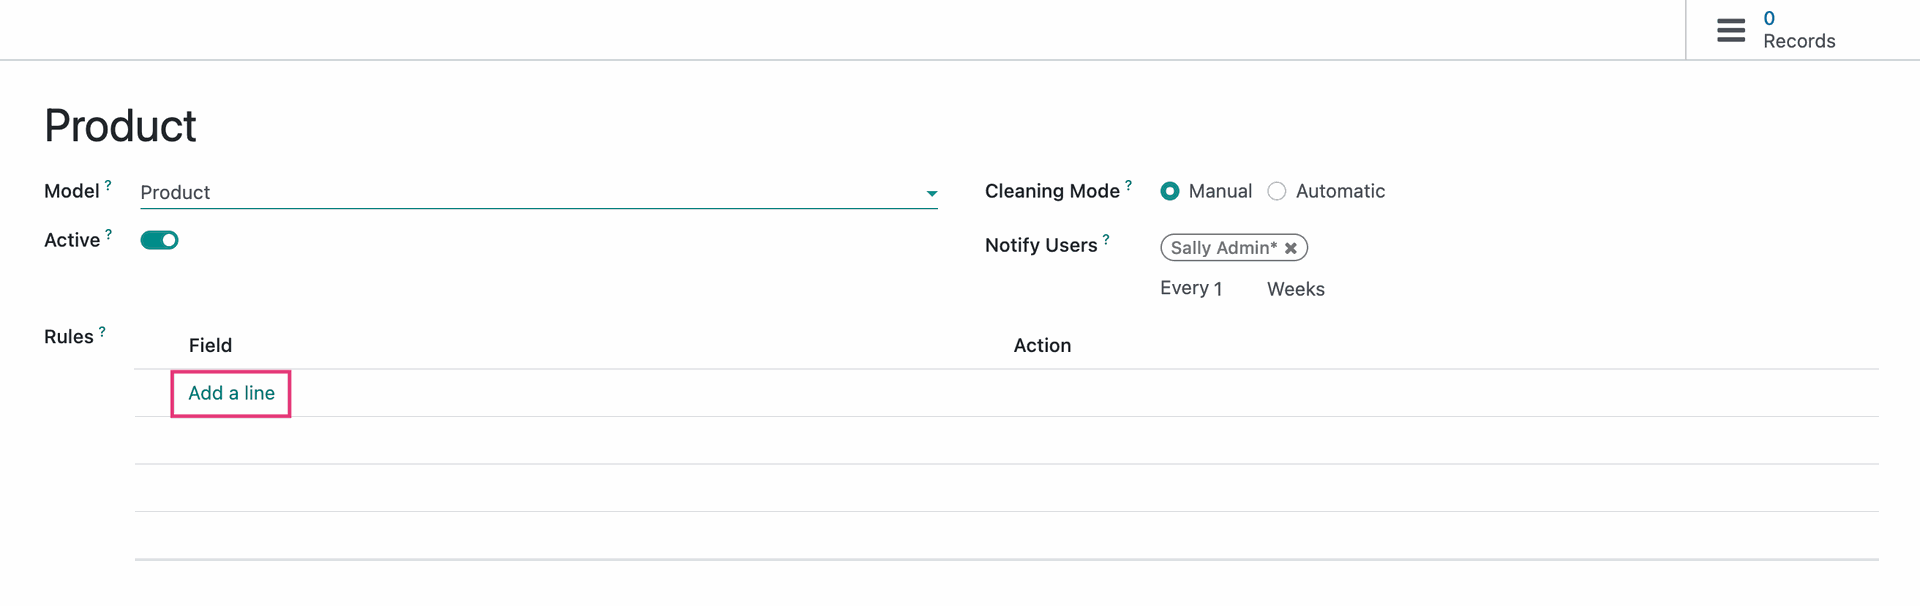
To configure the rules that are applied to these record types, to go Configuration > Rules > Field Cleaning. Once there, click NEW. This brings up the Field Cleaning Rules form where you'll configure the following fields:
Title: Enter the name of the new rule. You can also leave this empty and the selected "Model" will populate it.
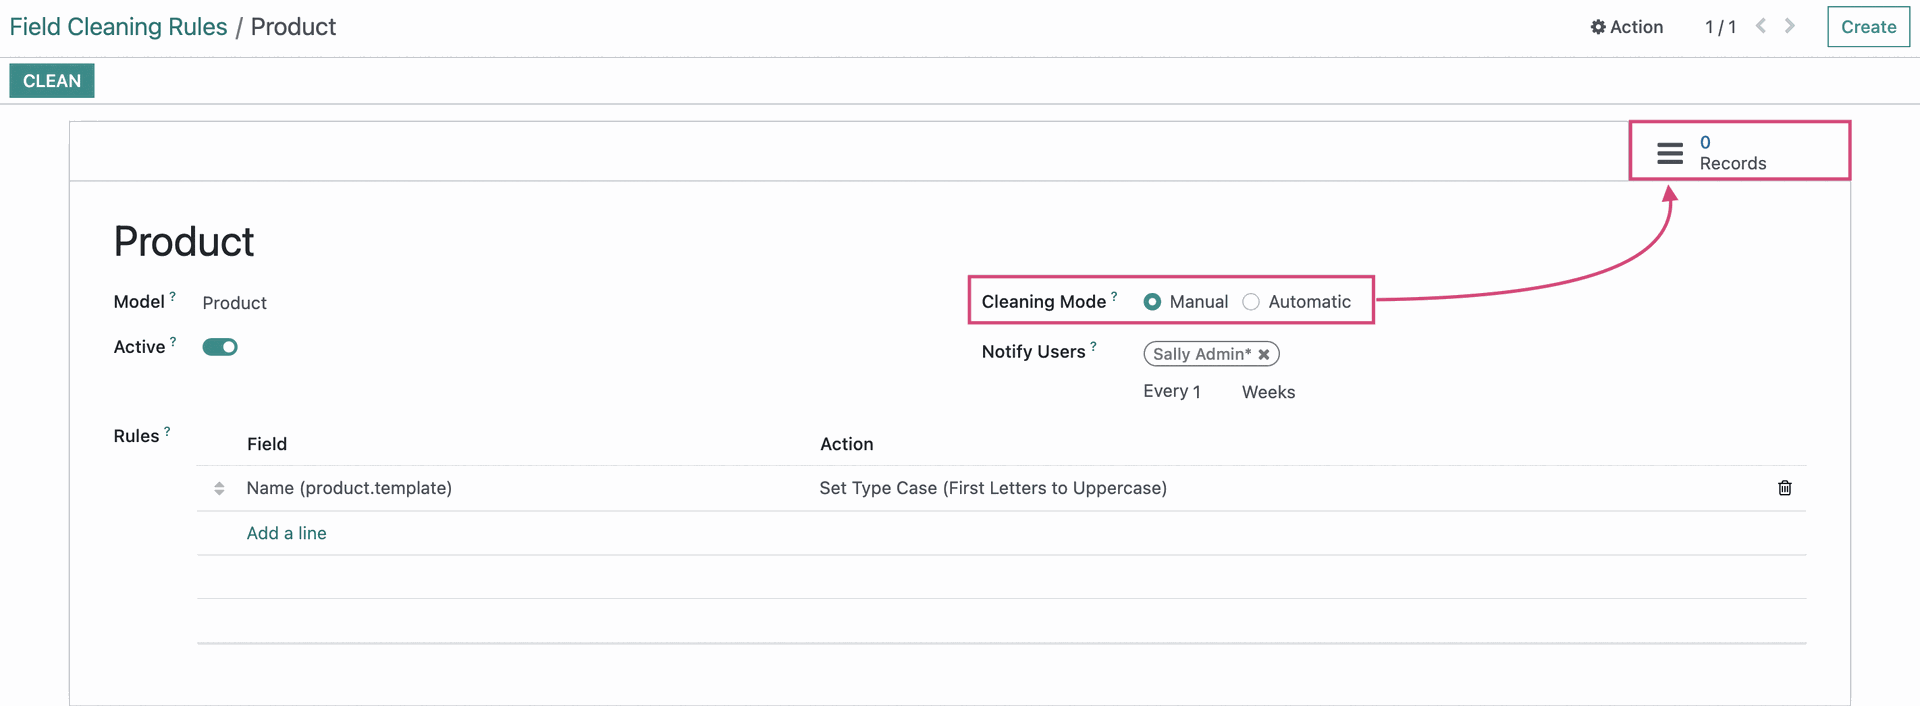
Model: Select the model this will apply to.
Cleaning Mode: If you'd like to review suggested changes, select "Manual". If you trust Odoo to clean this data without any manual intervention, select "Automatic".
Notify Users: If "Manual" is selected, Odoo will notify selected users when there are records to review.
Under the Rules section, click Add a Line.
This brings up another modal window where you'll configure the rule to apply
Field to Clean: The options in this field are based on the selected model.
Action: Select the action to perform.
Trim Spaces: Elect to remove all spaces for the entered value, or only superfluous spaces.
Set Type Case: Convert the value to "First Letters to Uppercase" (sentence case), "All Uppercase", or "All Lowercase".
Format Phone: Format to the universal phone number format.
Scrap HTML: Remove any HTML elements from the entered data.
For our example, we've chosen to set the product name to capitalize the first letter of each word.
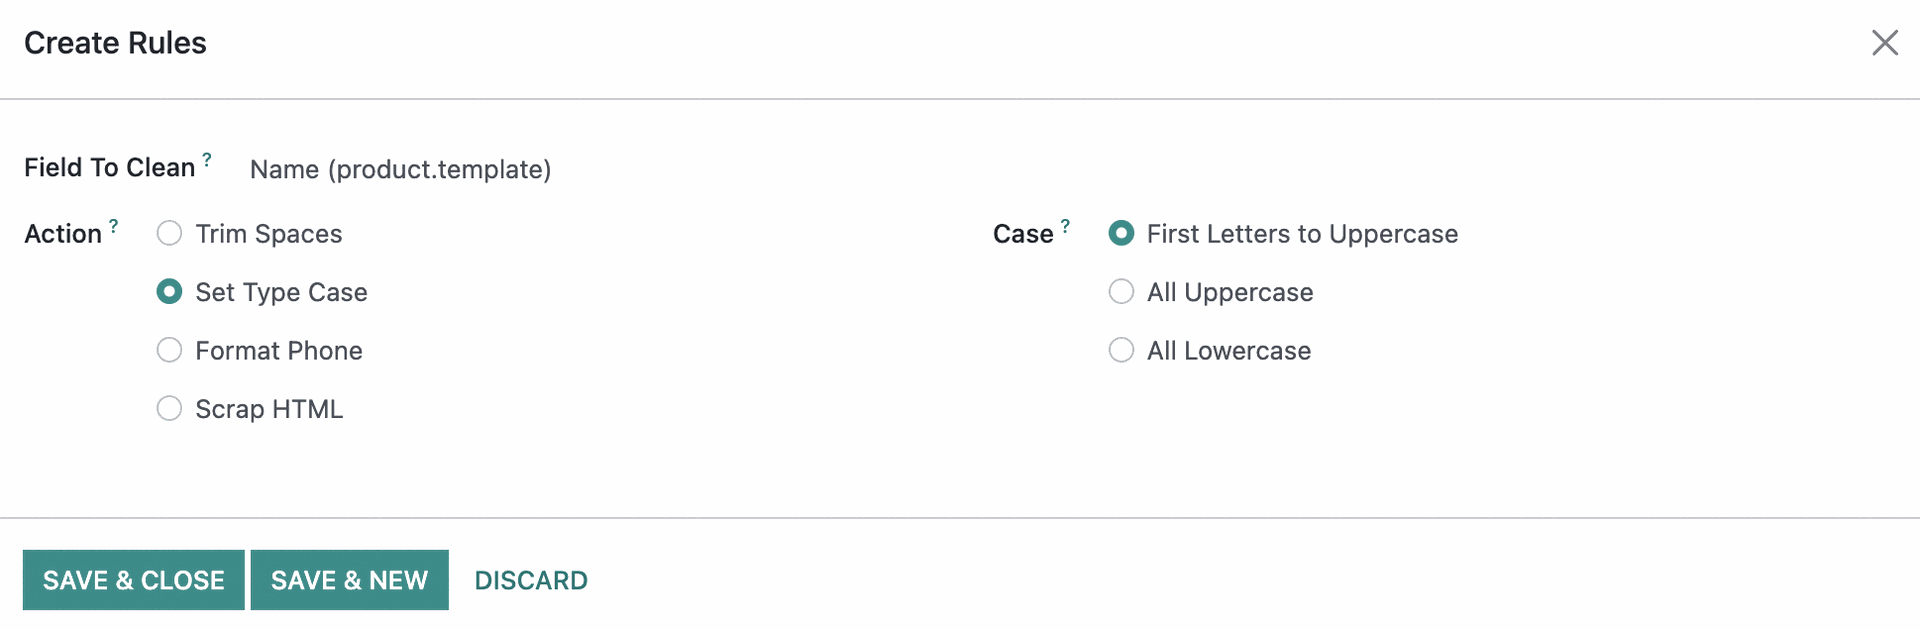
When you're ready, click save & Close or Save & New, depending on the number of rules you want to add to this configuration. Once you've added all rules, you'll be back on the main configuration.
On the top-right you can see the # Records smart button. This indicates how many records will be affected, but it will initially show '0' until you have records matching your set criteria.
Next, click Clean. If your rule is set to "Manual", then the smart button will update with the records for review, and you'll immediately be taken to those records in list view.
If the rule is set to "Automatic", then clicking clean will process the rules automatically but the smart button will always show "0".
Good to Know!
When Does Data Cleaning Run?
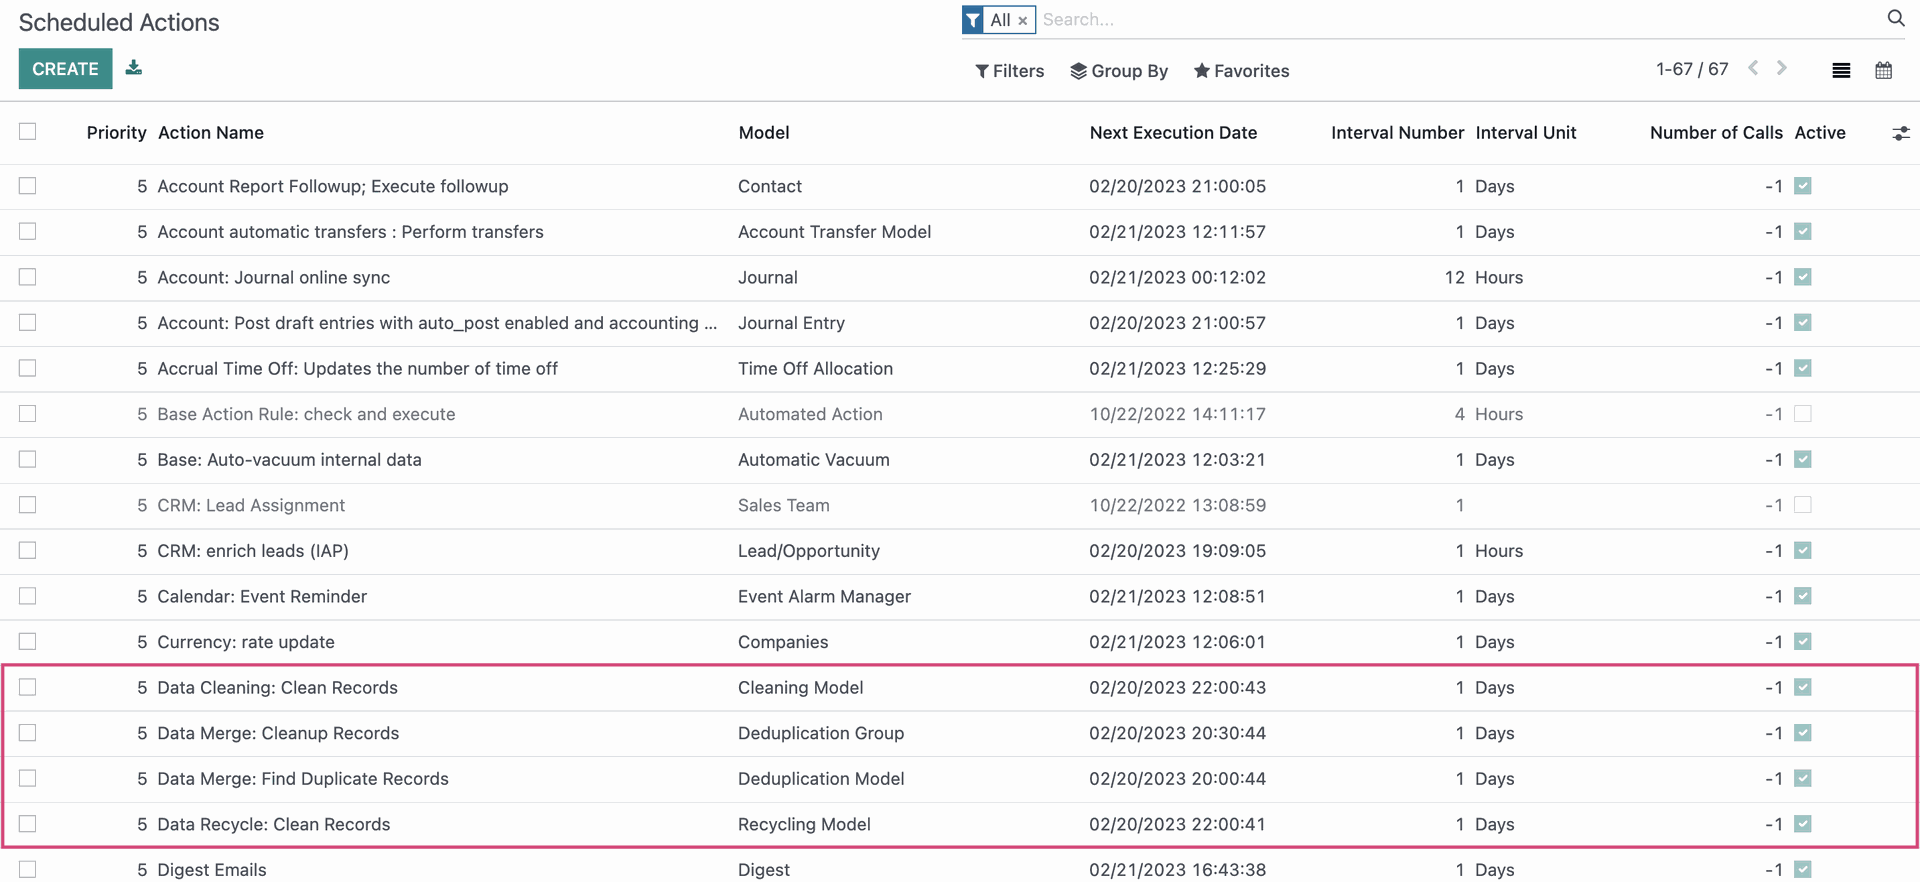
In debug mode, you can see how often Data Cleaning runs the cleaning modules by going to Settings > Technical > Automation > Scheduled Actions from the home screen.

Once there, search for "data" and you'll see three scheduled actions. You can select and edit these to run more or less often, depending on your preferences. You can also click into the action and run it manually, if needed.