CRM: CRM Configuration: Settings
Purpose
The purpose of this documentation is to serve as a walkthrough for configuring the CRM application in Odoo 14.
Process
To get started, navigate to the CRM app.
Once there, go to Configuration > Settings to review the following settings.
CRM
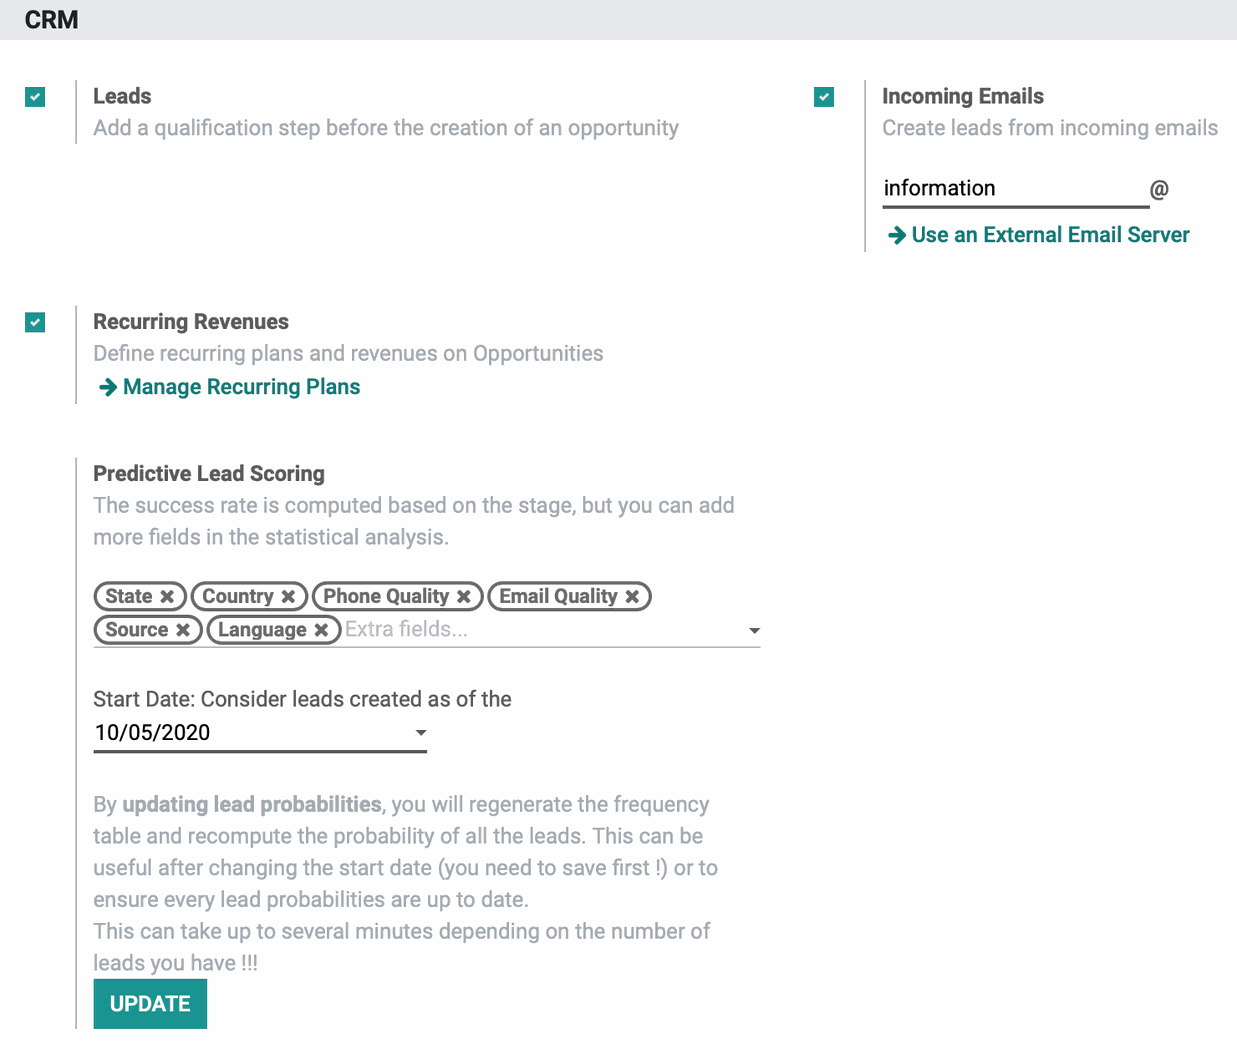
Leads: This option enables Leads, which adds a qualification step before creating an opportunity or a customer. Once the lead is qualified, it can be converted into a business opportunity and/or a new customer in your address book.
Incoming Emails: This field displays when Leads are enabled. Checking this box allows you to designate an email address (alias) for leads. Odoo will convert all incoming email to this address into a CRM lead. It's important to note that inidividual Sales Teams can have their own email alias, as well.
Recurring Revenues: When enabled, you can define recurring plans and revenues on Opportunities.
Predictive Lead Scoring: Odoo can use State, Country, Phone Quality, Email Quality, Source, and Language data to calculate the probablity of closing an Opportunity. These can be adjusted as you see fit.
Start Date: The date you enter here will give a starting point for Odoo to start calculating from. If you ever need to change the date, enter a new date then click update.
Lead Generation
The following are all paid features of Odoo.
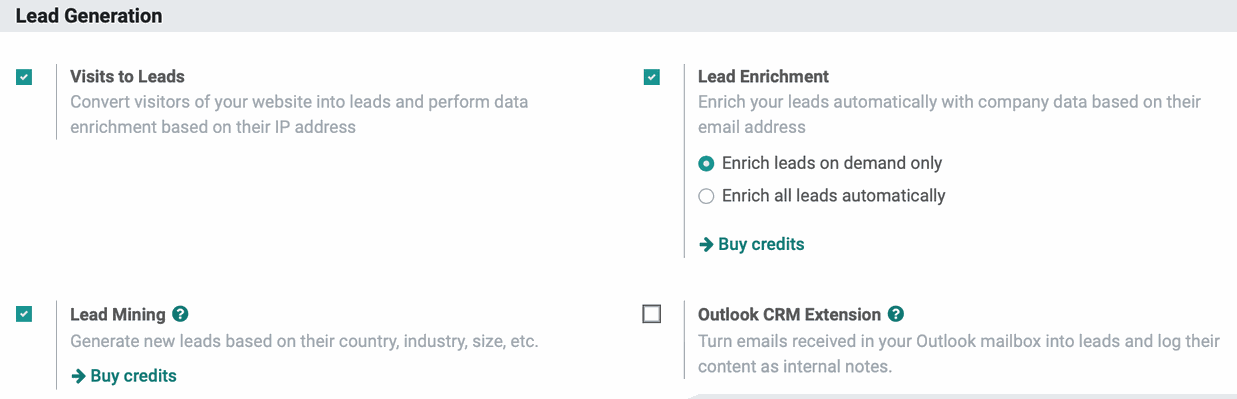
Visits to Leads: Enable this option to convert visitors of your website into leads and perform data enrichment based on their IP address.
Lead Enrichment: This is a credit-based feature offered by Odoo to use public data to enrich your leads. For example, if you enter the company's email address and name, Odoo will use that information to find data to complete the profile, like phone number and email address. The more data you have, the more likelihood of qualifying the lead. You can choose to then enrich leads on demand, or automatically.
Lead Mining: Enable this to generate new leads based on country, industry, size, etc.
Outlook CRM Extension: Enable this to turn emails received in your Outlook mailbox into leads and log their content as internal notes.
To use these features, first enable them here and click Save. The page will reload, then you can click Buy Credits to add the required credits to your account.
If you've changed any settings on this page, click Save.
Good to Know!
Enabling Lead Generation features will also add items to the Configuration menu for further setup.