CRM: Managing Your CRM Pipeline
Purpose
This document follows Creating a New Sales Team in Odoo CRM. We will cover the customization of your sales pipeline to manage Leads, turn them into Opportunities and the differences between the two. We will cover how to set the criteria that qualifies a Lead as a new Opportunity. We will also cover assigning members of your sales team to activities, and customizing reasons the opportunity was lost.
Process
Navigate to the CRM app.

You will be presented with your pipeline in its default setup. To configure your Pipeline, navigate to the Configuration Menu. You will be presented with the following options:
Settings: Allows you to toggle whether an incoming email or contact qualifies as an opportunity immediately, or if you'd like to set specific requirements first (as a Lead). For example, someone inquiring about a service may not qualify until your company has sent them an offer letter or quotation. You can also determine the format of phone numbers and whether or not Customer information will autocomplete.
Sales Teams: Allows you create and manage sales teams to make sure Leads are getting to the right people, whether that's Sales, Marketing, a specific location, or a certain project.
Activity Types: Allows you to create or edit activities that you can then schedule and assign to your team members.
Pipeline
Tags allows you to customize the tags your team uses to sort and filter leads and opportunities.
Lost Reasons allows you to track weaknesses in your sales strategy, such as losing business to competitors, poor time management, etc.
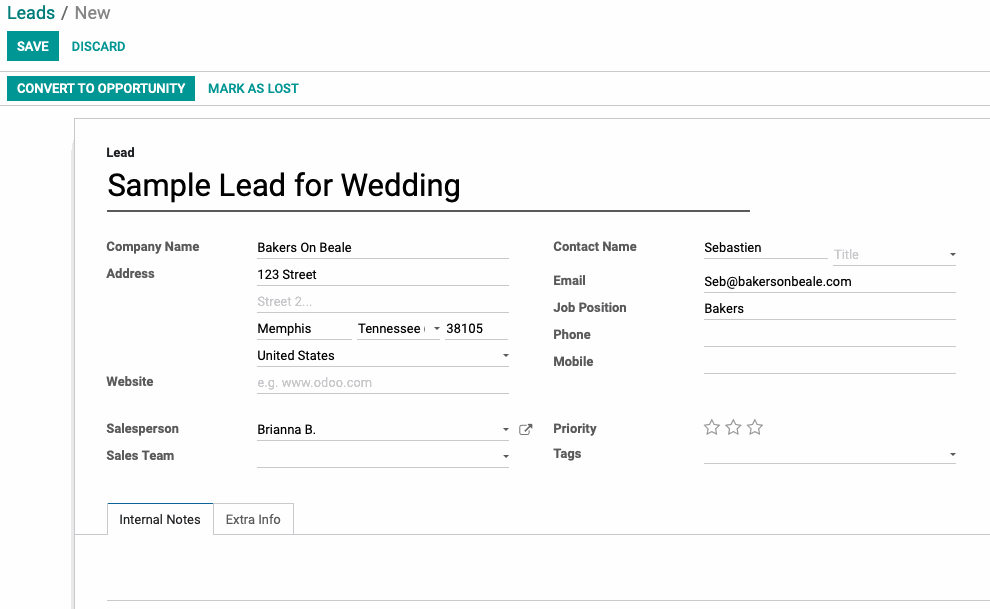
Leads can take many forms, whether it's a conversation your employee had at a conference, a networking call, or a direct message from social media. This form allows you to document all potential sales by logging them, sorting them, and then assigning a follow up. Fill in the data you need for your team to follow up and click Save.
Good to Know!
The information in a Lead does not have to be complete. It really can be as simple as "Customer from the conference reached out about purchasing a table".
Merging Opportunities will combine the two records and relevant chatter and scheduled activities will be included in the final record. We've chosen a salesperson and sales channel.
Leads to Opportunities
These new leads need to be assigned to a salesperson and then pursued in order to turn them into Opportunities. Selecting the first lead on the screen, we click on Convert to Opportunity.
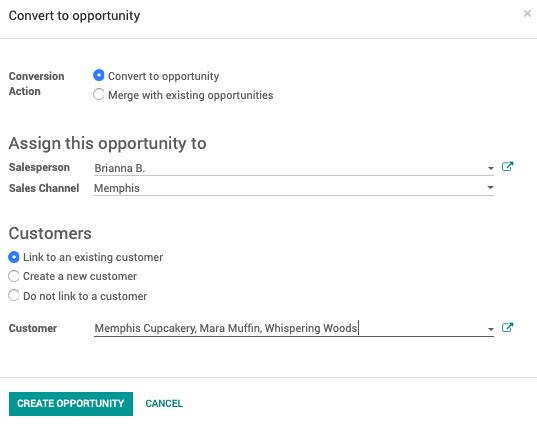
We've opted to link to an existing customer since we've worked with this contact before.
When you've filled in the necessary details, we will select CREATE OPPORTUNITY. When we click on Create Opportunity, we will arrive on the opportunity's record. Click Edit.
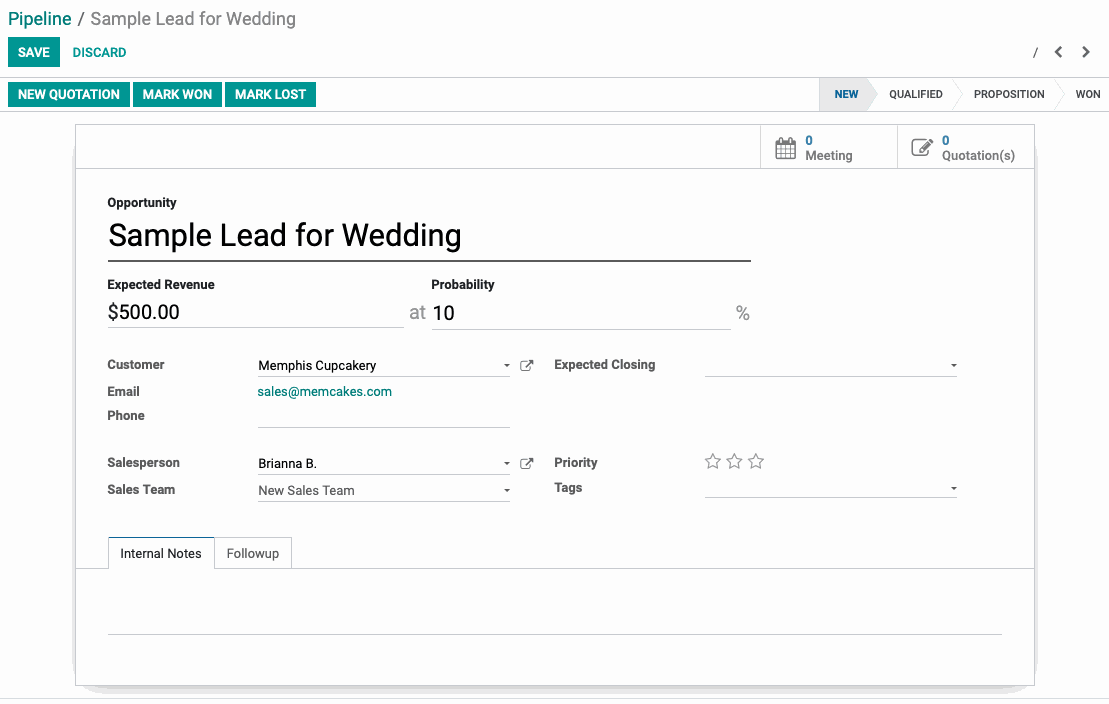
We can see from this screen that there are no meetings scheduled yet, and no quotations sent. We've set the Expected Revenue to be $500.00 and the probability is currently 10%. The probability can be configured for each stage to indicate the likelihood of closing a sale.
We'll Save and close, then return to Sales > My Pipeline
There may be a default filter in place called "My Pipeline", you will need to remove this to view all opportunities.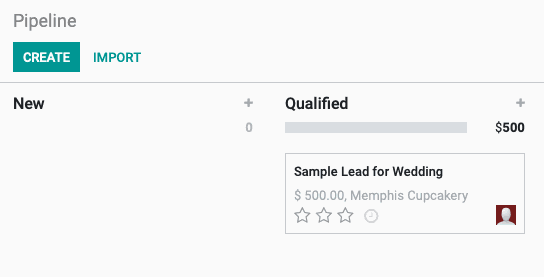
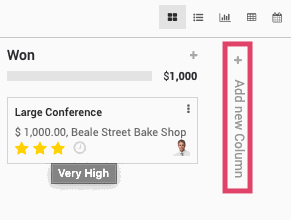
Here you can see that the estimated revenue total for a column is displayed below the title, giving an idea of potential sales at a glance. After starting a dialogue with the customer and gathering more information, we can move it to the Qualified stage. The requirements for moving an opportunity forward are customizable and are managed via internal processes (Odoo does not enforce the requirements), whether it's an approved quotation, a minimum spending budget, or a confirmed meeting. In our example, we will say that no opportunity qualifies unless they have a minimum of $500.
Editing Pipeline Stages
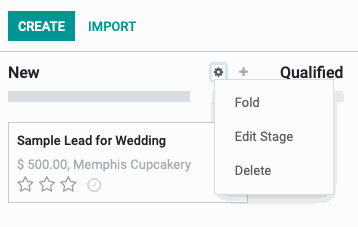
To edit a pipeline stage, mouse over the title and a Configuration icon will appear. Folding a stage will collapse it to a narrower view, hiding the records within. They can be toggled open again by clicking the folded column. Delete will remove the empty stage. Odoo will not allow you to delete a stage if it contains opportunities, so either archive them or move them before using this function. You also have the option to Edit Stage.
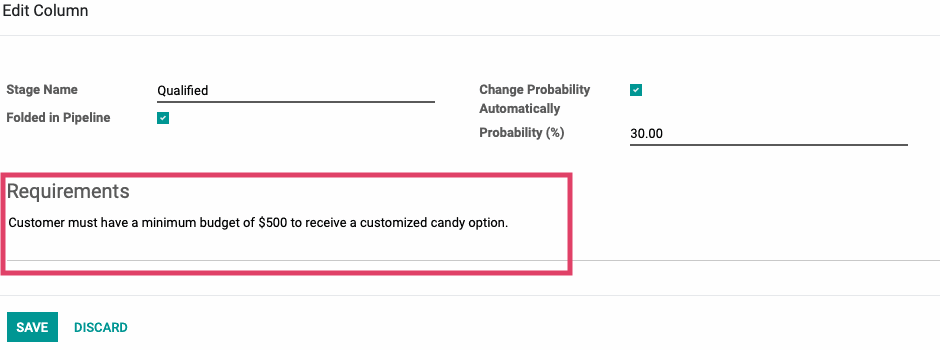
Here we can change the column title, the sales team that uses this stage (leave blank for it to be used by all sales teams), and whether or not the column is folded by default. In the right column, we can set a probability to update as an opportunity moves through the pipeline. Under Requirements, you can set the parameters mentioned earlier. Save your work, and return to the pipeline view.
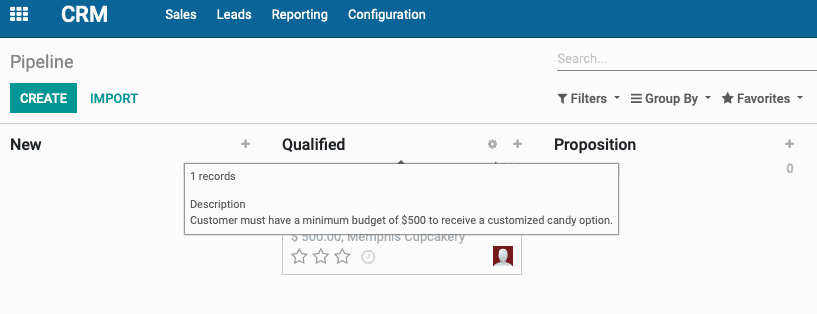
Success! Now, when we mouse over the title of the column, our qualification pops up in a tooltip!
There are two more customization options available to you on the pipeline screen. At the far right, there is an Add New Column button. You can title the new column, and then drag it to rearrange by mousing over the title until the symbol appears.