Maintenance: Maintenance Requests + Calendar
Purpose
This document covers how to create and schedule Maintenance Requests using the Maintenance application in Odoo 16.
Process
To get started, navigate to the Maintenance app.
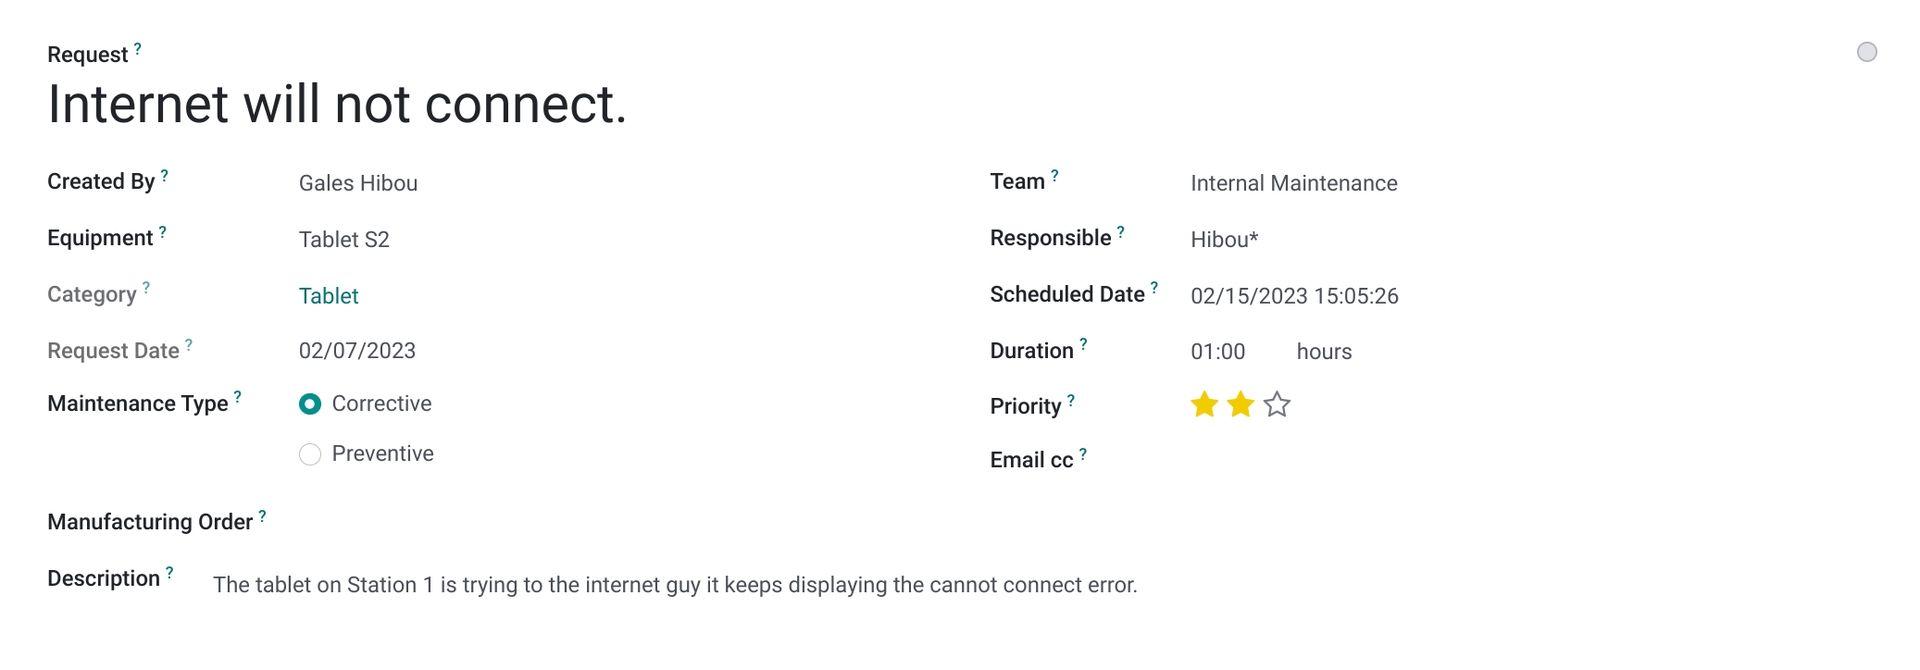
Once there, go to Maintenance > Maintenance Requests. Here you'll see a list of all existing maintenance requests. To add a new one, click NEW. This opens a new form with the following fields.
Request Title: Name of your maintenance request.
Created By: Employee who created the maintenance request. This will default to your username.
Equipment: Choose the equipment that will be undergoing maintenance.
Category: This field is added when a piece of equipment is selected, and populated with the related category.
Request Date: This automatically fills in the date that this request was created.
Maintenance Type:
Corrective: This is for scheduling requests for equipment that has defunct randomly.
Preventive: This is for scheduling preventive requests to prolong the usability of the equipment before failure.
Team: Choose a maintenance team to manage the request.
Responsible: This is the person responsible for fulfilling the request.
Scheduled Date: Date for which the maintenance work is planned.
Duration: This indicates the expected duration of the maintenance.
Priority: This will indicate its priority level of the maintenance request. This indicates the requests priority, no stars is the lowest priority while 3 stars is the highest.
Email CC: This is the list of carbon copies from incoming emails. Any messages sent from this record will also have the option to copy the addresses in this field.
Manufacturing Order: This is only available when enabling a Work Orders in the Manufacturing application. For more information on Work Centers, see our documentation in the Manufacturing topic.
Company: Company the maintenance request was created under.
Internal Notes: This is where you can add a description of the maintenance request or add additional notes.
When you finish, click to save.
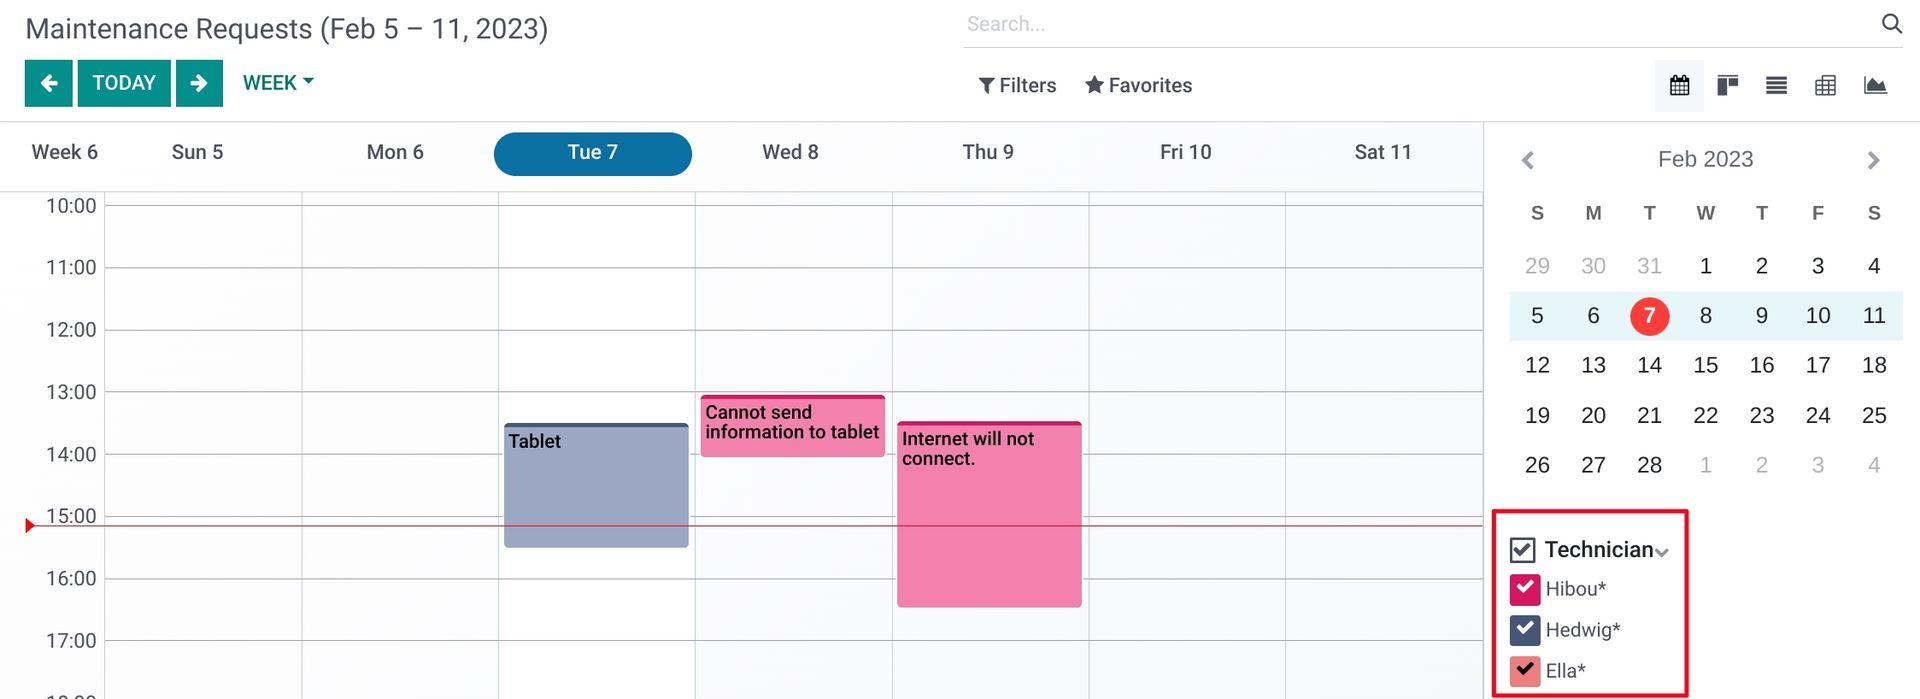
Maintenance Calendar
Let's review the maintenance schedule by going to Maintenance > Maintenance Calendar. This will show you a calendar with all the maintenance requests for the time range and color codes of each request by responsible technician.
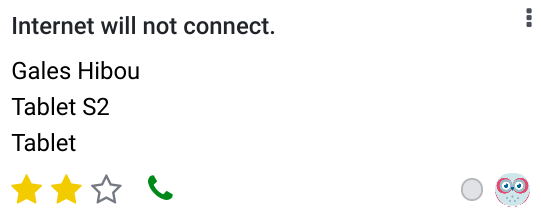
Kanban View
Go to MAINTENANCE > MAINTENANCE REQUESTS. This will take you to a kanban view of your maintenance requests organized by stage. You can drag these maintenance requests throughout the stages by clicking and holding onto the card with your mouse.
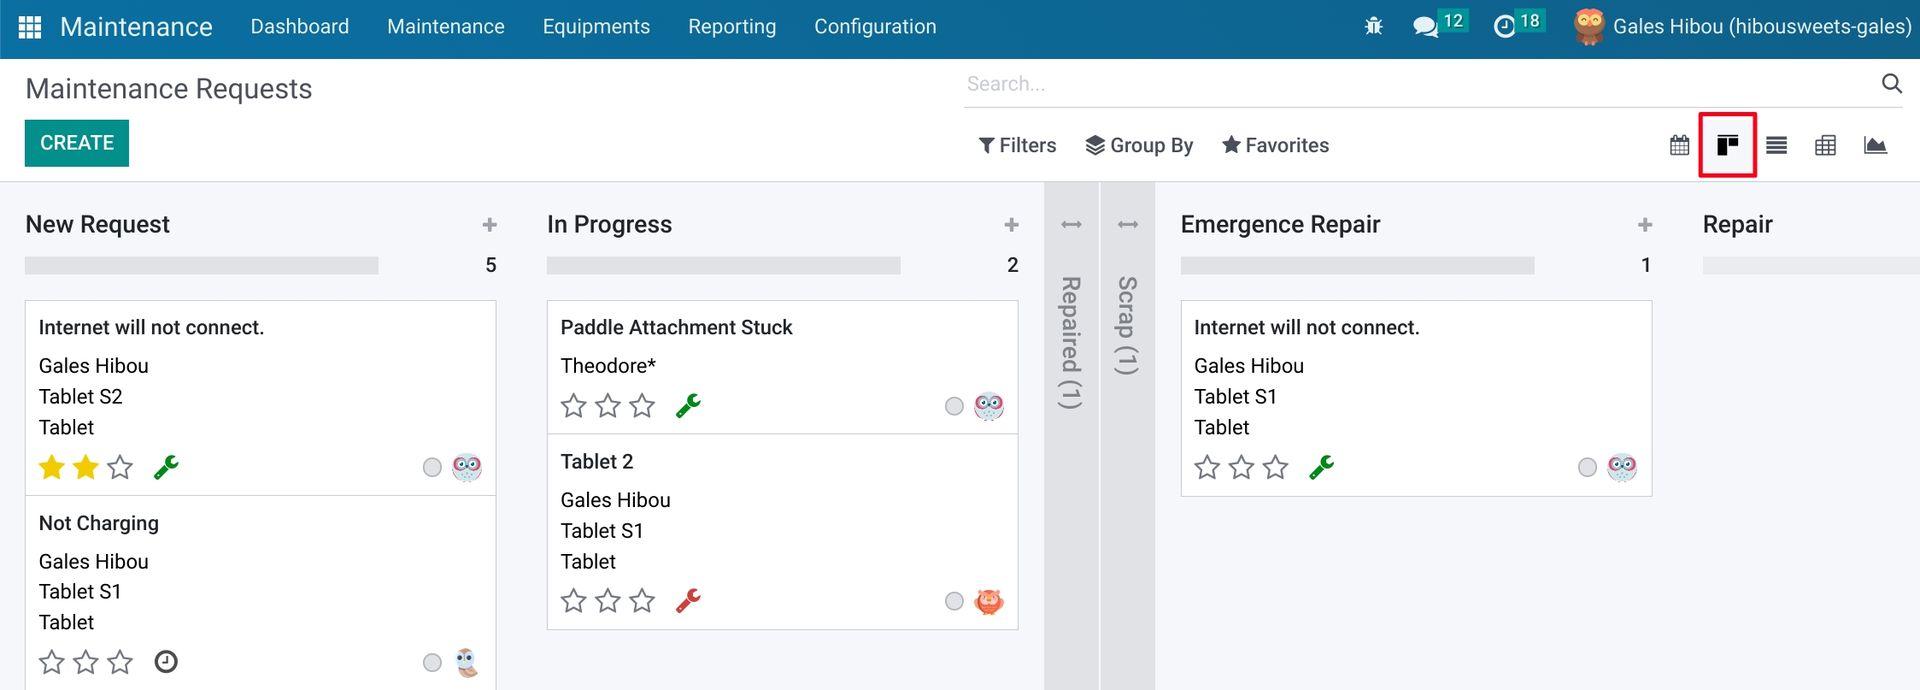
Let's look at the kanban card in closer detail.
Priority: This indicates the requests priority, no stars is the lowest priority while 3 stars is the highest.
Activities
None: This button allows you to see what activities are currently scheduled for this maintenance request if any, when it is greyed out, this means that there aren't any pending.
Planned: This indicates an activity scheduled for the future.
Today: This indicates an activity scheduled for today.
Overdue: These indicates an overdue activity.
Kanban Status Indicator
In Progress: This means that the task is in progress, this is its status by default.
Ready for next stage: Indicates that the request is ready to move onto the next stage.
Blocked: This indicates that the maintenance request is blocked and should be put off until further notice.
Chat
Responsible: By clicking on this icon, you will open up a chat box that will allow you to send messages to the person responsible for taking care of this maintenance request.