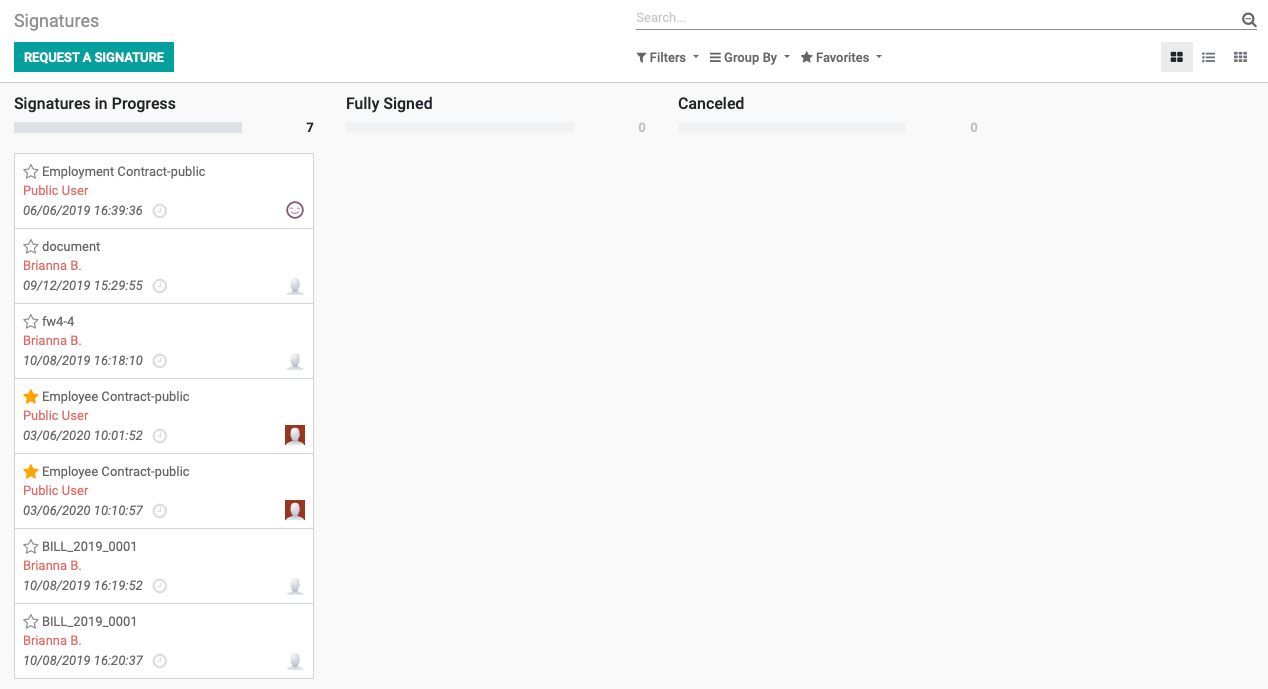
Documents: Signing Documents
Purpose
Odoo makes it easy to receive signatures on documents. You are able to upload a PDF, add custom fields and send it to the signee. You can also link documents to the Documents application for easy storage.
Debug Mode
Some steps in this document will require you to be in Debug Mode.
Process
To get started, navigate to the Sign application.
Configure Settings
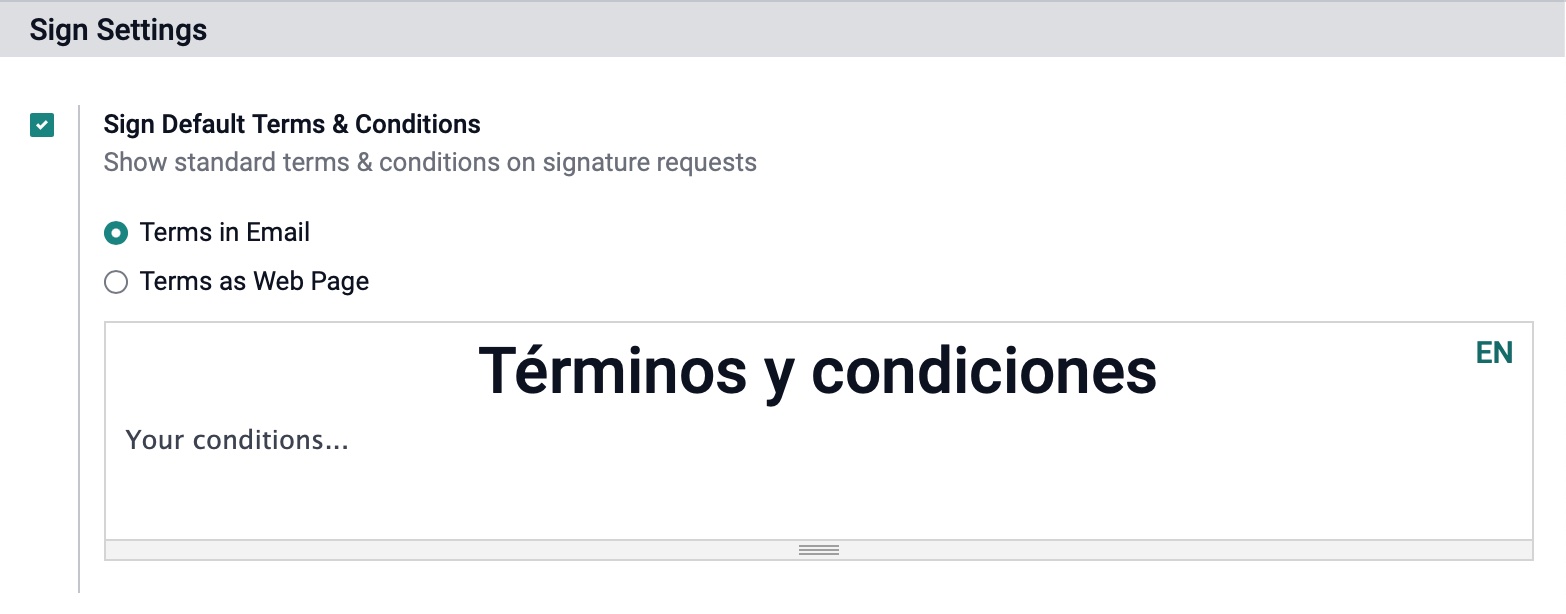
Let's navigate to Configuration > Settings. Under the Sign Settings section, you will see the following option:
Sign Default Terms & Conditions: Enabling this option will show the standard terms and conditions on the signature requests.
Terms in Email: The text will be displayed at the bottom of every signature request email
Terms as Web Page: A link will be pasted at the bottom of every signature request email, leading to your content.
Configuring Roles
In order to acquire signatures from specific sets of people, such as Customers, Employees, etc., you will need to create a variety of roles.
Navigate to CONFIGURATION > Roles. You will land on the roles in list view.

To create a new record, click Create .
Name: Assign a name to the role.
SMS Authentication : This allows document owners to require a text message verification before a signature can be recorded to verify the identity of the signee.
When you are done, click save.

Templates
You can create new templates by simply uploading a PDF file. You then will be able to send that template to a specific signee or receive a link to send.
To upload a template, navigate to Dashboard, where you will see a Kanban view of all your templates.
From here, you will be able to send, share, and edit the templates. By default, this will be filtered to My Favorites, to see all the templates, remove the filter by using the .

You have two upload options at the top: upload a pdf to sign and Upload a PDF template. We will start with Upload a PDF Template.
Select UPLOAD A PDF TEMPLATE and choose a pdf file to upload from your local computer.

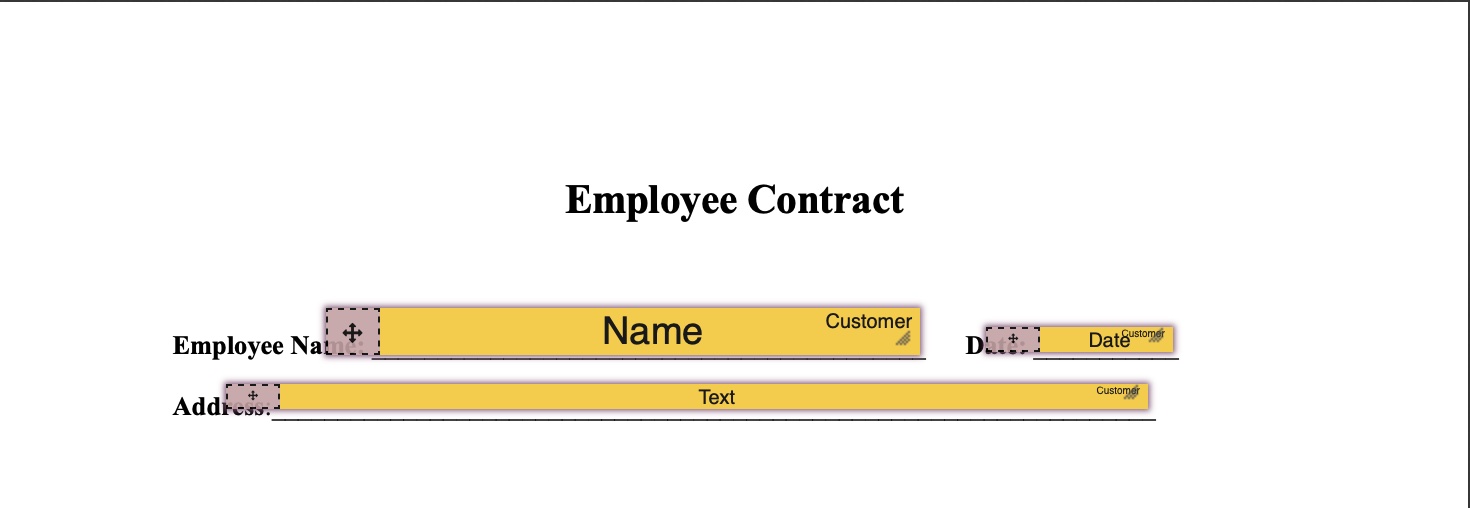
This will open a field editor window that will let you modify the document to add in editable fields in on the document for signatures, dates, and more.
Mouse over the green blocks on the left of the PDF viewer, click on them to then drag and drop the desired items into place.
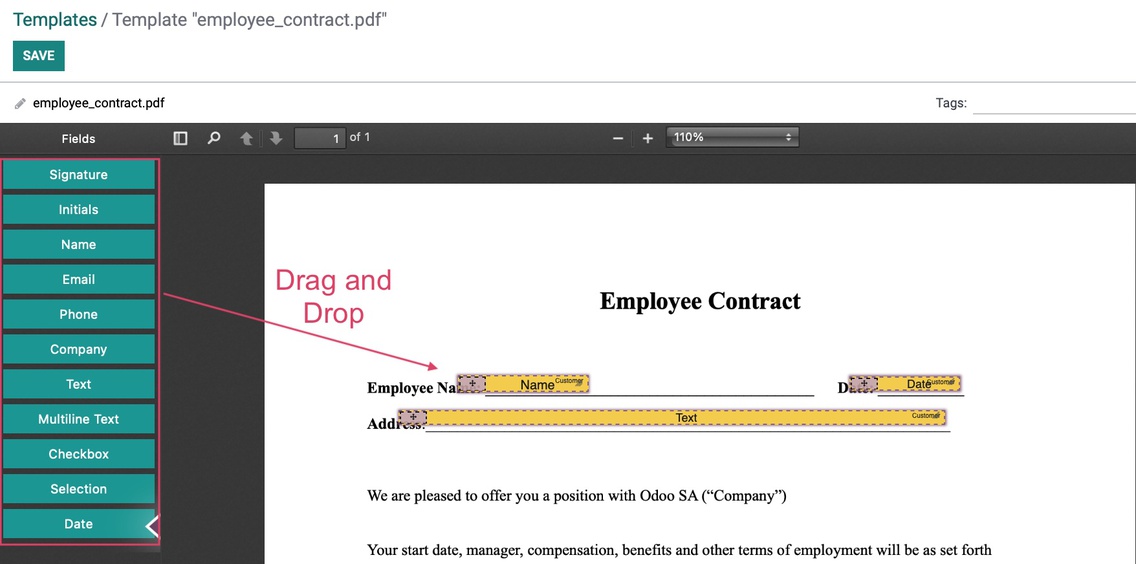
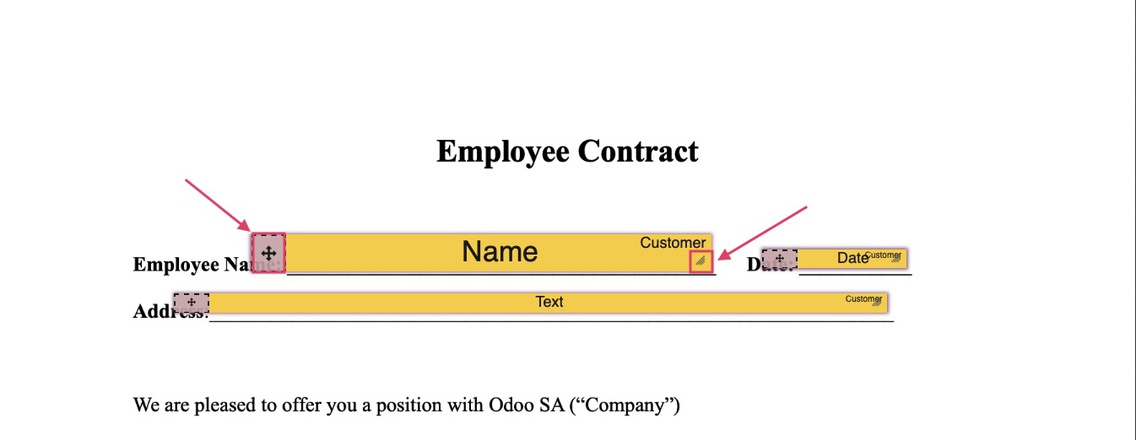
Using the in the upper left corner of the field, you can move the field, and by grabbing the grey triangle in the lower right corner of the field, you can adjust its size.
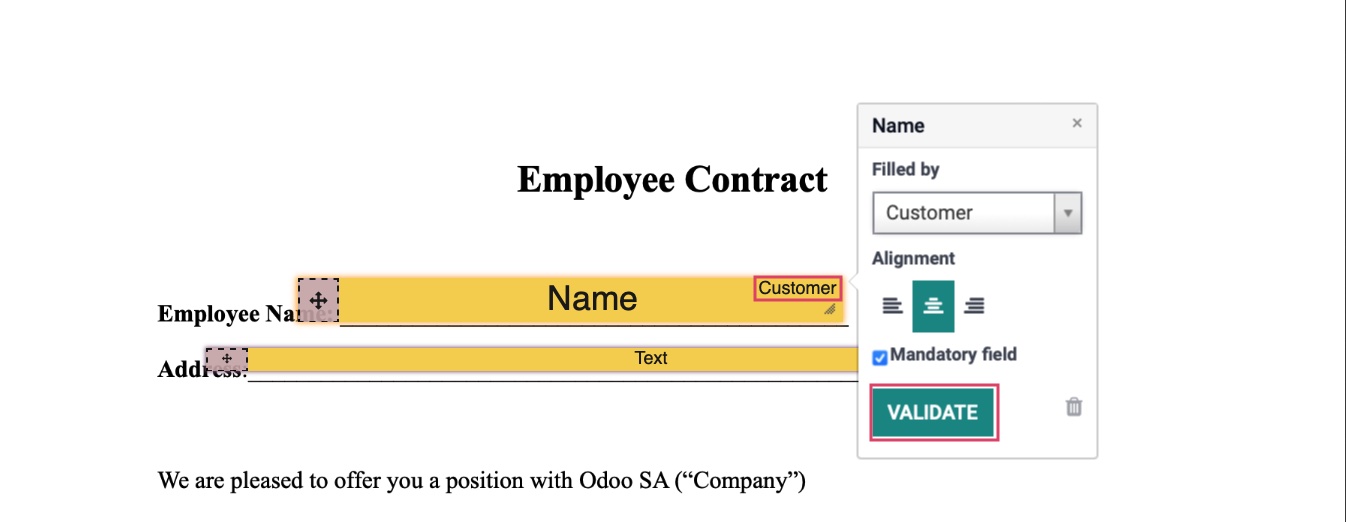
Once the field has been dropped in the correct spot, click on the variable name. This popup window will give you the option to change the role using the dropdown menu. You also have the option to make the field mandatory and adjustment the alignment of the text. Once you are done making changes, click Validate. Or to remove a field, click the Bin icon in the right of the window.
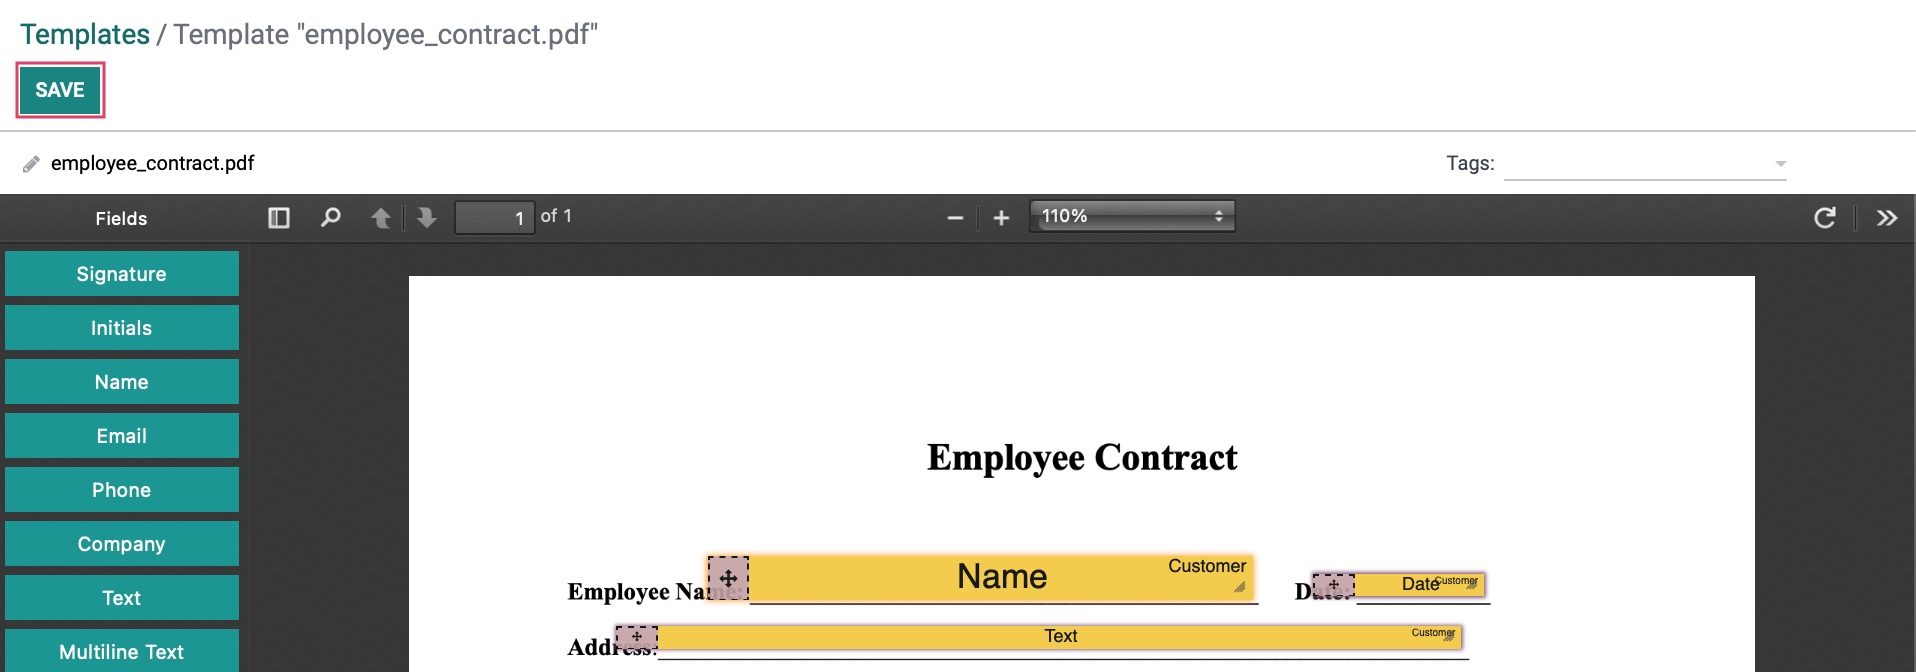
Once you have finished adding the desired editable fields, click Save.
Properties
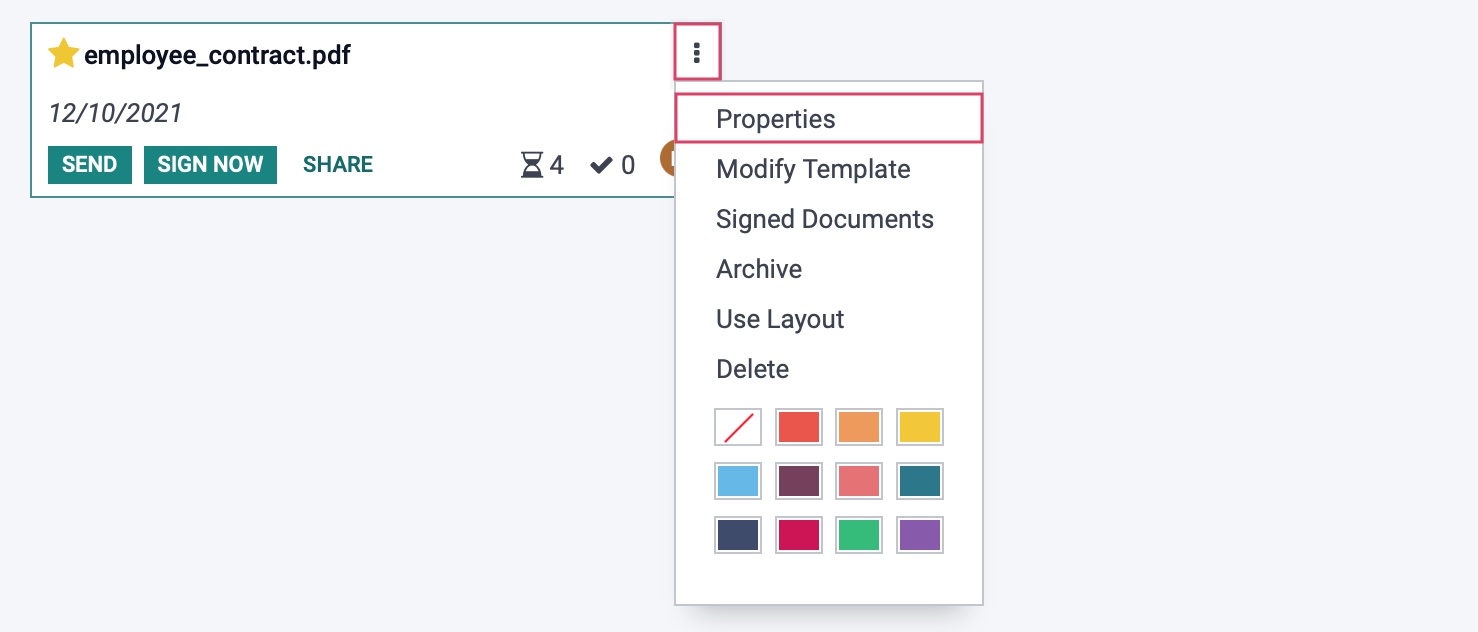
Once you have saved the template, you will be taken back to the template dashboard. First enter into Debug mode, then go to > Properties.
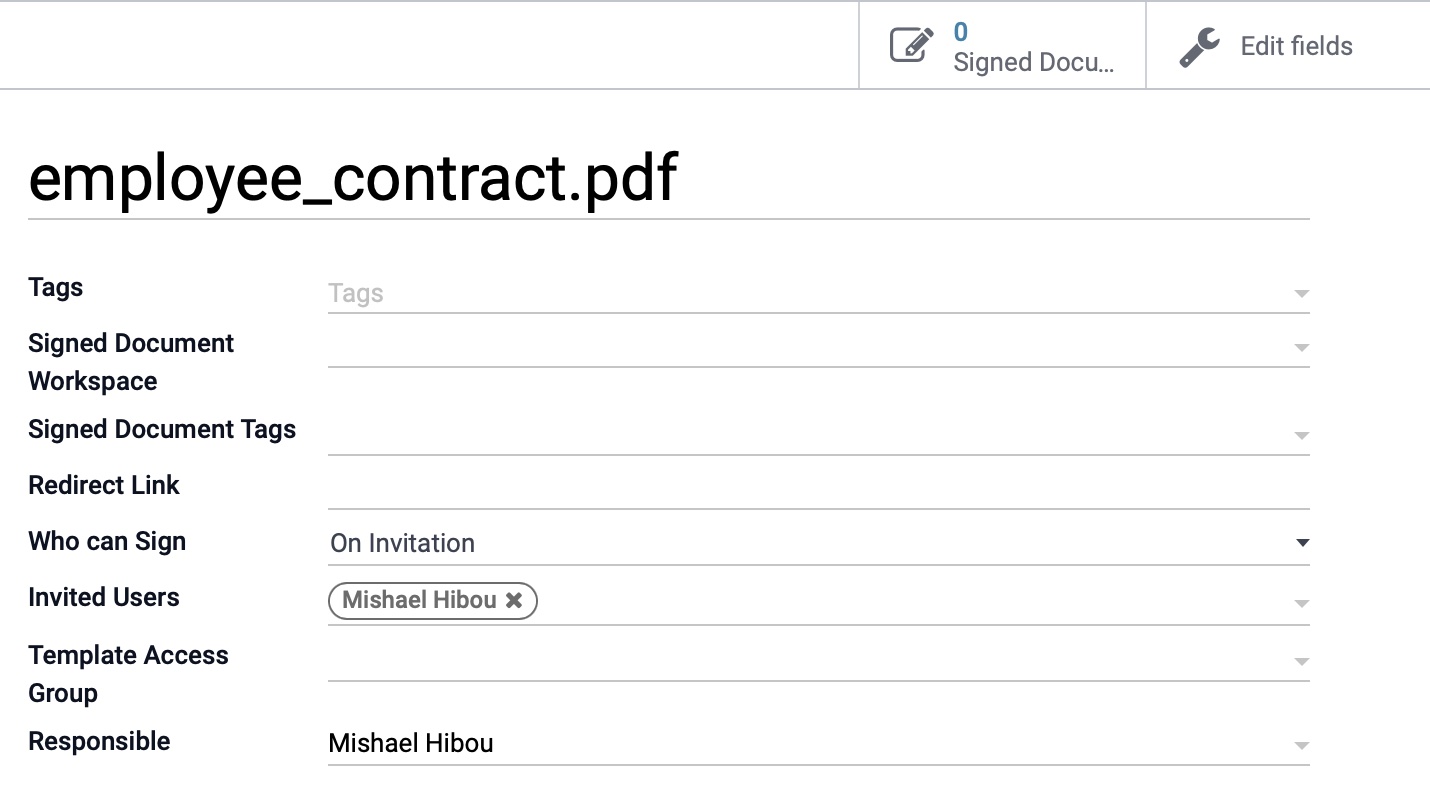
You will see the following fields and smart buttons under the template properties:
Name of File: This will default to the name of the file you have selected. You may changed this if you desire.
Tags: You can add tags to your document template.
Signed Document Workspace: This will allow you to designate this file to a workspace folder.
Signed Document Tags: This will allow you to designate the tags a signed document should receive.
Redirect Link: This is an optional link for redirection once the document is signed.
Who can Sign: This will allow you to define who can sign the document. Existing requests based on this template will not be affected by changes done to the document properties.
All Users: All users of the Sign application can view and use the template.
Invitation: Only invited users can view and use the template.
Invited Users: Designate the invited users to view, edit and use this template.
Template Access Group: You may define what users can view, edit and use this template based on a user access group.
Responsible: This is the user responsible for the template, signed documents, etc.
Smart Buttons
Signed Documents: This will take you to a Kanban view of fully signed documents.
Edit Fields: This will take you to the field editor where you will be able to edit the template.
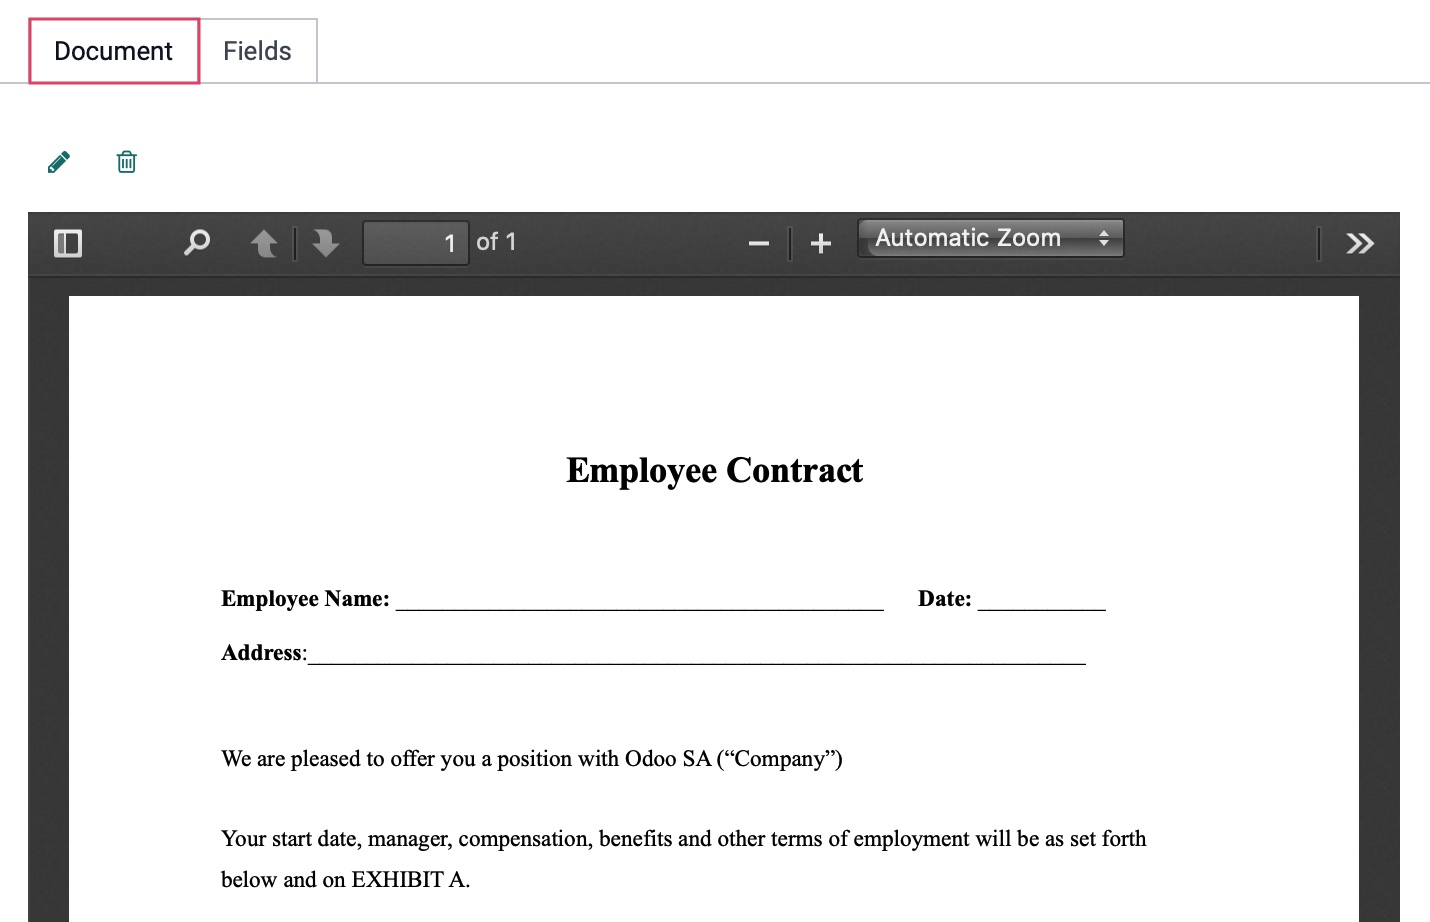
Under the Document Tab
This tab will show you the original document that was uploaded. You can choose to switch out the document with a different pdf file using the Edit icon, or remove it using the Bin icon.
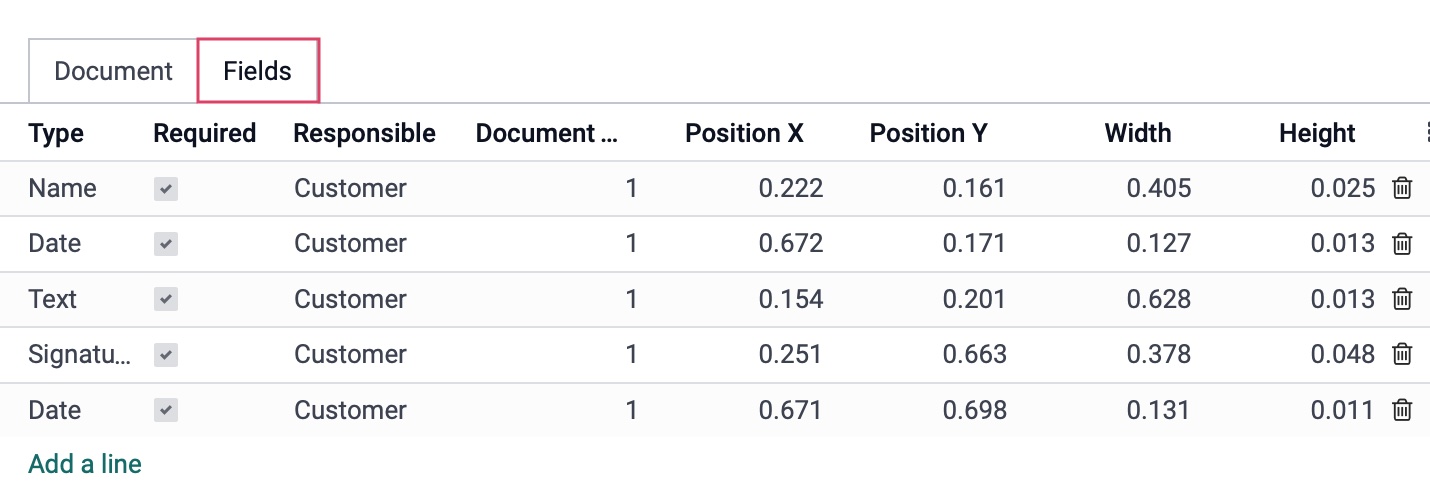
Under the Fields tab:
This tab will show you a list of the current fields that have been dragged and dropped into the pdf viewer.
When you are done configuring the template properties, click Save.
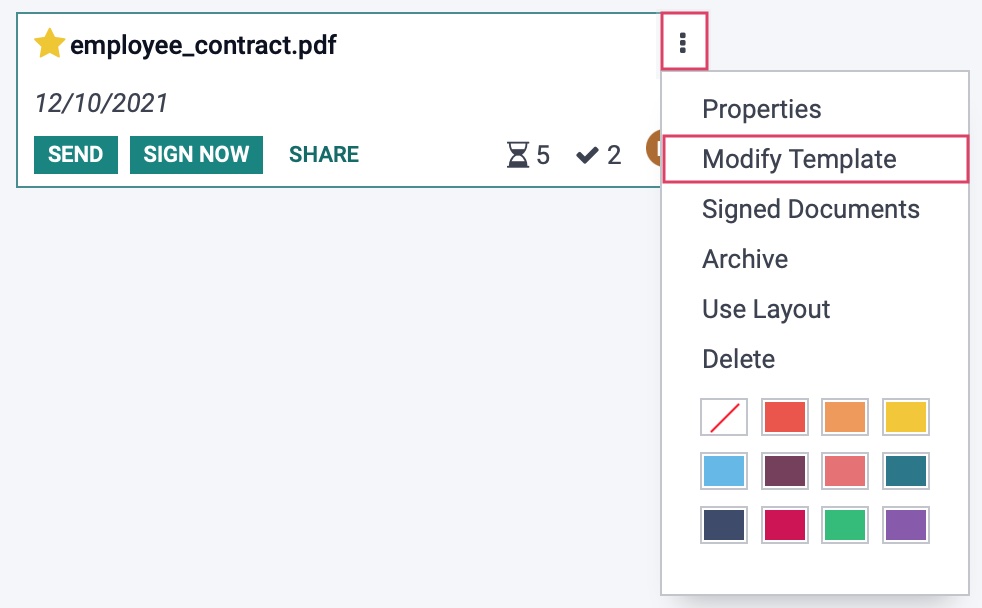
Modify Template
Using the option > Modify template, will take you to the pdf editor.
To learn how to modify templates, please go back and review the above section called Templates.
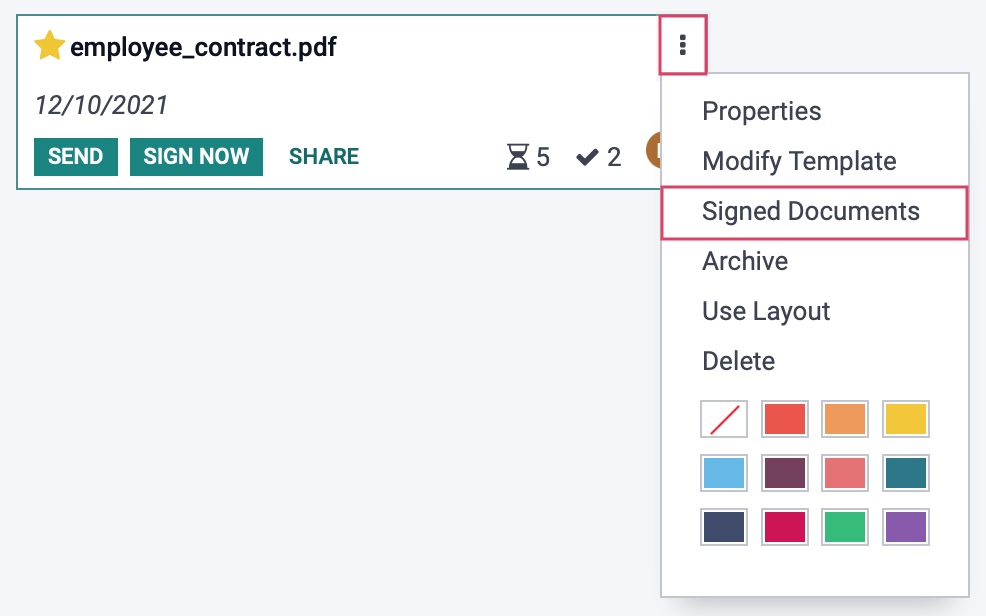
Signed Documents
Using the option > signed documents, will take you a list view of all the signed documents for this specific template.
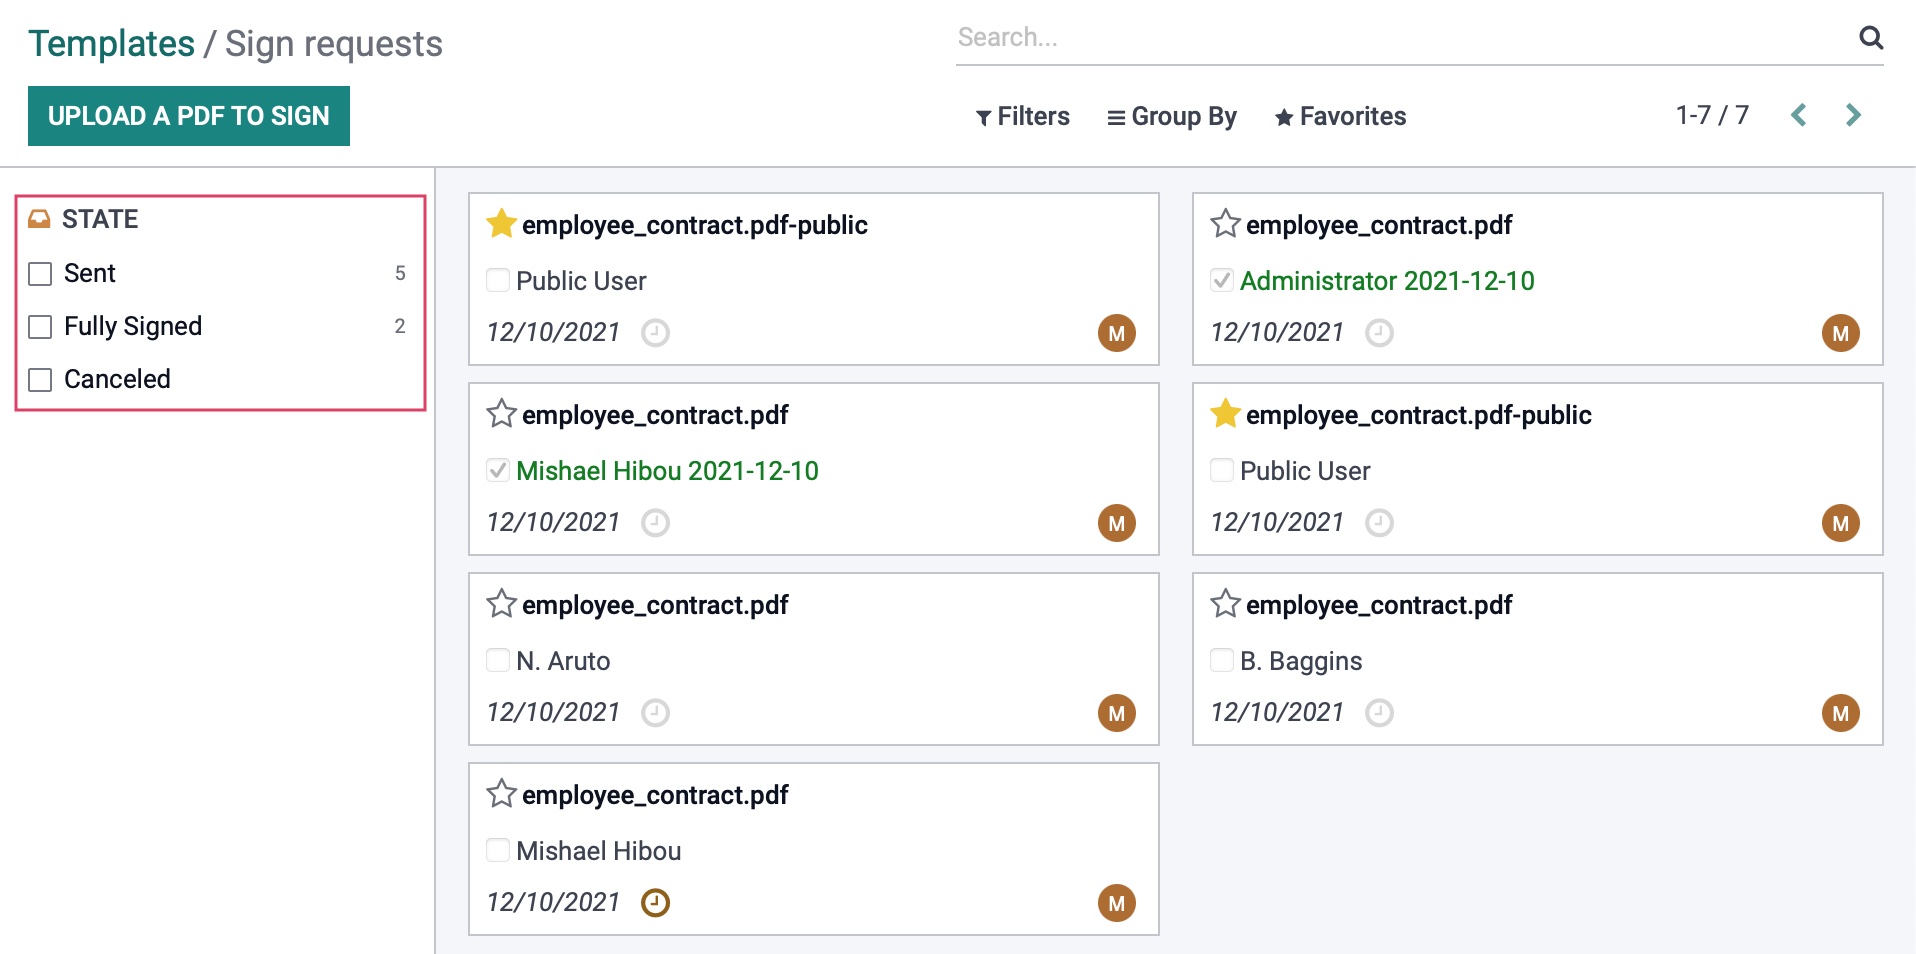
This list view will by default will filter to the Fully Signed documents only. Go ahead and remove this filter using the to view the rest of the documents for this template.

By using the side bar state filters, you can filter the documents by which were Sent, Fully Signed, or Cancelled. To view all the documents under this template, uncheck each box.
Template Options and Icons
Now, let's go ahead and click Dashboard to go back to the template homepage. You will notice that the uploaded template will give you the following options to use: Send , Sign Now or Share.
Icons
: This represents the number of documents in progress for this template.
: This represents the number of signed documents for this template.
: This represents the responsible user for the document. If you click on this icon, you will open a direct chat with them

Send
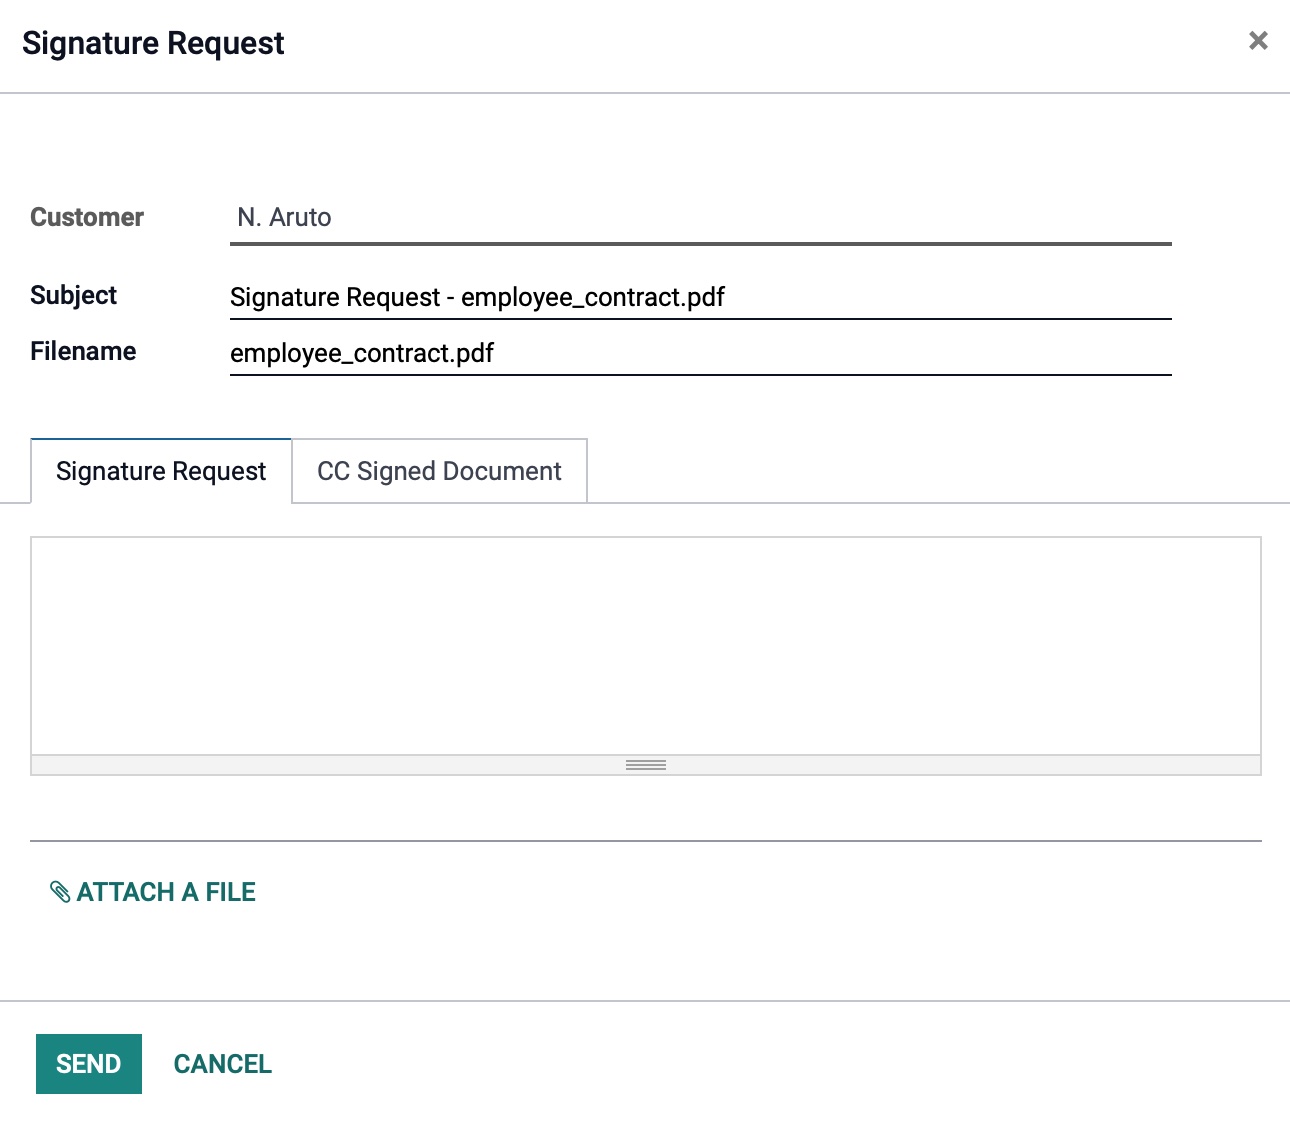
Using the Send option, will open up the Signature Request modal where you will be able to see the following:
Customer: Assign the customer this signature request should be sent to.
Subject: This will default to Signature Request - <name_of_the pdf_file>.pdf.
Filename: This will default to the name of the pdf file being sent.
Under the Signature Request tab:
Optional Message: You can send an optional message to the customer.
Don't forget! You can attach an additional file from your local computer if needed by using the ATTACH A FILE button.
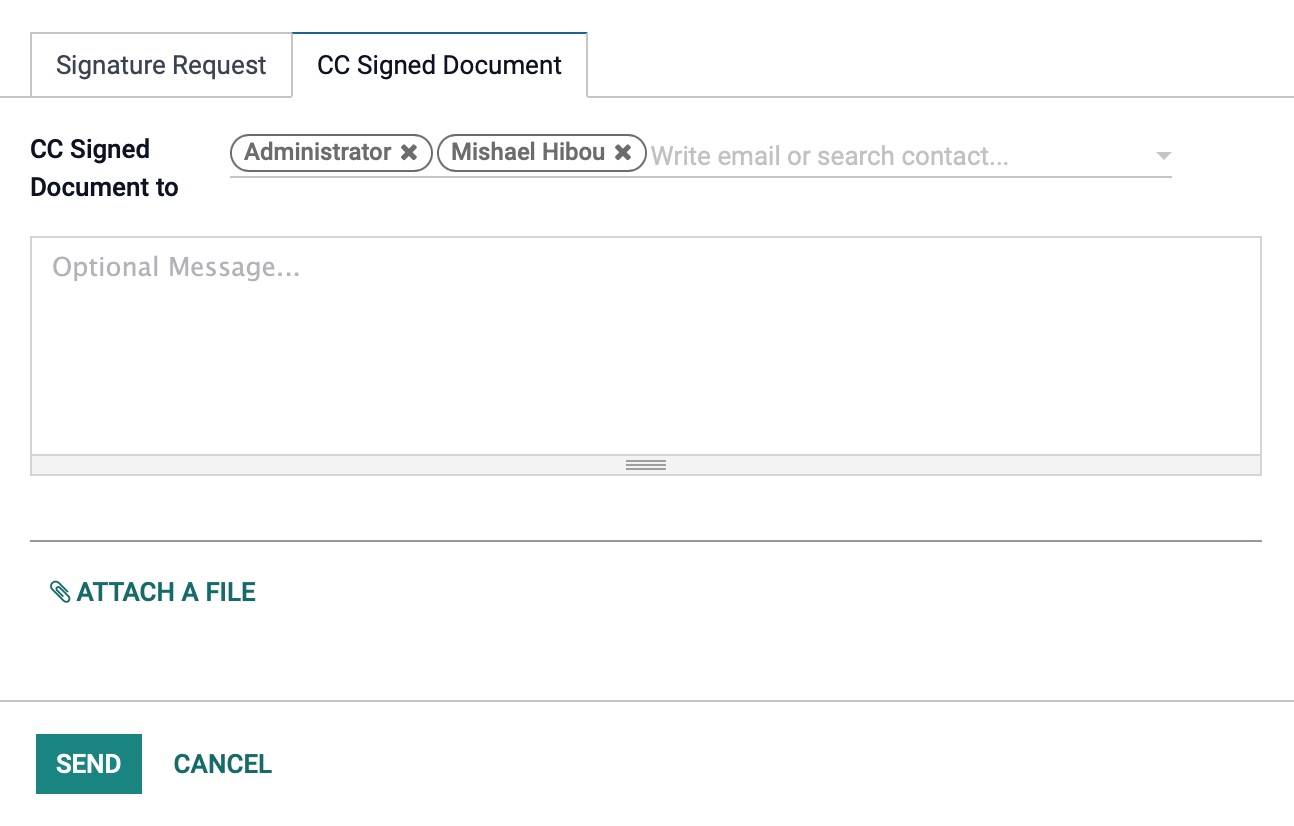
Under the CC Signed Document tab:
CC Signed Document To: Select the contact or type in the email address of the contact that should receive a carbon copy of the signed document.
Optional Message: You may type in an optional message for the contact. Notice, this message is not the same one that will be sent over to the main customer.
Once you are done, click Send.
Sign Now
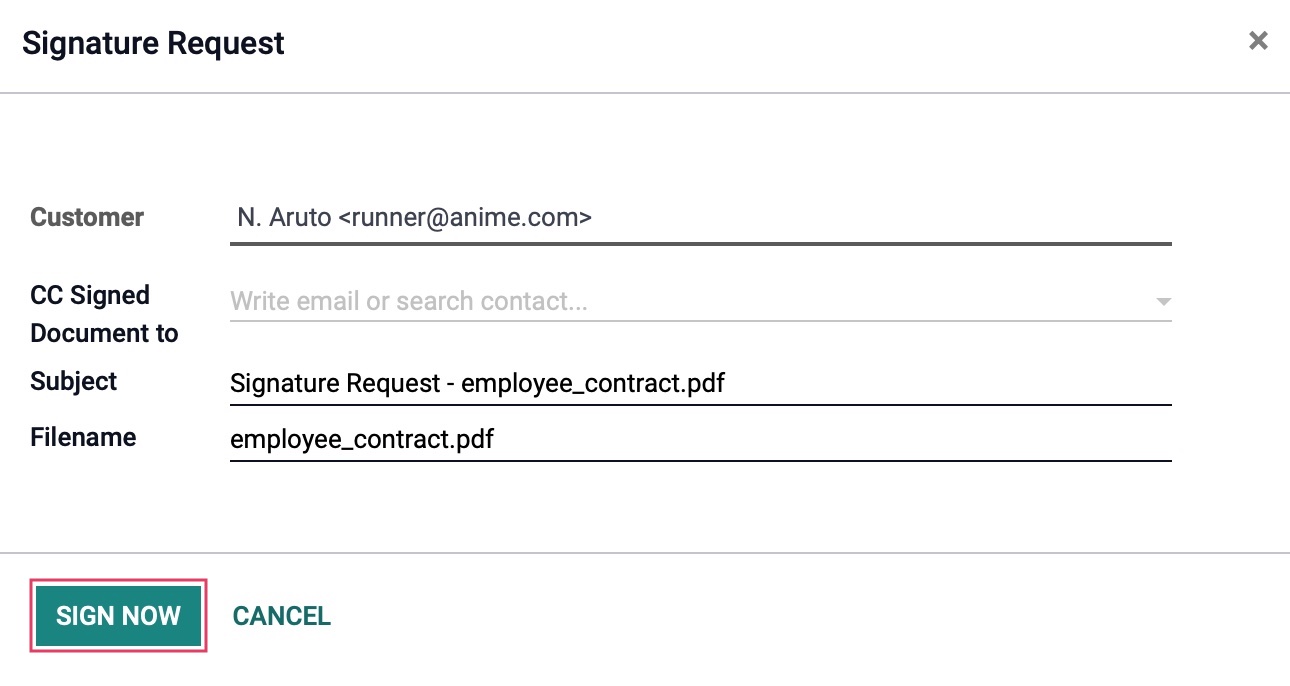
The Sign Now option gives the ability for your Odoo backend user or a contact of your choice to sign the document on the spot.
Customer: This by default will be your user's contact card. If you wish for another customer to sign this, select their contact instead.
CC Signed Document To: Select the contact or type in the email address of the contact that should receive a carbon copy of the signed document.
Subject: This will default to Signature Request - <name_of_the pdf_file>.pdf.
Filename: This will default to the name of the pdf file being sent.
When you are ready, click Sign Now.
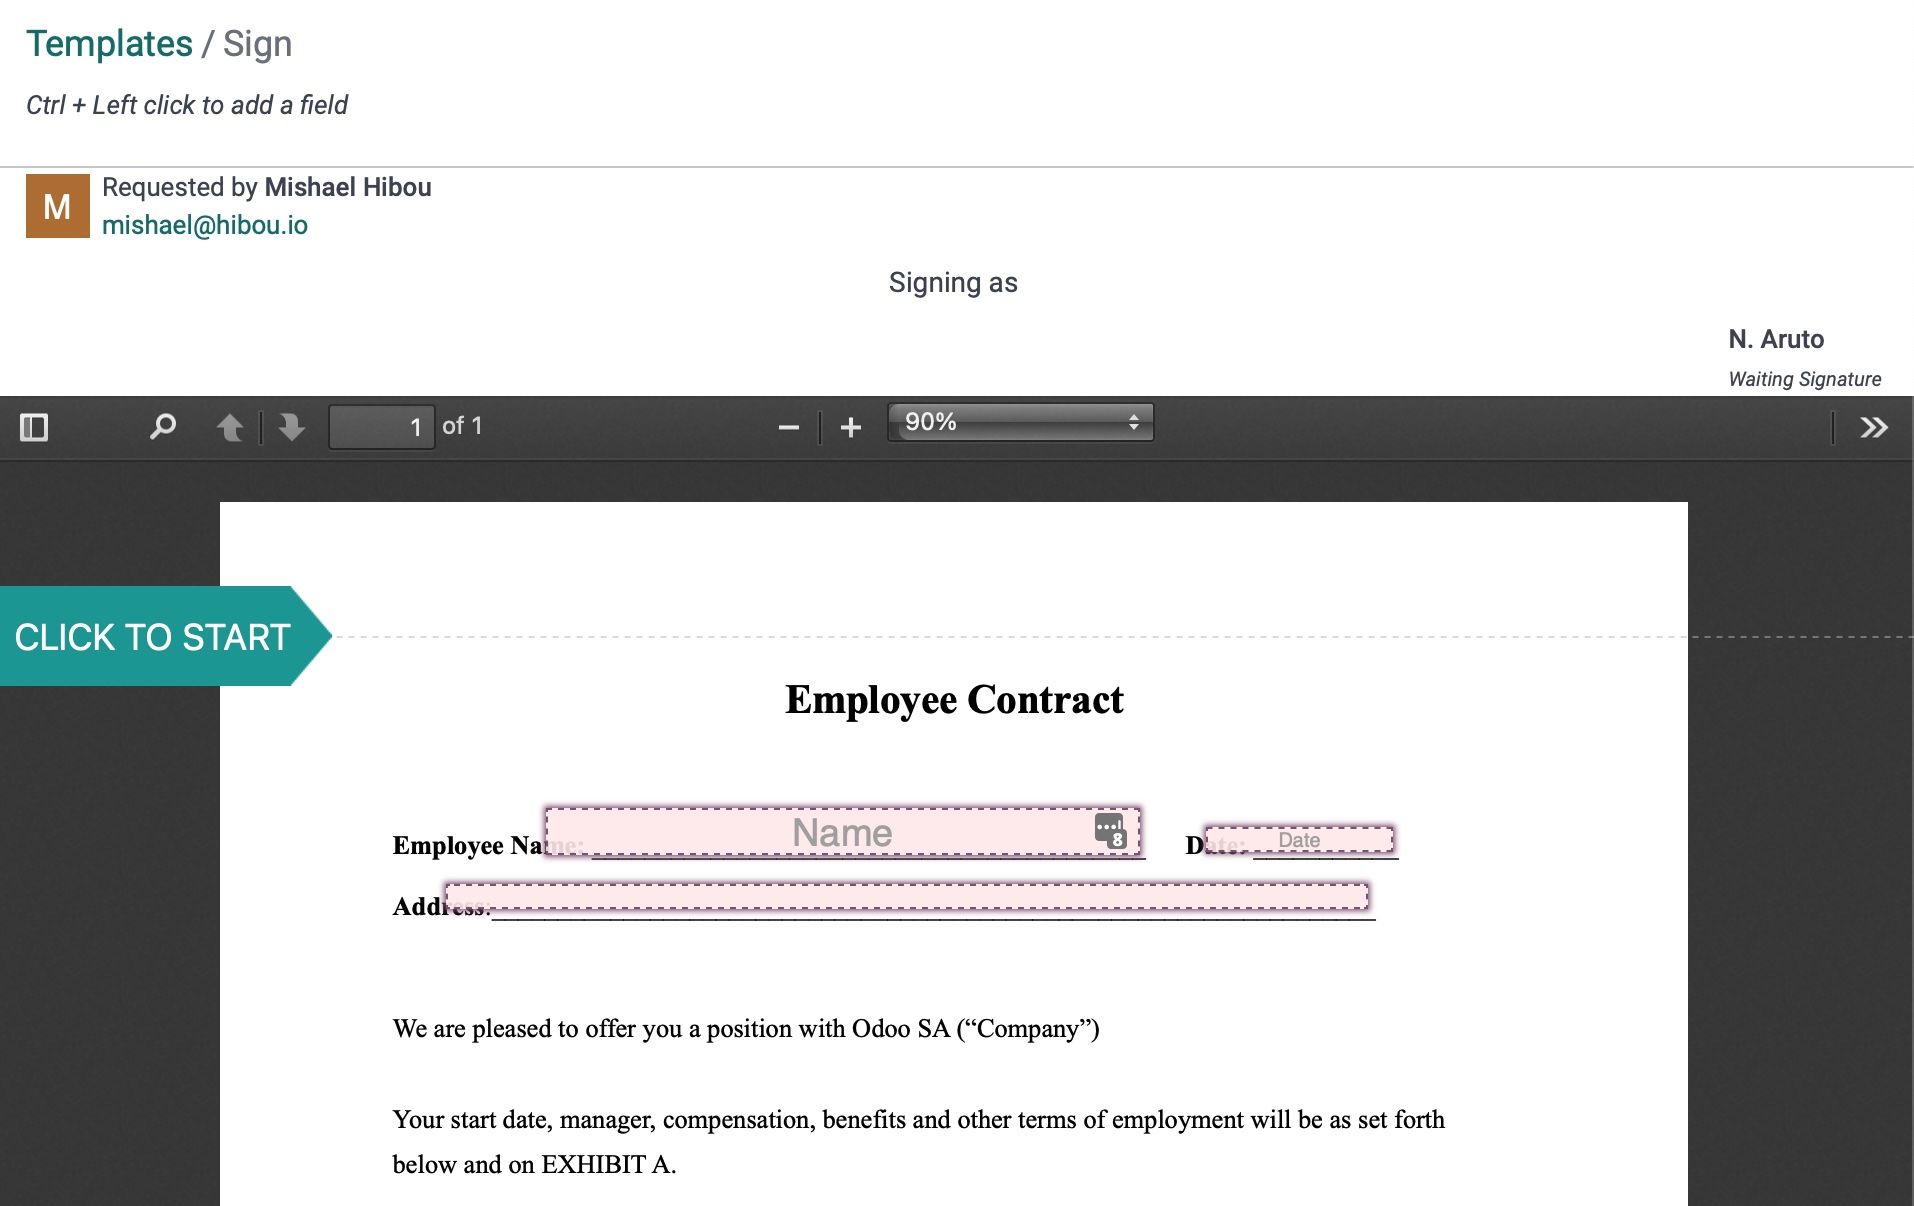
This will open up the pdf view allowing the user or contact to fill out the fields.
Share
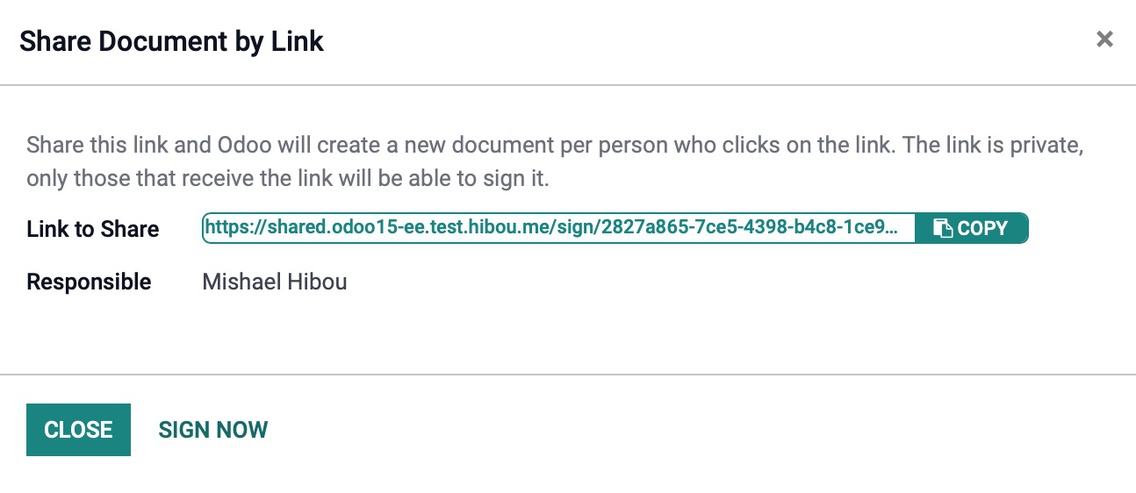
The Share option will create a shareable link that your recipient can use to view and sign the document. You will see the following information:
Link to Share: This is a shareable link generated by Odoo that will allow the recipient to view and sign the document.
Responsible: This is the user responsible for the document.
Select Copy to copy the link.
Navigating the Document
Odoo presents documents in an easily navigable way, allowing the user to quickly click to the fields they must fill in. Using the Share function, copy the link and paste it into a new browser tab to see what the document will look like to the recipient.
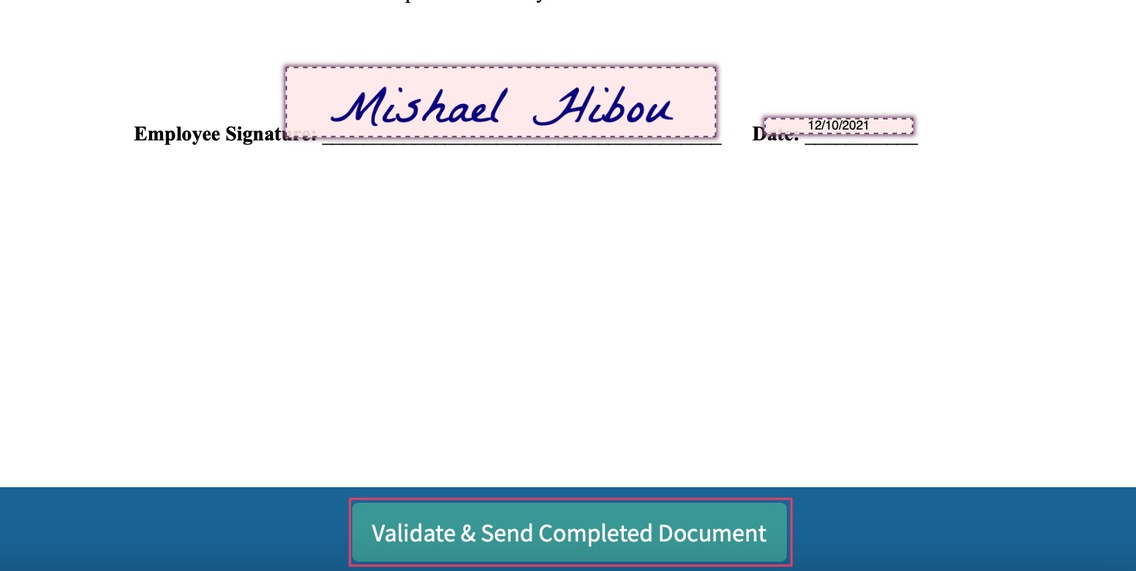
The NEXT button on the left brings the user directly to the fields that must be filled in. The user can continue to click this option until it takes them to the end of the document.
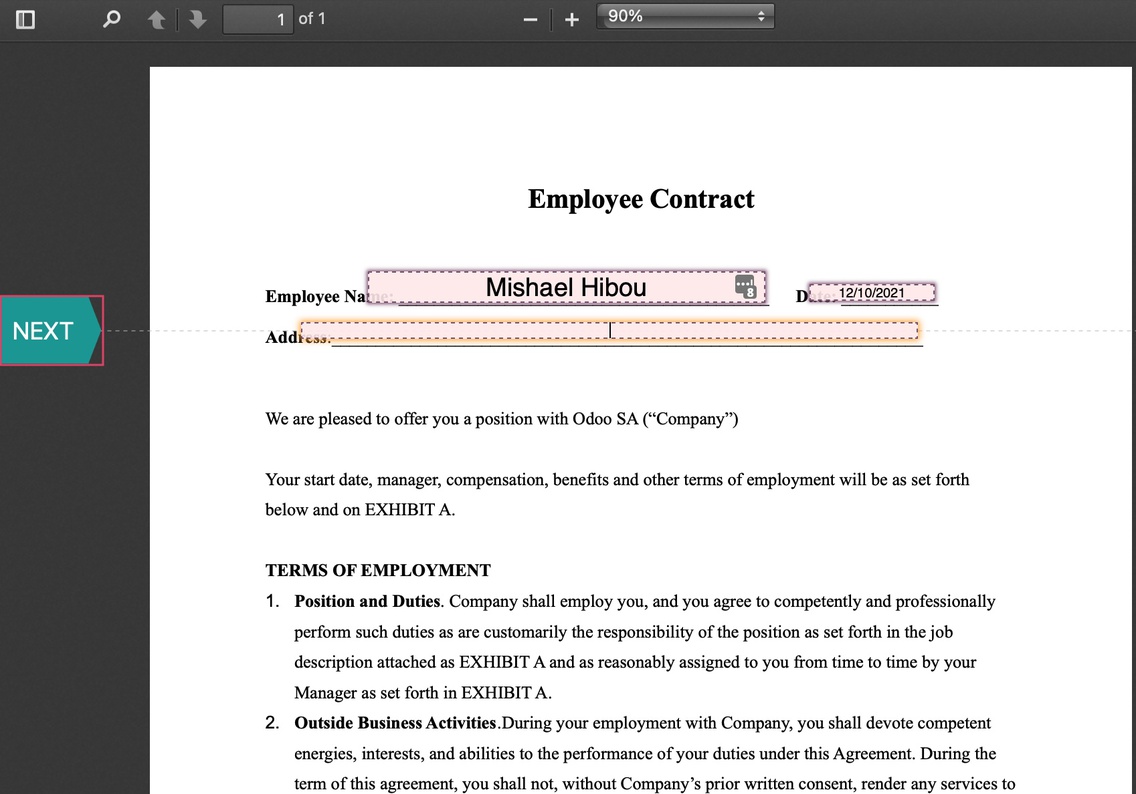
When they reach the end of the document, they will be able to click the Validate & Send Completed Document button to complete the signature process.
Documents
Let's head over to the Documents menu. This menu will show you all the documents for every template so far. By default, you will be filtered to My Documents or My Requests, so to view all documents, remove the filter by using the .
On the left hand side, you will have the ability to filter through the documents by State or by Tags.
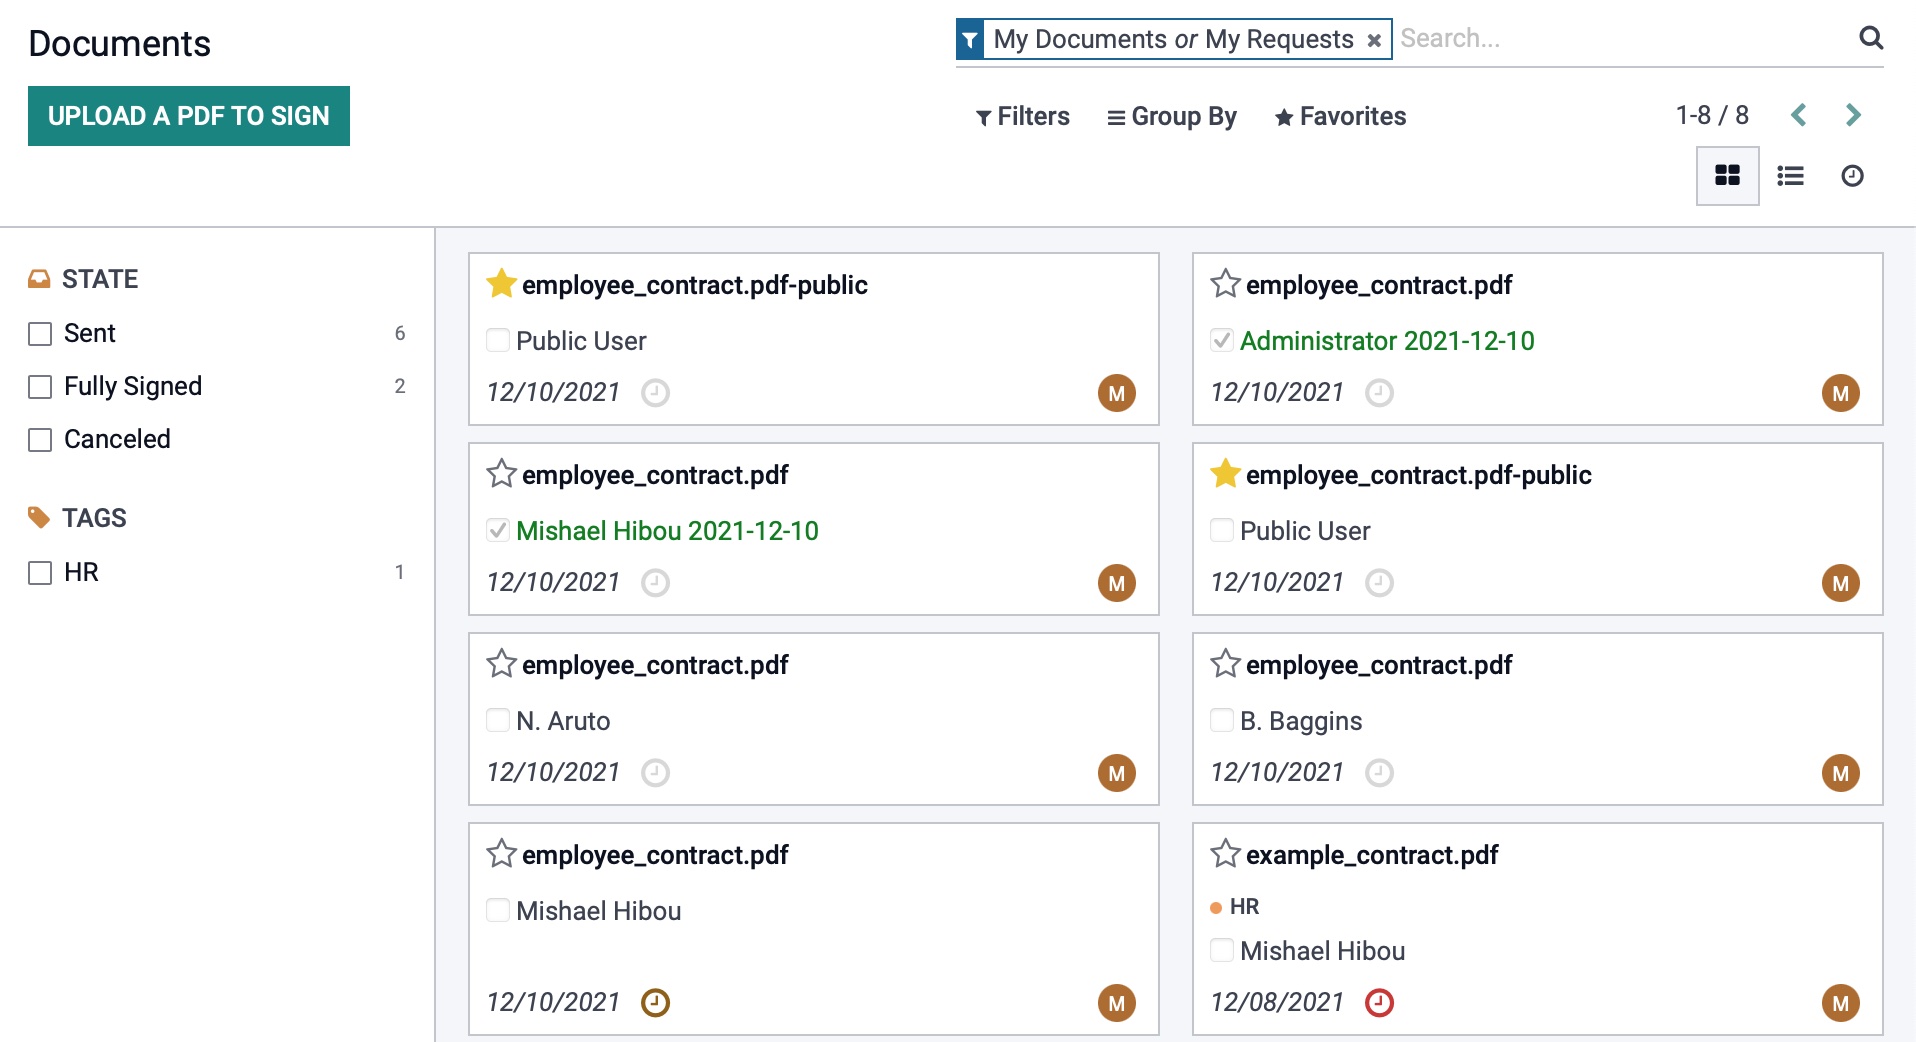
The document here will give you the ability to see the following:
/ : You can mark this as a favorite if desired. If not, unmark the document.
Signee Name / Signee Name: This indicates if the document has been fully signed or not. A blank box with a grey name means it has not been fully signed, while a checked box with a green name means that it has.
MM/DD/YYY: This represents the date the document was completely signed or was originally sent to be signed depending on its case.
: This allows you to schedule an activity for this document.
: This is the user responsible for this document template.

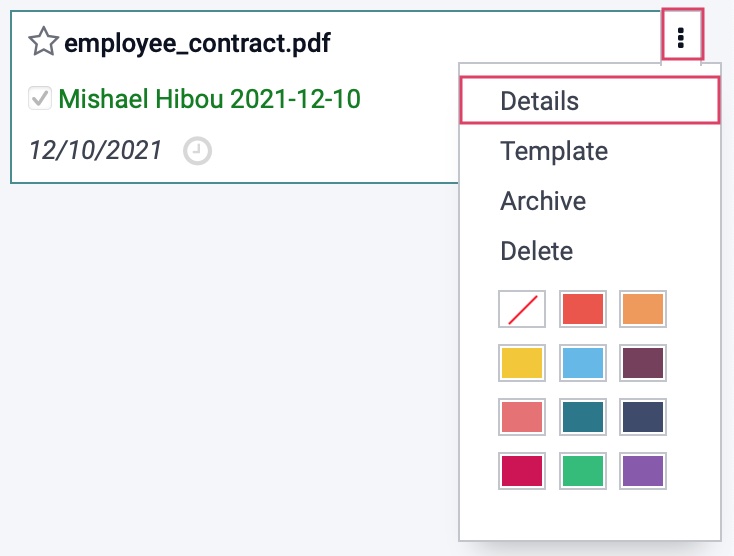
Details
Using the option > details, will take you another view where you can see full details of a specific document.
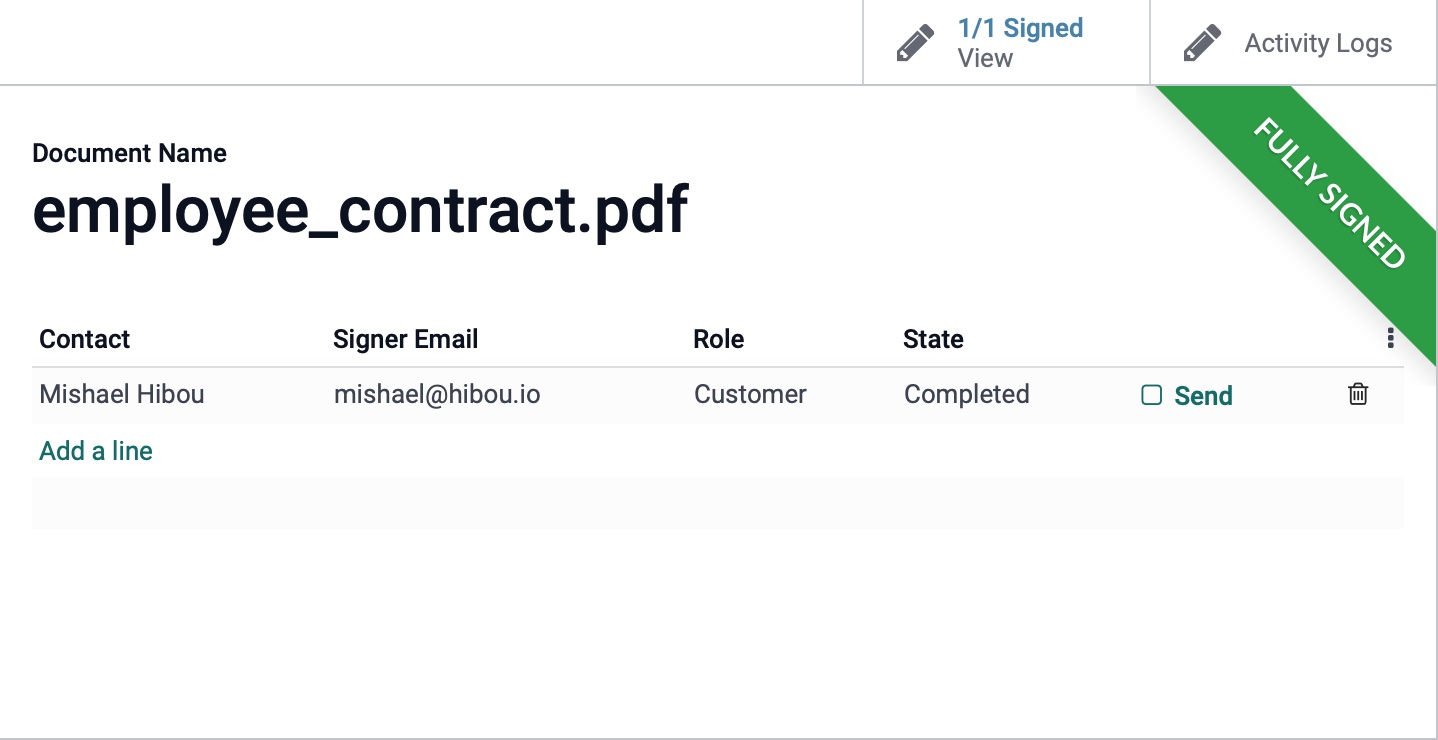
Here you will be able to preview the PDF file and well as download document onto your local computer or Print it. If needed, you can Send a copy of the file to a contact or even cancel the document. Depending on the state of your document, this view will also give you the ability to resend to document to sign.

This record will show you the status of the document as well as the following details:
Document Name: this is the name of the pdf file that was sent
Contact: This details out the contact information of the designated signee and the status of the document. You can also click Send to send out an email to the contact. This will update the button to say Resend, which will also allow to send another email to the contact if desired.
Smart Buttons
#/# Signed View: This will show you if the document was signed and allow you to preview the signed document.
Activity Logs: This will show you an activity log of the signee's or a backend user's interaction with the document.
Template
Using the option > Template, will take back to the main template the document was associated with
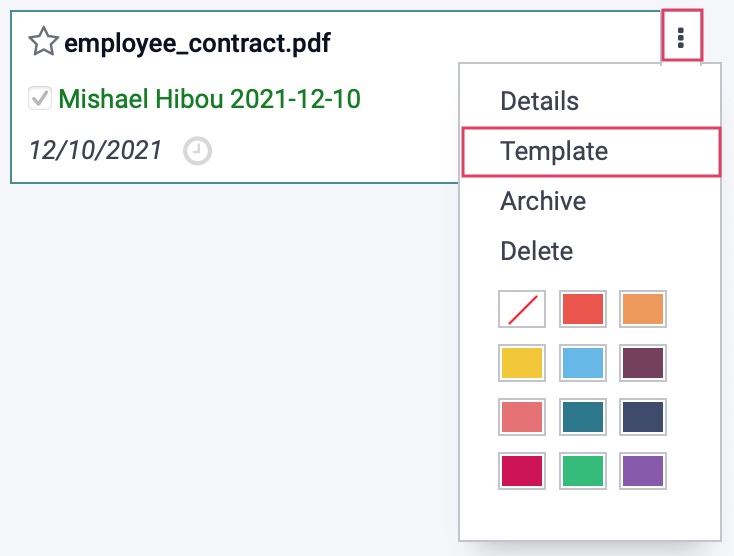
To learn more about templates, please review the above section called Templates.

Signature Request Items
You are able to see the status of signatures on any document if you enter into Debug mode, then navigate to Configuration > Signature Request Items. Here you will see a list of signature requests that have been sent out and their current state.
