Repairs: Repair Orders
Purpose
This document covers the creation of Repair Orders in the Repairs application within Odoo 16. Repair orders are used to manage the after-sales process of repairing products that have been returned by a customer, if there is the need to do so.
Process
To get started, navigate to the Repairs application.
Create a Repair Order
You will land on this overview showing all of your existing repair orders with the stage they are in displayed on the right.

Click on NEW to make a new Repair Order. Note that Repair Orders are created in Quotation form to be approved by the customer, or confirmed by your company if the repair will not need to generate an invoice.
Repair Reference: Upon saving, Odoo will generate a reference ID with the prefix "RMA" (Return Merchandise Authorization) and an ID that follows normal sequencing. Anything you choose to add to this field will be appended to the end of that generated ID.
Product to Repair: Select the product that is going to be repaired.
Product Quantity: Enter the quantity and unit of measure of the items being repaired.
Customer: Select the customer from the drop-down. You may also use this field to create a new contact if they don't have an existing account.
Delivery Invoice: This will be auto filled if the selected customer has a delivery address designated; otherwise it will use the parent contact.
Responsible: The name of the person who will be completing the repair order. This will auto-populate with your name.
Location: This is where the product to be repaired will be pulled from.
Warranty Expiration: Select the expiration date for the warranty, if applicable.
Invoice Method: This can be set to "No Invoice" if the repair is covered under warranty. If set to "Before Repair" or "After Repair", two additional fields will display allowing you to set an Invoicing Address and Pricelist for this repair.
Tags: If preferred, or required by your company, set any necessary tags on the repair.
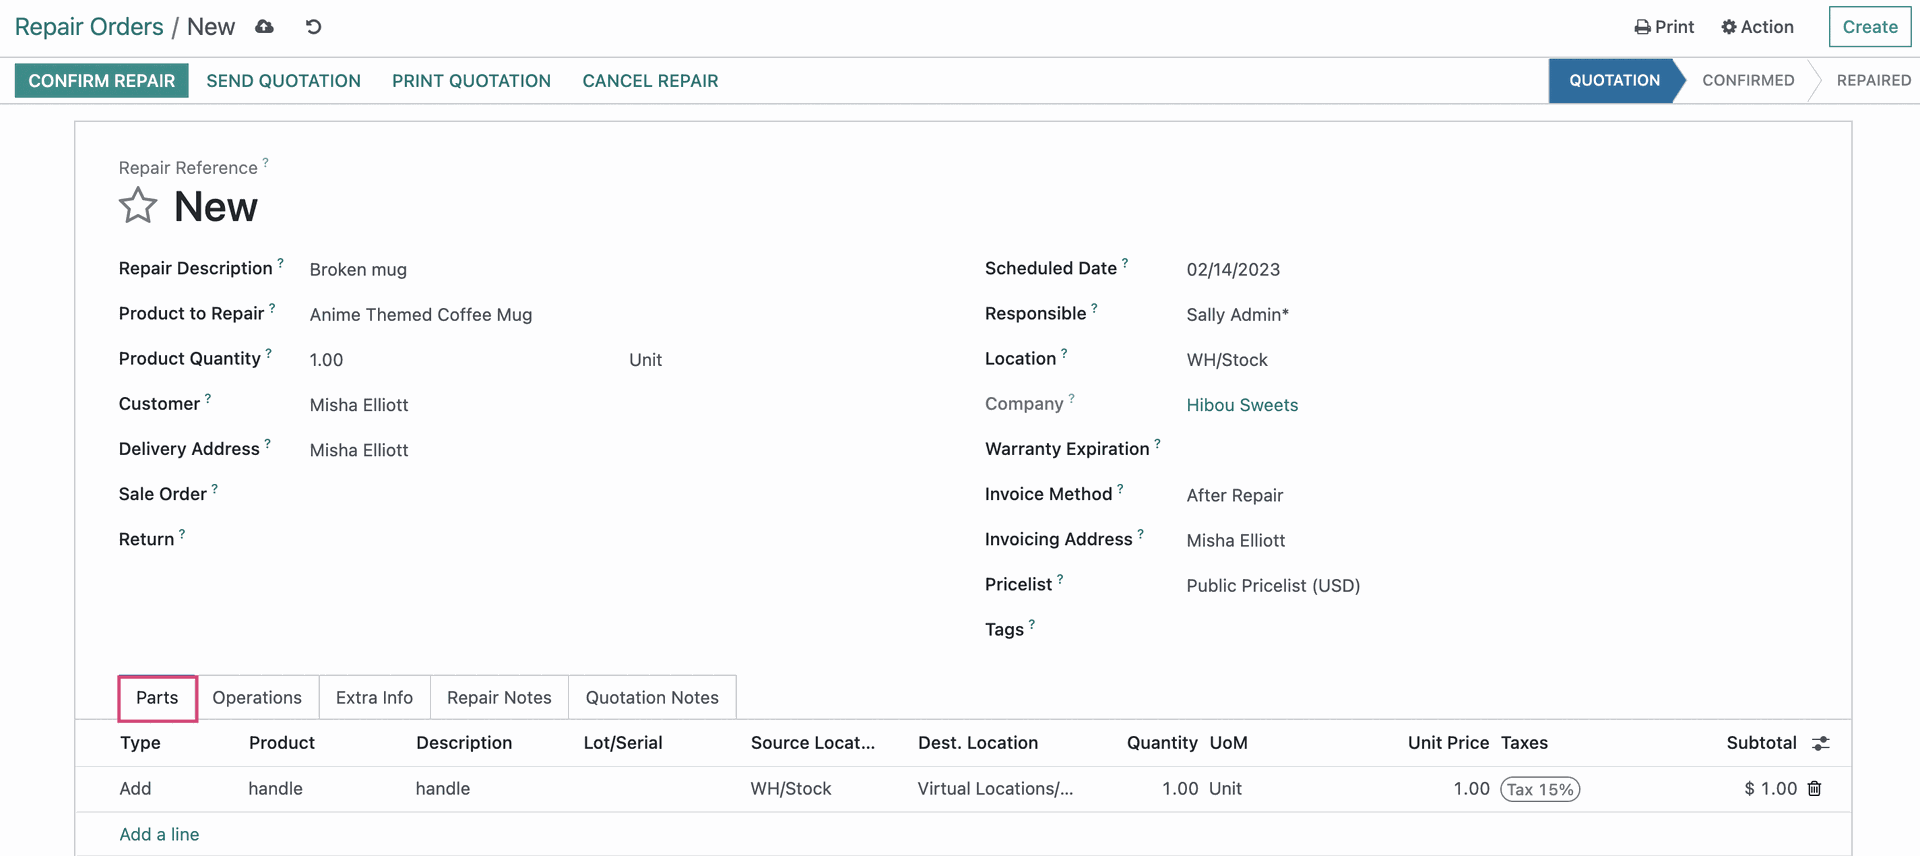
Under the Parts tab, clickADD A LINE to add any parts that will be used in the repair.
Under the OPERATIONS tab, select the shipping method that will be used to return the repaired product to the customer, if applicable.

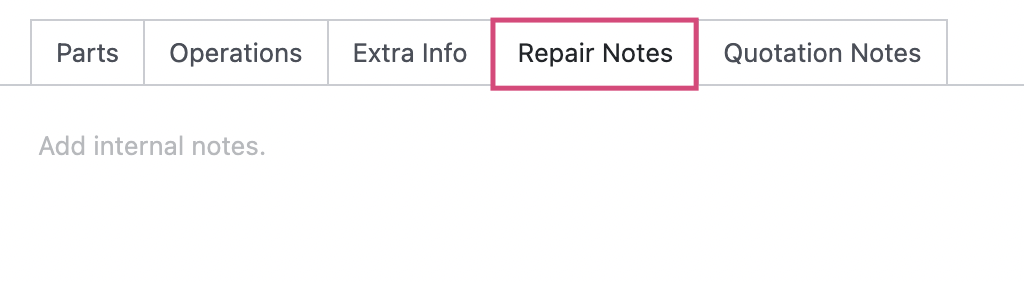
Under the REpair NOTES tab, you may enter internal notes for internal users involved in the repair such as an explanation of how the item was broken.
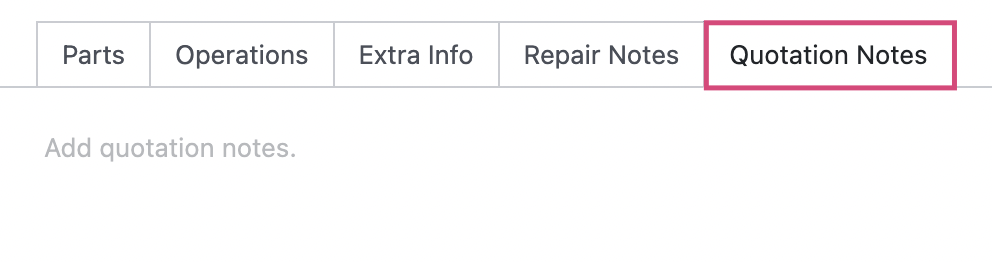
Likewise, under the Quotation Notes tab, you may enter notes that will appear on the quotation and be visible for the customer.
Send, Print, or Confirm the Quote
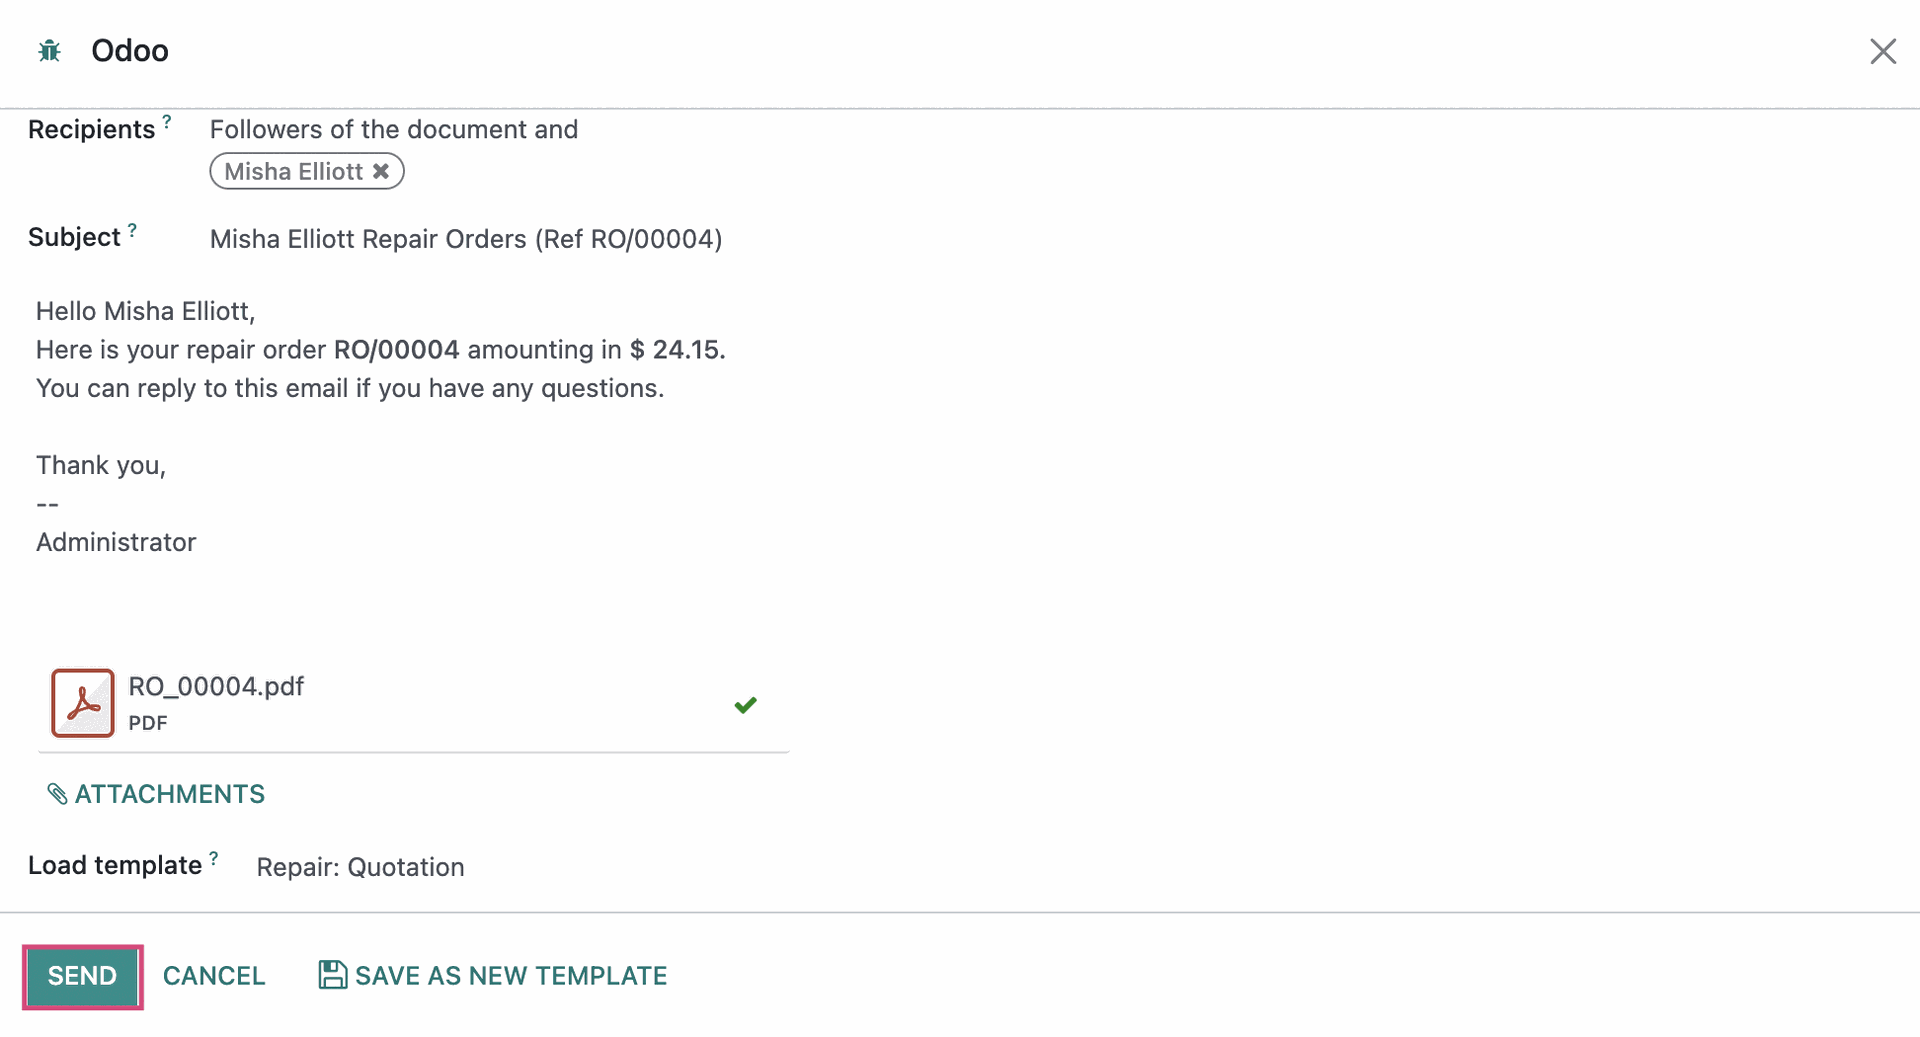
Now that we have created our repair order, you can click SEND QUOTATION to send to the customer for approval.

You can edit the body of the email here if you would like. Note that a PDF copy of the quotation is attached automatically to the bottom of the email. When ready, click SEND.
You can also click PRINT QUOTATION to download a PDF file of the quotation.

Finally, you can also click CONFIRM REPAIR if you do not need the customer to approve a quotation. A use-case for this would be if the repair is covered by a warranty and requires no invoicing or payment from the customer.

Now that you have created and confirmed a repair order, you are ready to continue with our Repair Workflow doc!
Good to Know!
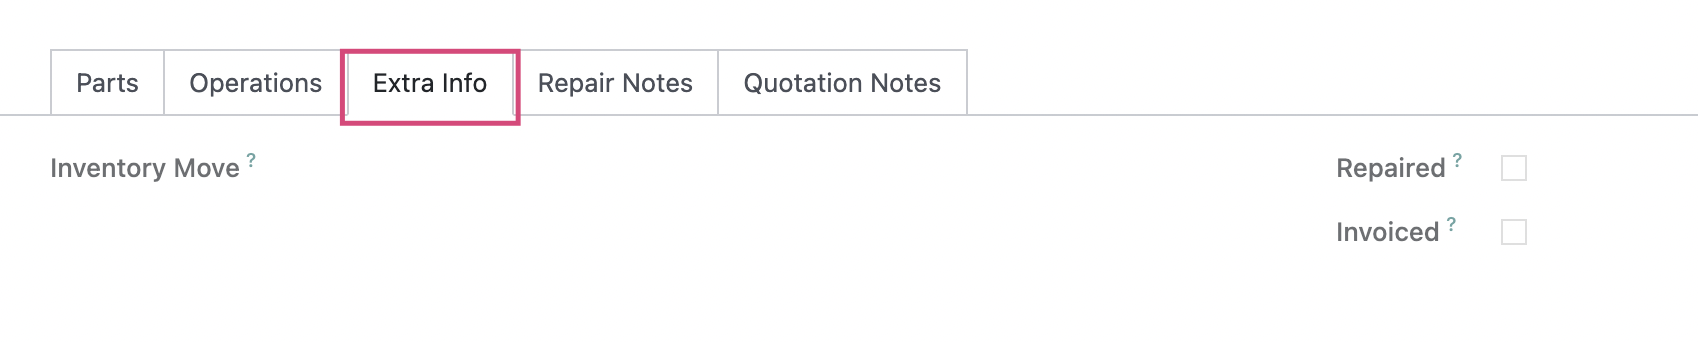
When in debug mode, an additional tab is visible called the Extra Info tab. On it, there are three areas for information to display that are not editable, but they do reflect any related stock moves on the repaired item, whether the item has been repaired, and whether or not the repair has been invoiced.