
![]() There are so many reasons for a product to be returned! It was a gift and it's not the right size, maybe there was an issue with the machinery while it was being manufactured, or maybe a piece was missed while packaging an item. Thankfully, the process of returning an item can be simple and straightforward. You just need the right software. Enter Odoo and Hibou! Configuring Hibou's RMA (Return Merchandise Authorization) module is beyond easy and filling out the RMA form is a breeze. Start by selecting your RMA application. Moving to your Configuration menu option, you'll notice that you only have two options: Templates and Tags. We'll begin with Templates!
There are so many reasons for a product to be returned! It was a gift and it's not the right size, maybe there was an issue with the machinery while it was being manufactured, or maybe a piece was missed while packaging an item. Thankfully, the process of returning an item can be simple and straightforward. You just need the right software. Enter Odoo and Hibou! Configuring Hibou's RMA (Return Merchandise Authorization) module is beyond easy and filling out the RMA form is a breeze. Start by selecting your RMA application. Moving to your Configuration menu option, you'll notice that you only have two options: Templates and Tags. We'll begin with Templates!
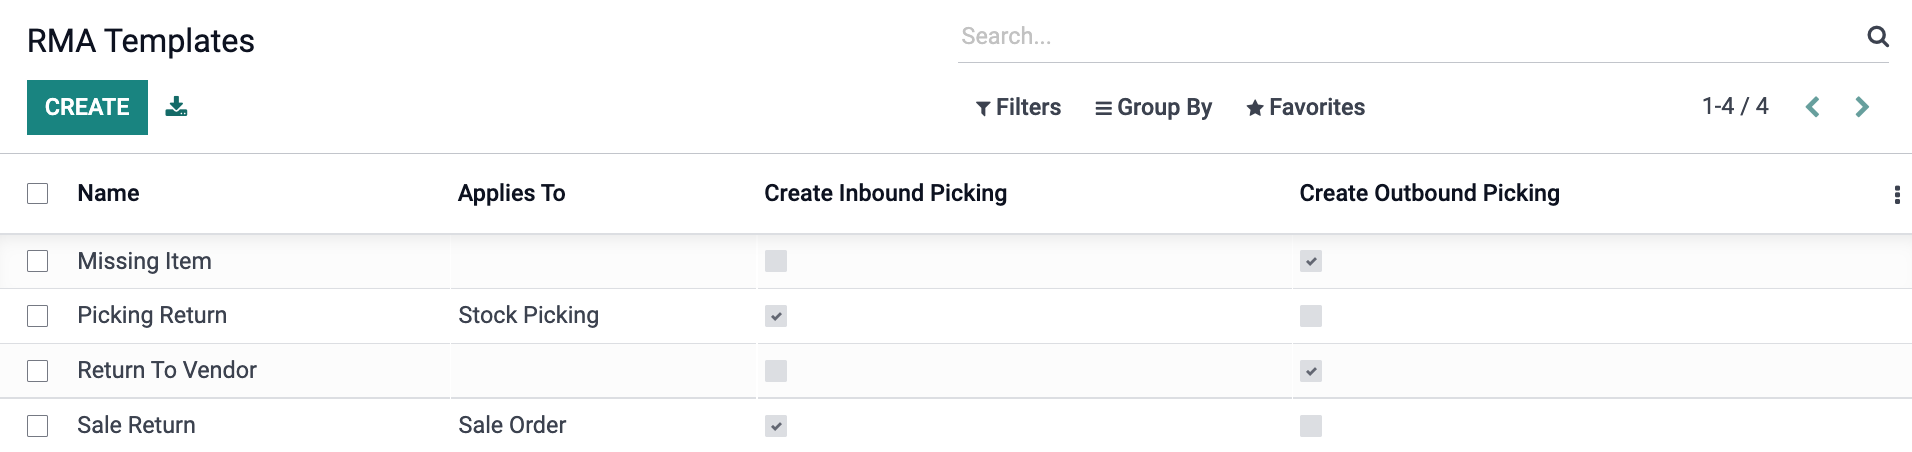
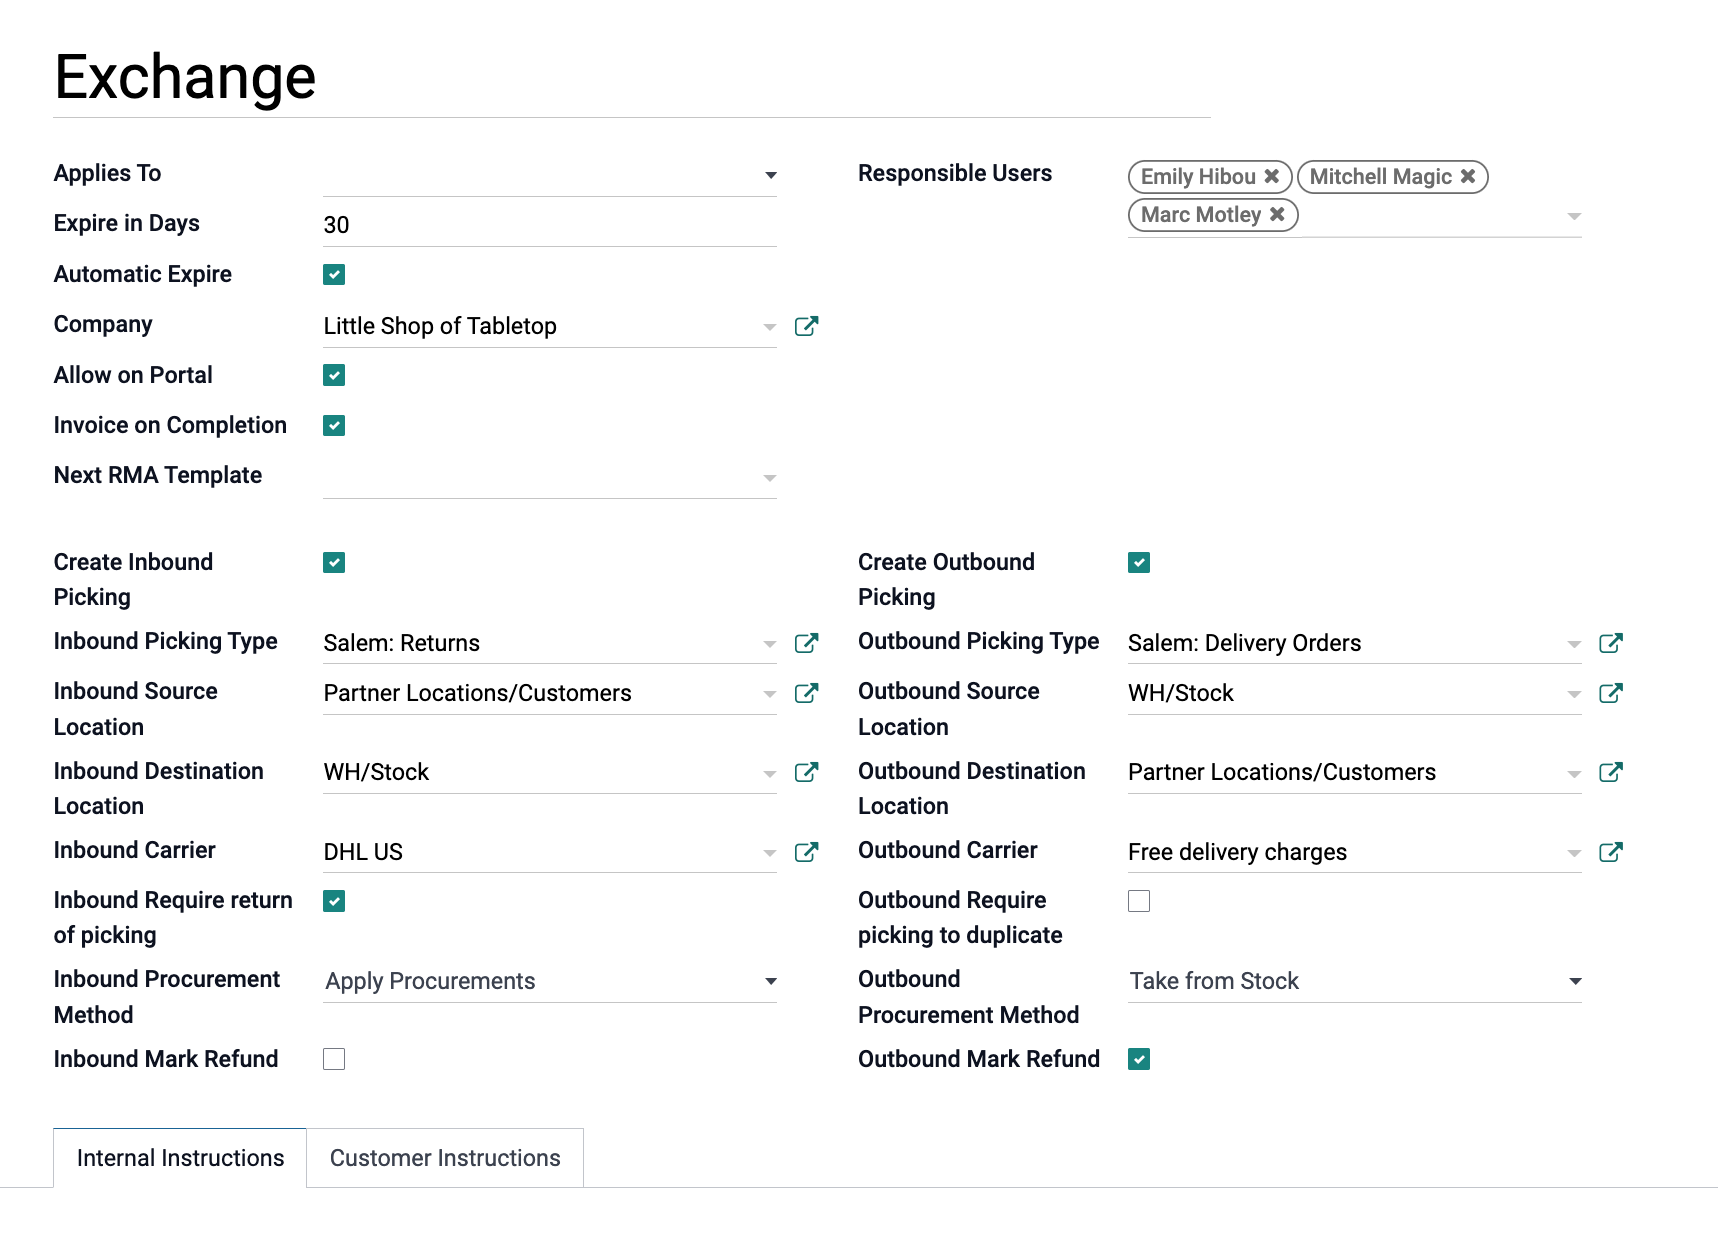 A template is used to pre-fill a return slip. The template form allows you to choose whether this type of return expires after a certain amount of time and if the customer can perform this action via the client portal. Most return types will be considered an "Inbound Picking" as you are "picking" the item not from your warehouse shelves to leave your business, but from the customer's hands to be brought back into your storage. Once the inbound option is selected you'll see new fields appear such as what location this item is to go back to. In the case of replacing a missing or damaged item, this would be listed as an "Outbound Picking" so you can send your customer any hardware that may have been left out of the original shipment or just give them a replacement. You can also select both in the case of an exchange. At the bottom of the page you'll see the Internal and Customer Instructions tabs. Here you would enter any additional information for your employees (such as damage assessment before something goes back to the shelf), and for the customers, you would be able to add notes such as packaging instructions or what their next steps in the process are.

Tags allow you to add that extra level of organization. Creating these are even more simple, it's just a word or phrase. Here you can create tags to show why the item is being returned. Was it lost in transit? Is it a defective item?
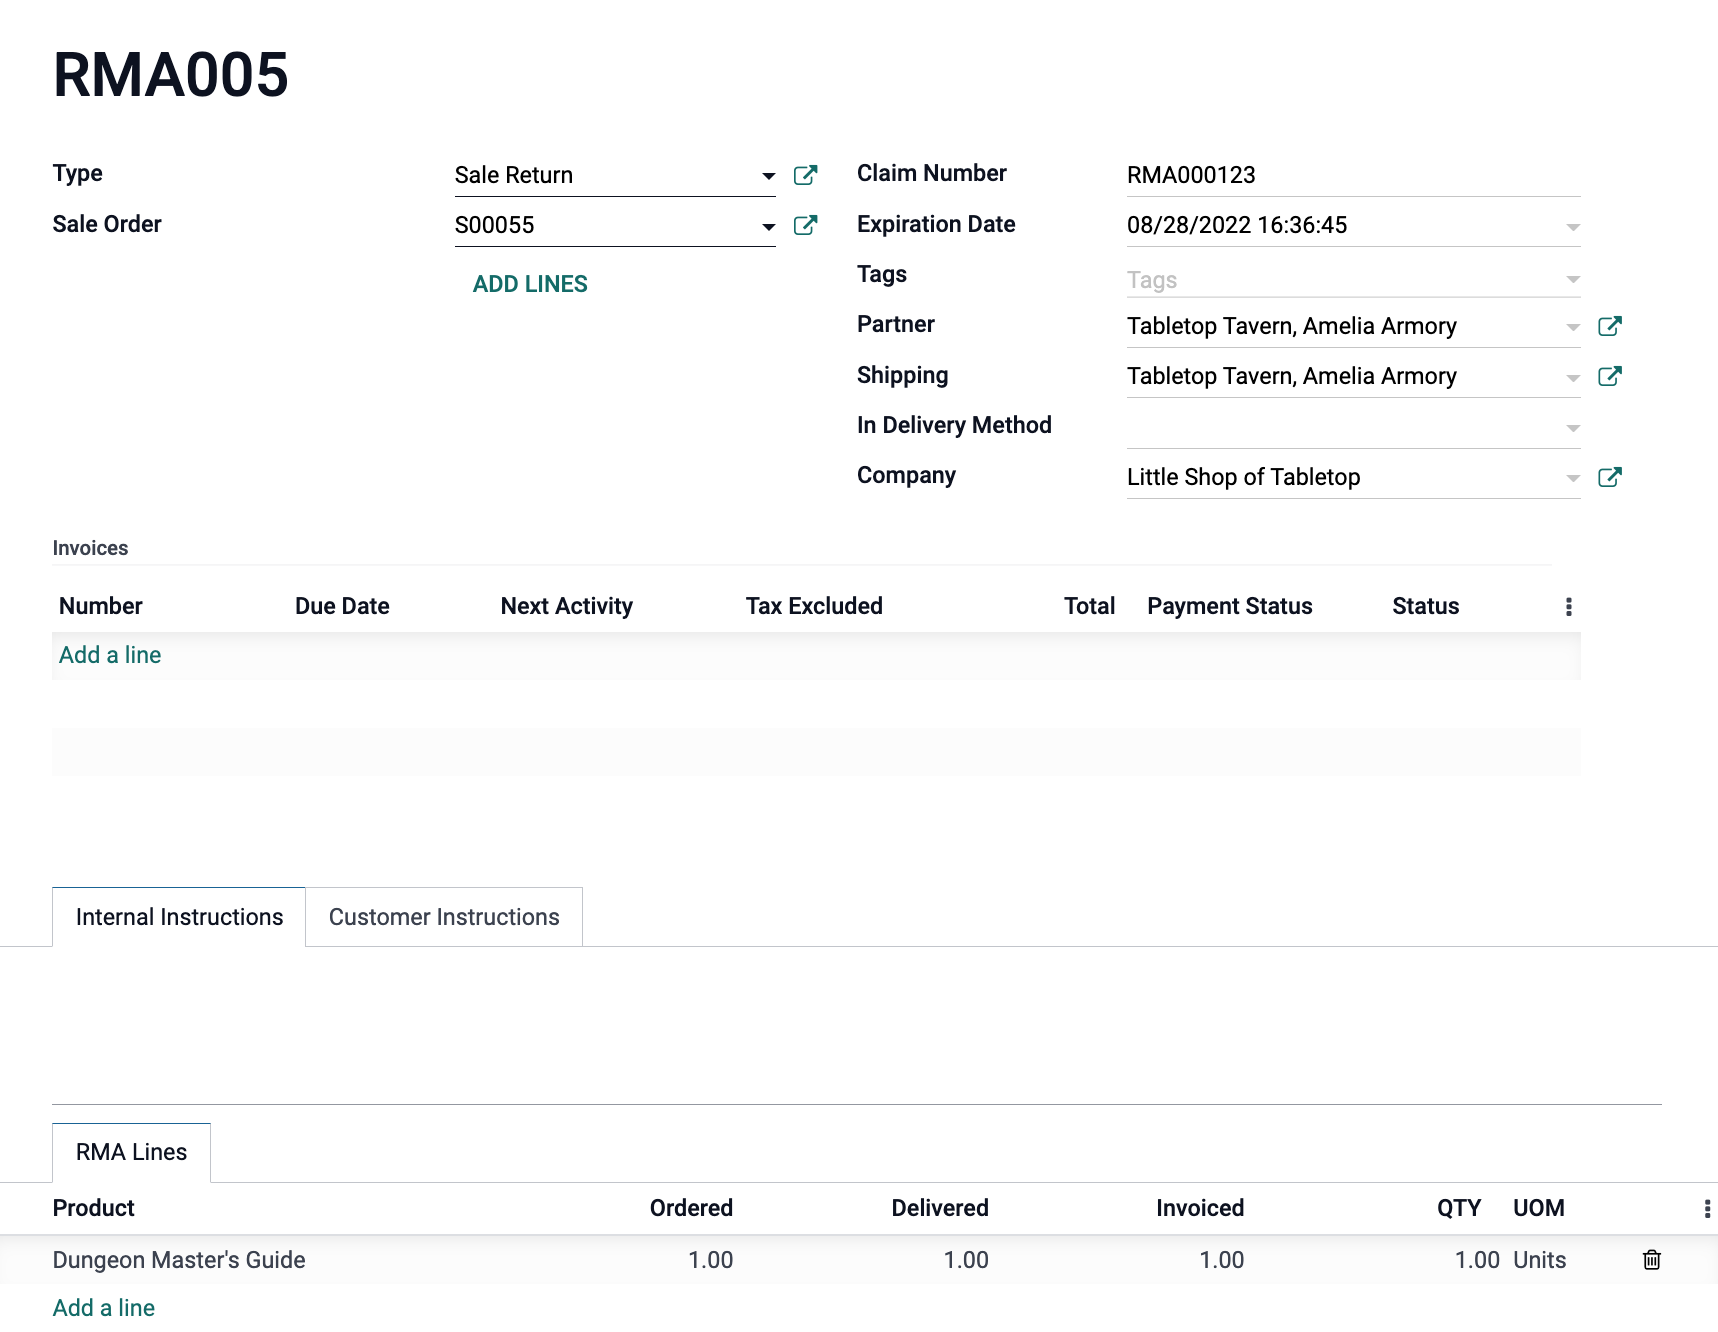 Once the Templates and Tags are set up to your liking, you will be able to start taking in returns. You'll select the type, give it a return number and whether this return will expire in a certain amount of days. Then, you'll select the sale order the return is originating from. By selecting the sale order, the customer and their information will automatically populate. Below the Sale Order number, an option to "Add Lines" will also appear. When you select that, the order is pulled up in a modal window.
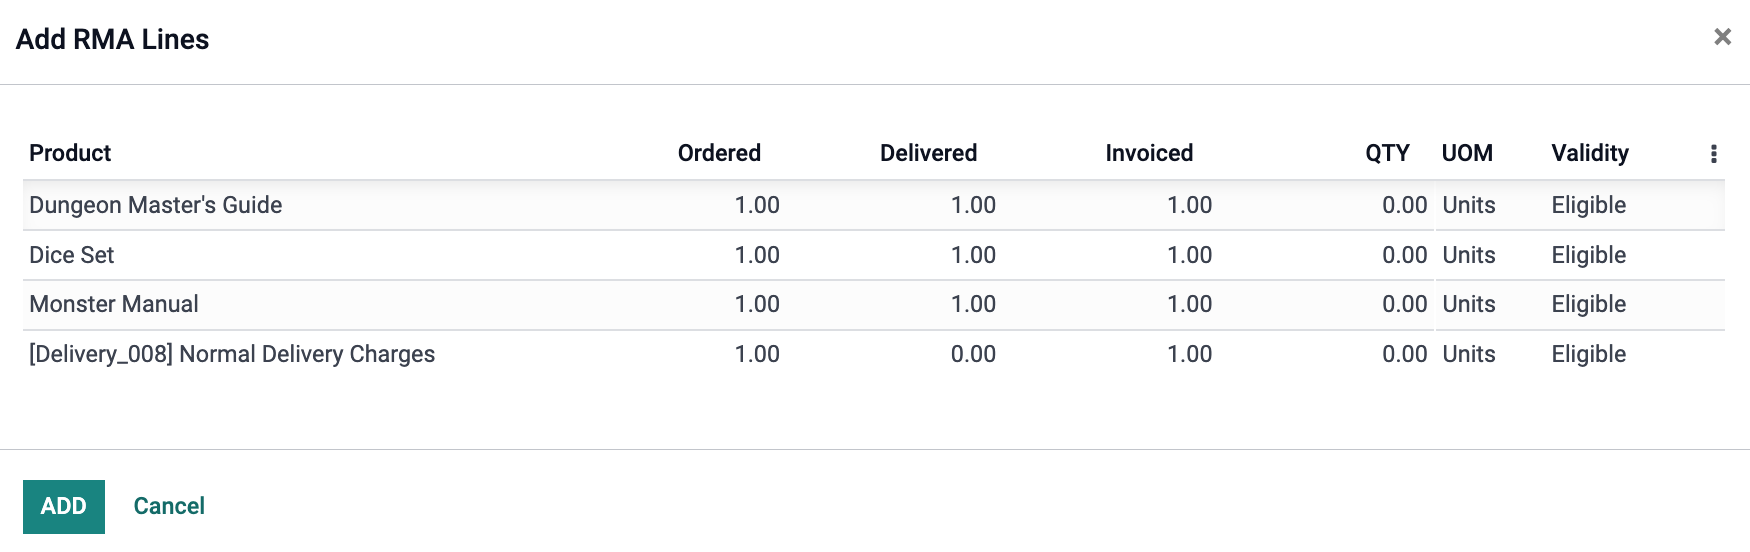
The Validity column states each products eligibility to be returned. Once you have selected the correct item, you will be able to enter in the quantity to be returned and select "Add."
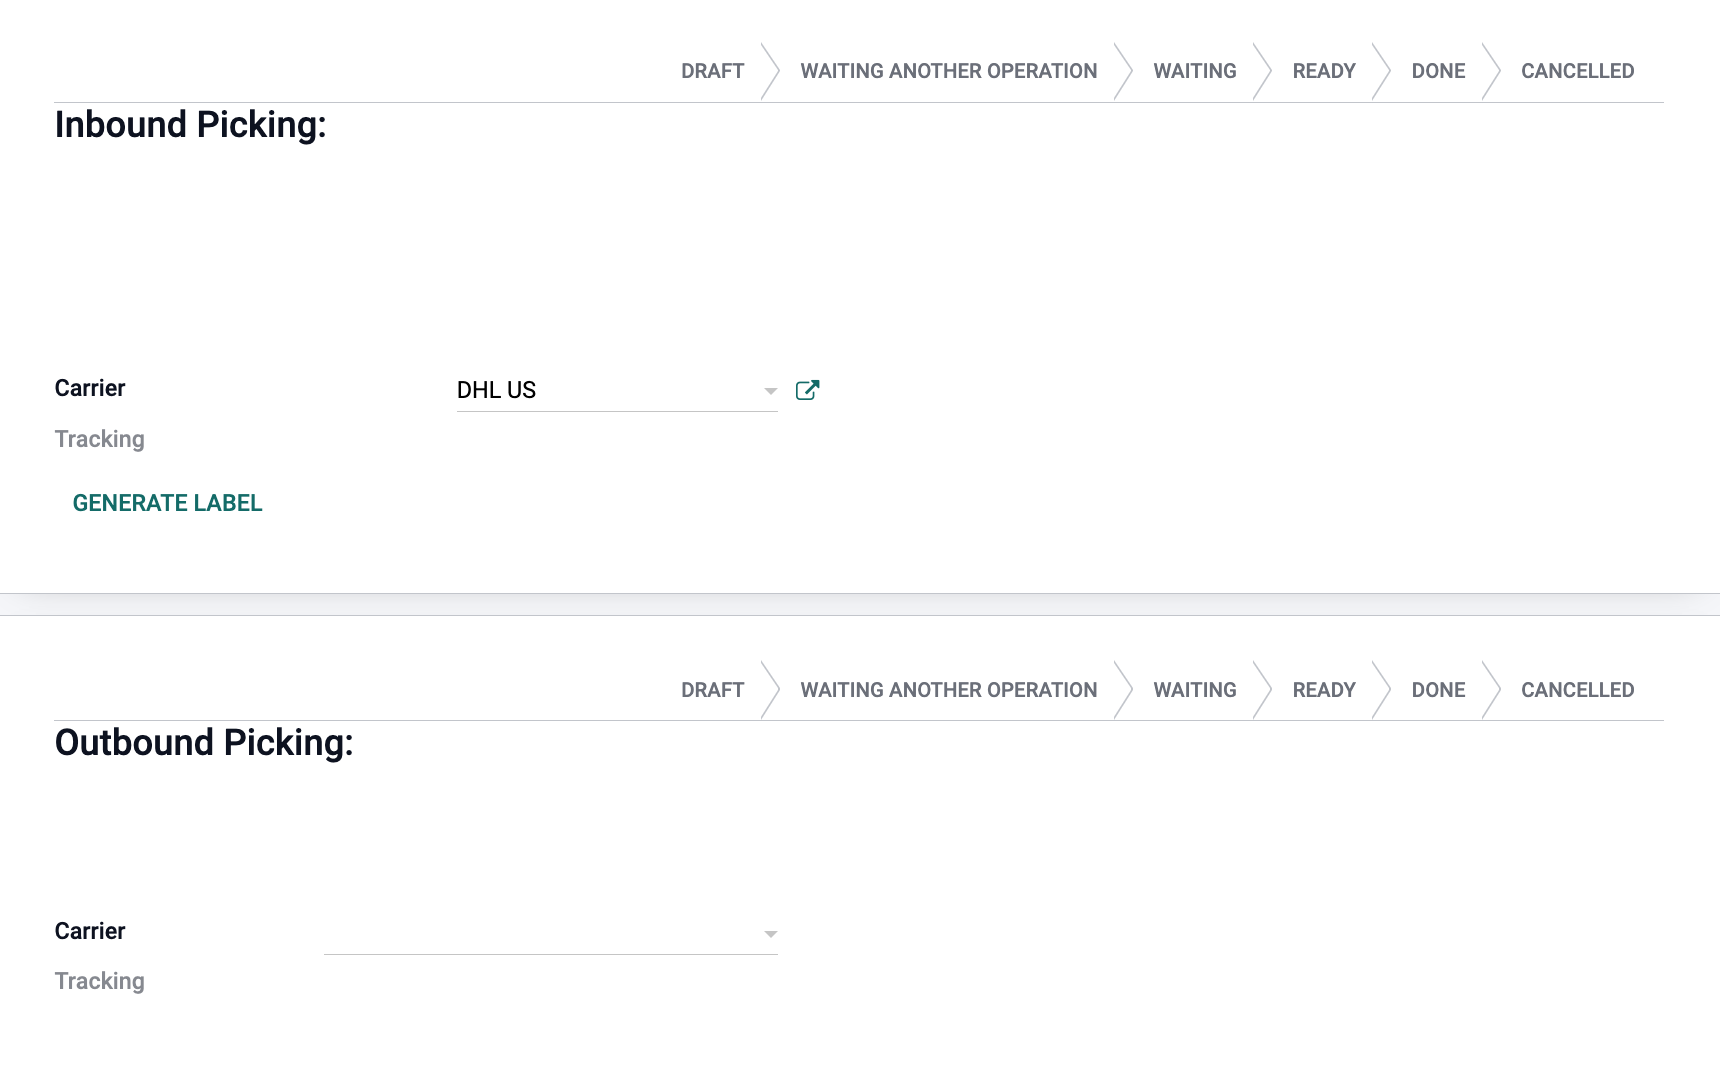 Towards the bottom of the RMA form, you'll note there are two more windows, one for inbound picking, and one for outbound. With these, if the items are being shipped you will select the appropriate carrier.
Once the form is completed, you'll be able to select save and ~tada~ the appropriate moves are scheduled, and the RMA is set to be completed! No need to jump from place to place to schedule everything individually. If you like the sound of this handy dandy module and want to get it integrated with your own Odoo database, use the Contact Us form at the bottom of the page or visit our shop page for RMA. We'd be happy to help!