Studio: Approval Groups
Purpose
This document covers how to restrict access, or usage of specific action-based elements to certain groups with Approval Groups in Studio for Odoo 14. For example, you can require that users with specific permissions approve a record before it can move to the next stage. You can require multiple users, as well.
Important
Use Studio with Caution
If you have a lot of customizations to your pages and forms, it's best practice to make those changes in code rather than via Studio. Studio modifications can cause problems when it comes to upgrading your Odoo instance to a newer version, or implementing future dev. Additionally, changes made in Studio and data added through Studio fields, can be easily overwritten by other users. For assistance in adding changes to code, please contact us!
Process
To see how this works, navigate to the Sales app with Studio enabled.

Once there, click into the form view.

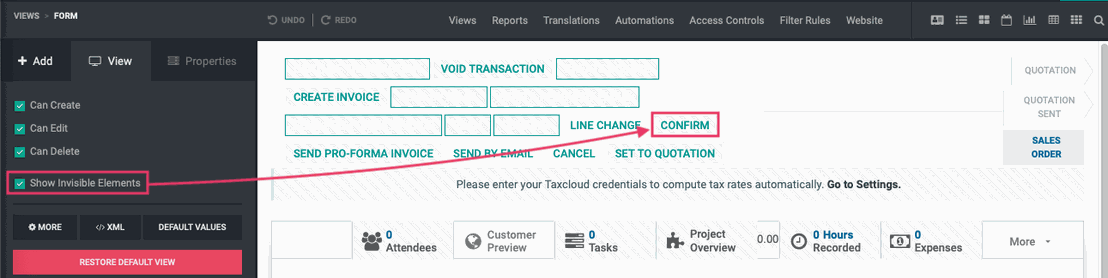
Look for the Confirm button. If you don't see it, go to the View tab and enable Show Invisible Elements. After a few moments, you'll see all action buttons on the page. The buttons that aren't generally available in this view will have a patterned background.Next, click the CONFIRM button.
The Properties tab should open on the left-hand pane. Within that tab, click Set Approval Rules.
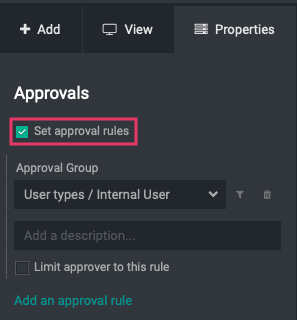
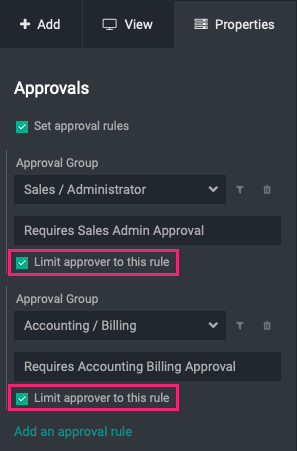
After a few moments, you'll see an Approval Groups drop-down menu. From the drop-down, select the permission set required for the first approver. Since this is a Sale Order, we'll select 'Sales / Administrator'. To add another approver, click Add an approval rule.

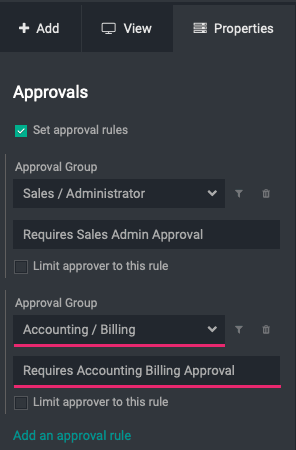
This adds another drop-down where you'll select the permission set for the second approver. You can add as many approval rules as needed.
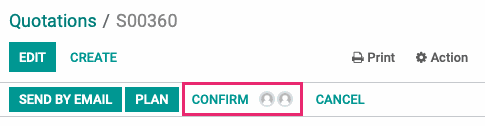
You can easily see how many approvers are required for an action on the record by the user-profile icons displayed.
Good to Know!
Can Approvers be the Same Person?
Yes, approvers can be the same person if they have both permission sets; however, you can require approvers to be different users by selecting Limit approver to this rule under each Approval Group setting.
Filtering Records
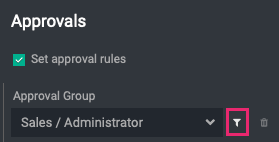
The filter icon can be used to apply the approval rule to records of a specific type.
When clicked, a modal window will display where you then set your criteria. If, for example, we don't want to require approval for any Sales Orders with 'Mitchell Admin' as the Salesperson, we could set the filter as follows:
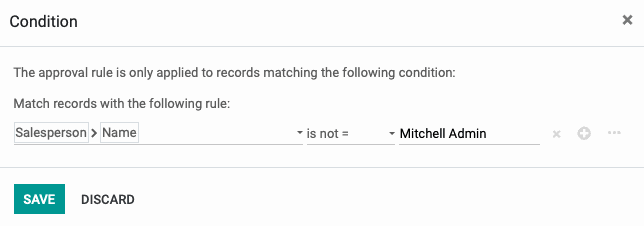
We'll then click Save to keep this filter. Now, if this permission group tries to confirm a Sales Order where Mitchell Admin is NOT the salesperson, they'll see an error on the top-right and will not be able to do so.
