Marketing: Marketing Automation
Purpose
The purpose of this documentation is to go over how to create campaigns using Odoo’s Marketing Automation application.
Campaigns are a way to target specific records within your Odoo database (like client contacts, sale orders, purchase orders, product templates, projects, tasks, etc.) and trigger automatic actions to happen to them like sending emails, transferring stock, updating product templates, etc.
For the purposes of this document we will focus on sending emails automatically, but this application can be used for more tasks beyond that.
For help with automating other aspects of your operation, please contact the Hibou Support team for assistance.
Process
To get started, navigate to the Marketing Automation app.
Creating Campaigns
Once there, select CREATE to start building a new campaign. You will be prompted to enter in the following information.
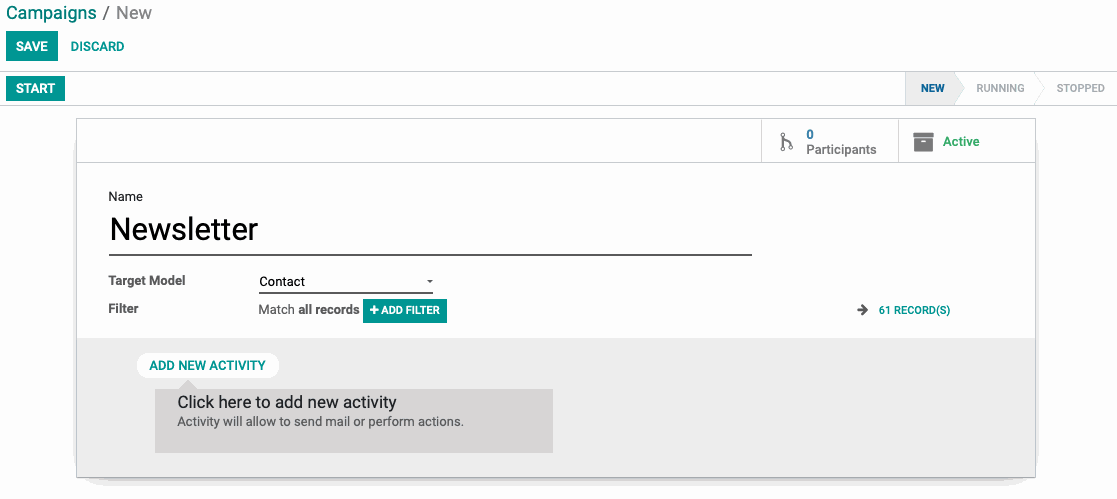
Name: Input the name of the campaign.
Target Model: This is the type of record that you want to trigger an action for. In our example, we want to send an email out to the contacts that are associated with a specific mailing list that we have already loaded into our Email Marketing application.
For details on how to create Mailing Lists, please read our Email Marketing documentation.
Filter: These are the filtering rules that you will need to input so that Odoo knows the sub-set of the Target Model you selected (in our example “Mass Mailing Contact”) that you want to send an email to or modify in some way.
You can see our Email Marketing Documentation for an overview on how to apply these filtering rules and check the Record(s) that you are targeted based on your rules.
Add New Activity: This is what you will select to tell Odoo what you would like to do with the specified target models that you have filtered out.
Once you select the Add New Activity button, you will see a modal pop-up and you will be prompted to input the following details:
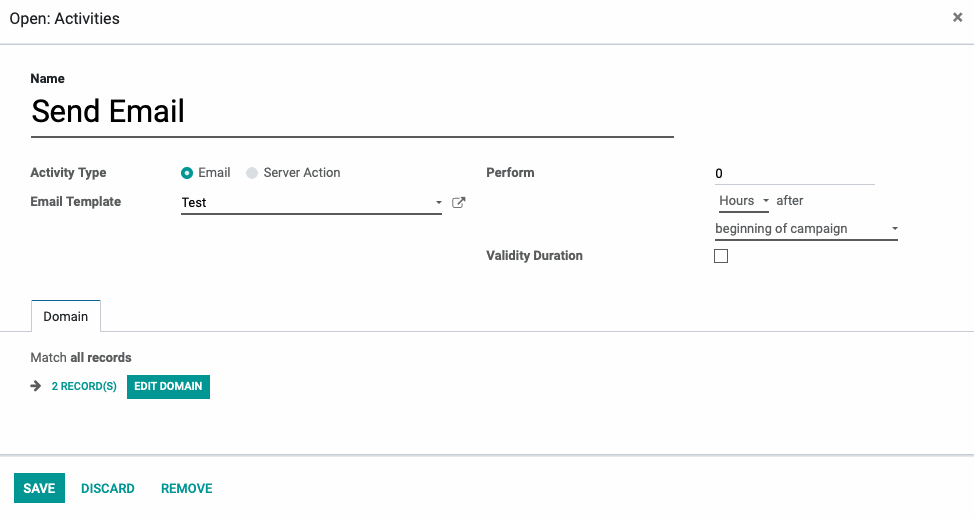
Name: Name the Action that you want to take.
Activity Type: This is what will be triggered with this activity.
Email: This tells Odoo that you want to send out an email as your desired action.
Server Action: This tells Odoo that you want to perform a server action to modify the targeted records. We will not be covering how to utilize this feature in this documentation.
Perform: This is where you will specify when you want Odoo to perform this action.
Validity Duration: If this is selected, you can choose how many hours, days, months, or years, you would like this activity to be valid for. If you leave this unselected, this action will not expire and will continuously run.
Under the Domain tab, you will see the records and rules that you specified that will be impacted by this activity.
Once your information is entered, click the Save button.
Reviewing Your Workflow
Once you have your Activities inputted, you can see your workflow mapped out on the page.
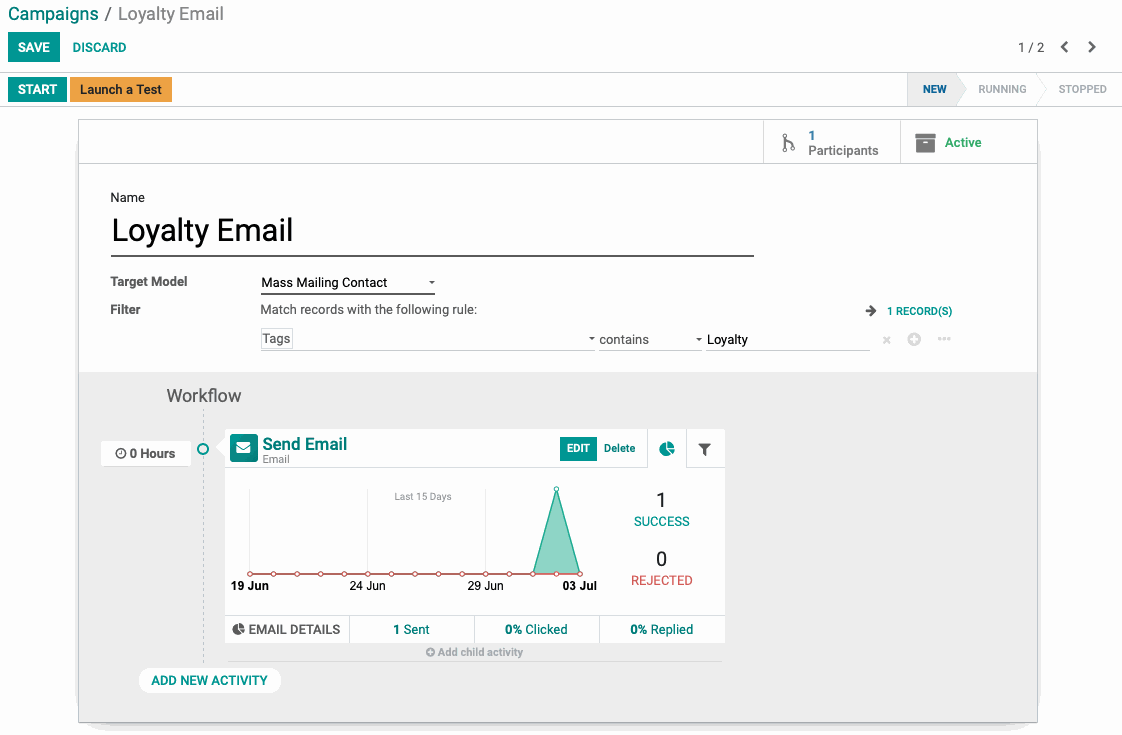
Each new Activity that you add to the workflow by using the Add New Activity button will create a separate activity that will be triggered in a sequence, like sending out a series of emails at pre-scheduled intervals. Regardless of any action a user takes, they will all receive these messages.
To create an activity based on whether or not the email we scheduled in the first activity was opened, a link was clicked, or it bounced back, we can create a new child activity by selecting the Add child activity button underneath the activity we just made. This child activity can be customized based on a variety of outcomes that are specific to the kind of action your first activity was programmed for.
For example, if we wanted to automatically unsubscribe users from our list whose emails bounced back, we could do that using the child actions and creating a server action that would accomplish that.
Once all of your activities are programmed in, you can choose to launch a test which will allow you to trigger the activities in the sequence and ensure that they behave as you would like them to.
Once you’re ready to actually activate the campaign, you can click the Start button and that will trigger the live campaign to begin.
As your recipients and activities start completing, you will see your activities statistics appear on the workflow overview. You can also see the number of Participants using the Participants smart button on the top right of the campaign.