Employees: Employees Workflows: Creating + Conducting Employee Appraisals
Purpose
The purpose of this documentation is to outline the use and processes associated with creating, completing, and sending employee appraisal forms in the Odoo 13 Appraisal application. You can request appraisals of an employee from their manager, subordinates, and colleagues.
Process
To get started, navigate to the Appraisal application.

Configure Appraisal Settings
Once there, go to Configuration > Settings. You will see the following features:
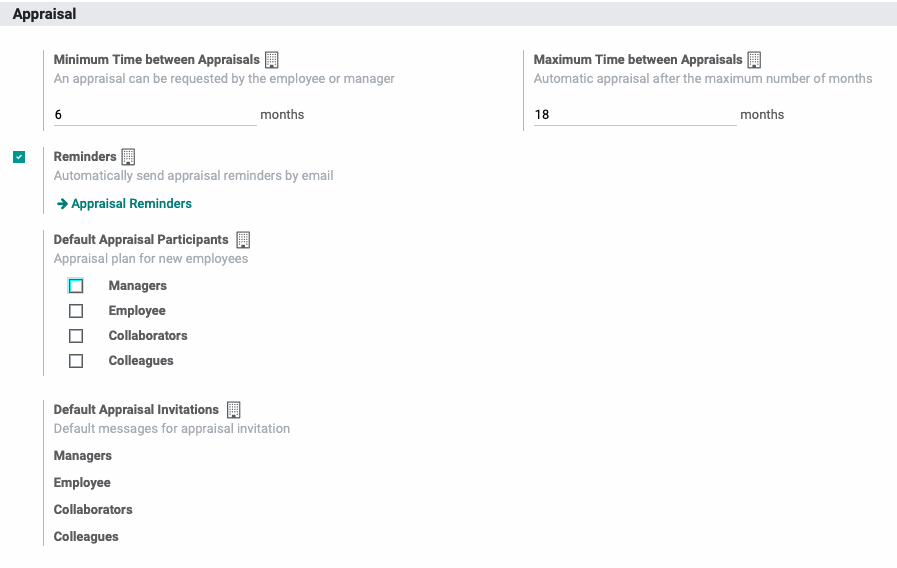
Minimum and Maximum Time between Appraisals: You can set the shortest and longest periods of time between appraisals. When you reach the maximum amount of time, an appraisal is generated automatically.
Reminders: Check the Reminders box if you wish for the manager or employee to receive an email reminder to conduct an appraisal. We'll talk about reminders in the next section.
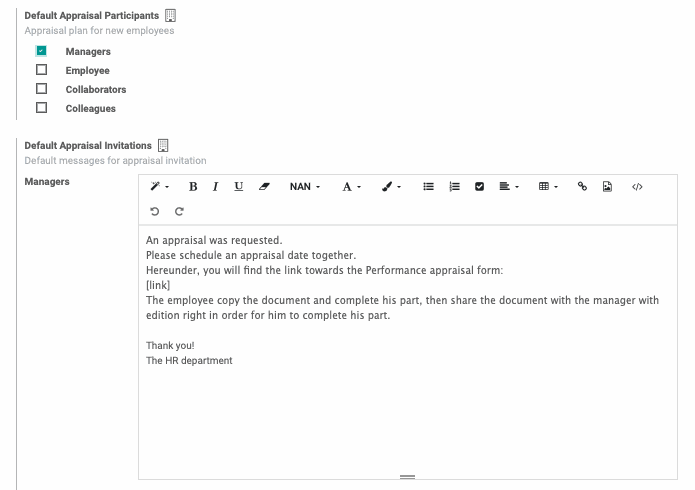
Default Appraisal Participants: Here, you can select the participants to whom you will wish to send appraisal requests. When you select a participant, a Default Appraisal Invitation will appear below. You can modify this message. Odoo creates a field for every participant, so you can send a different message to each.
When ready, click save.
Reminders
From within Configuration > Settings, you can configure the Appraisal Reminders. Click APPRAISAL REMINDERS to open a new window. There, click CREATE to create a new Appraisal Reminder and complete the following fields.
Notify: Select either manager or employee.
When: Input a number of months and then, from the drop-down field, select either "after the last appraisal" or "after the arrival date."
Subject: Write a subject for the email.
Body: Enter a message for the employee or manager.
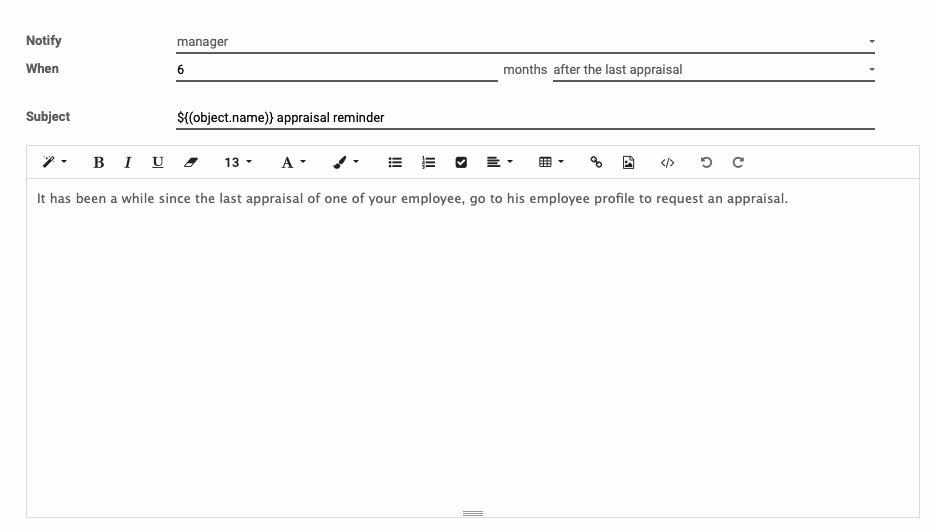
Once done, click SAVE.
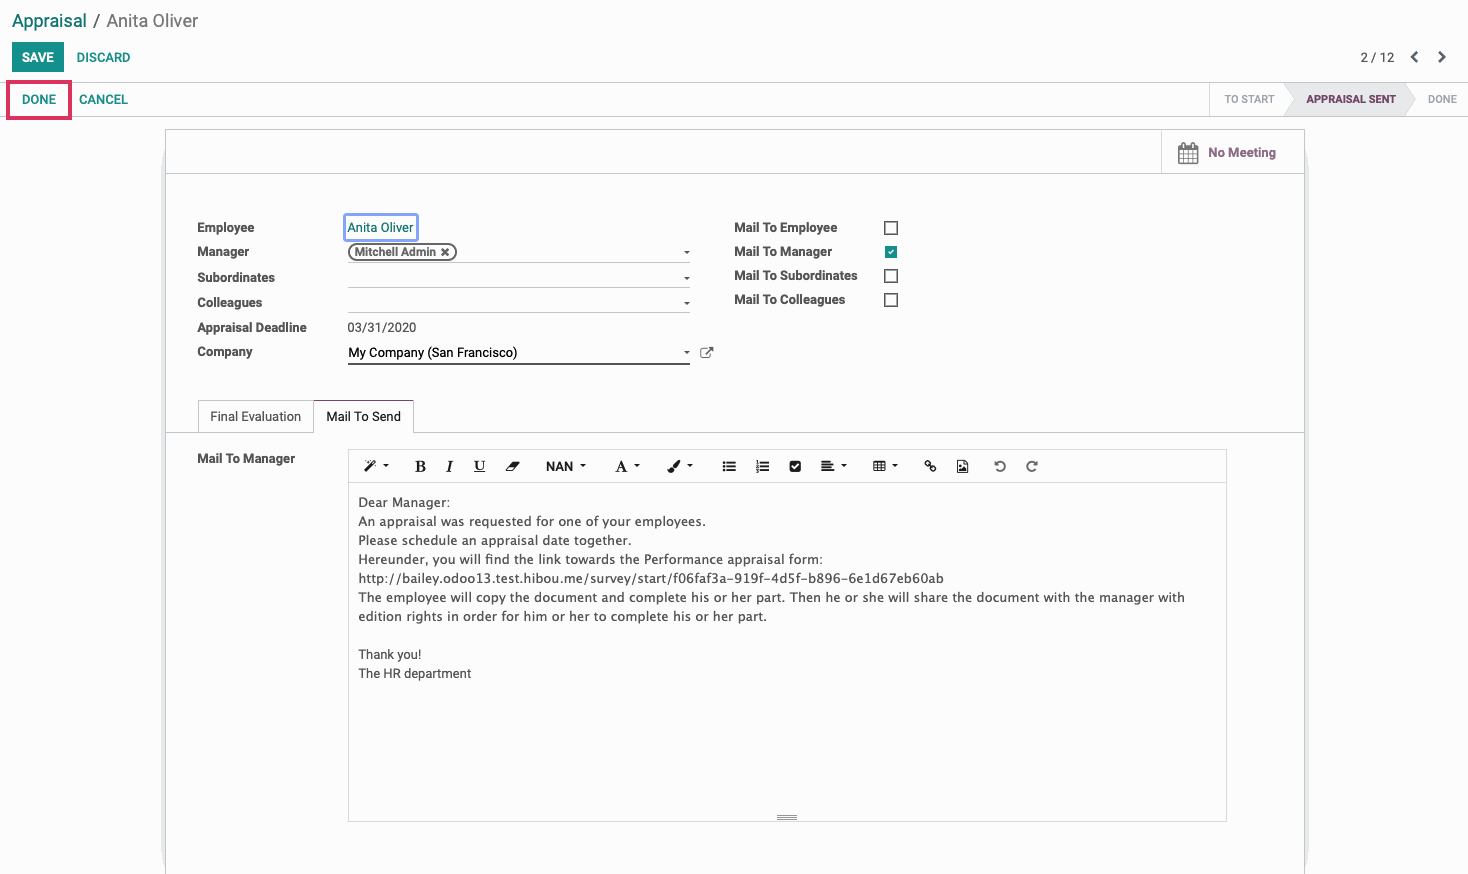
Employee: Select the employee you wish to have appraised.
Manager: Enter the employee's manager if you would like the manager to make an appraisal. If the manager is already noted on the Employee page, this field will auto-fill.
Subordinates: Enter the employee's subordinates if you would like the subordinates to make an appraisal.
Colleagues: Enter the employee's colleagues if you would like the colleagues to make an appraisal.
Appraisal Deadline: Select the date by which the appraisal must be completed.
Mail to Employee/Manager/Subordinates/Colleagues: Check these boxes if you plan to mail the appraisal form to any of these individuals. You must have a name entered in the Manager, Subordinates, or Colleagues field in order for Odoo to send them the email.
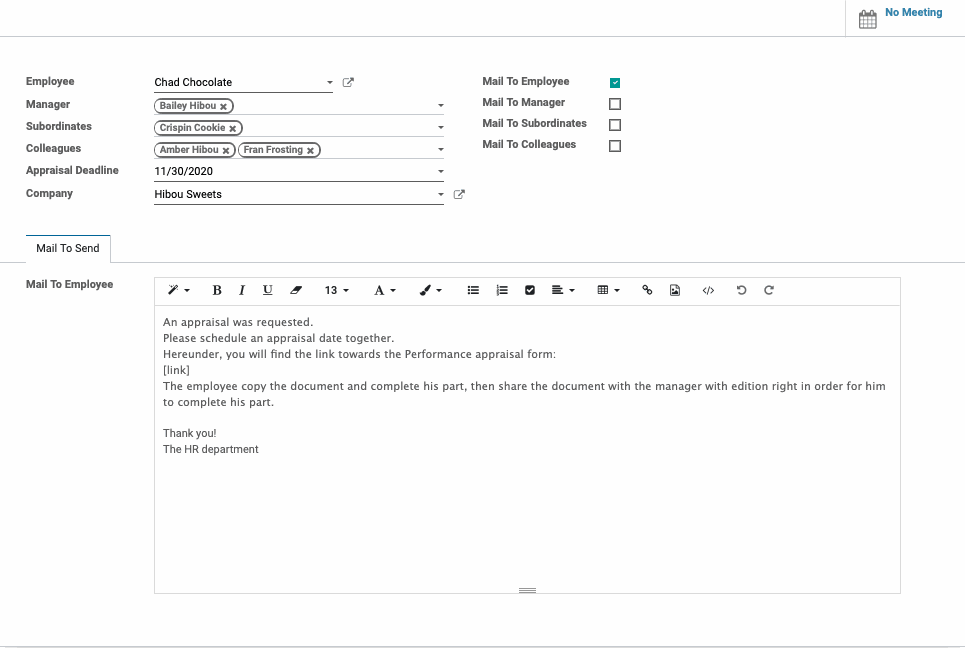
As you check these boxes, notice that editable fields appear below, with the default invitations you configured in CONFIGURATION > Settings. You can further modify these fields here.
If you do not check any of the Mail To boxes, the boxes for all populated fields, except for Employee, will automatically be selected when you SAVE.
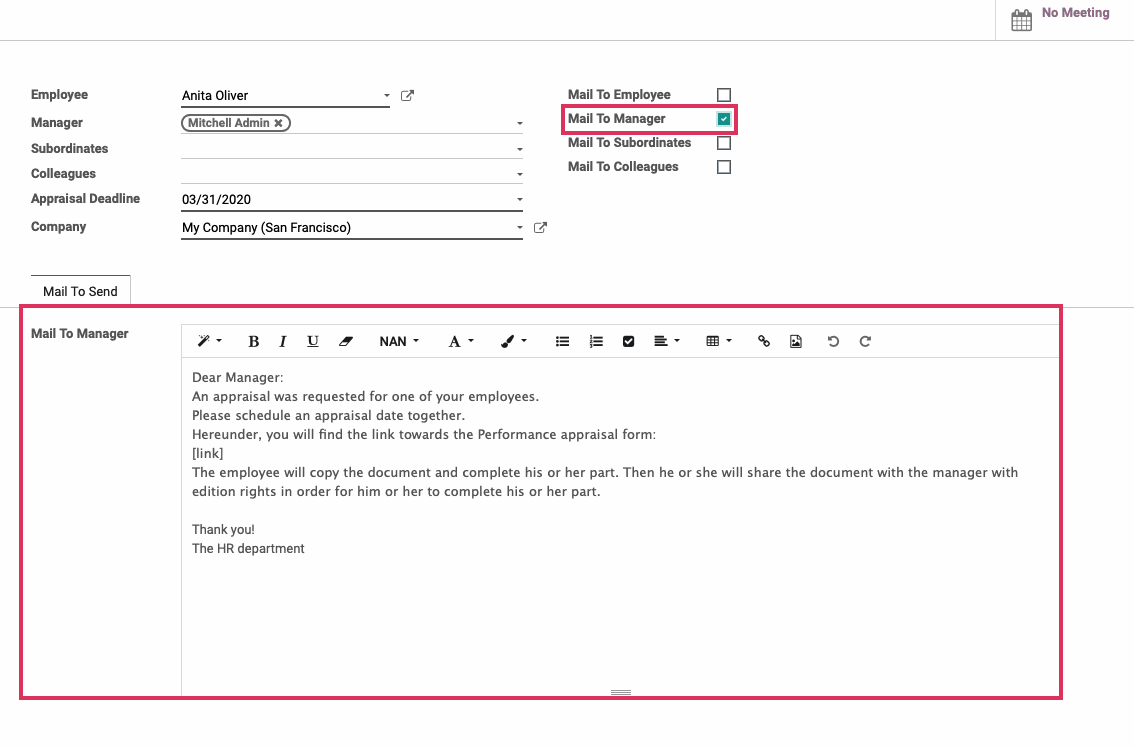
Once you have completed the above portion of the form, click save. You have set up the appraisal request and now must create the Survey for your participants to fill out.
To create a Survey, please follow our Survey documentation. Once you have created the Survey, return to this documentation and resume here to finish the Appraisal process.
Important!
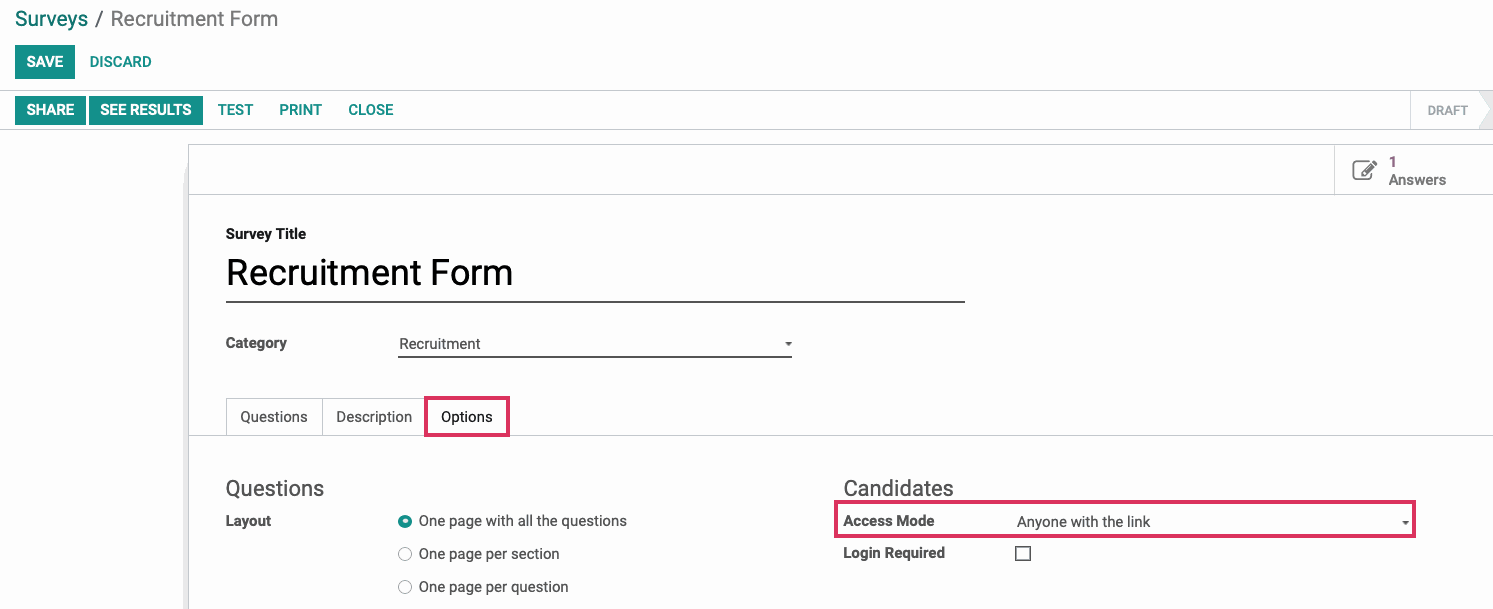
When you are creating the Survey, there is one specific setting you must use in order to make the Survey compatible with the Appraisal process.
Navigate to the Options tab of your Survey. In the Access Mode field, select "Anyone with the link." This will allow you to retrieve a link to the Survey, which you can paste into your Appraisal email.
Adding the Survey to the Appraisal
Once you have created and tested your Survey, you can retrieve the link to share it in your Appraisal.
Remain in the Surveys application.
From the same Survey home screen, click Start Survey. Then, click share. A window will open which gives you a link to the survey. Click Copy Text.
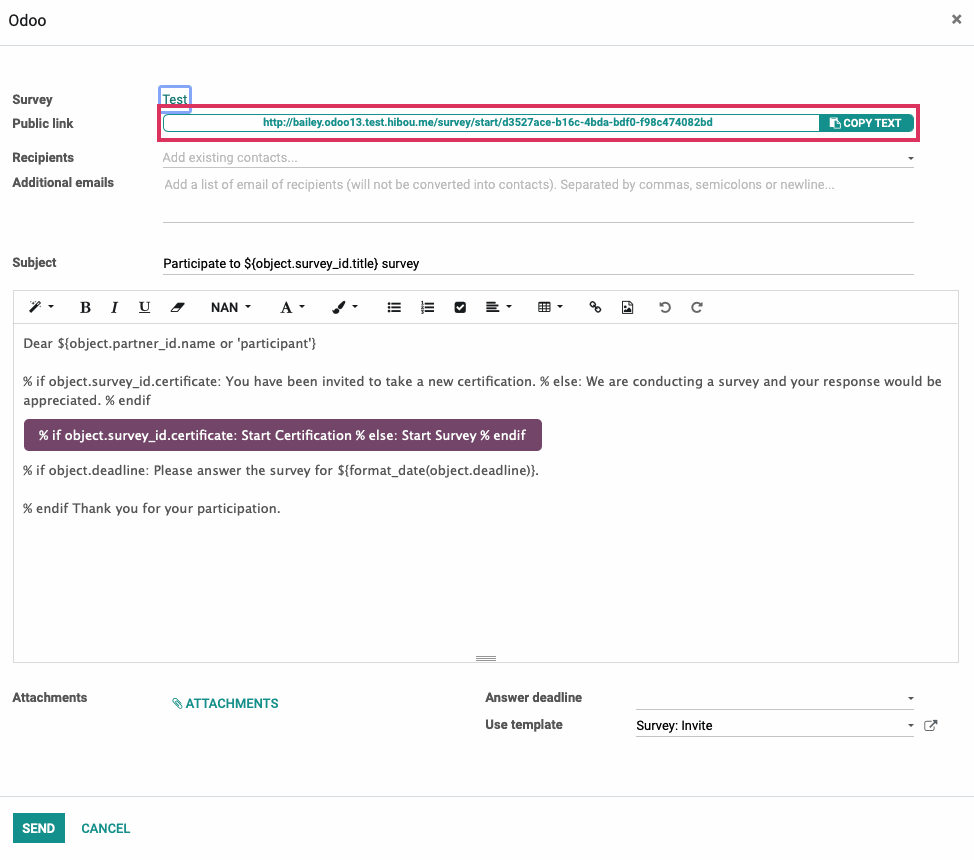
Return to the Appraisals application.
Locate your original appraisal and click edit. In the Mail to <contact> field, paste the link where it makes sense in context.

You can now click Confirm Appraisal and Send Forms. The appraisal form will be sent to the selected recipients.
Viewing Survey Results
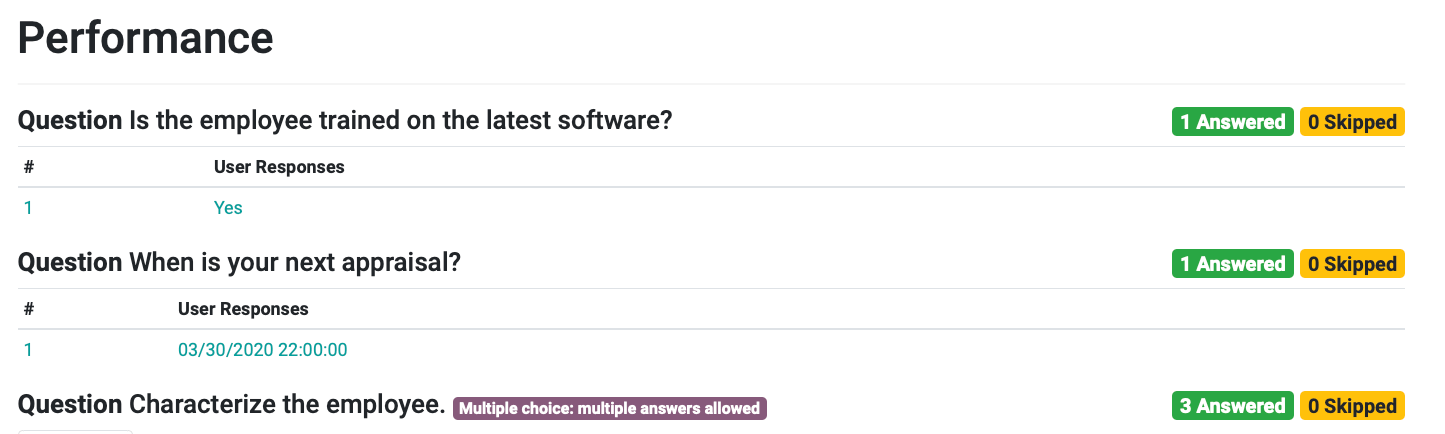
To view the results of your survey, navigate to the Surveys app.
Locate your survey card in the kanban view. You will see a number on the survey. Click the number.
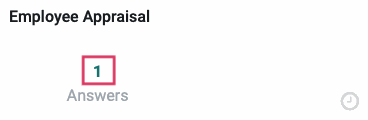
This will take you to a page showing a detailed break-down of the survey results. You will be able to see the respondent's answers as well as the number of respondents who completed the survey.
Scheduling a Meeting
The next step of the Appraisal process is scheduling a meeting with the employee. To do this, navigate to the Appraisals application.

You are able to schedule a meeting in two different locations within the Appraisals application:
You can click the employee's Appraisal card in the kanban view. In the employee's Appraisal, you can then click the No Meeting smart button in the top right corner.
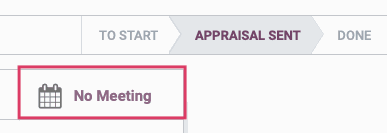
Or, from the kanban view, you can click Schedule the Final Interview on the employee's Appraisal card.

Both buttons will take you to the calendar view. Click and drag on the day and time you wish to hold the meeting. A window will appear where you can enter a Summary for the meeting.
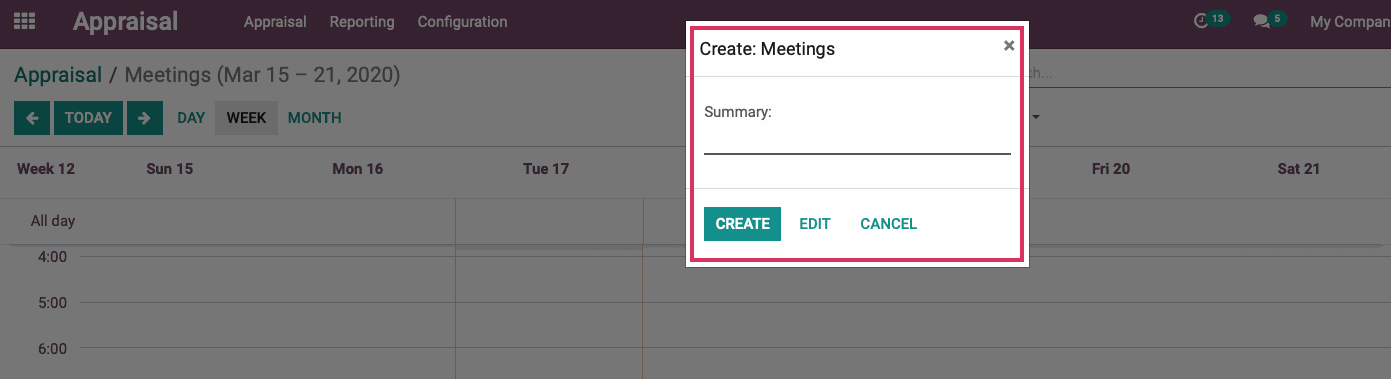
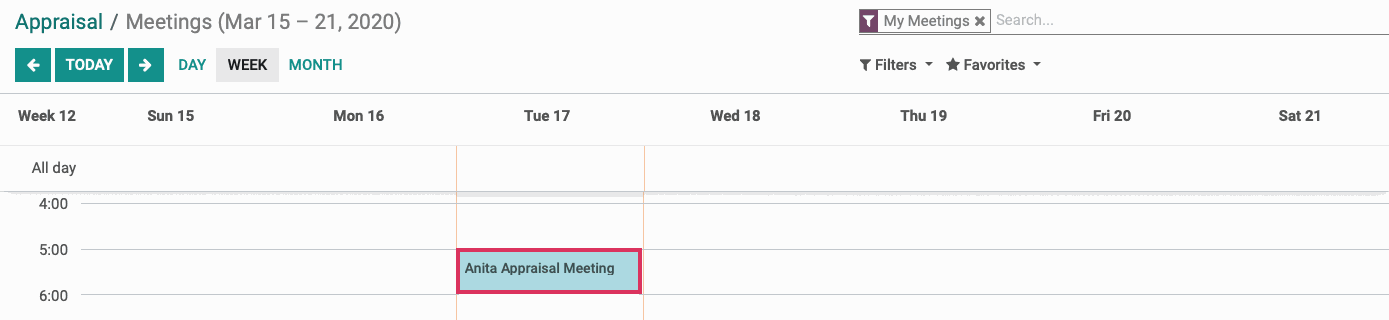
When done, click CREATE. You will now see the meeting scheduled in your calendar.
Completing the Appraisal
Once you have received the Appraisals and held a meeting with the employee, navigate to the employee's Appraisal. Click edit.
Under Final Evaluation, enter your final report on the employee.

To conclude the Appraisal process, click DONE.