Accounting: Customers + Vendors: Customers: Register a Customer Payment
Purpose
The purpose of this documentation is to outline different processes to register payments.
Processes
To get started, navigate to the Accounting application.

Registering Payments on a Customer Invoice
Full Payment
Once there, click on Sales and then Customer Invoices.
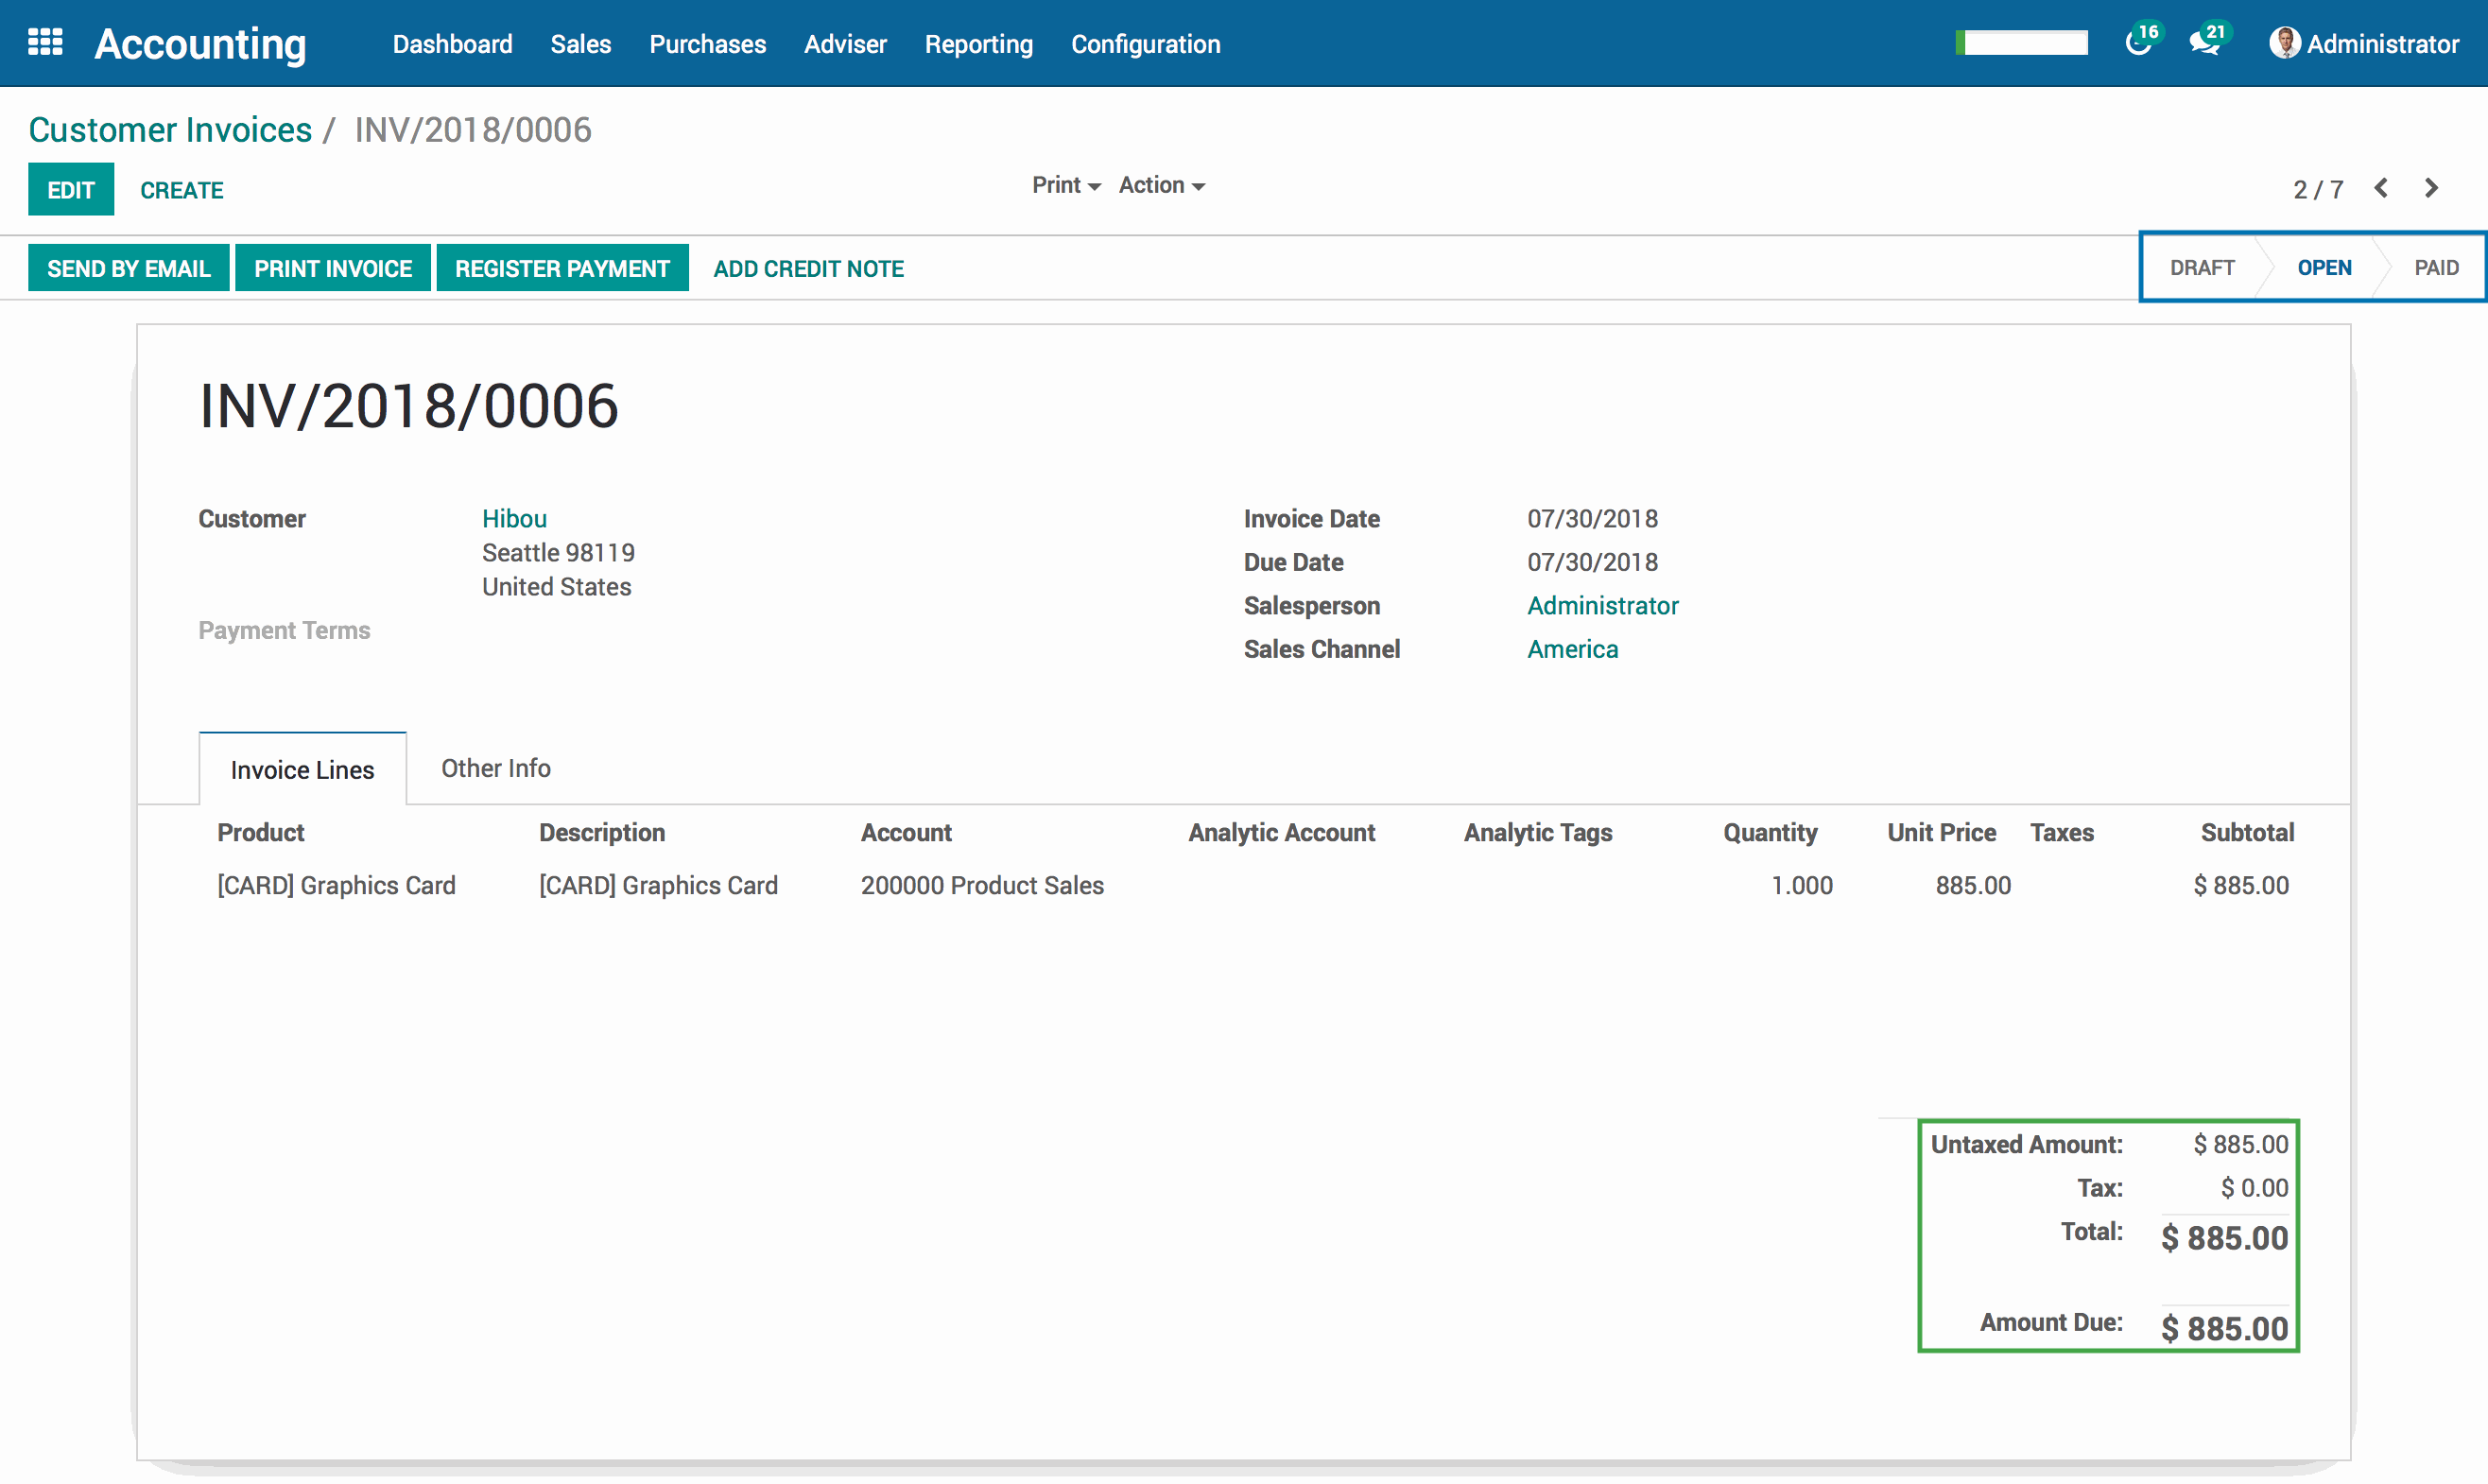
Select an open invoice from the list or create a new one by clicking the Create button.
Important Note!
When an invoice is first created, it will be in the Draft state. An invoice will not be entered into your general ledger until it has been Validated.
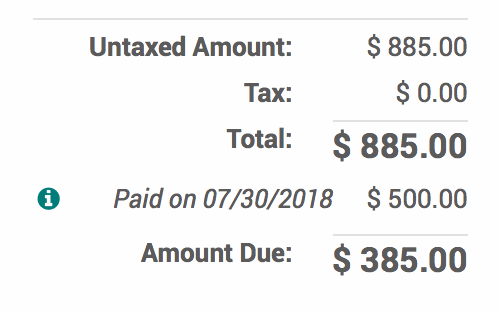
Near the top right of the screen, you will see the state of the invoice. The current state should be Open in order to register a payment.
On the bottom right hand corner, you will see the Amount Due. This is the amount of the invoice that is still open and awaiting payment.
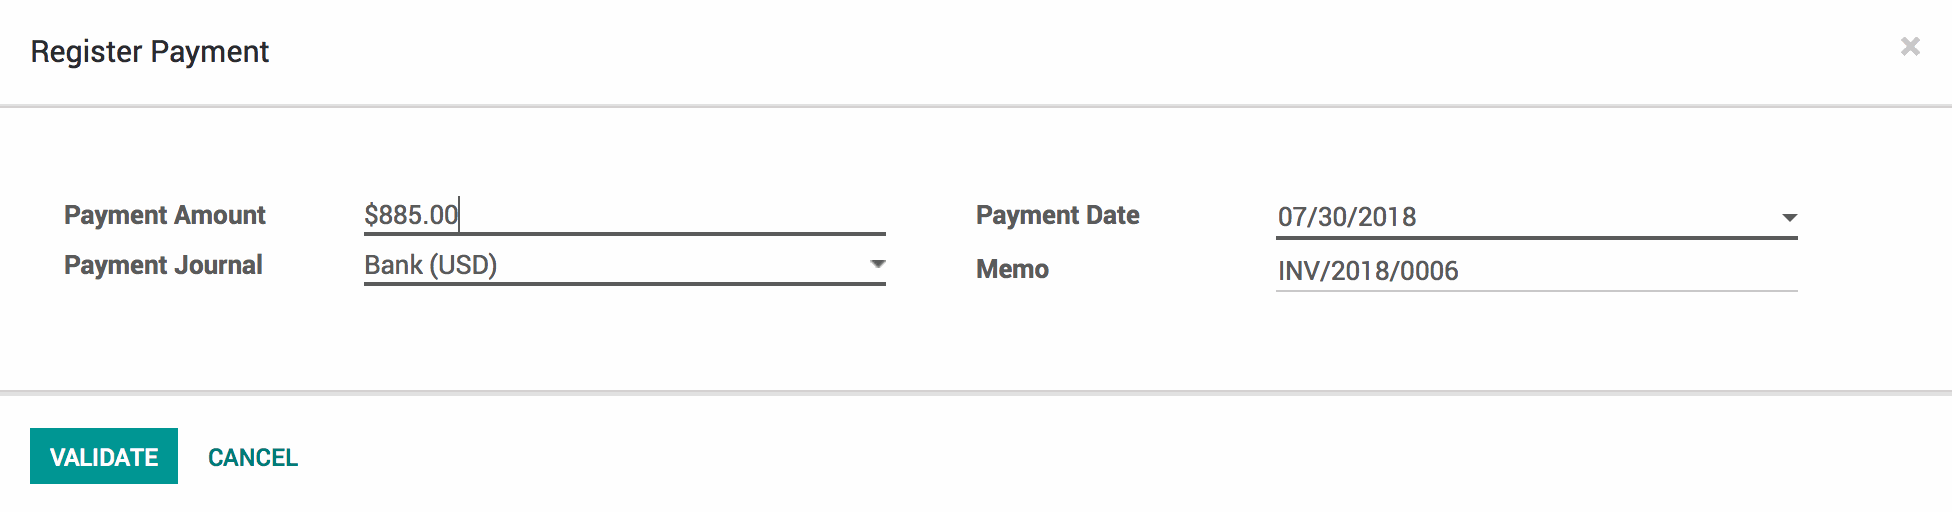
To register a payment, click the REGISTER PAYMENT button.
A pop-up modal to register payment will appear. Enter the following information:
Payment Amount: This is set to the full amount by default, but can be changed.
Payment Journal: The journal to which the payment should be registered.
Payment Date: The date on which the payment was made.
Memo: This is set to the Invoice number by default, but can be changed. A common use case for this field is the check number for the check by which payment was made.
When finished, hit the VALIDATE button.
Once the payment is validated, the Amount Due at the bottom of the invoice will be updated and the payment will be logged with a date. Click the small info button to the left of the payment line to see the payment details.
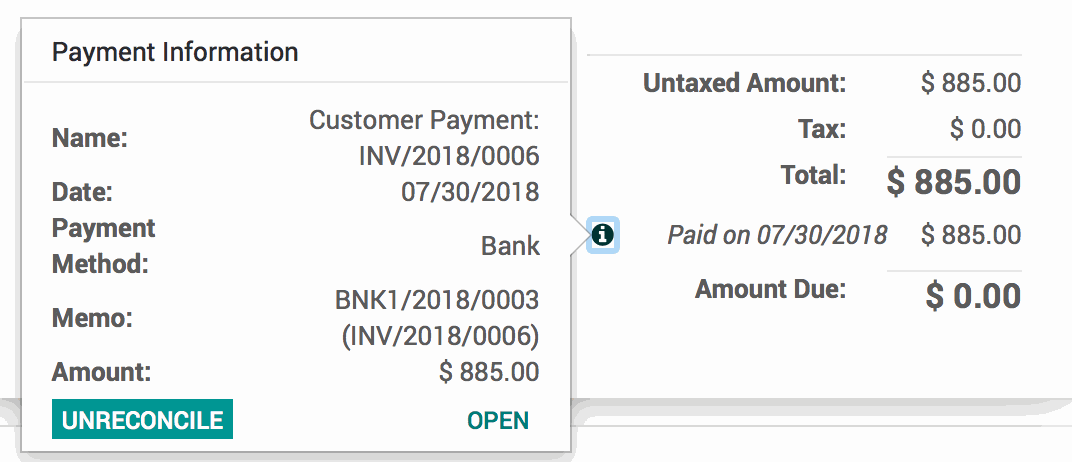
When paid in full, the state of the Customer Invoice will change to Paid.


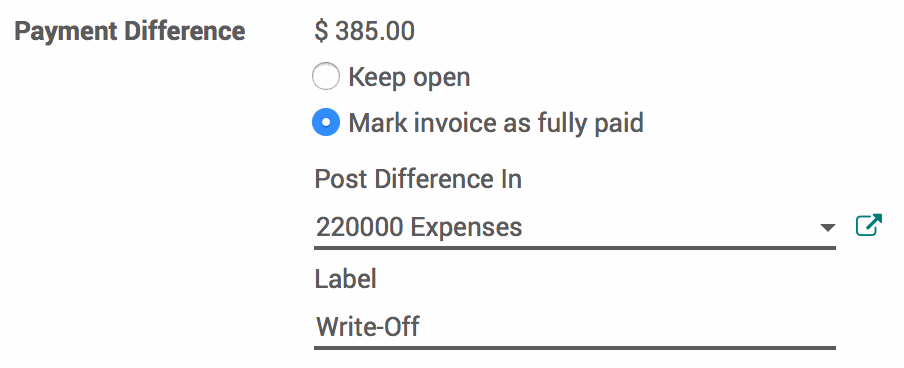
Registering a Partial Payment
When registering a partial payment, there are two payment different options: Keep Open or Mark Invoice as Fully Paid.
Keep Open: The invoices stays in the Open state. The payment gets recorded and the Amount Due is updated.
Mark Invoice as Fully Paid: The partial payment gets recored and the difference is posted in an account. When this option is selected, choose the account you wish to post the difference in. You may also change the label from the default "Write-Off", if desired.
Matching Database Payments
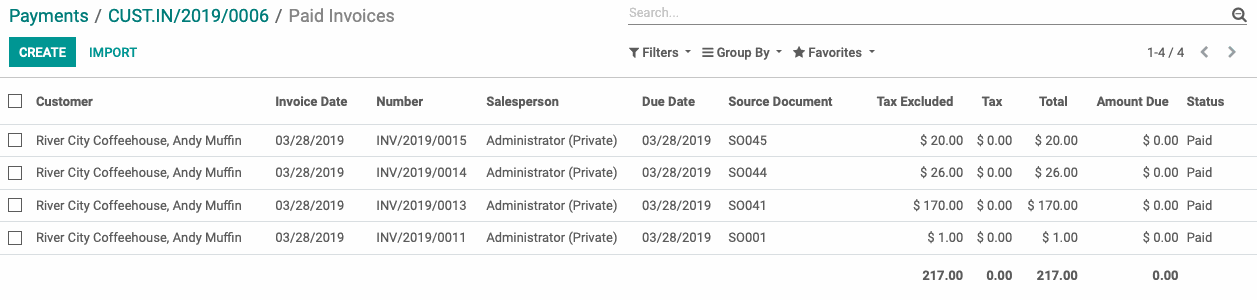
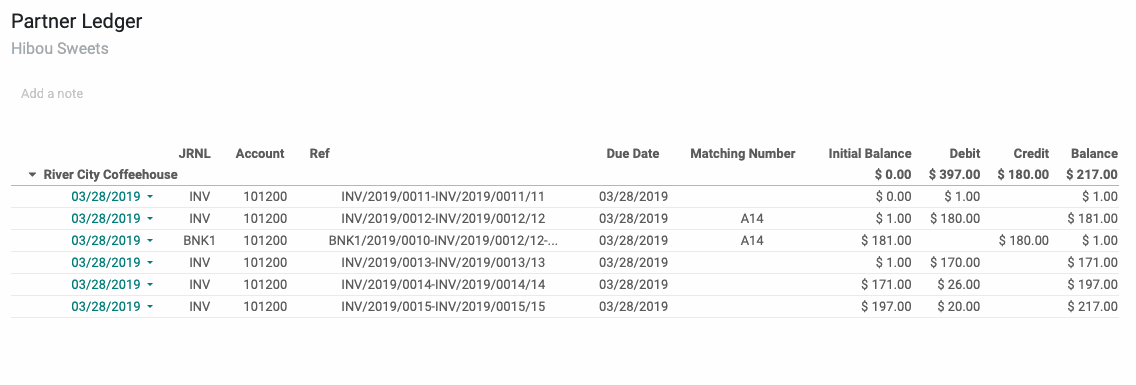
It is possible to take a lump sum payment and attribute a portion of it to various invoices.
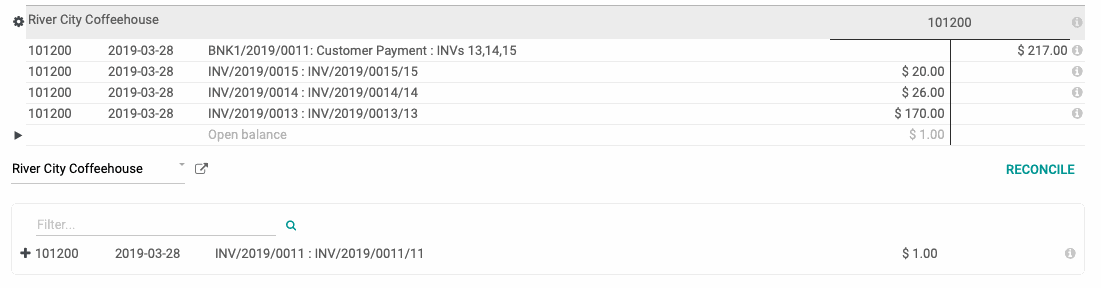
After confirming three more invoices, our customer has decided to write a check for the total amount. We can receive this $217 payment separately. Below, you can see his previous payment of $180 in the credit column. The three invoices that are open for this customer appear after that as debits, leaving his total Balance at $217.
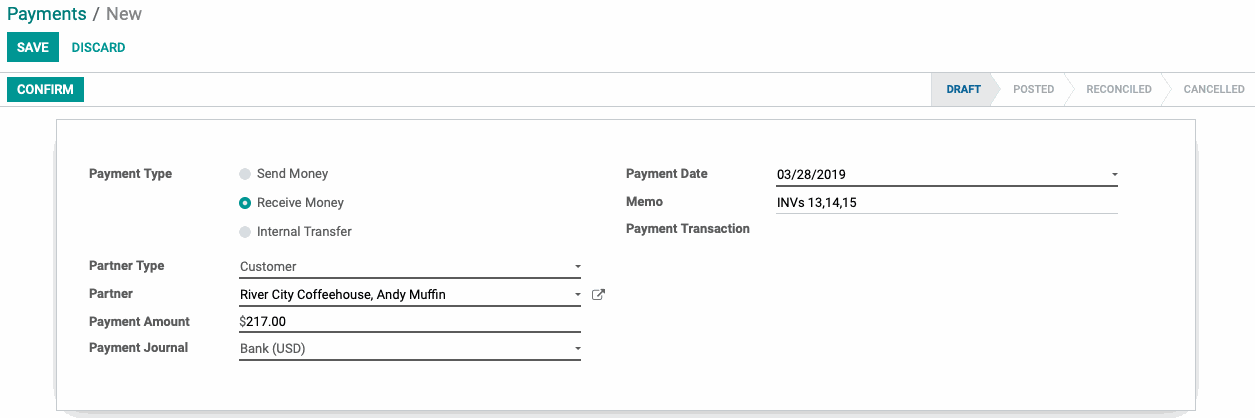
Now we're going to create a new payment for this customer, to show that we received a check for that amount.
Under CUSTOMERS > Payments, select create.
Assign the partner, the total amount, and if desired, make a note in the Memo field regarding where the payment should be attributed. Click Confirm.
Because this payment is not associated with any invoice records, you will see a new Smart button in the top right called Payment Matching.

Clicking this smart button will take you to a reconciliation tool. You will see the credit and potential matches outlined in the window below it.

As you begin to add components to the t-field, you will see any imbalance highlighted in light gray. Our credit of $217 appears on the right, and to the Left, we've begun to add debits that account for a portion of that credit. You can see that the last line shows a $1.00 balance in the credit that is not accounted for yet.
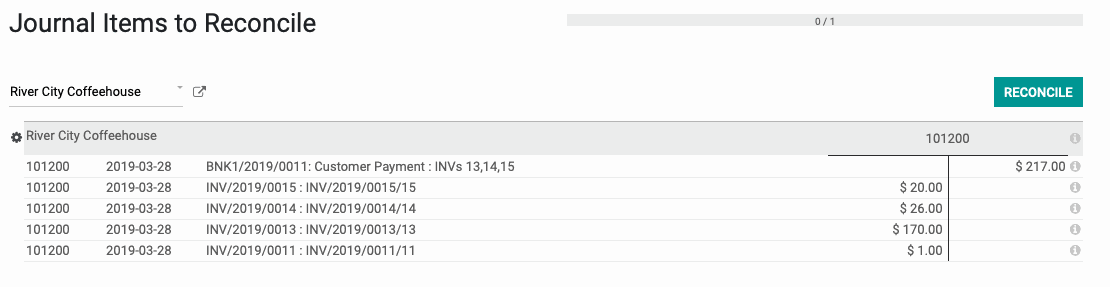
After adding the last debit record, balancing the t-sheet, we will click Reconcile.
The Payment Matching button has now become an Invoices Smart button that will take you to the invoices you've reconciled to this payment.